

The Venice Beach Shorts pattern has been out for a little while, and despite it having the option for pockets, (which is an absolute necessity for shorts) I hadn’t purchased the pattern. Perhaps noting all the binding gave me pause? 😉
The Venice Beach Shorts are a rather popular running shorts style, and would give me a different look from all the Brassie Jogger shorts currently filling my shorts drawer, so it was time to branch out a bit! And, since I make a lot of tops and tanks with binding, I’ve gotten pretty comfortable with my binding and coverstitching abilities.
There are two methods of binding and construction shown in the pattern tutorial, and I chose the second “alternate construction method”, as it made the most sense for the way I sew. Since I own a serger and was using a knit fabric, doing a single fold faux binding was the way to go. After attaching the pockets and sewing the shorts front and back together at the inner leg seam, it was time to work on the binding.
When doing a single fold faux binding, I like to cut my binding strips 1″ high, rather than the recommended 1-1/4″. To give the binding extra stability when coverstitching, I serged down one long edge of the two strips of binding with my stitch width set on M, and the differential turned up to 1.3. Then right sides together, I pinned the raw edge of binding all the way around the outer edges of the back, bottom, and front of each leg, being super careful to not stretch the binding at all when going around the curves.
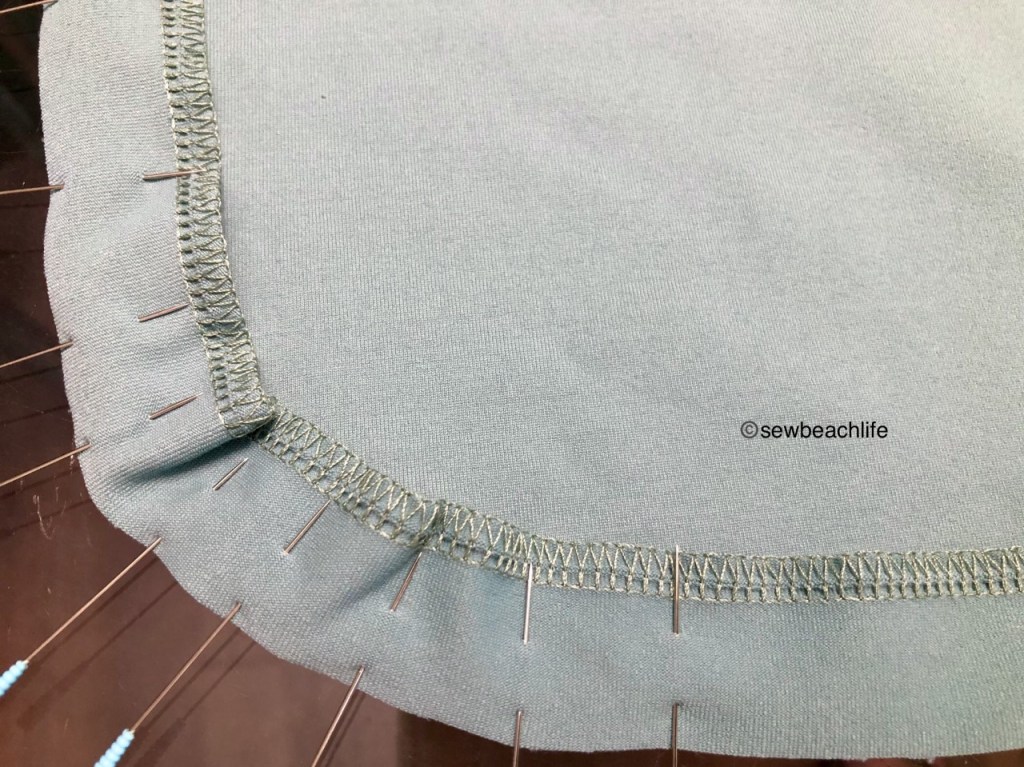
After stitching, press the binding outwards, then wrap it around the back, and pin it in place. The side panels are going to be stitched into place while coverstitching. To ensure that they stay properly aligned, I basted them in place first, being sure to keep my basting stitches well away from my stitching line.

Then it was just a matter of coverstitching all the way around the binding. Having a machine with plenty of harp space (my beautiful Babylock!) makes it way easier to get your hands up in there to maneuver the leg and curves. But if you’ve ever top stitched leggings, or a neck or sleeve binding, you can do it. Take the time to adjust as needed when going around the curves. Make sure your needles are down in the fabric before lifting the presser foot to adjust. That will help keep your stitching line straight.
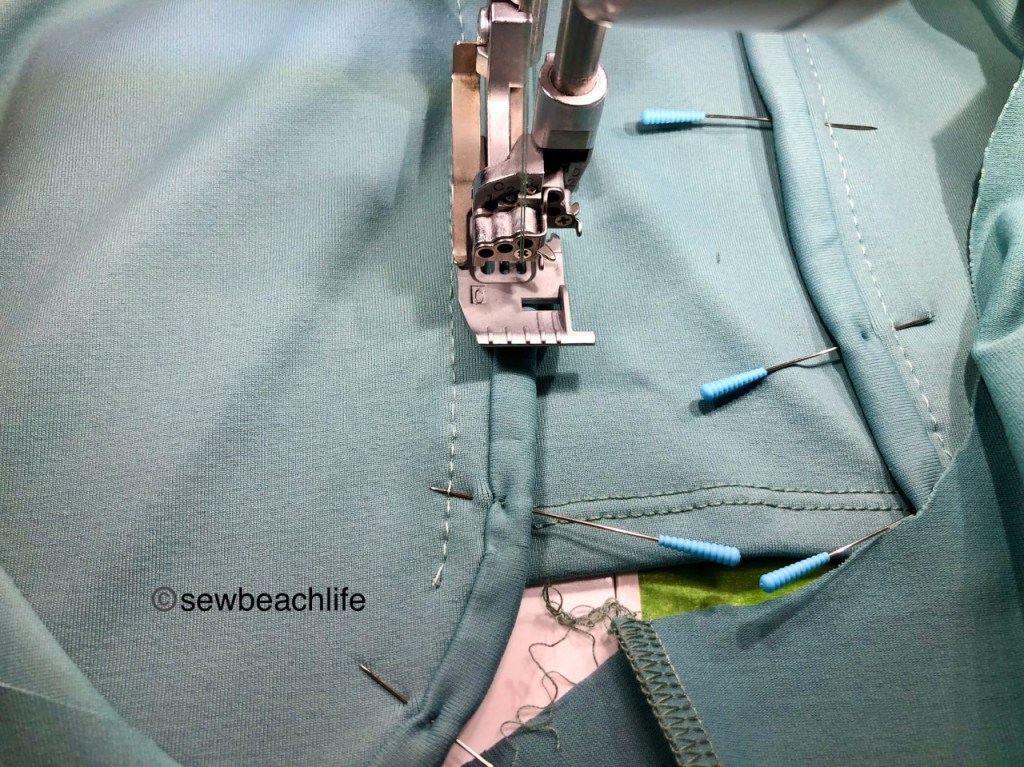
I use curved foot C when coverstitching, as the shorter length makes it easier to “follow your line” when stitching around curves. Then pull the basting stitches, and follow the tutorial for sewing the rest of the shorts. I used the contour waistband, which is recommended over the elastic foldover waist when adding pockets.

As I always tend to do with contoured waistbands on my leggings, I added a layer of powernet to the front waistband, and serged clear elastic into the top seam when sewing the inner and outer layers together. That keeps my shorts from getting pulled down when I carry my heavy phone in my pocket.

It’s fun to have a new style of shorts! These are the 4-1/2″ inseam, #becausegrandma, but you know, I’d feel comfortable trying the 3-1/2″ inseam. I’ll leave the 2-1/2″ inseam to you runners out there though. 🙂
Oh, did you notice how much better my Cami Tank looks? If you read my previous post, you’ll recall that I had accidentally cut my straps too short, and hadn’t used the shelf bra on this tank. Well, since the Cami Tank is so cute and comfortable, I took the time to seam rip off all of the binding, added the shelf bra, cut the proper length of strap binding and stitched it all back together. It gets worn so much more often now that I don’t have to wear a bra with it! 🙂 Totally worth the time and effort to make it right.

The details: I used a nylon spandex athletic knit from JoAnn Fabric for my Venice Beach Shorts. I’m thinking of trying some of the stretch woven from GreenStyle for my next pair.
You’d have thought that it would be super hard to find serger thread to match the minty/sage color of the fabric. But MaxiLock aqua was a near perfect match. I ordered the thread and magic pins from Wawak.com.
The links to GreenStyle are affiliate links, which means that at no extra cost to you, I may receive a small commission if you purchase through my link. As always, I only give my honest opinion. After all, it is my blog, which represents me! Thank you for reading and sharing my love of creating, sewing, patterns, fabric, and making beautiful, well-fitting garments! ❤


Great information! Thanks for sharing!!!
LikeLike
You’re welcome! Binding can seem super tricky, and I want people to feel comfortable using it on their projects.
LikeLike