
People sometimes comment in Facebook sewing groups that they can’t find a pattern that they like, or they want a certain style for the top, but a different look for the bottom. Do you have patterns with certain elements that you absolutely love, and wish that you could mix and match them with elements from a different pattern? Have you ever tried mashing those patterns together to give you a new look? I find myself mashing and hacking patterns all the time. It’s generally a good idea to make the pattern as designed at least once, to judge how it fits and looks on you. Once you know how it fits, it’s easier to start playing with your patterns.
A pattern mash can be something as simple as using the contour waistband you love from your favorite workout pants on a different pants or shorts pattern. I use a modified version of the Patterns for Pirates Peg Legs contoured waistband on P4P SOS Pants and it works great, blogged here. Mixing and mashing sports bras with workout tanks can really personalize your gym wardrobe. Like using the GreenStyle Power Sports Bra and mashing it with the body of the GS Lille or Jillian Tank to make a workout top. It’s always fun to turn a top into a dress, like using the Stitch Upon A Time Aushui Tank and mashing it with the skirt of the Calista Bra, Top, Tunic & Dress.
Sometimes your mash will require a little bit of adjustment in order to work. Like tracing the armscye from a pattern onto another pattern to ensure that the sleeves you want to use will fit the jacket, top, or dress. Sometimes it’s a matter of making your best guess as to what will work, then trying it on and adjusting from there.
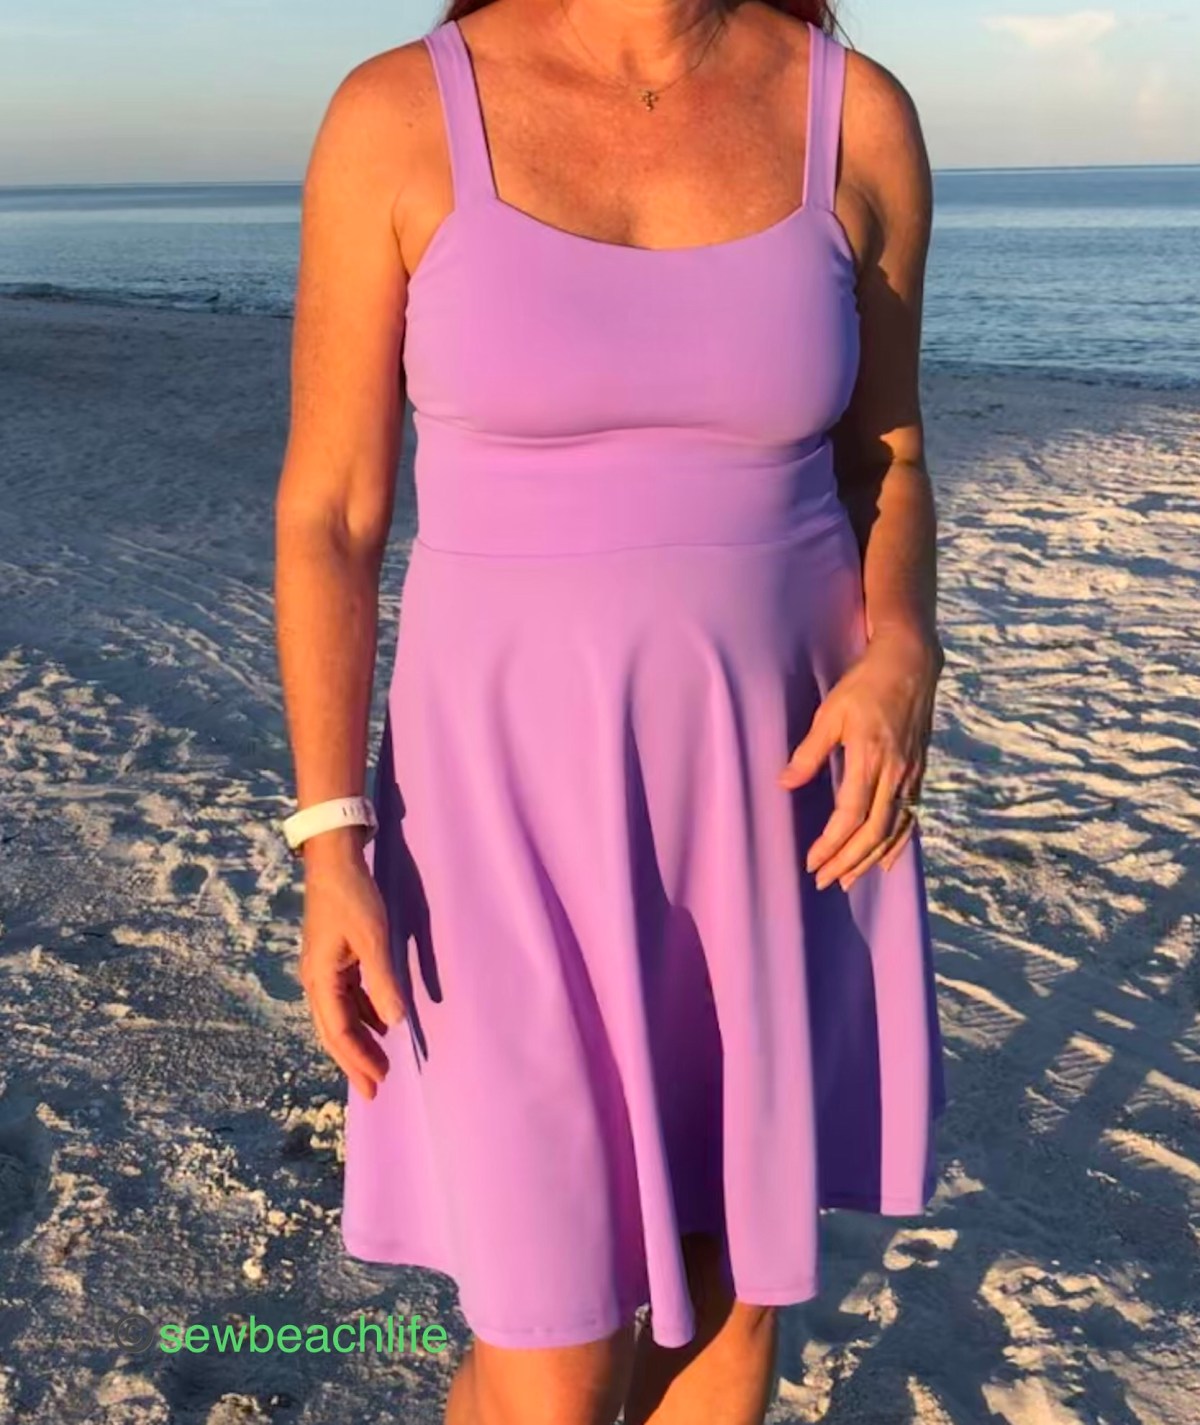
That was my experience with last week’s pattern mash. I wanted another new dress, and loved the flared skirt from the Sinclair Yasmin Dress. Temperatures are still in the 90’s here, so a strappy dress seemed in order. The Stitch Upon A Time Water Faery Twist & Swim Top (blogged here) fits well, so I figured that mashing the plain front version with the Yasmin skirt would make a super cute dress. And I think it does. But it took a little bit of basting and trying on to perfect my fit. I knew that the V-shaped waistband from the Yasmin wasn’t going to line up with the bodice of the Water Faery, so I cut out the crop length Water Faery body to use as a waistband. Since it’s technically designed as a swim top, the body is quite fitted, so that it won’t float or ride up when you go in the water. Since I don’t plan to swim in my dress, I want the waistband fitted, but not too form-fitted. Since I’ve been known to bake (and thoroughly enjoy indulging in) apple crisp this time of year, I decided to size up one on the “waistband”. 😉
Knowing how a pattern fits, and taking note of any changes you make to the pattern really helps the next time you make it. When I made the Water Faery into a workout top, I narrowed and lengthened the straps and liked it, so this time I knew that cutting out strips 3″ wide & 14″ long would give me the perfect finished size. Sewing up the bodice (which is an inner and outer layer of Phee Fabrics Tricot, with a layer of powernet sandwiched between) and straps was pretty quick and easy, and the fit was spot on. Since I hate seam ripping, I just basted the “waistband” pieces together, and tried it on. It was too loose under the bust. So I graded the front waistband piece from my measured size at the top, and somewhat straight down, rather than angling in which gave me more of a rectangular rather than tapered shape. With the width figured out, I stitched the side seams together and basted the outer waistband to the bodice, right sides together. Then I pinned the inner waistband to the inside, effectively making an enclosed waistband. It’s easier for me to keep all of the layers perfectly lined up by basting one layer on before pinning on the other layer and stitching everything together. Before folding the waistband pieces down into place, I zigzagged 1″ wide elastic to the seam allowance, using the length recommended for my size in the Water Faery pattern. This ensures that the waistband and skirt will stay down under the bust.
Then it was time to determine how long the waistband needed to be. I wanted the flared skirt to start right at the natural waist. Starting the flare at the narrowest part of the body gives the illusion of an hourglass shape. My natural waist is quite high, pretty much right at the bottom of my ribs, well above my belly button. It was surprisingly easy to find the perfect spot. Since the waistband also had powernet sandwiched between the layers, it was definitely going to find the narrowest point for me! Literally just bending side to side, forward and back, caused the waistband to roll up to the height of my natural waist. I used my hem gauge to take note of the fact that the waist seam needed to be 1″ up from the bottom of the waistband in the back and on the sides, tapering to 1-3/4″ up in the center front. Since I prefer using 3/8″ seam allowances, I trimmed 5/8″ off the back waistband pattern piece. I used a ruler to taper from 5/8″ at the sides to 1-3/8″ at center front on the front waistband pattern piece. Then I very carefully matched up the side seams of my bodice, lined up the bottom edges, pinned the bodice together so that the center front and center back were on the two outside edges, and used my rotary cutter to trim off the excess fabric.
Adding the skirt was super simple, sew up the two side seams, match center points and side seams, pin all around, and stitch. The most time consuming part was pinning up the hem. I finished the hem with a simple zigzag stitch. And Ta Dah! I have a brand new fun and flowy dress! Because I used powernet in the bodice, waistband, and straps, and elastic under the bust, I didn’t need to add swim cups or wear a bra with this dress. And I’ve already had two random strangers ask me where I found such a cute dress.

See how the seam where the skirt is attached runs perfectly parallel across the back?

Laughing while modelling your makes is half the fun!

And of course I had to twirl! Whenever you make a twirly skirt, you can’t help but twirl!

This pattern mash was a complete success, and something I’m bound to make again. After sewing it, I realize it’s probably pretty close to the Water Faery Retro One Piece dress option, and that’s ok, because it looks like a great pattern. Since I already own the Twist & Swim Top, and would never wear a one piece, I don’t feel like I have to buy the pattern just for the dress option. (Although if you’re not yet comfortable with pattern mashing or hacking, it is a great option).
One of the best things about sewing is being able to personalize patterns, mixing and mashing, and hacking them to suit your body, and your style. Are you ready to try a pattern mash?
This post may contain affiliate links. This means that at no extra cost to you, I may receive a small commission if you purchase through my links. As always, I only give my honest opinion. After all, it is my blog, which represents me! 😉 Thank you for reading and sharing my love of sewing, patterns, fabric, and pattern mashing and hacking. ❤


One thought on “Mashing Patterns To Suit Your Body And Style”