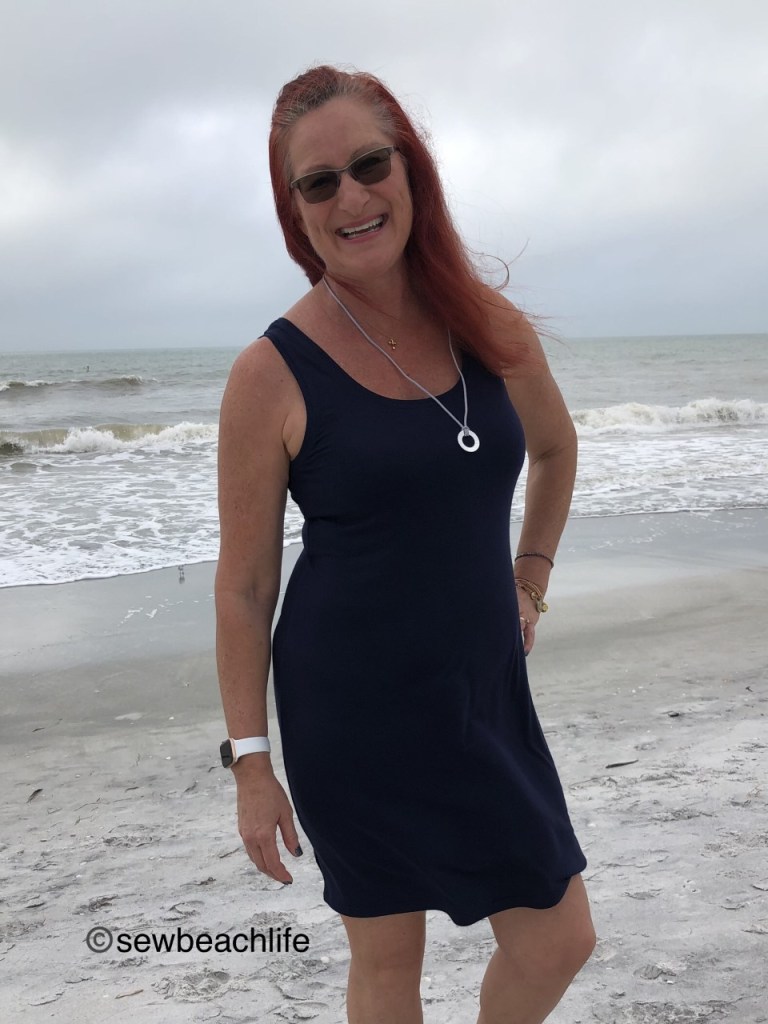
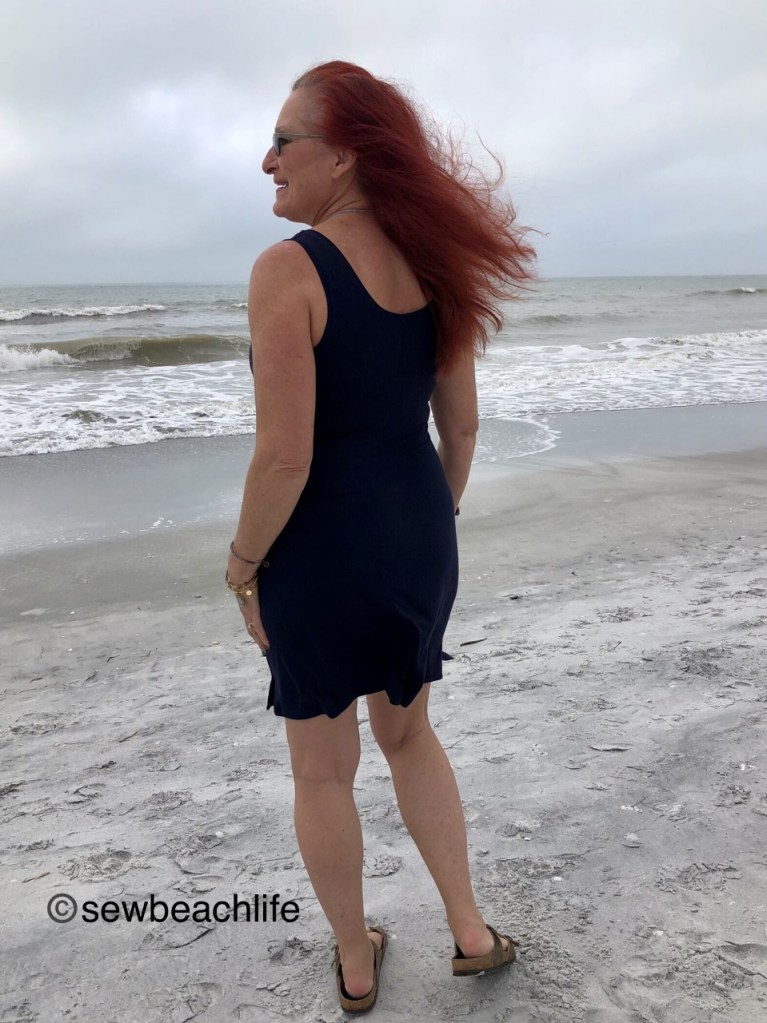
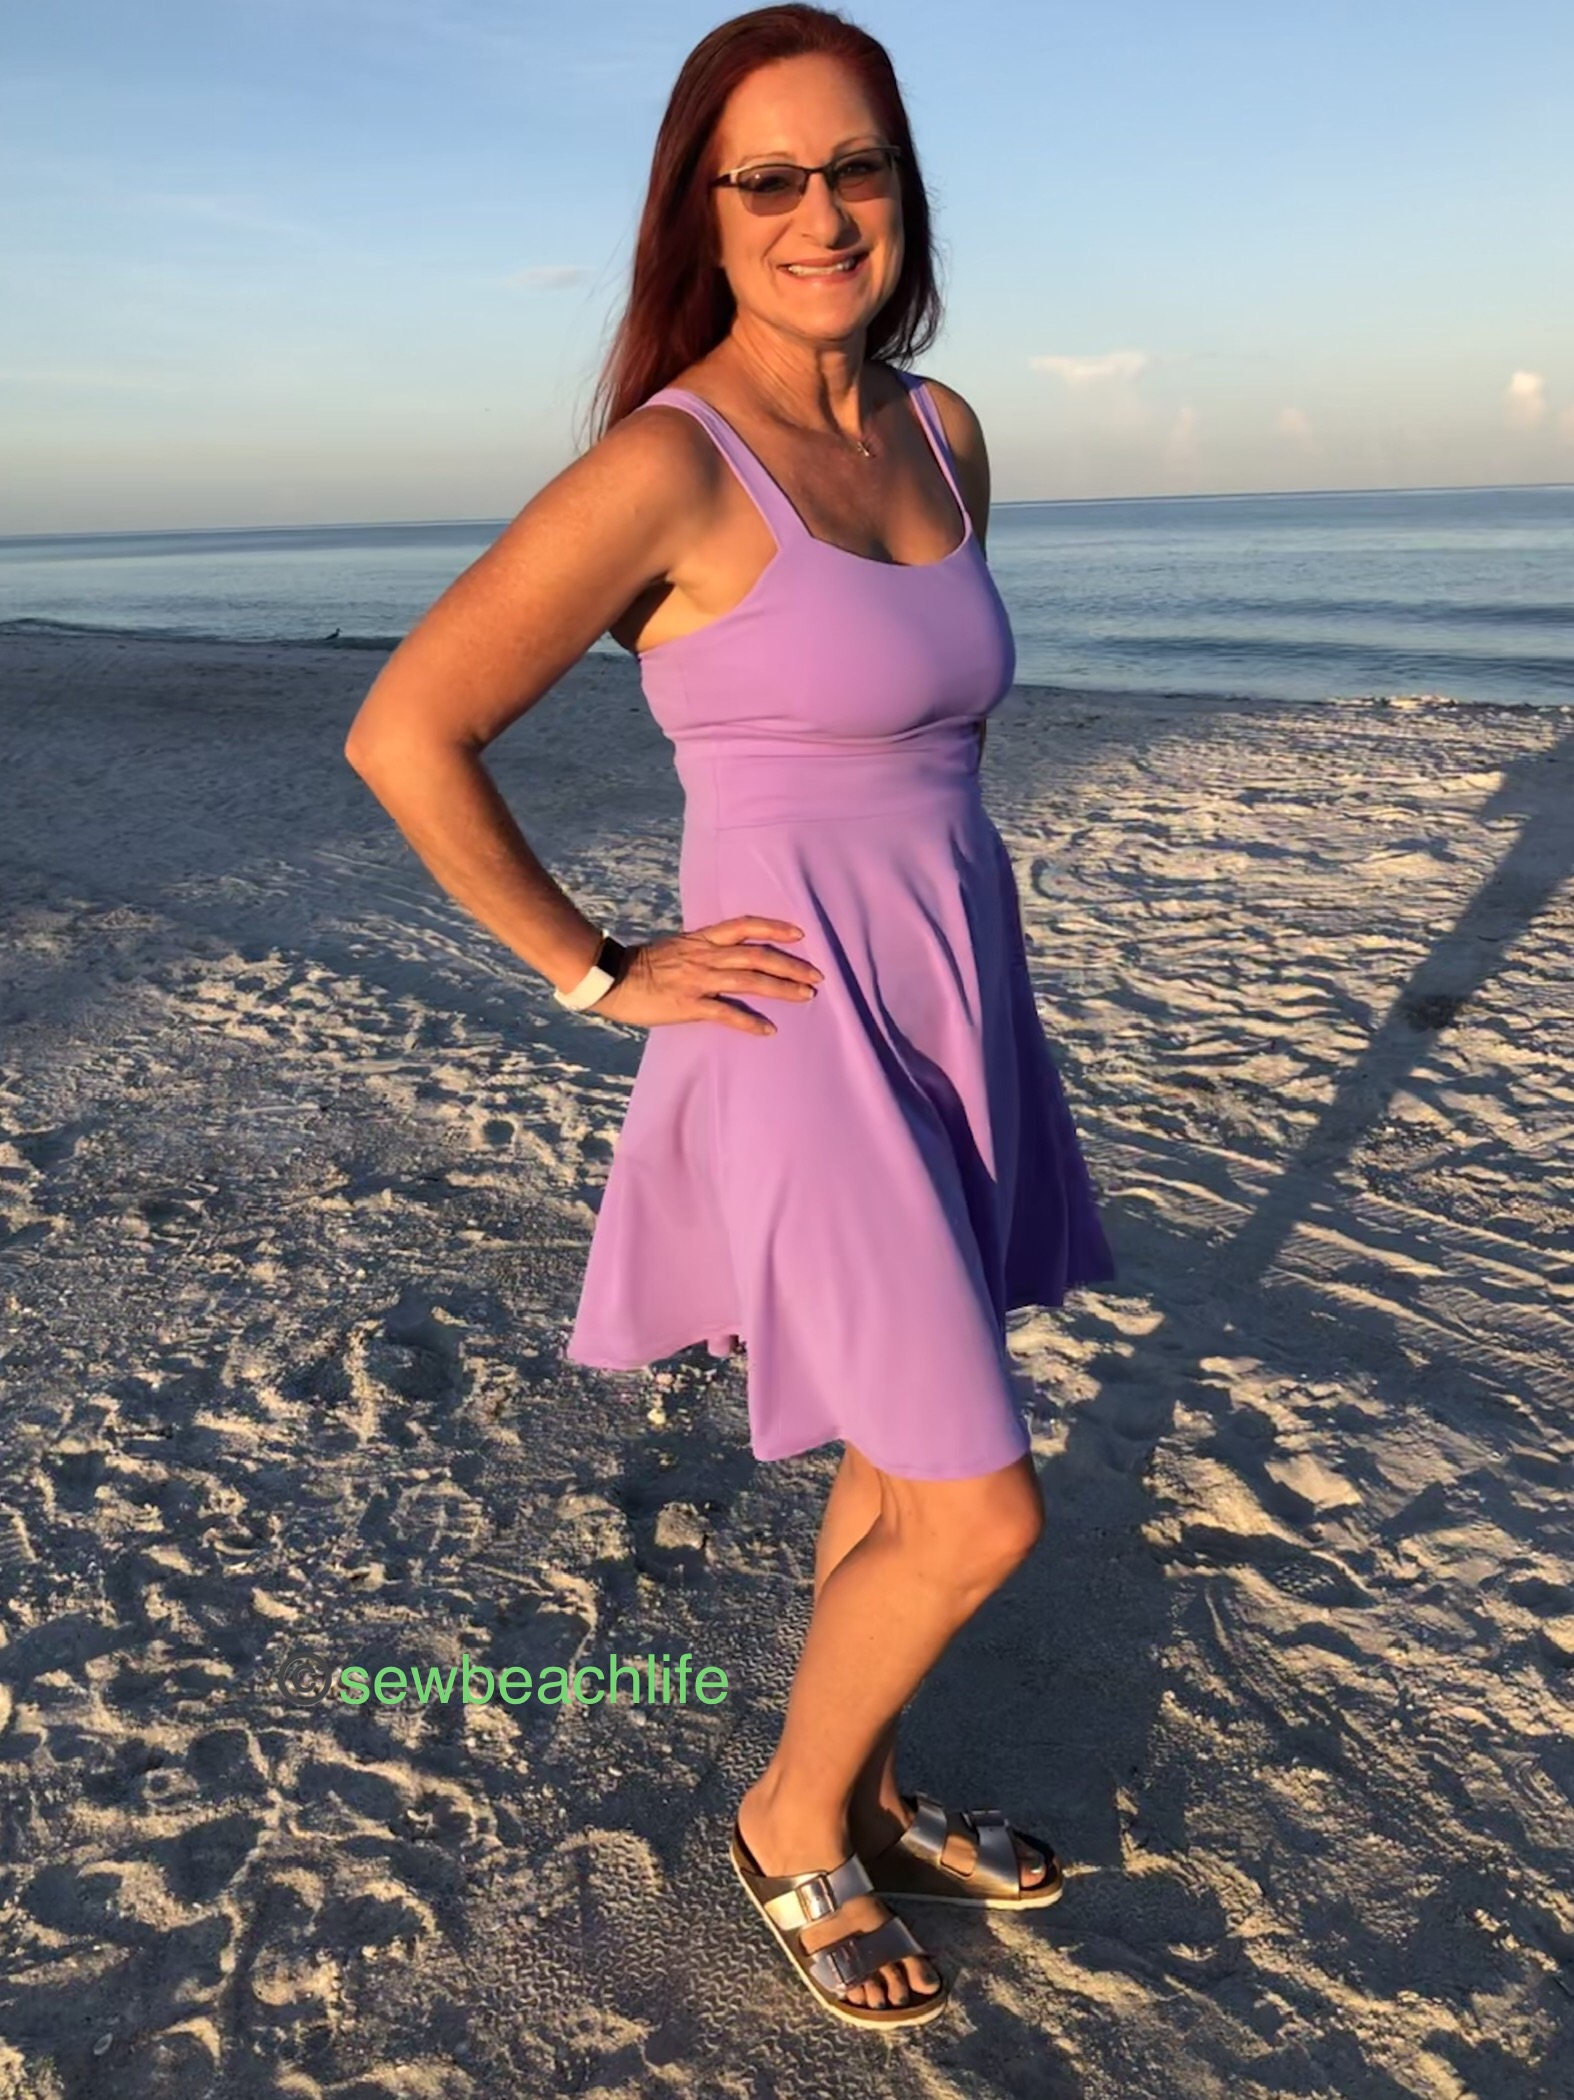
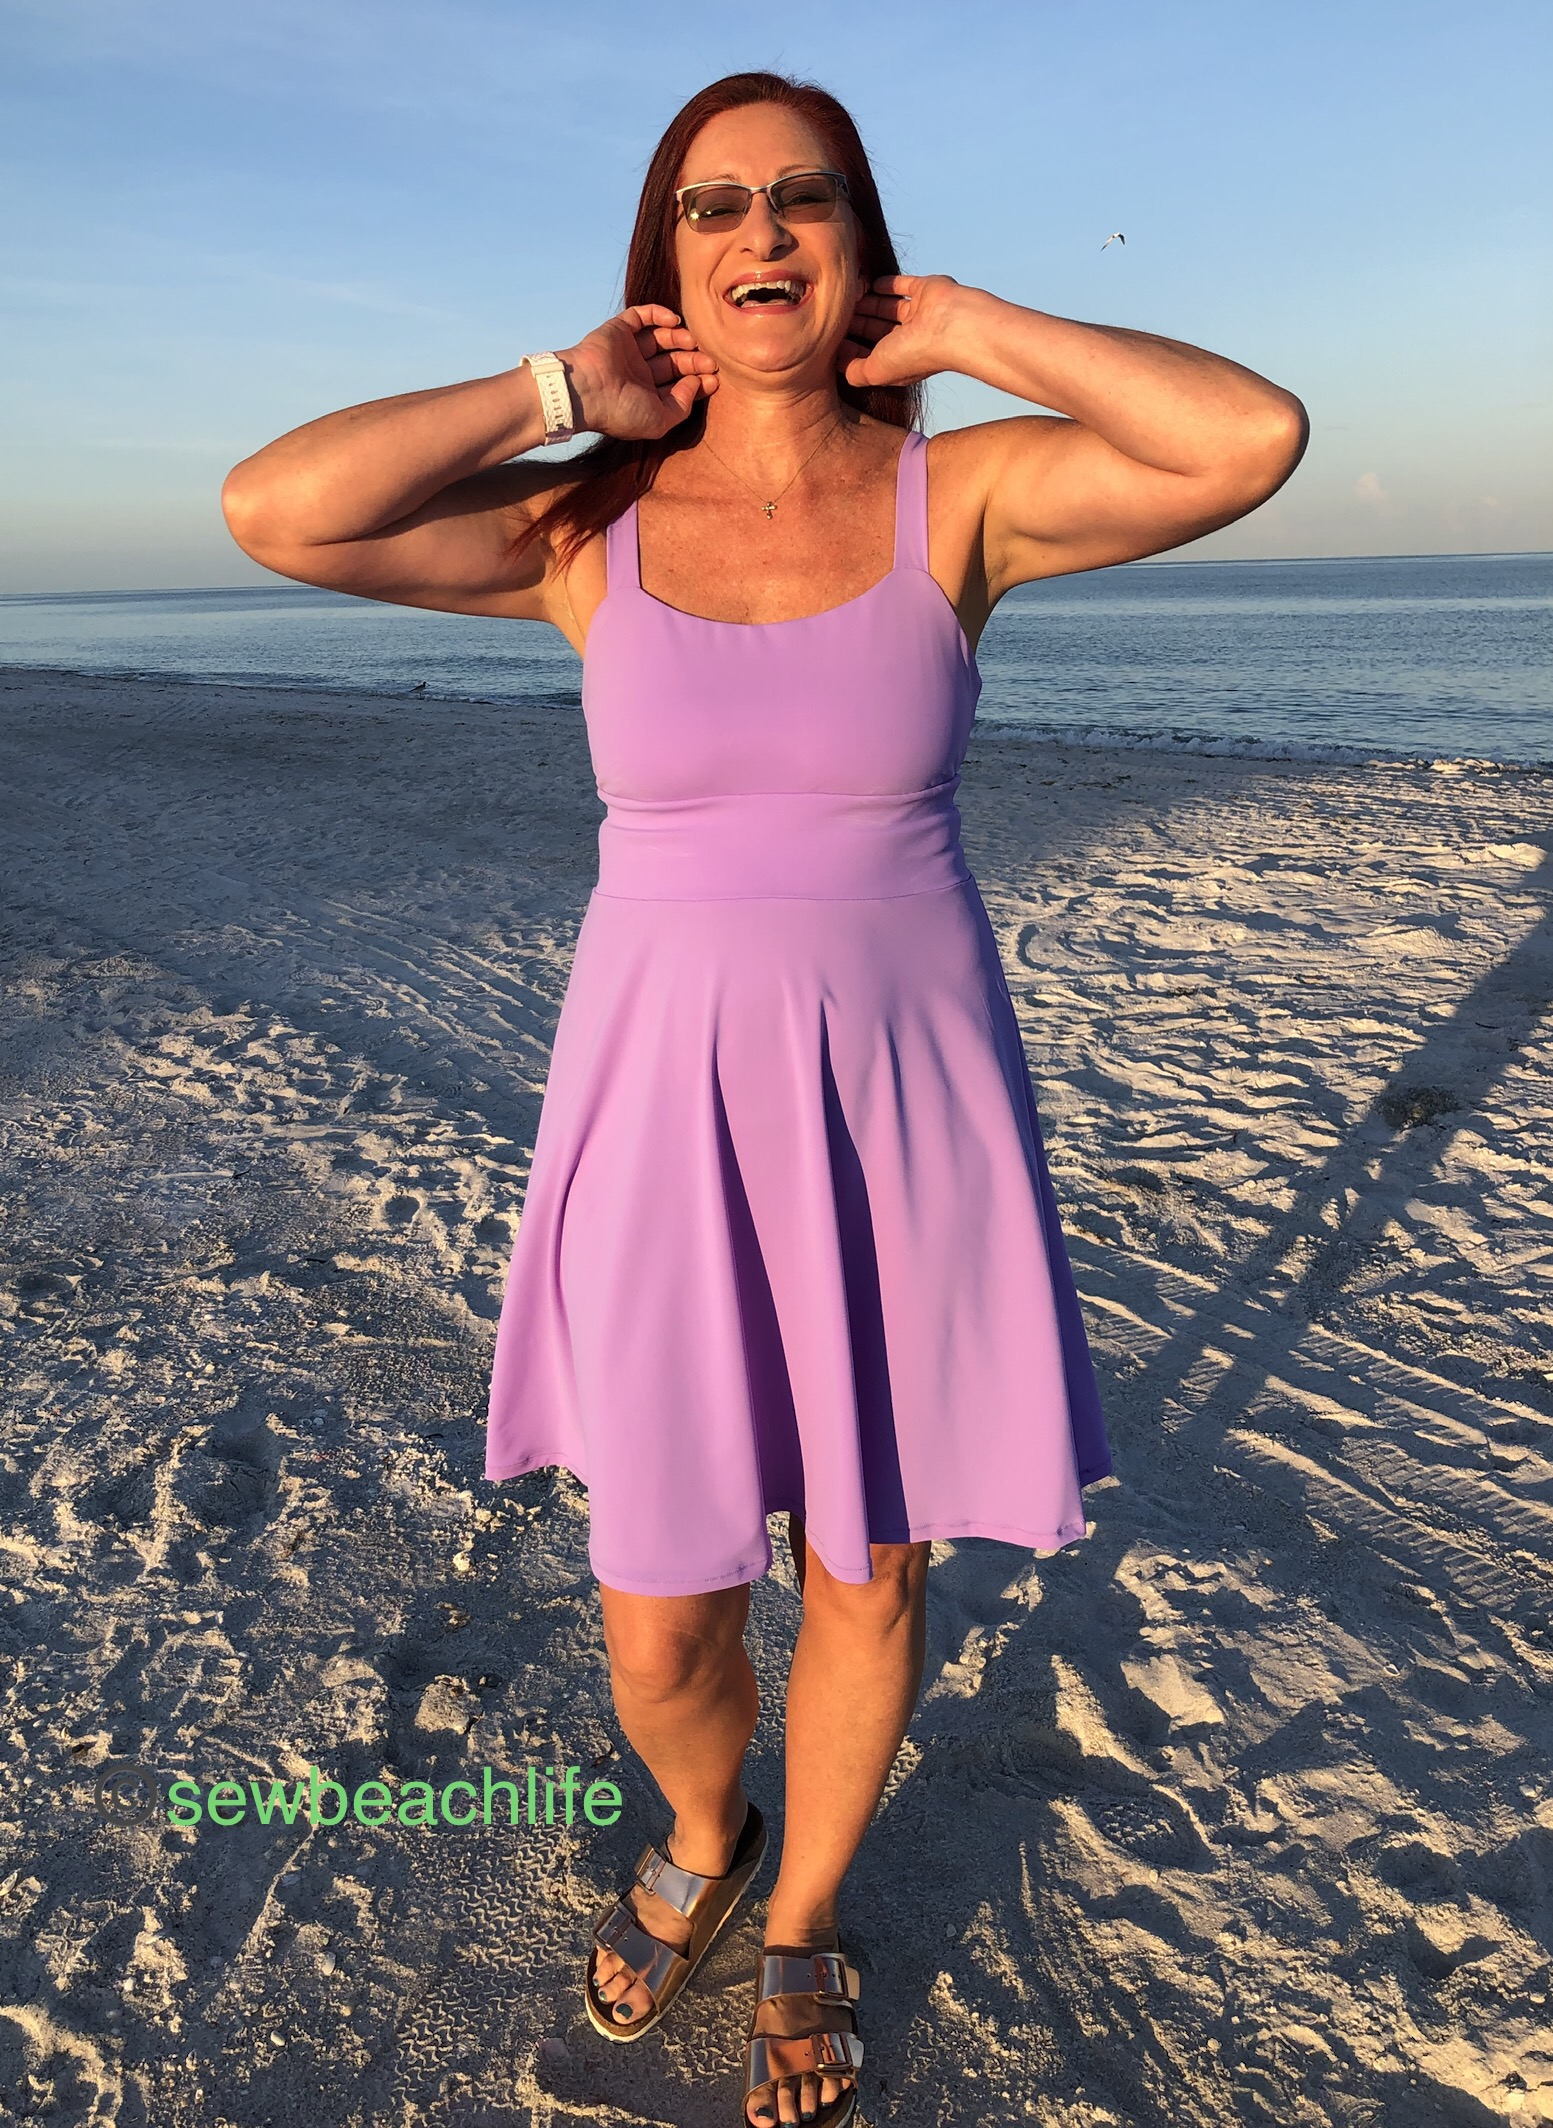
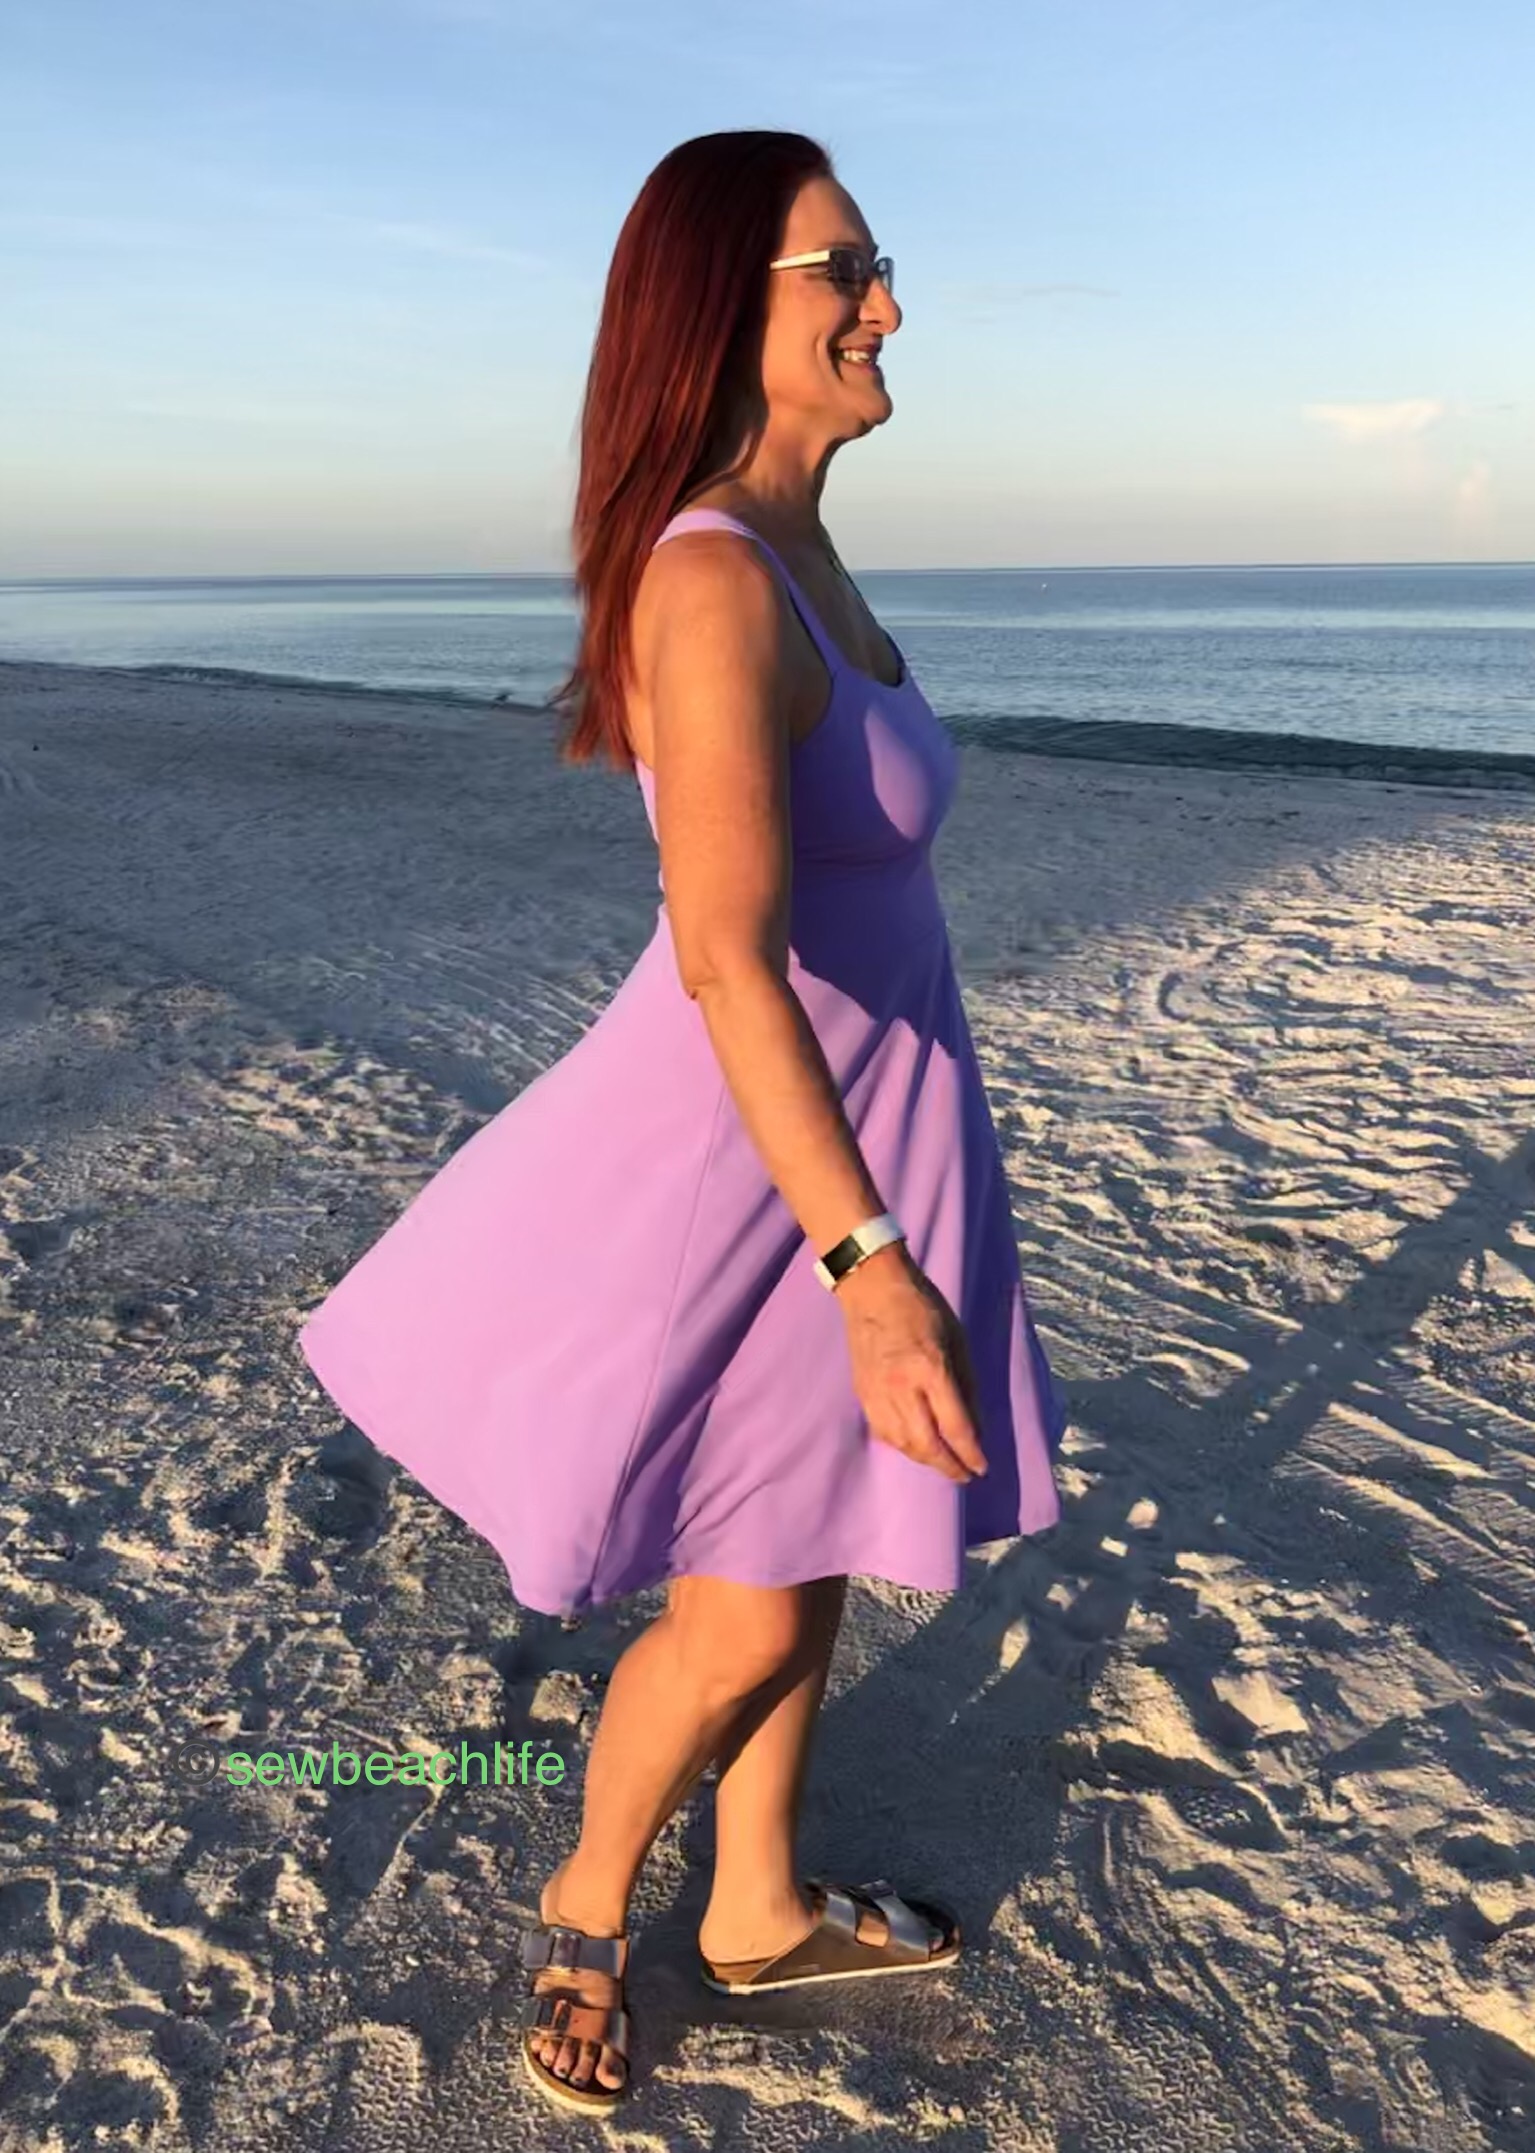
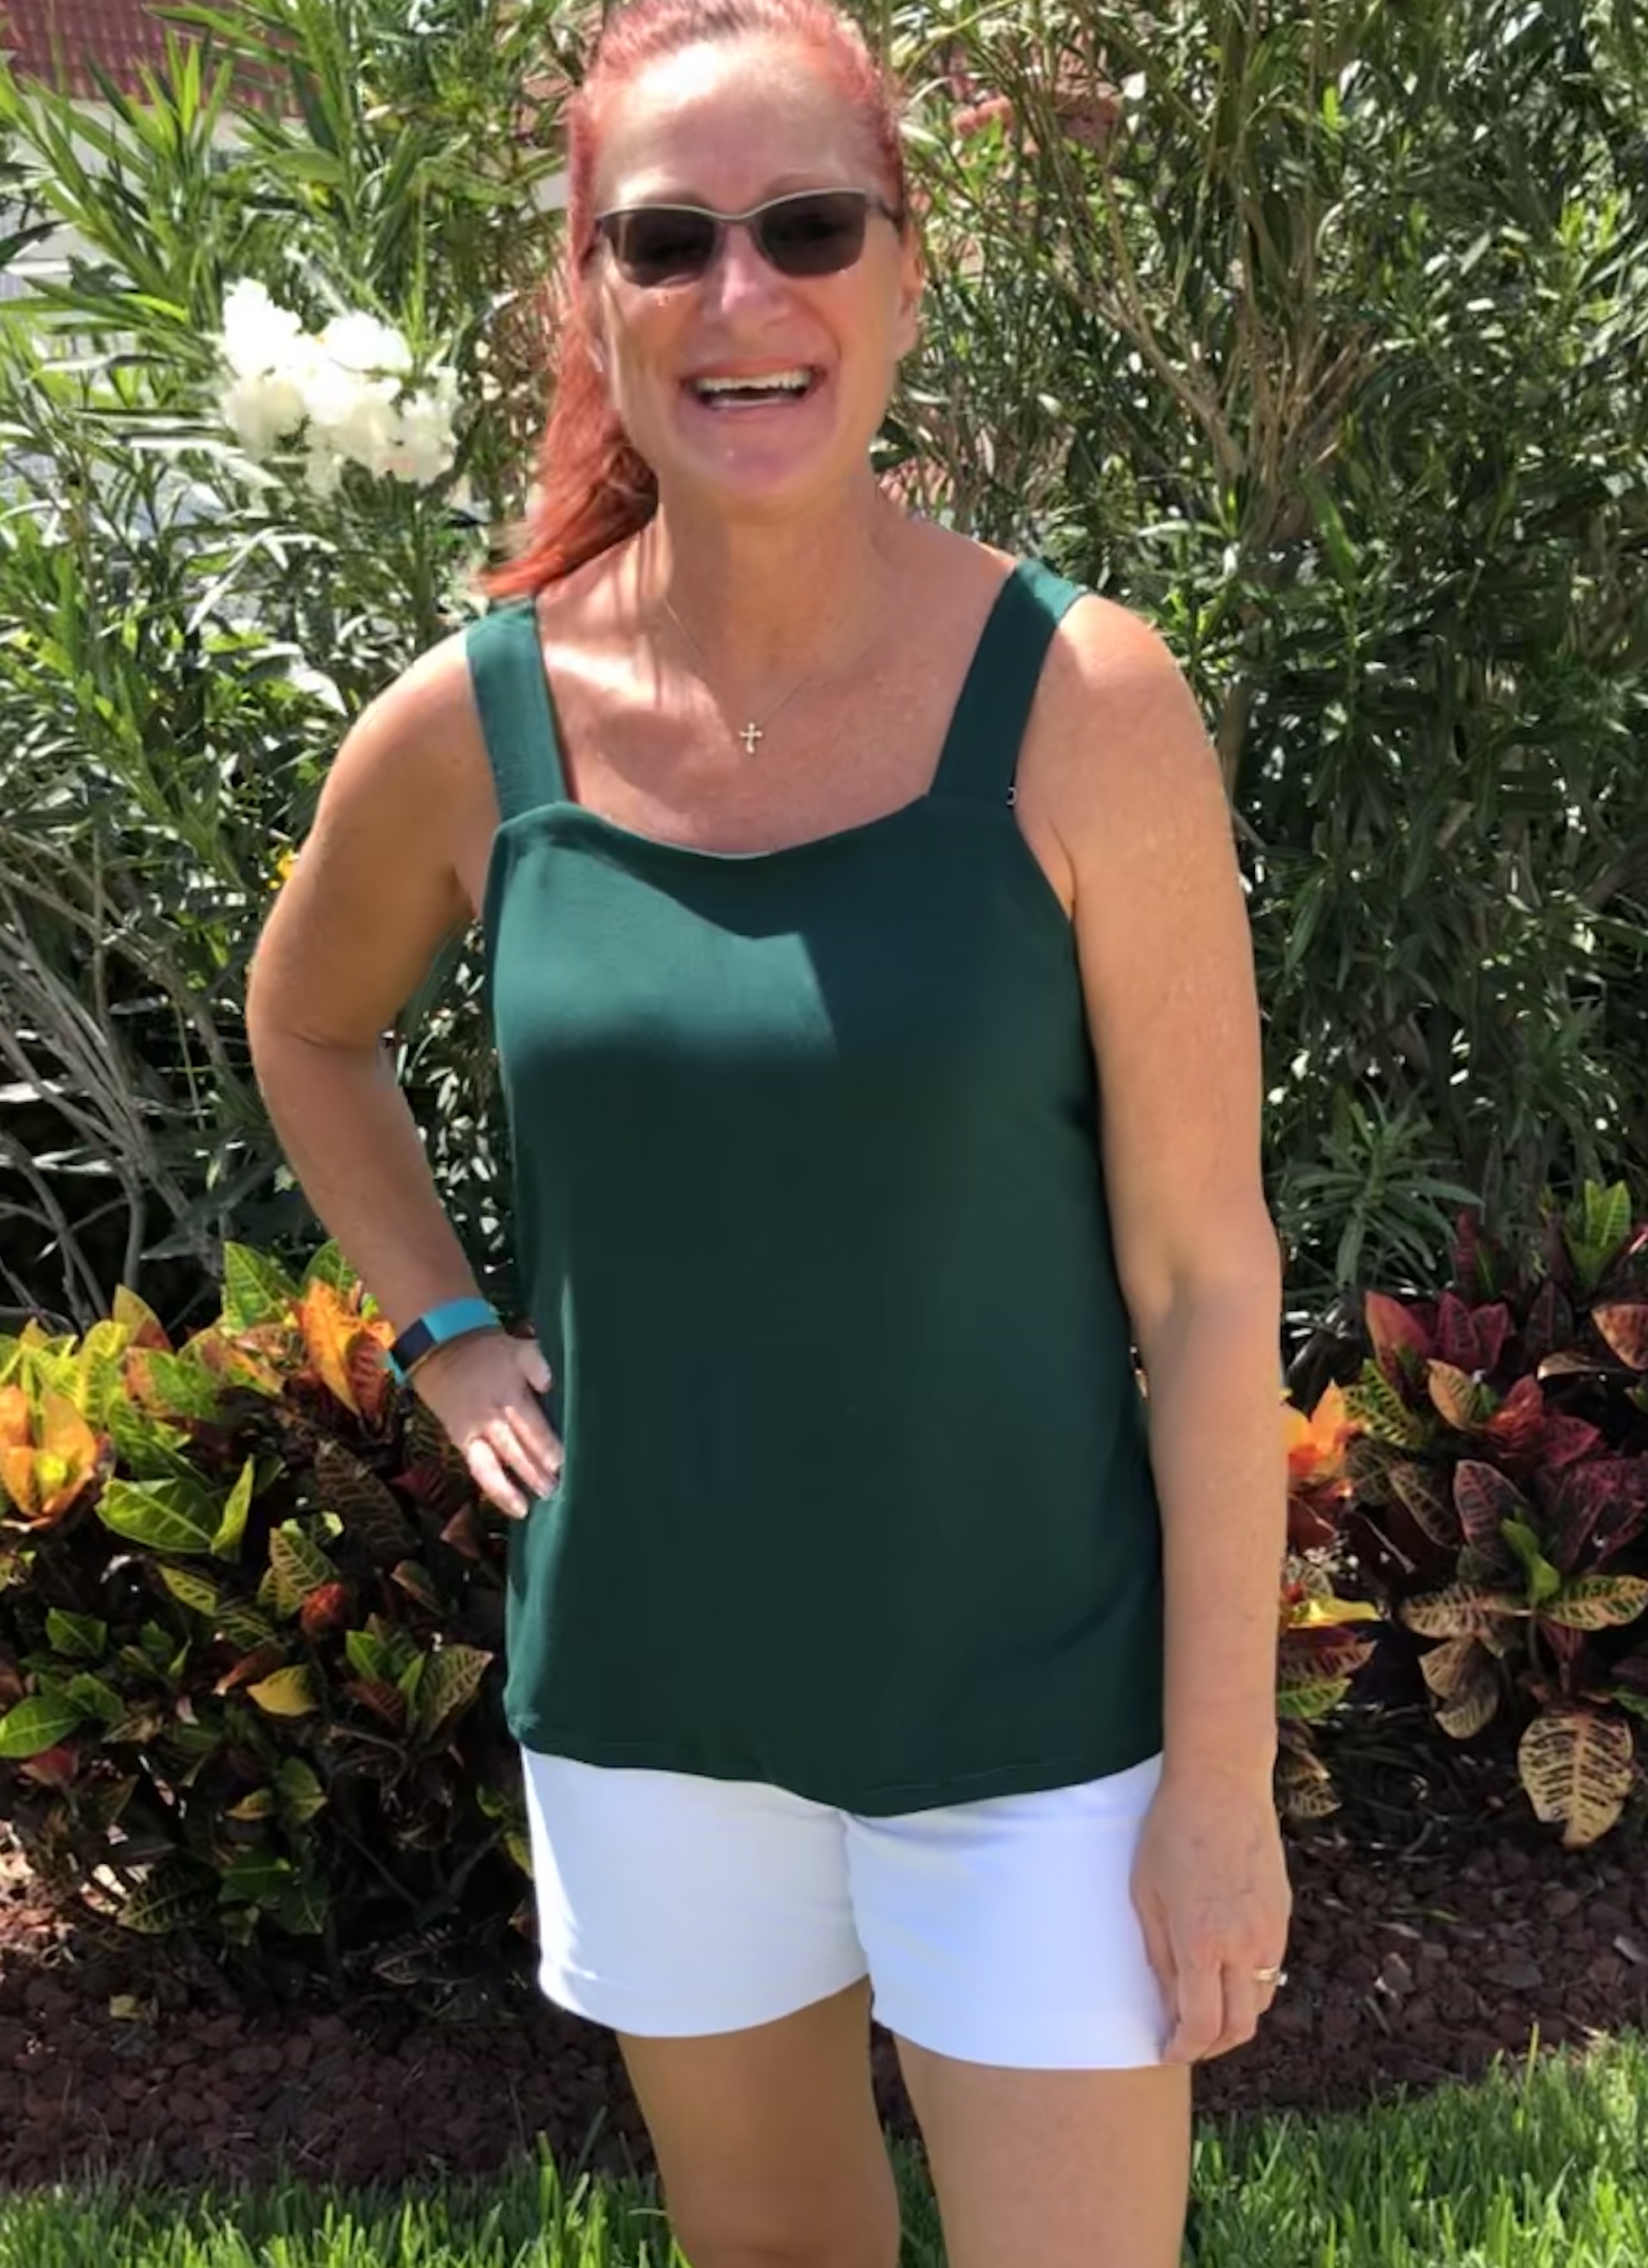
When the GreenStyle Creations Valerie Dress was first released, I put off buying it. I don’t know why, since 2020 was definitely the year for lounge wear! 🙂 Now that I’ve whipped a couple of them up, I’m really wondering why I waited! It’s a comfortable, flattering dress that can transform from lounge wear, to beach cover-up, to throw-it-on-and-run-to-the-store, to pretty enough to wear to church.
The shaped seamed back gives a flattering, comfortable fit that is so much nicer than a sloppy, boxy T-shirt. It has sleeves ranging from cap to long, but of course I chose to go sleeveless. #floridalife The curved hem (a shirttail hem) gives a more casual look, so I chose that and the scoop neckline for my first make of the pattern.

Talk about comfortable! This immediately became my new favorite nightgown and got worn to bed that evening. And worn around the house the next day while sewing. Surely I’m not the only one to sew in my lounge wear? Be honest, you know you’ve done it! 😉 I chose to bind the neckline and armscyes rather than do bands just because I can.
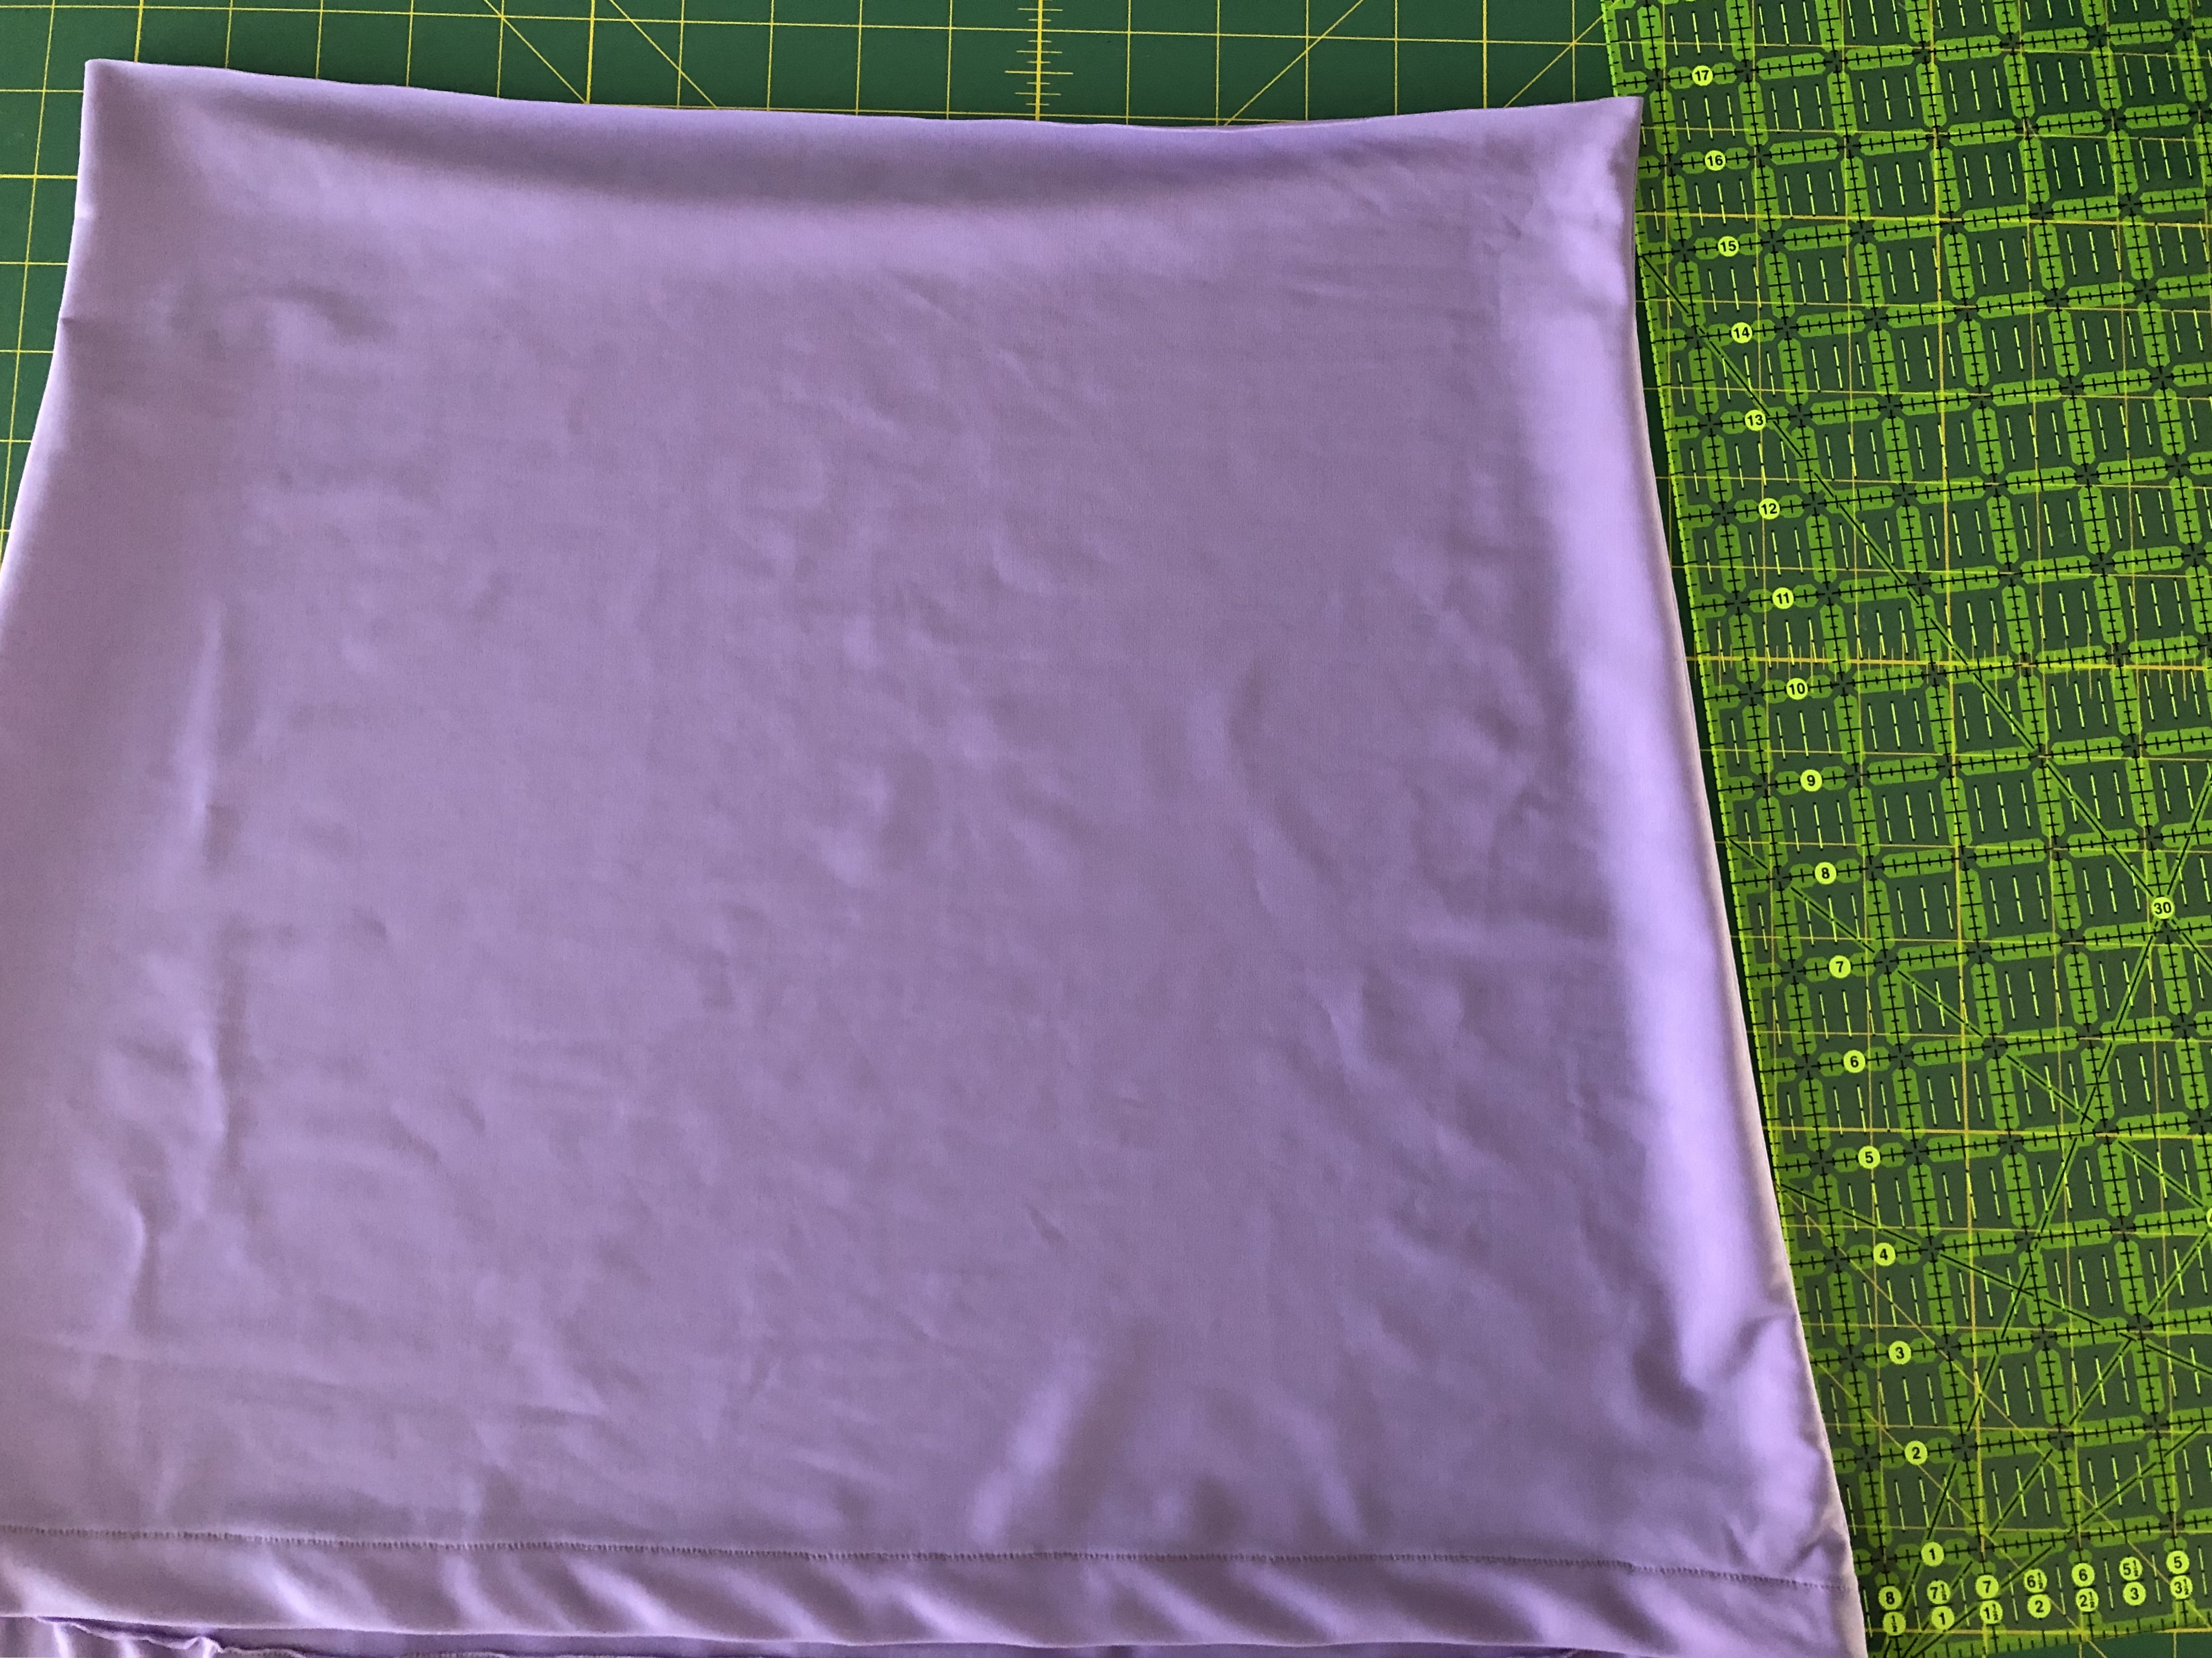
Use the same length for binding as recommended for your band, but only cut your strip 1″ high. Stitch the short ends together and quarter and pin the binding to the neckline right sides together. When you serge the neck binding on using the normal 3/8″ seam allowance, with your stitch width set at M, your machine will trim 1/8″ off. Press the seam allowance up, and wrap the binding around to the inside, pinning in place. Then top-stitch or cover-stitch it in place. It’s a super easy, yet professional looking (although technically faux) binding finish.

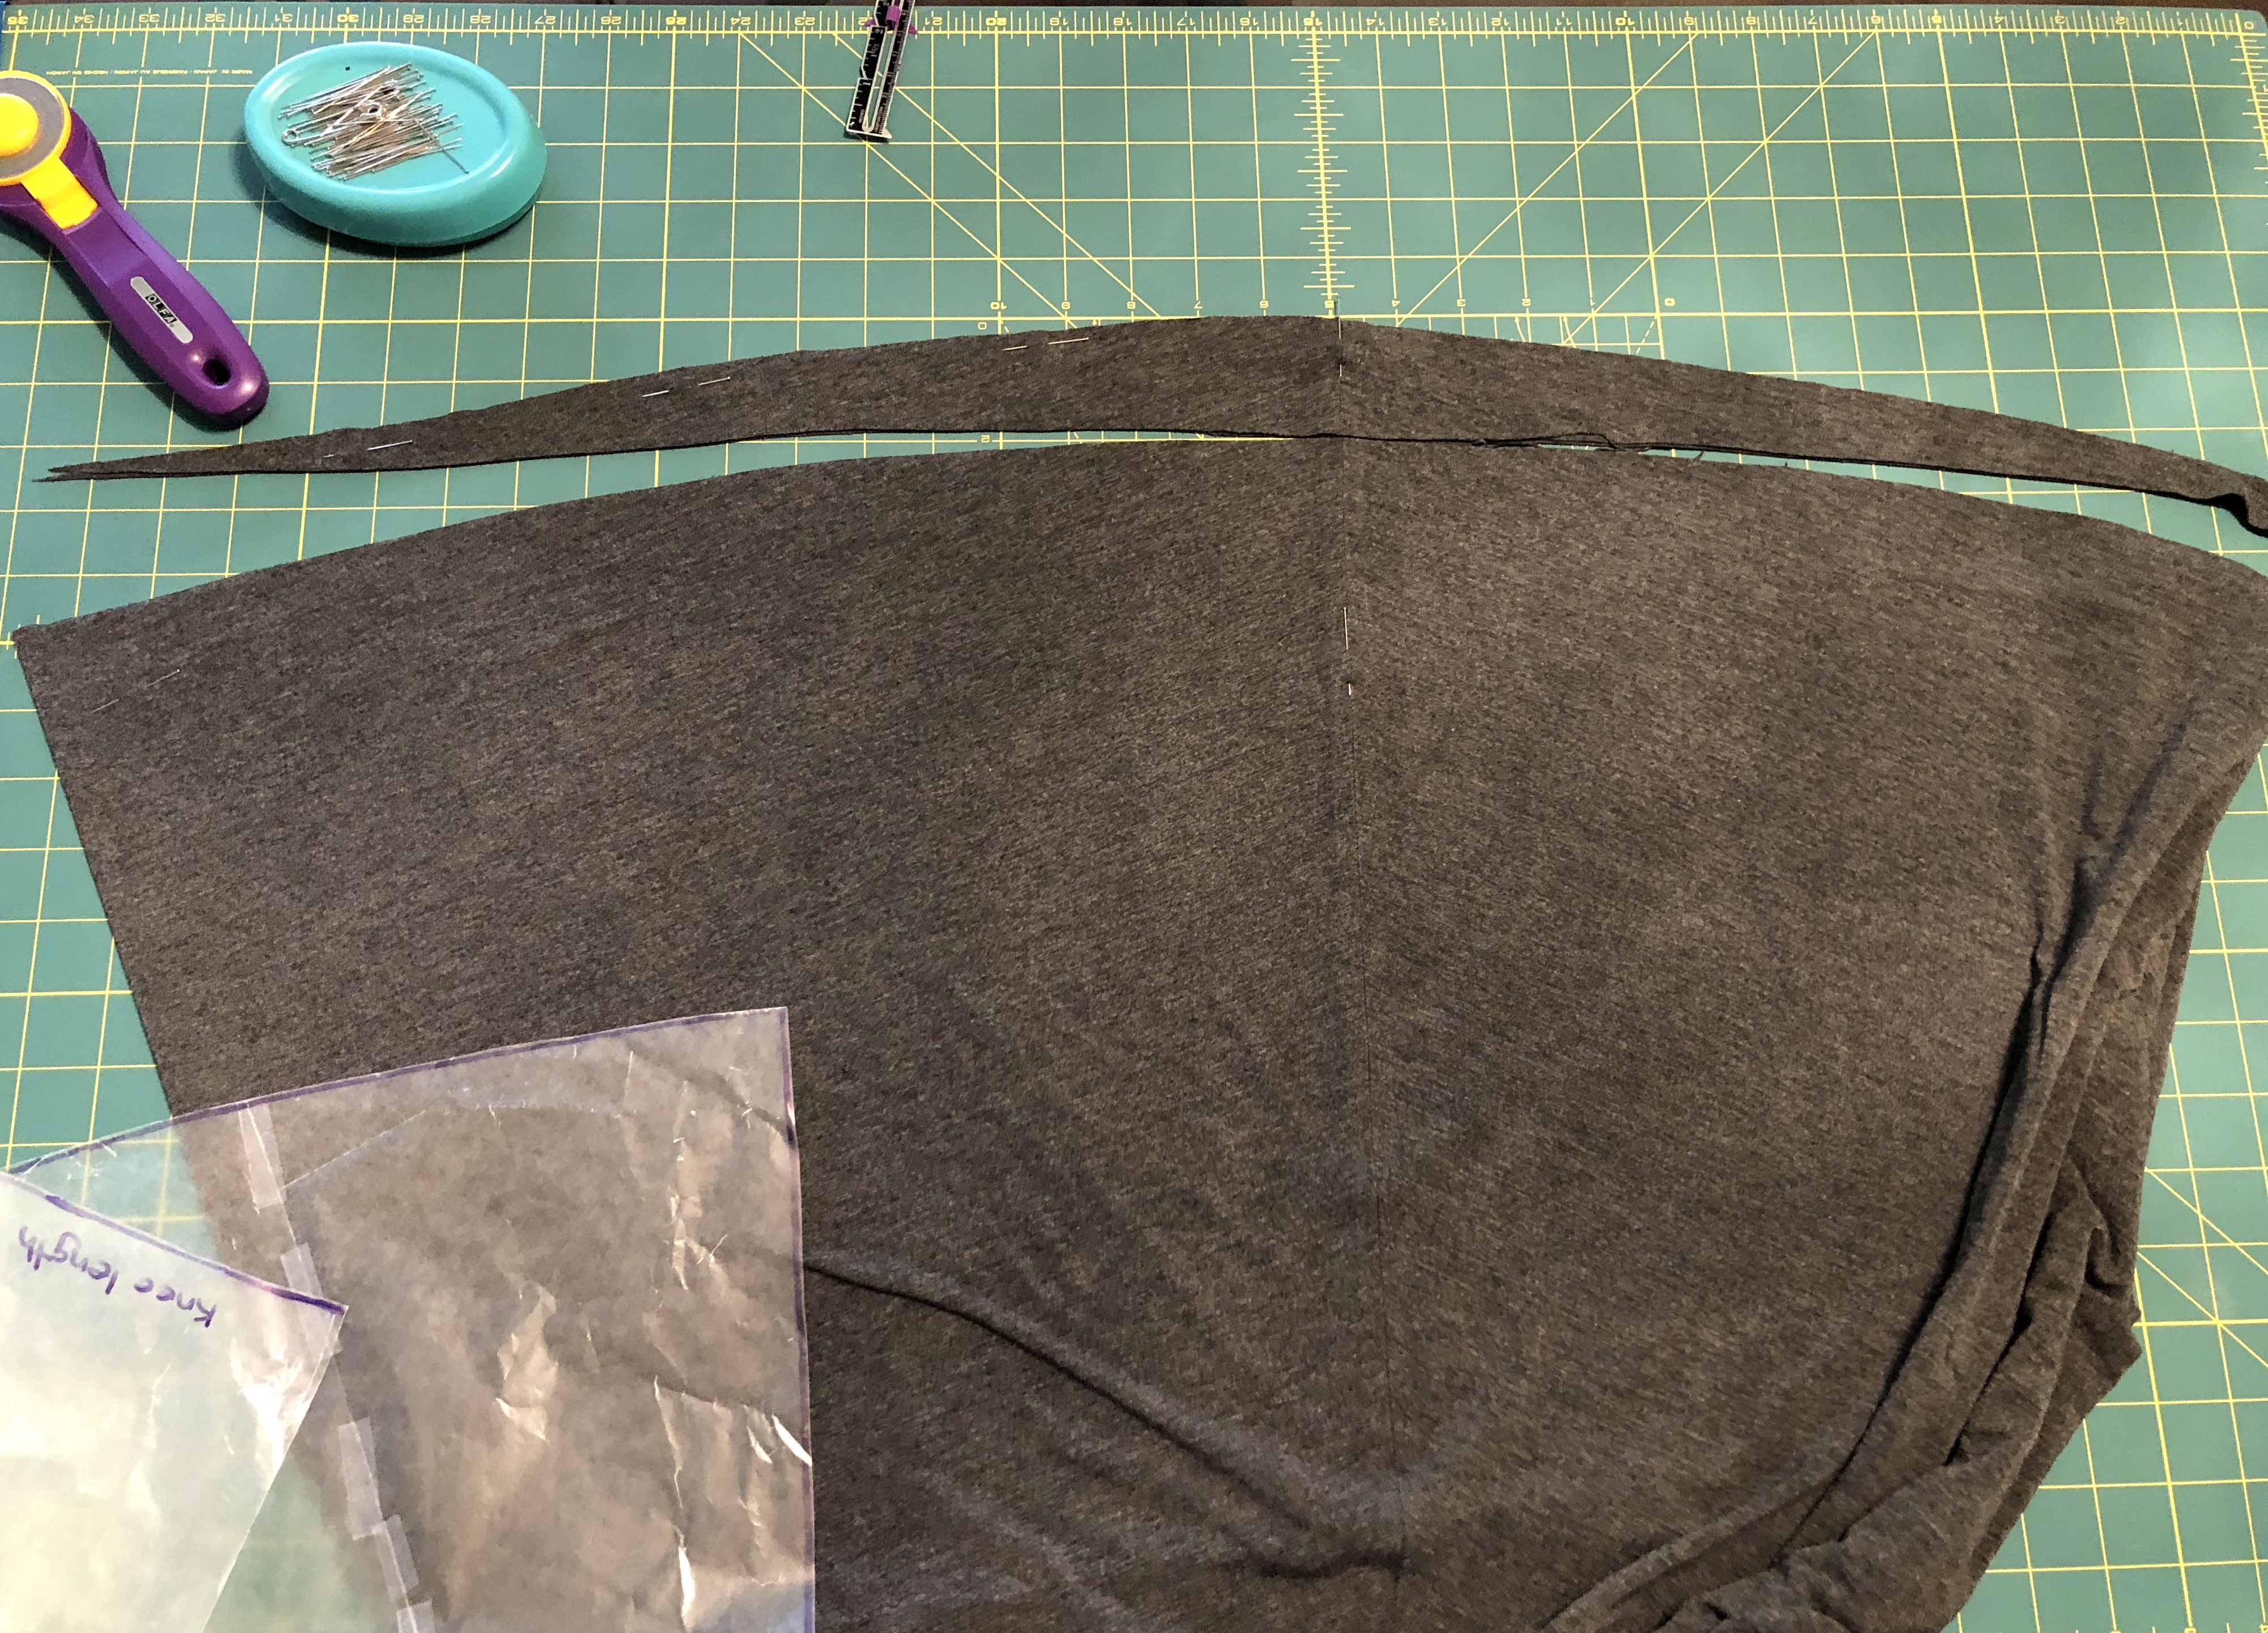
People sometimes get nervous about hemming a curved shirttail hem, with memories of past wonky, wrinkly, bunched up hems. But it really isn’t hard if you do a couple of things. First of all, don’t sew with fabric that doesn’t have “recovery”. Generally speaking, this means it contains spandex/Lycra. When you stretch your knit fabric out, it should come back to its original size. If the fabric stays in a stretched out shape, it’s a sign that the fabric is going to grow and hang oddly and unflatteringly. Just don’t waste your time with it. Secondly, the Valerie pattern has a nice gradual curve not sharp turns, which makes it easier.
And here’s the most important tip: serge along the hemline on the right side of your dress, using a 4 thread overlock, stitch width of M, stitch length of 2 to 2 and a quarter, with your differential turned up to 1.3. This does two things. It gives the hem stability so that it won’t stretch out while top or cover-stitching. It also very slightly brings the edge in a bit. Then when you pin the hem in place, you won’t have excess fabric bunching up. You’ll just have a smooth beautifully curved hem.

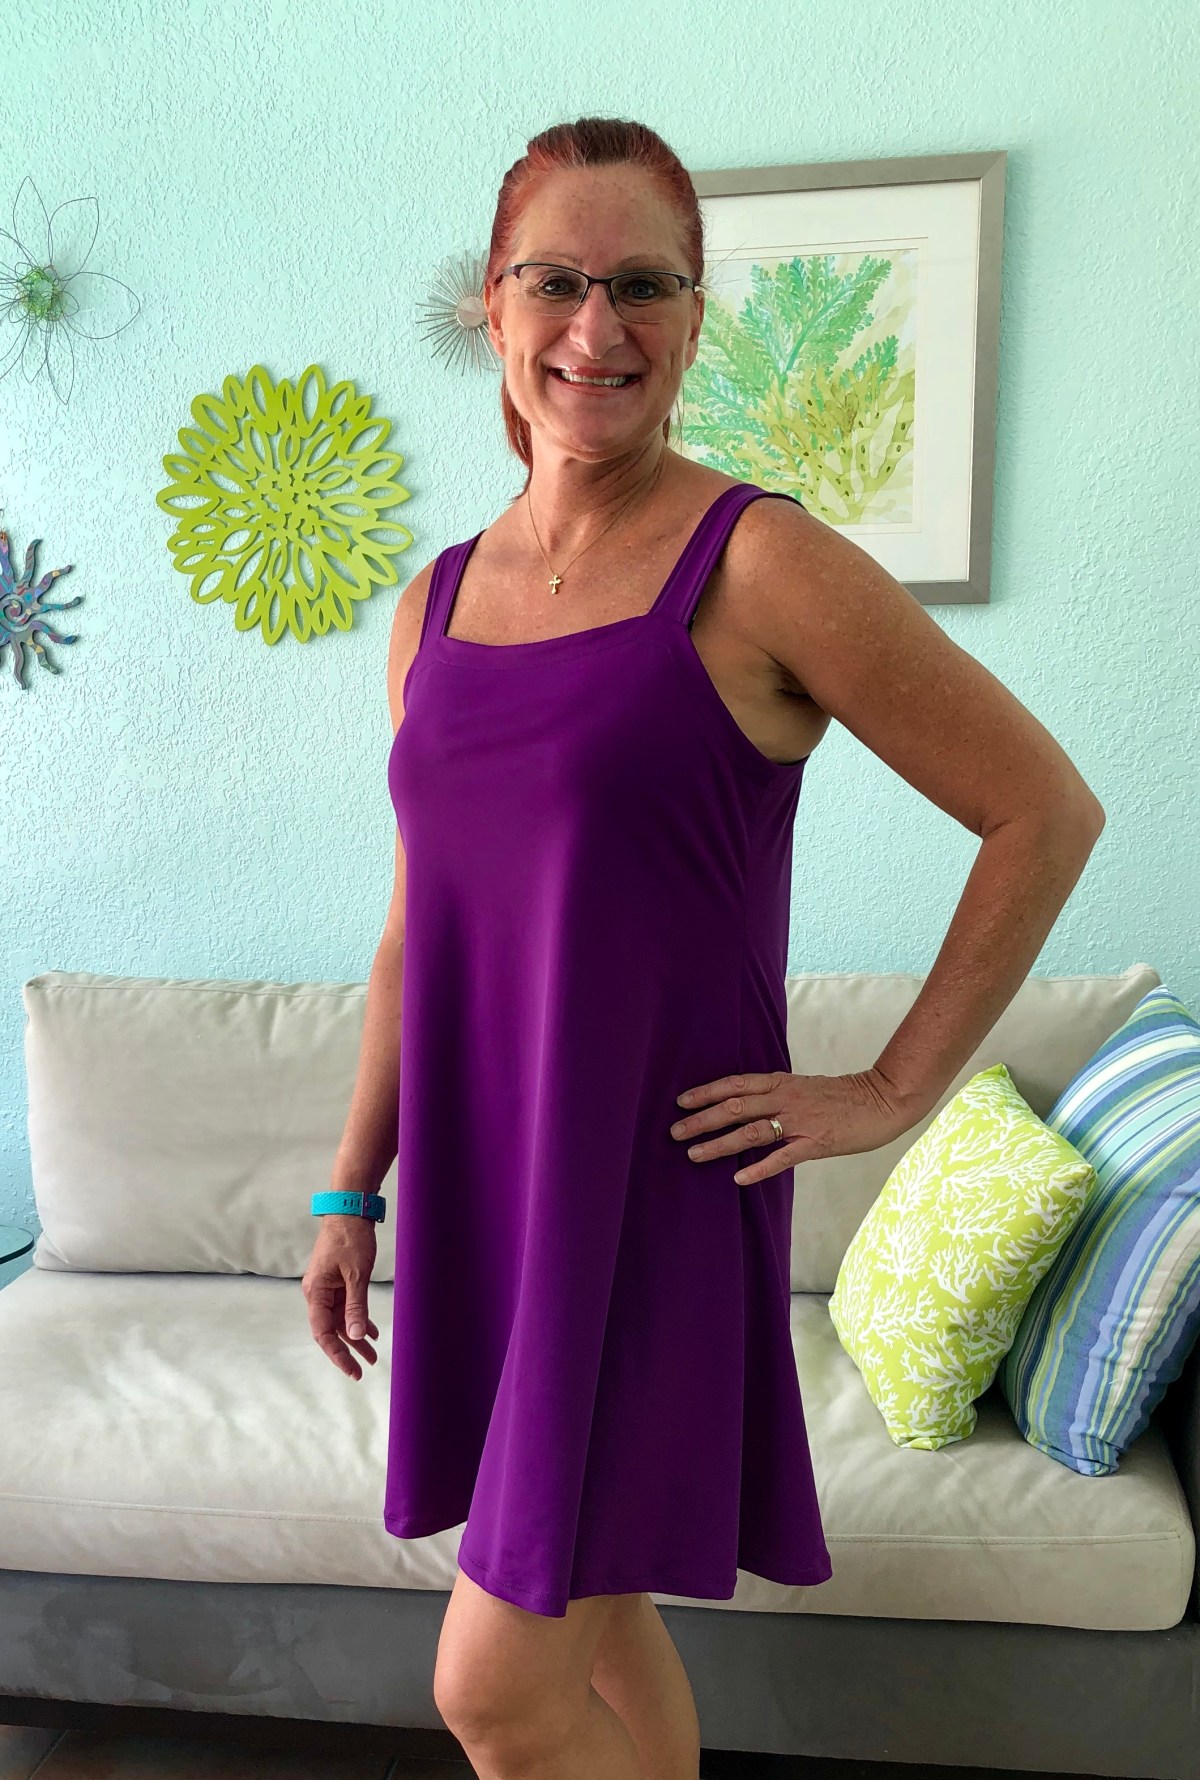
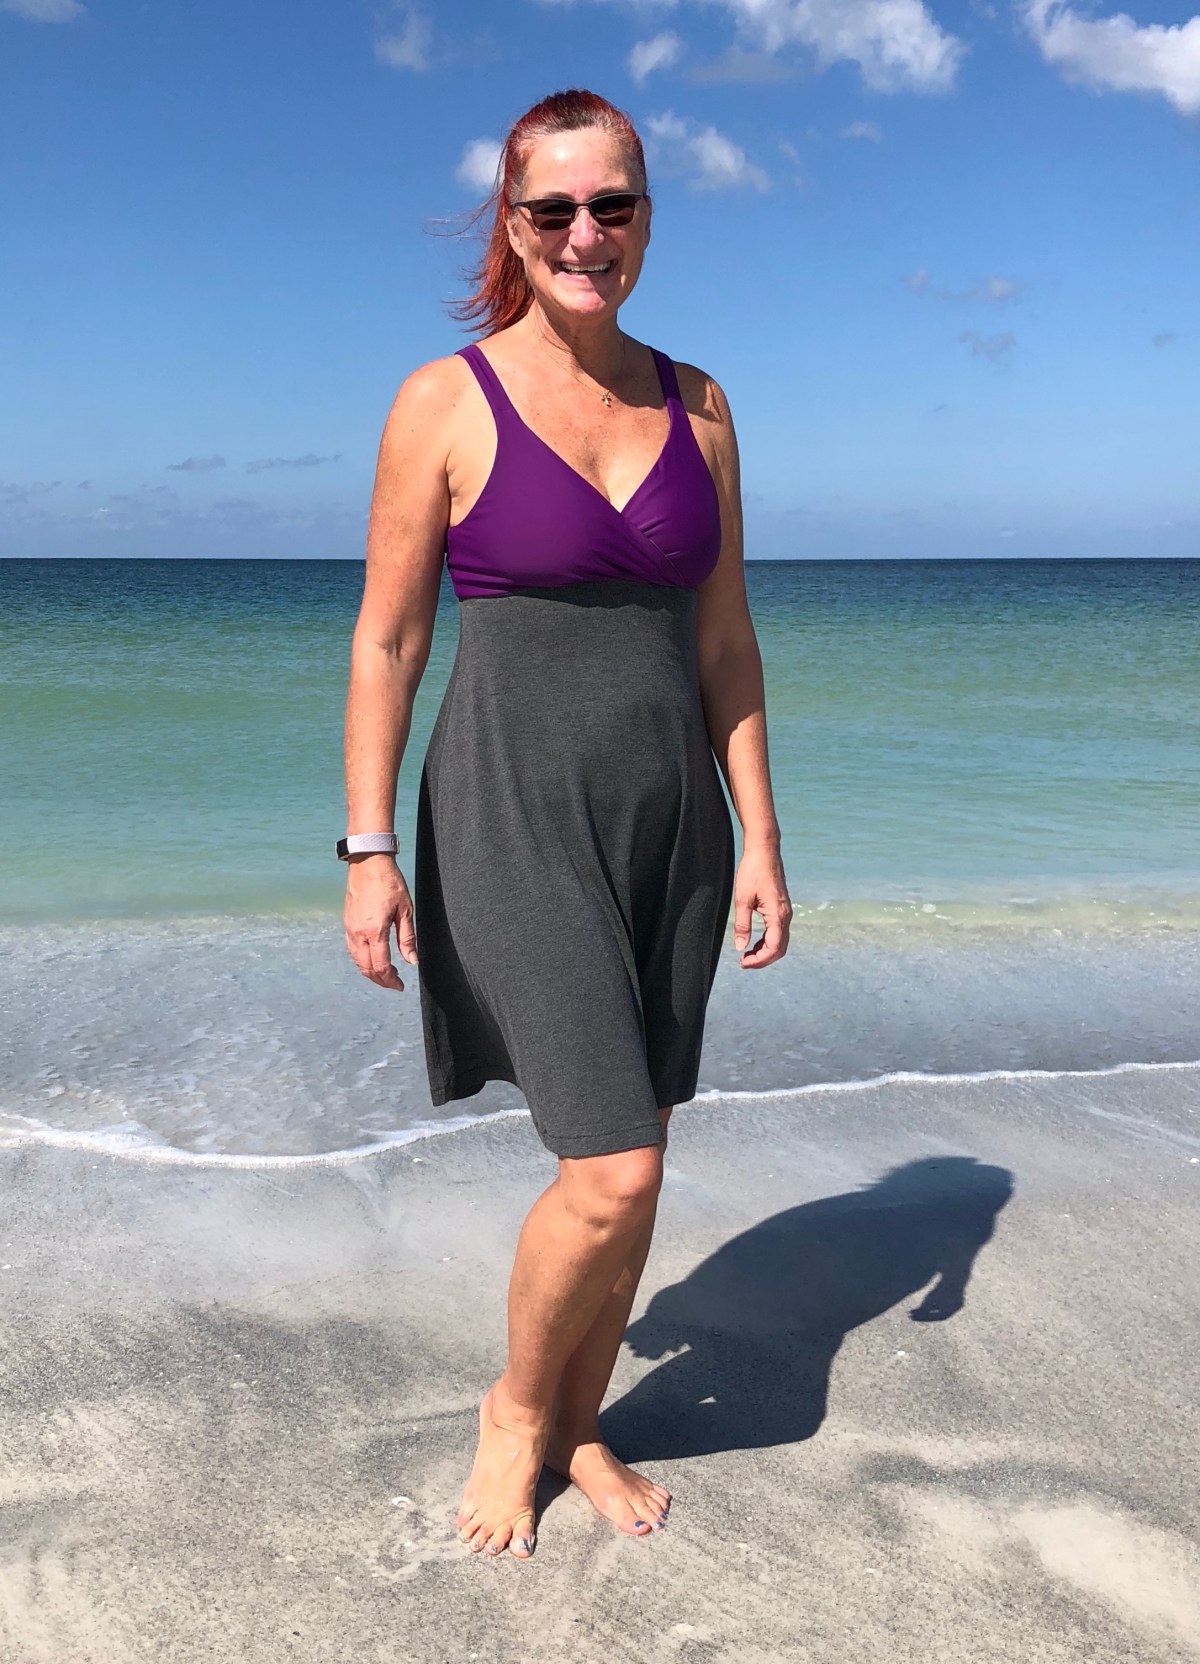
One Valerie dress led to another… as in the very next day I decided I needed another one! To change things up, I did a mash and a hack. Mashing the Valerie with the Staple Tank was a no-brainer, since the Staple Tank is my most used tank pattern. Simply layer your Valerie pattern with your Staple Tank pattern, matching the natural waist markings. Then trace the Staple Tank bodice merging it into the Valerie body .

A seasoned sewist has learned and understands the importance of grading. But a new sewist is likely to be a bit nervous about the idea. You mean I bought a pattern and it’s not going to magically perfectly fit my unique body and shape? What??? Okay, the possibility exists that it will fit you perfectly well, at least as well as your basic ready-to-wear. But the more you sew, the more demanding you become about getting the best fit possible. And the first step towards that is measuring and grading. Pattern companies include a measurement chart in the tutorial, and it’s important to look at them.
You may be tempted to say well, my bust falls into size x, and my waist and hips are size z, so I’ll just make size y. Depending on the ease of the garment, it may fit. But it will likely be a bit large on your shoulders, and the top or dress may ride up because it’s a little too snug across the hips. Personally, I like when patterns include an upper bust measurement, as well as a full bust measurement. My bust is fuller than average for the frame of my body. So if I choose a pattern size based on my bust measurement, it’s likely to be too wide across my shoulders, which leads to bagginess above the bust, with the excess fabric digging into the front of my armpits. Super uncomfortable and not an attractive look. So I generally trace a smaller size above the bust, grading out to my bust size below the armscye. If my hips measure on the edge of two sizes, I generally grade out to the bigger size to give myself more room for the booty.
All of this is pattern dependent of course, but on a more fitted style like the Valerie Dress or Staple Tank, it’s super important to grade. Some people get all fancy using a french curve to grade their patterns. Since I don’t own one, I just draw gently curved lines from one size to the next. Think hourglass curves rather than straight lines when going in or out on sizes.
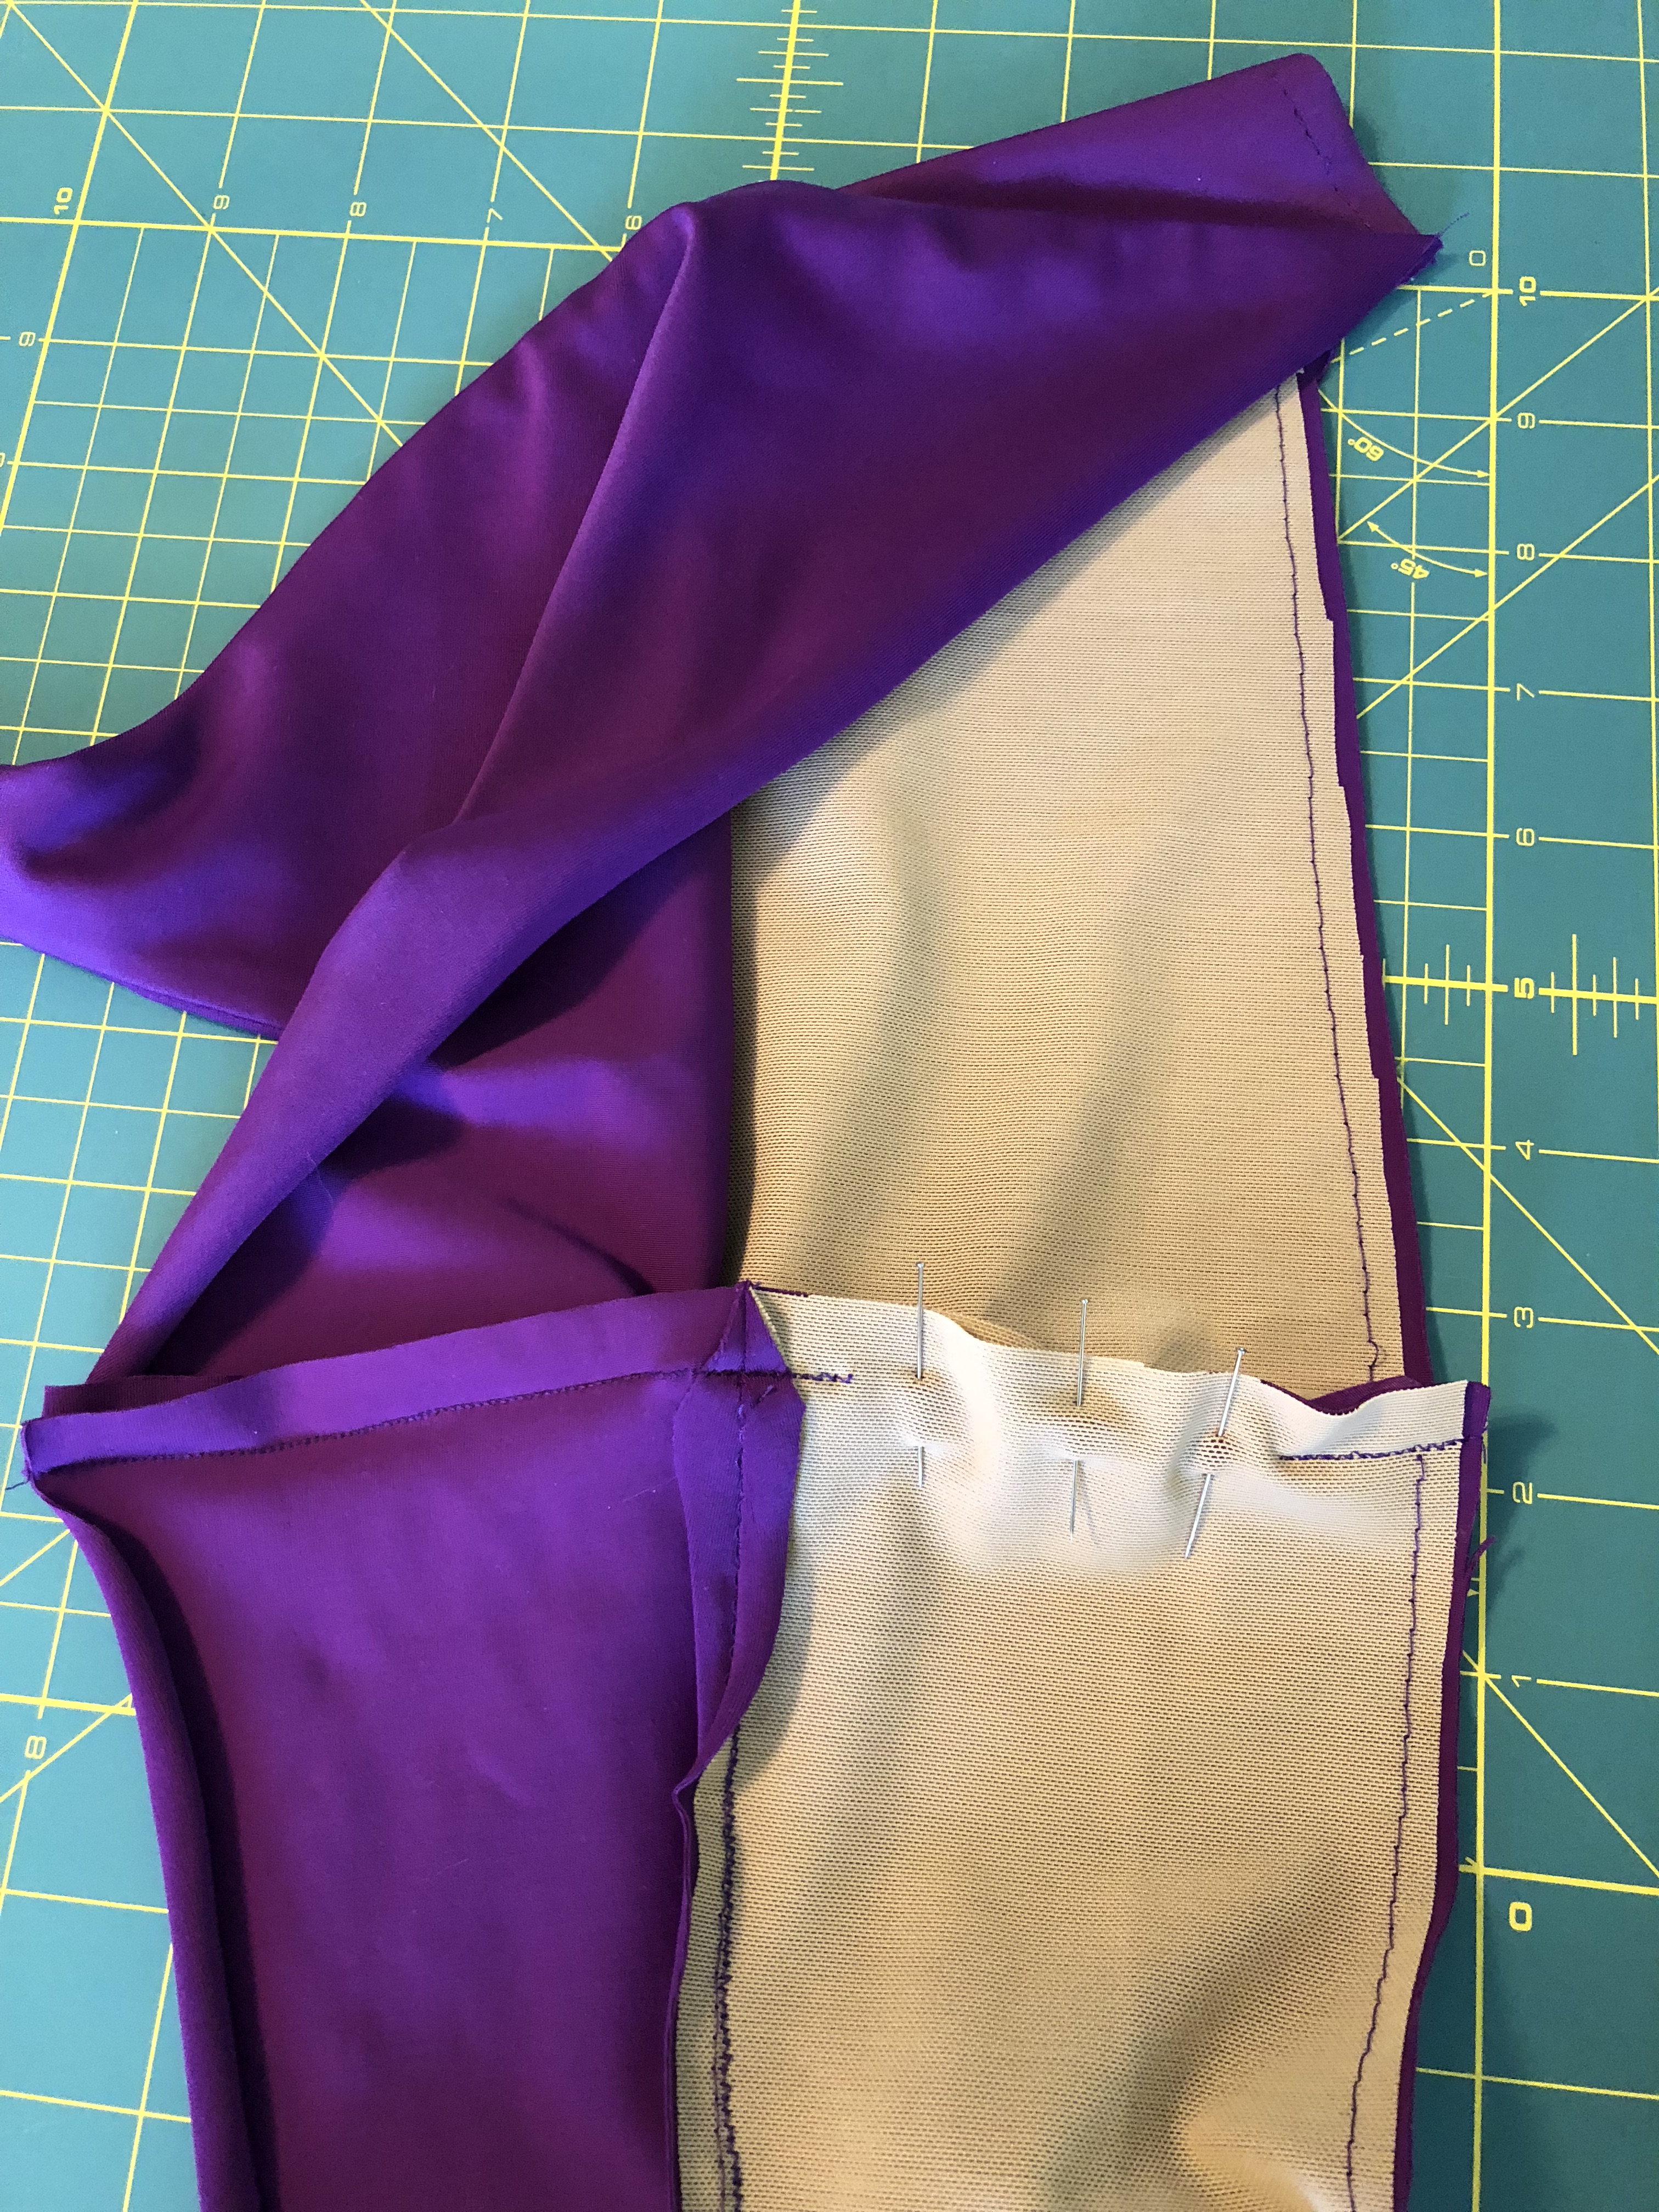
You kind of get a hint of my side vent hack in the photo above. Since I was doing the straighter hem on this dress, I thought it would be fun to add some side vents. I marked the sides of the front and back pieces 4″ up from the hem, and made a 3/8 ” snip.

Serge from the snip to the hem, along the bottom raw edge, up to the snip on the other side, on both the front and back.

Then follow the pattern tutorial for assembling the dress. When sewing the side seams together, be sure to fold the lower vent area out of the way when serging off the snipped edge. Tuck your serger tails, and press the vents to either side and cover stitch. Then pin the hem up and coverstitch. You’ll end up with beautifully finished side vents.

I love the look and fit of this hacked, mashed dress! It’s comfortable, and kind of sexy, while still looking classy. In fact I wore it to Mass on Sunday with one of my Sunday Cardigans.

Here’s the takeaway: grade to fit your body; don’t be afraid to mash the Valerie with one of your favorite patterns; side vents are fun; and try my serger tips and tricks. The details: both the emerald and navy dresses were made with rayon spandex purchased at Phee Fabrics.
So, which version should I make next? I’m thinking I need to try the V-neck!
This post may contain affiliate links. This means that at no extra cost to you, I may receive a small commission if you purchase through my link. As always, I only give my honest opinion. After all, it is my blog, which represents me! 🙂 Thank you for reading and sharing my love of creating, sewing, patterns, fabric, and making beautiful well-fitting garments! ❤


 Other than the straps, I sewed the bra together per pattern instructions. While I love the look of the double straps, they are more time consuming to construct. So I still cut out four strap pieces, but used them flat (as main fabric and lining fabric) rather than as double straps sewn to each shoulder. I used powernet in my straps rather than adding elastic.
 Once you’ve sewn your main and lining pieces together along the top, try the bra on, adjust the straps to length, then push the straps through the openings and stitch.
 To avoid bulk, be sure to trim the seam allowances at the back strap openings on an angle before turning the bra right side out. It’s important to press as you sew. It helps everything lay more smoothly, and gives your projects a more professional finish. See the difference pressing makes between the left and right straps in the photo below?
 The Lille body was wider than my bra. If I were making the body out of Supplex, and wanted it more fitted, I would have slimmed the top of the body a bit. Since I was going for a drapier fit with ruching, I just matched up my quarter points and eased the body to fit the bra.
 I could have added a band with elastic on the inside at this point, but wanted to try something else. I used 3/8″ swim elastic cut to fit me at the snug yet comfortable length (just like you would trial fit the wider elastic in the band). I overlapped the elastic and stitched it together making a circle. Then I matched up my quarter points, and zig zagged the elastic to the seam allowance. After that, I flipped the seam allowance toward the bra, and top-stitched it in place.
 To ruche the sides, I cut two pieces of swim elastic a couple of inches shorter than my side seams. I zig-zagged the elastic to the side seams and ta-dah, instant ruching!
 When I go to the beach to get photographs in my makes, sometimes silliness overtakes me. But we’ll just say I was jump testing the workout top to ensure that everything stays in place!

 Please note that out of respect for the designers, and protection of their intellectual property, I will not show full pattern pieces. I bought the cross-front add-on when I bought the Brazi pattern because I love the look and knew that it would be the most flattering for my body type. But you can do the straight strap hack on the original pattern. I simply marked my pattern where it curves from cup to strap, and folded it under 1/2″ above that. I folded the back straps under and cut out my modified pattern pieces. I cut four 2″x13″ rectangles out of my fabric as my strap and strap lining pieces.
 being successful at supporting “the girls” is
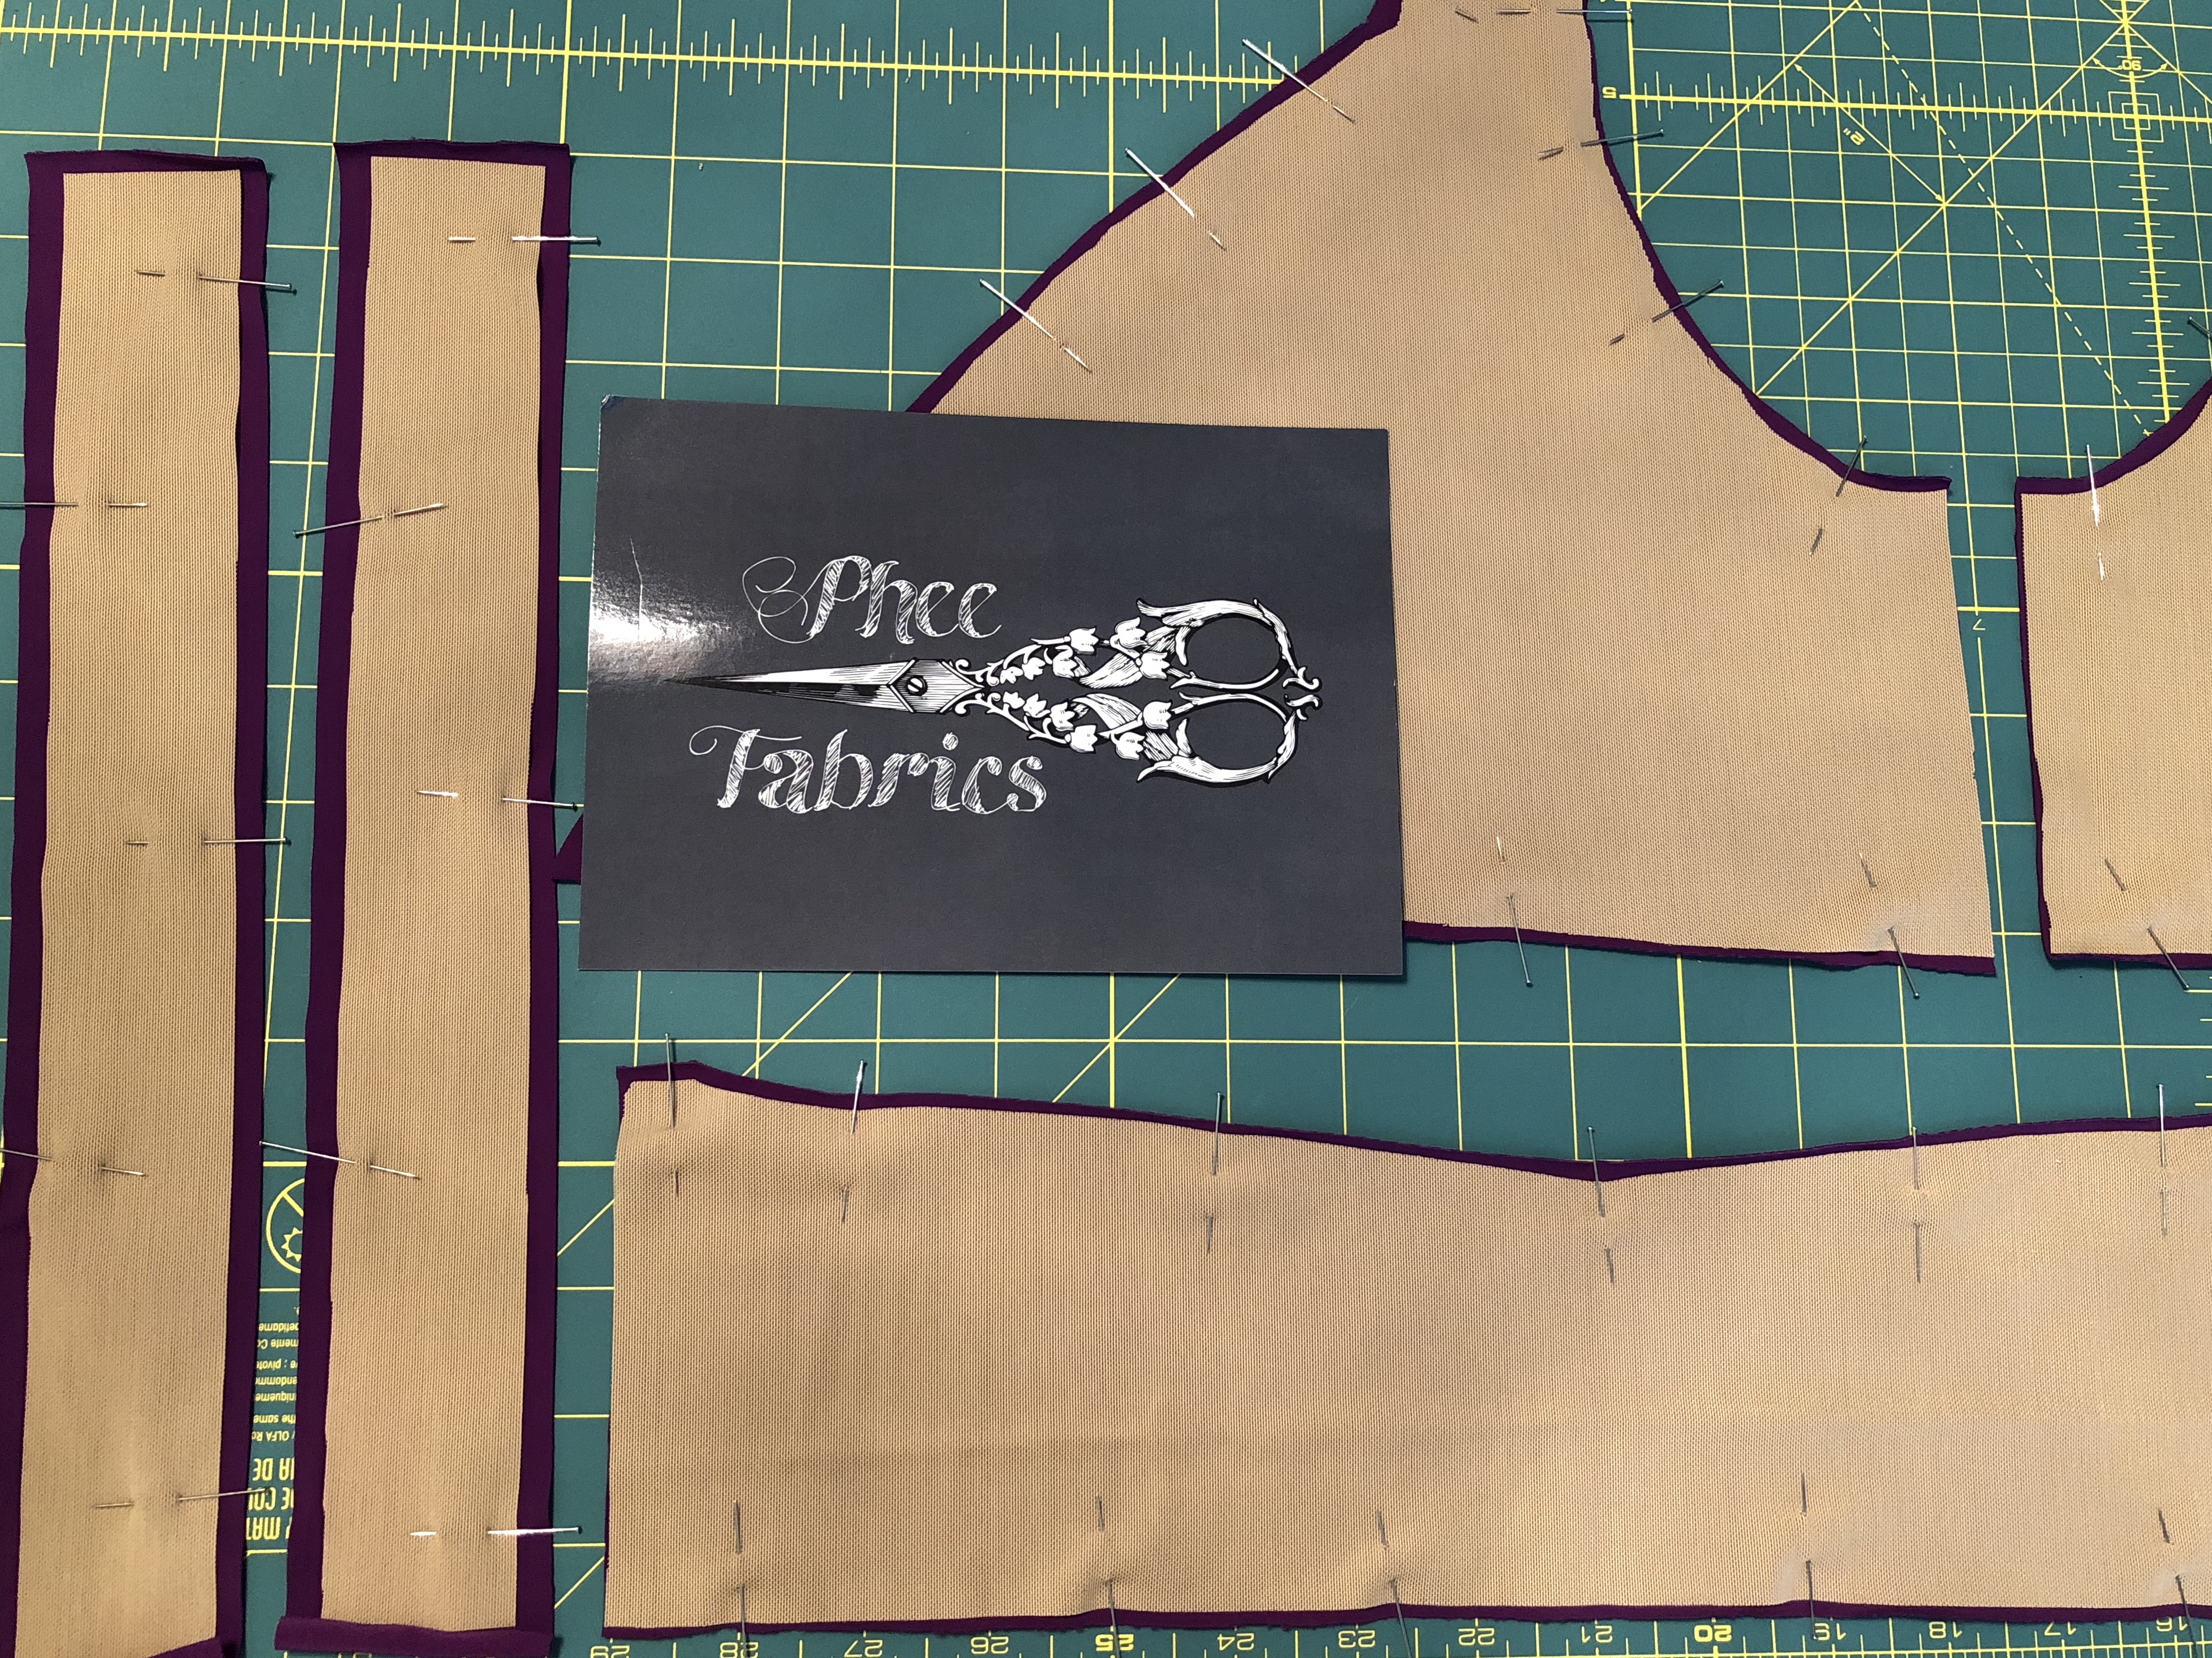
 Pin the trimmed powernet pieces to your lining pieces and baste in place. Do not baste along the side seams! To make the pocket for your bra cups, lay your cups on top of the bra front and mark the height. Sewing a horizontal line across the height mark will keep your cups from shifting out of place.
 Sew your main and lining front pieces right side together. The pattern tutorial recommends using elastic along the front edge of the cups. Using the elastic adds another layer of security if you are concerned about anything showing when you lean forward.
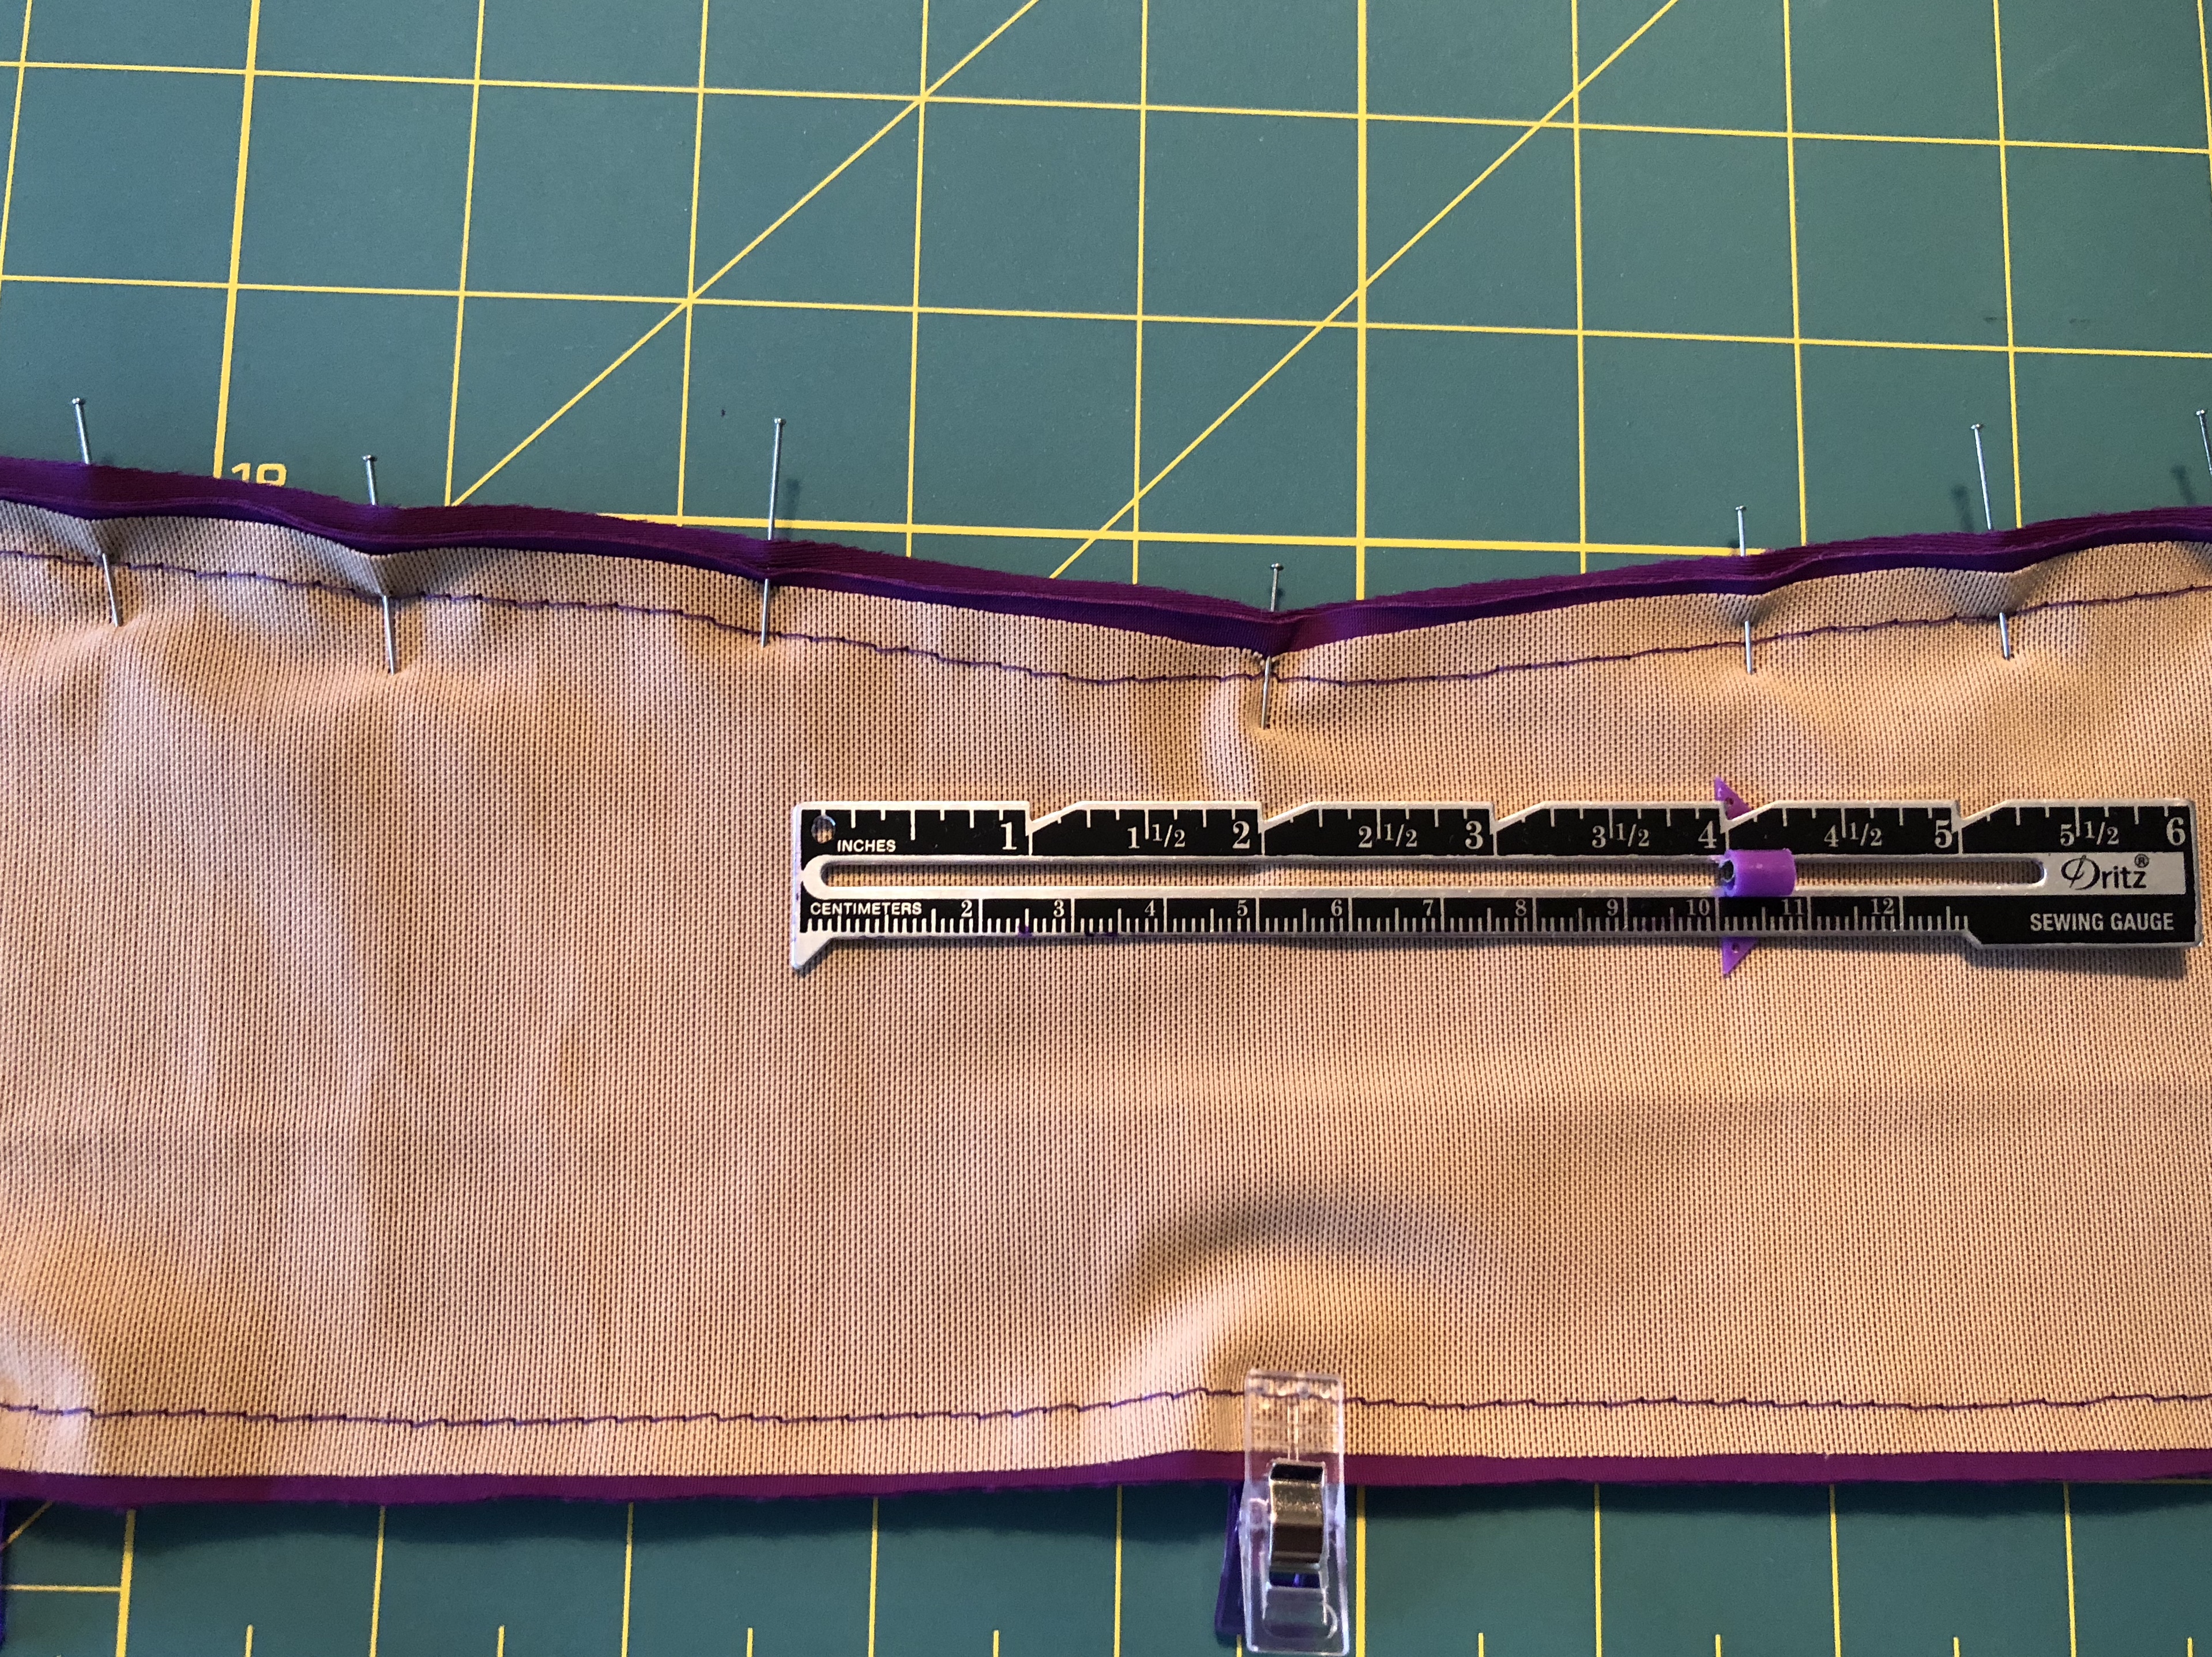

 Repeat the process with the other side seam. At this point you can follow the pattern directions about matching your center front notches, adjusting strap length, sewing on your bra band or skirt and adding the elastic.
 Since I was adding the Calista skirt to the Brazi top, and the bottom of the two bras are different shapes, I knew that I might need to make some adjustments. You might like the look of the dipped hem my mash produced, but I am kind of old school, and like my hems to be level with the floor. I had an easy fix for my problem.