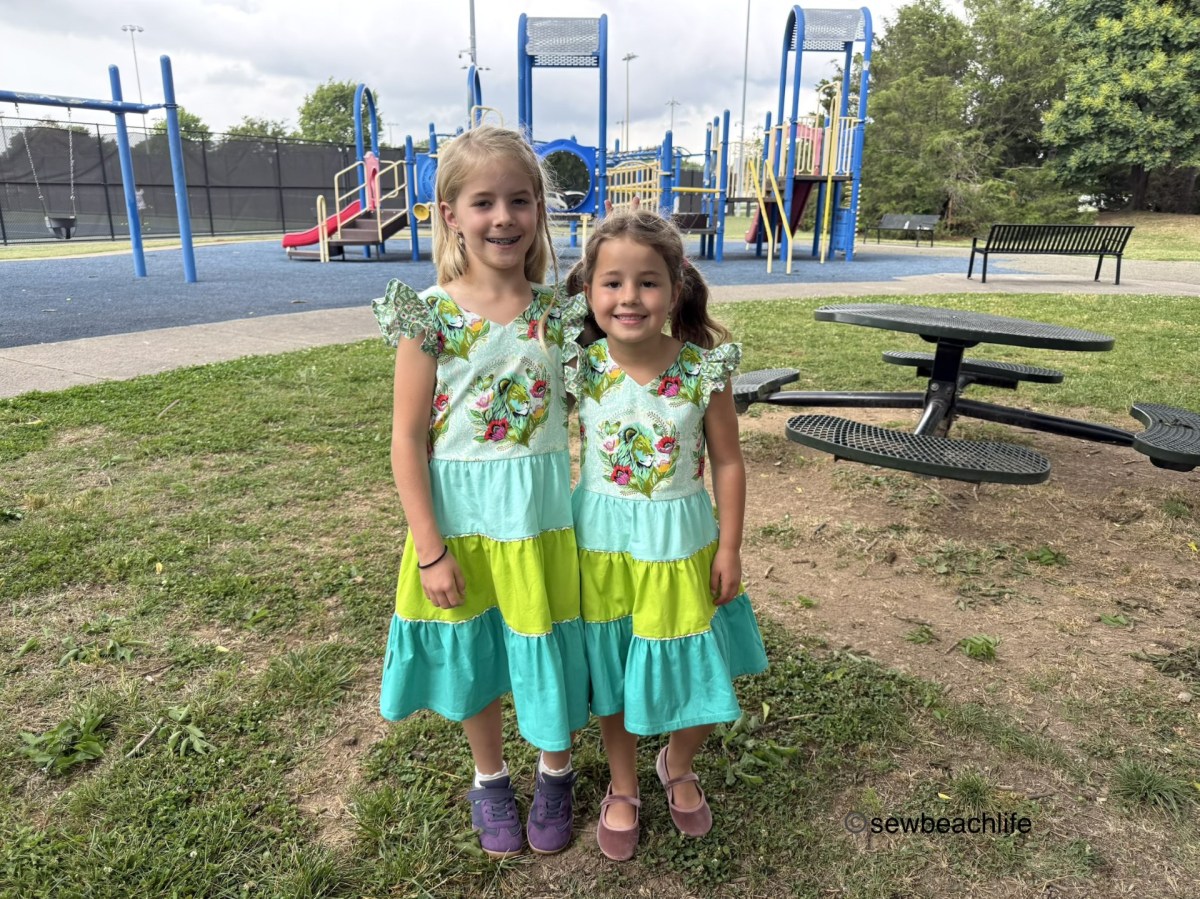
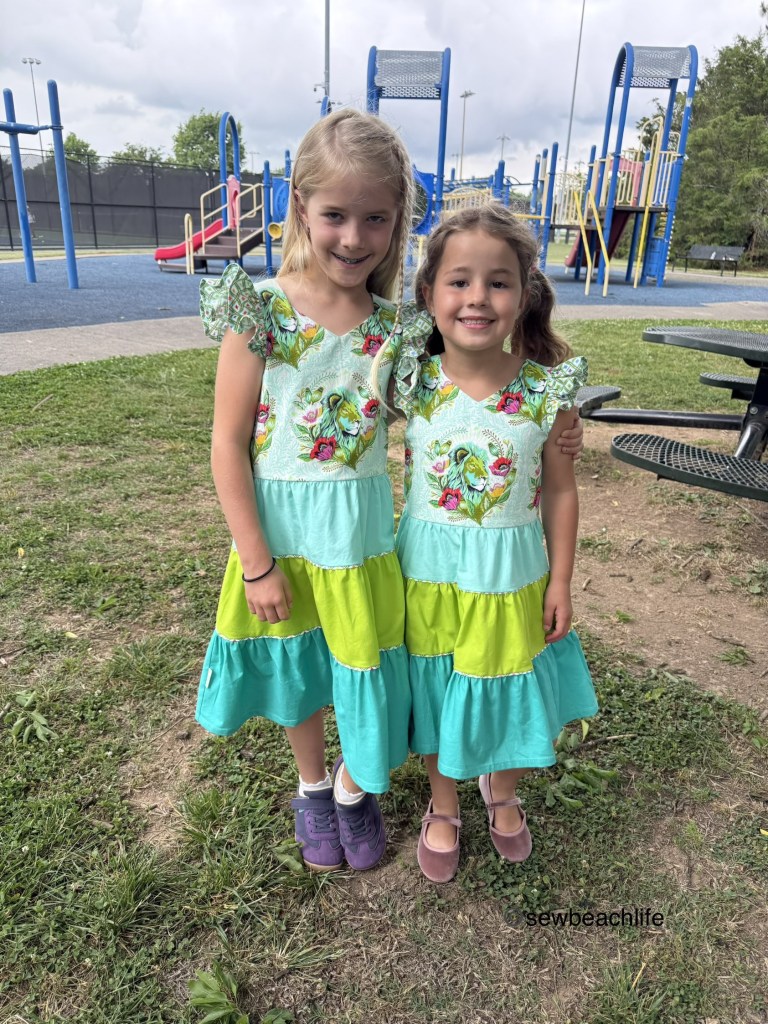
I’ve gotten into the habit of making my granddaughters matching dresses for their birthdays. On occasion only the birthday girl has gotten a dress, like the year the youngest wanted a “pink princess dress”, and I only had a limited amount of the fancy, flower and sequin-encrusted tulle. The elder girl got a simpler outfit. But usually they get matching dresses. Sometimes the dresses have matched the theme of their party, and other times the girls have requested what they wanted.
This year when asked, the soon-to-be-six-year old said, “I like it when Grandma surprises us!” In the past they’ve sometimes drawn a picture of a dress that they want Grandma to make. Maybe six or eight months ago, they drew a picture of a dress with a tiered skirt in multiple colors, with ruffles at the shoulders in rainbow stripes. At the time, I didn’t have fabric that would work for that vision, and they kind of forgot about it.
Well, when I bought fabric for my second quilt, as a novice, I of course had no clue how much yardage to buy. (I like modern quilts, so I use yardage rather than charm packs or jelly rolls). Anyway, I had plenty of fabric left over from my quilt, and it kind of fit into the drawing they had made of the colorful tiered dress they wanted. So I got to work.
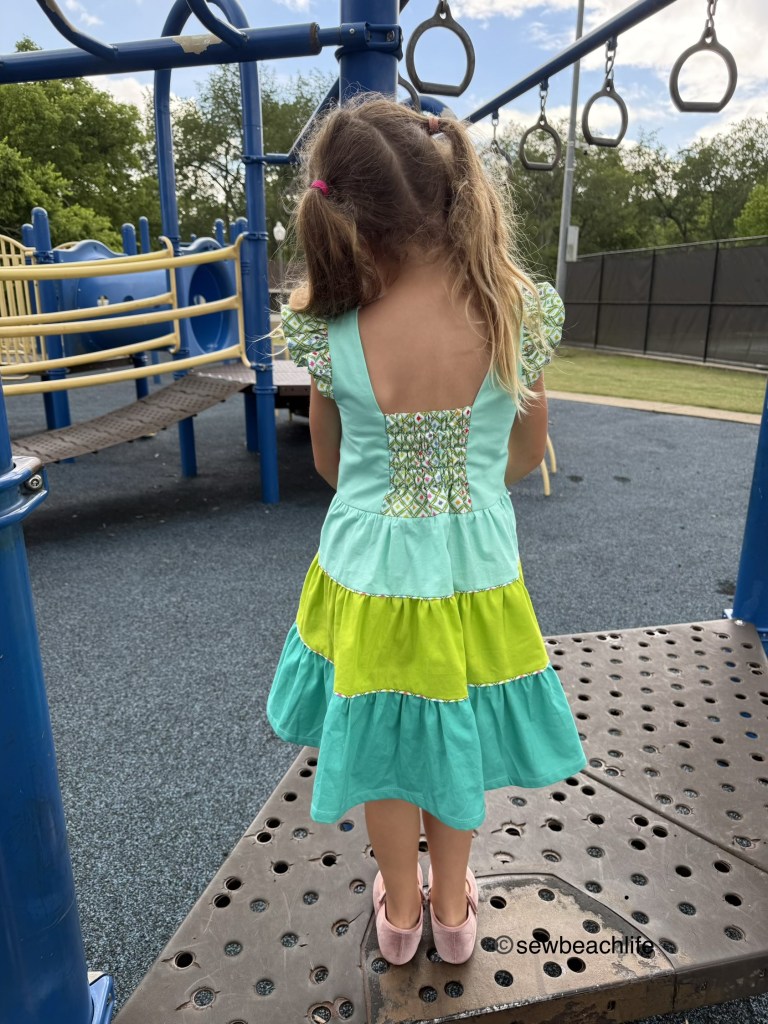
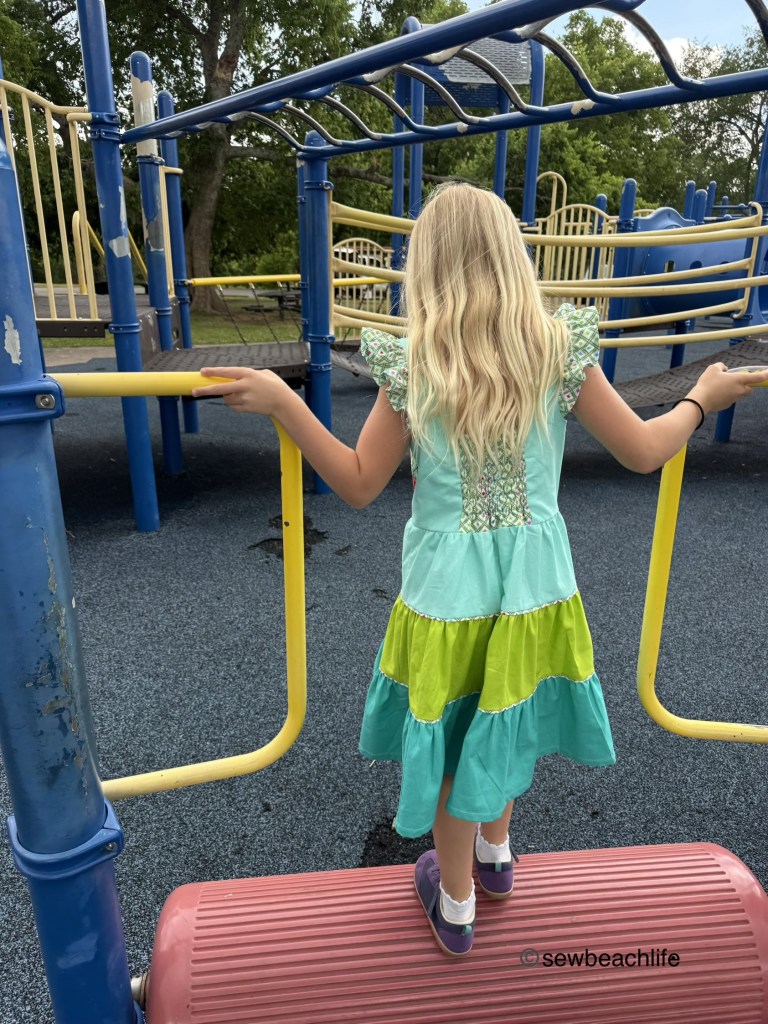
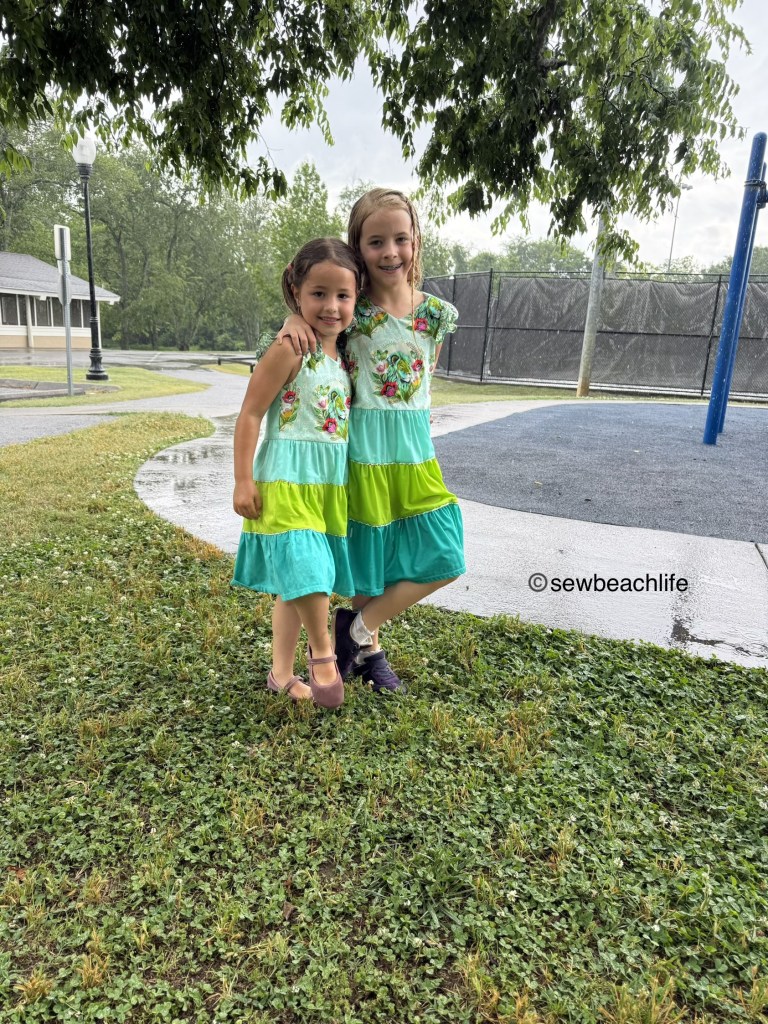
I used the Little Lizard King Aarhus Dress for the bodice, hacking it to have the Mackinac Island neckline in the front. Then I made up the tiered skirts, adding one and a half times the width for each successive tier. The size 6 dress had a skirt with tiers of two pieces at 5″x 21″, 6″x 31-1/2″, and 7-1/2″x 47″. The bottom tier has a bit more length since it is hemmed. The size 8 dress had tiers of two pieces at 6″x 21″, 7″x 32″, and 8-1/2″x 47″. The 8 year old is slim, so her bodice was size 7 width and 8 length. Honestly, she could have fit into the size 6 bodice.
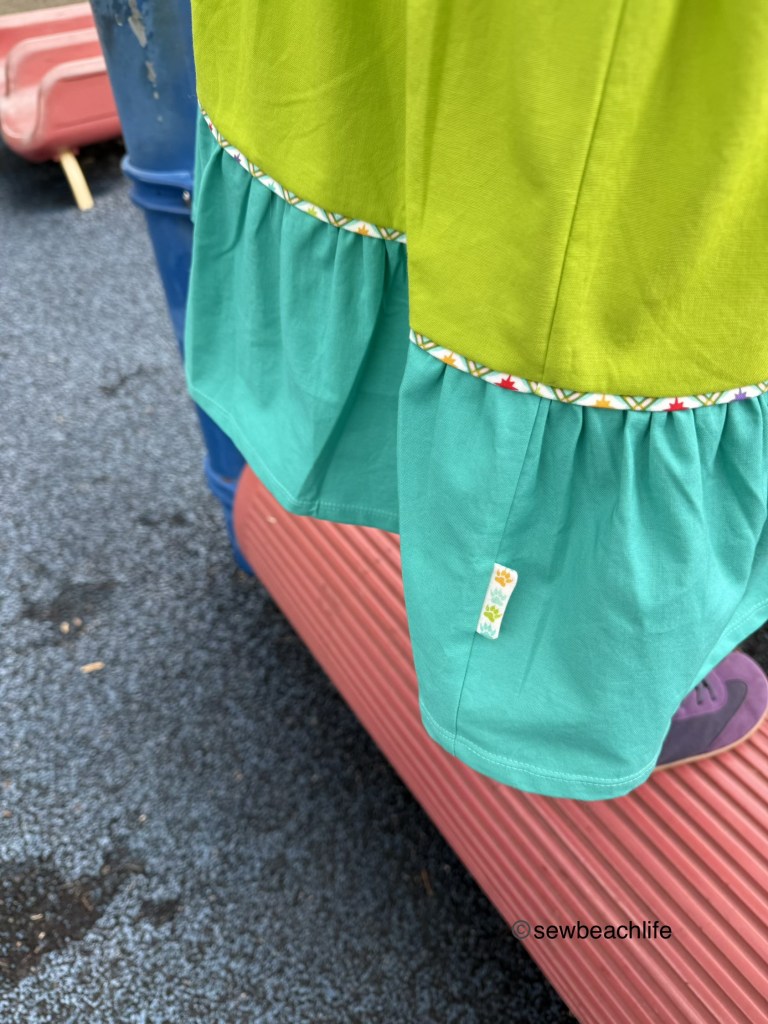
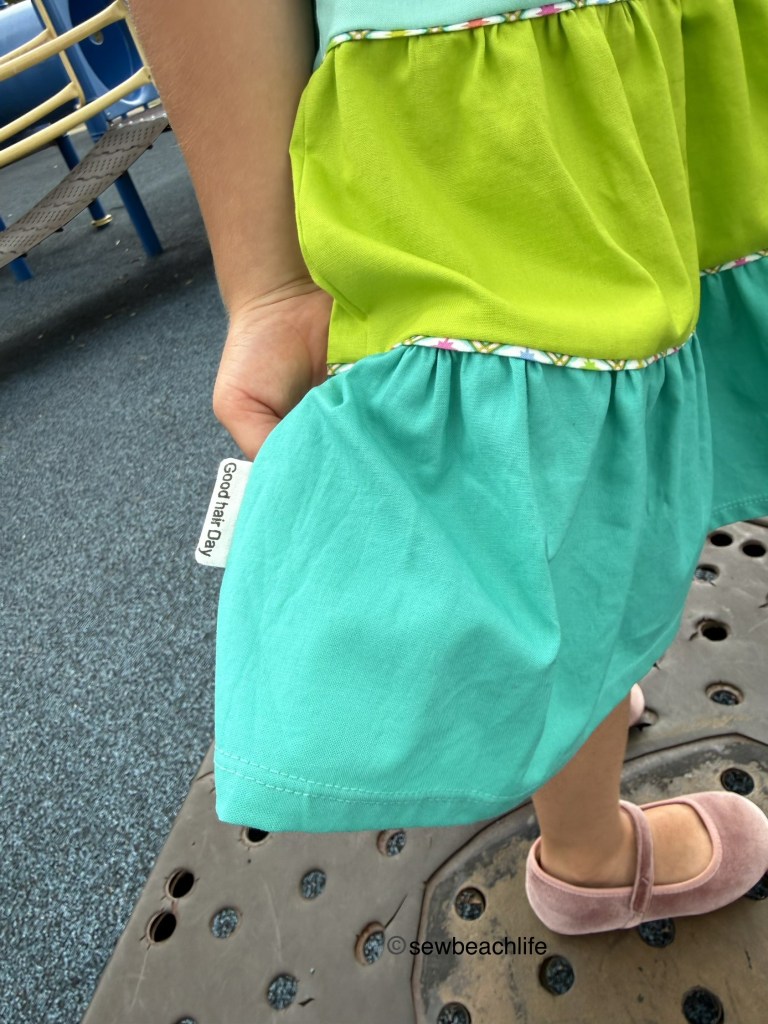
The fabric is all by Tula Pink (Free Spirit Fabrics) except the lime green as the shop was out of that color. The lion print is called Good Hair Day, which I think is hilarious! Of course a beautiful lion’s mane would look good. So I just had to use the fabric selvedge to make my own tags for the dresses.
I used sections of the lion paw prints (that show all the colors used in the fabric print) for one side of the tags.
Then I used Good hair Day (the name of the print) on the other side of the tag. I used a Tula Pink print called Stargazer for the shoulder ruffles, elastic casing, and handmade piping.
Although it’s not a rainbow stripe, it does contain a rainbow of colors, so I figured it would be acceptable! 😉 The girls like the elasticated back so that they don’t have to deal with zippers or buttons when getting dressed.
I used 1-1/4″ strips of the Tula Pink Stargazer fabric to make the piping. I pressed the strips in half, and basted it to the bottom edge of the first two tiers. That way it was perfectly in place when I gathered the top of the next tier and stitched it to the tier above. I think it adds a nice pop of color.
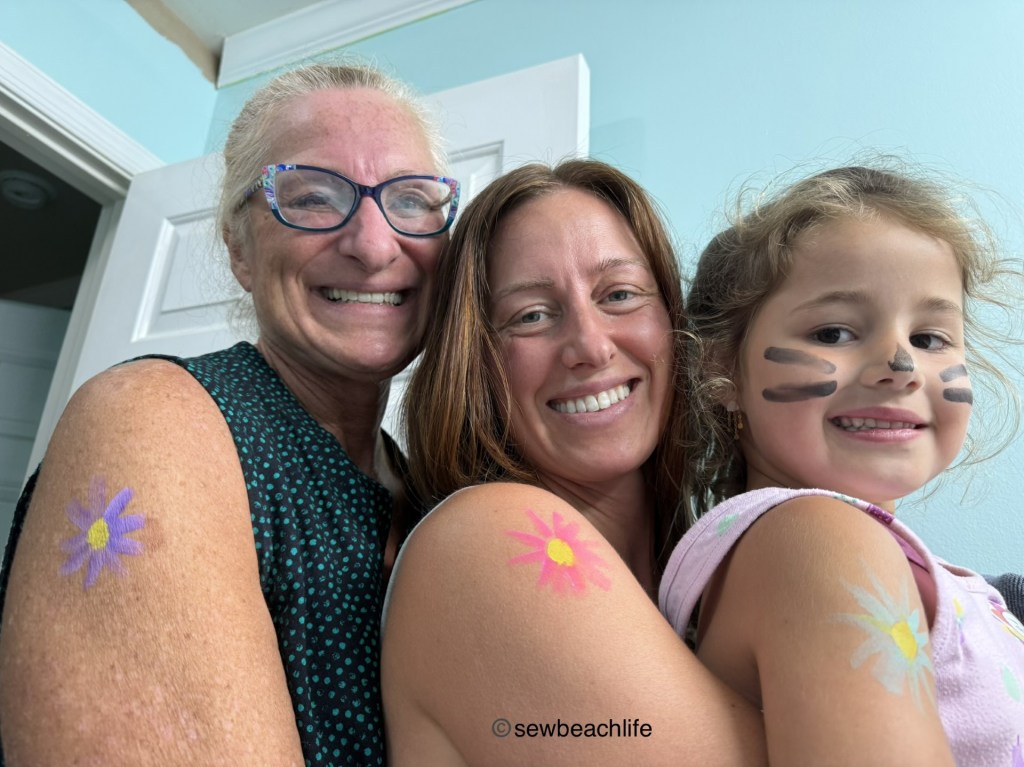
The girls had so much fun playing with their friends, eating snacks and ice cream cake, and enjoying face painting (done by the eight year old with her fancy face painting kit). Grandma stayed nearby to rinse and sanitize each brush as it was used. The designs turned out super cute. She practiced the night before by painting flowers on Grandma, Mama, and sister. She even made a little sign listing the designs available. She was willing to be a little flexible when a couple of the boys at the party wanted 67 painted on their arms. 🙂
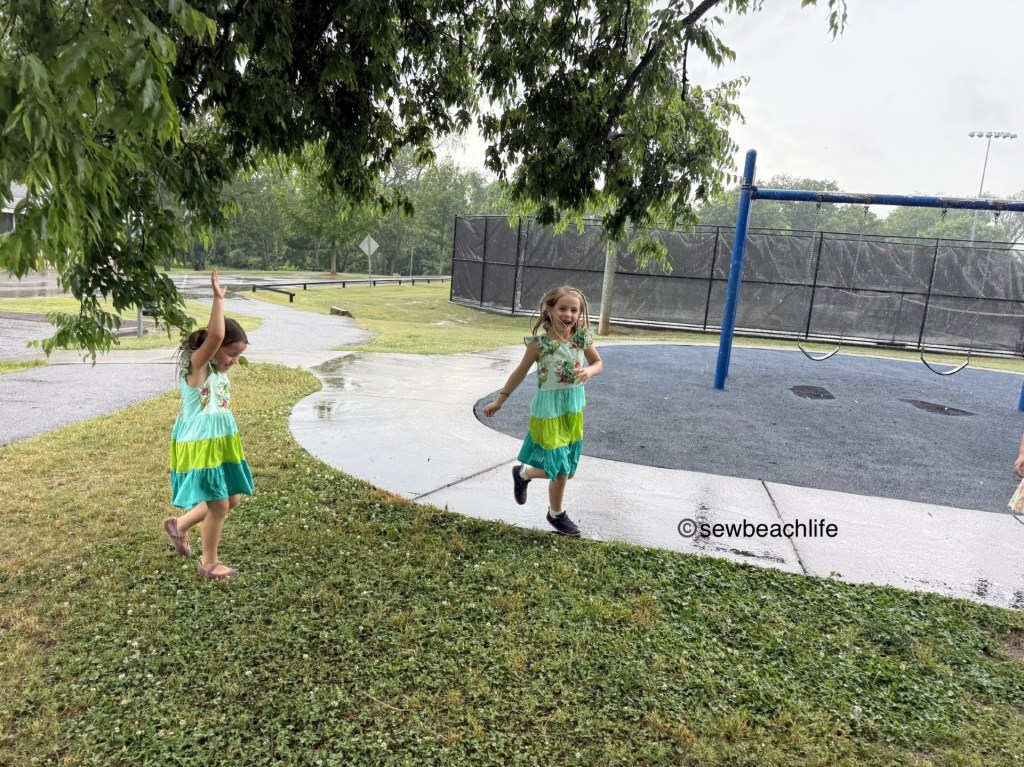
The morning had been nice and sunny, and the afternoon was sunny for a while. But then the rain moved in. Some people left, but you know kids, they don’t care if it’s raining, and continued on playing and running around.
Someone had a canopy in their vehicle, so the adults huddled under the canopy for a bit, trying to stay dry, while the kids had a blast running and jumping and continuing to play on the playground. Eventually the party came to an end, but my sweet girls still looked adorable in their (sopping wet) matching birthday dresses!
Being a Grandma is the best! And I love it when I can make my girls pretty and fun clothes.
I bought all the Tula Pink fabric from a very nice quilt shop in St. Petersburg, Florida called Whim So Doodle. All of the ladies who work there are so friendly and helpful. And they have the largest selection of Tula Pink fabric that I’ve seen in this area.
Thank you for reading and sharing my love of sewing, fabric, patterns, color, and making cute clothes for others. Since this is my blog and represents me, I always give my honest opinion about any patterns, fabric, or supplies that I talk about. I do like knowing whether the time I spend writing posts actually interests people enough that they take a look at the patterns I review, but I write for me. It’s one more creative pursuit that I hope is helpful or interesting to others. I write to share my love of sewing and to encourage others to love it as much as I do!
It’s nice to have a little challenge to spur on your sewing, especially if it’s been a minute since you’ve made a new outfit. Greenstyle has an annual challenge to sew at least three new items using their patterns during a four week period in the spring. I looked at it as a mini capsule if I were going away for a weekend. Items that worked with clothing I already made, and filled a hole in my wardrobe.
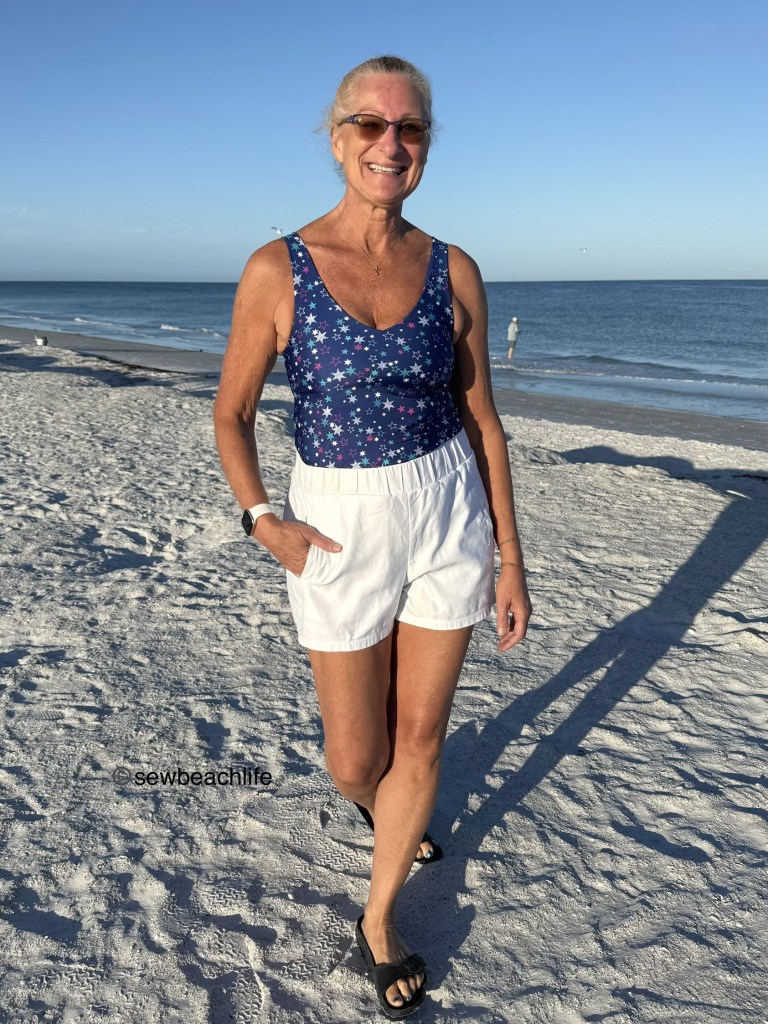
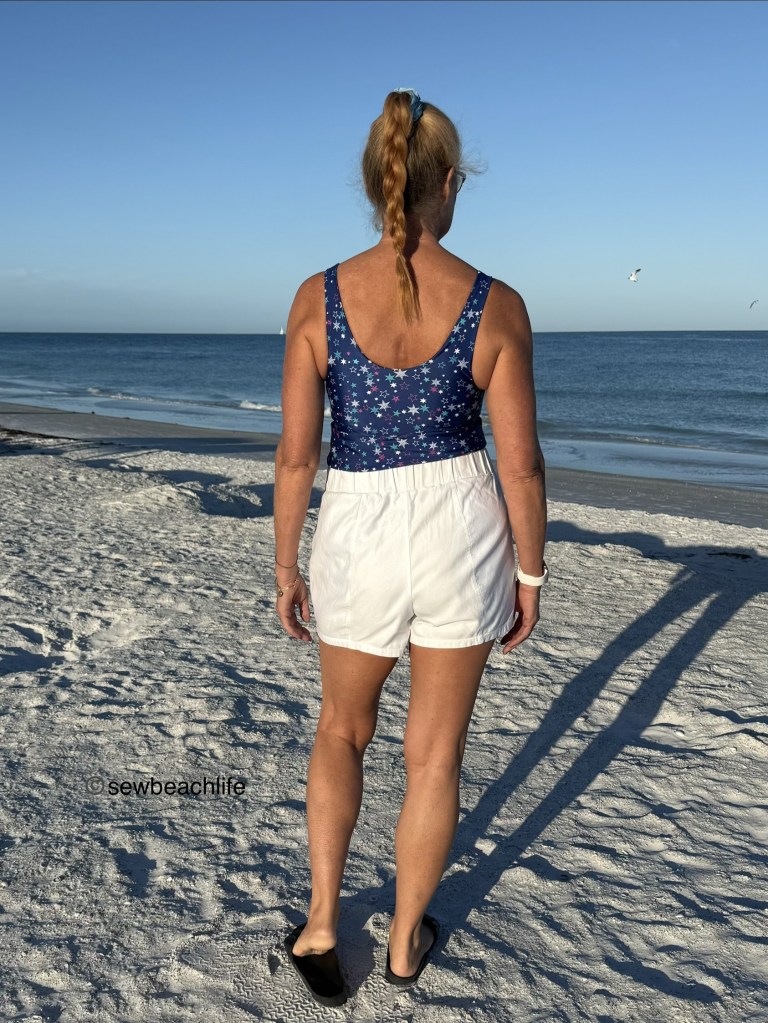
My first two makes were Bobbi Brami‘s. I love that they have a built-in bra, and that they are super comfortable. I’ve worn the blue star print Brami to step class with Moxi bike shorts. It also looks great with my white Windward Shorts. This is a great outfit for walking around, shopping, or running errands.
I love the smooth fitting bodice that tucks in so that the waistband of my shorts show.
I always choose the V-front and U-back when I make Bobbi Brami’s. It’s my favorite combo!
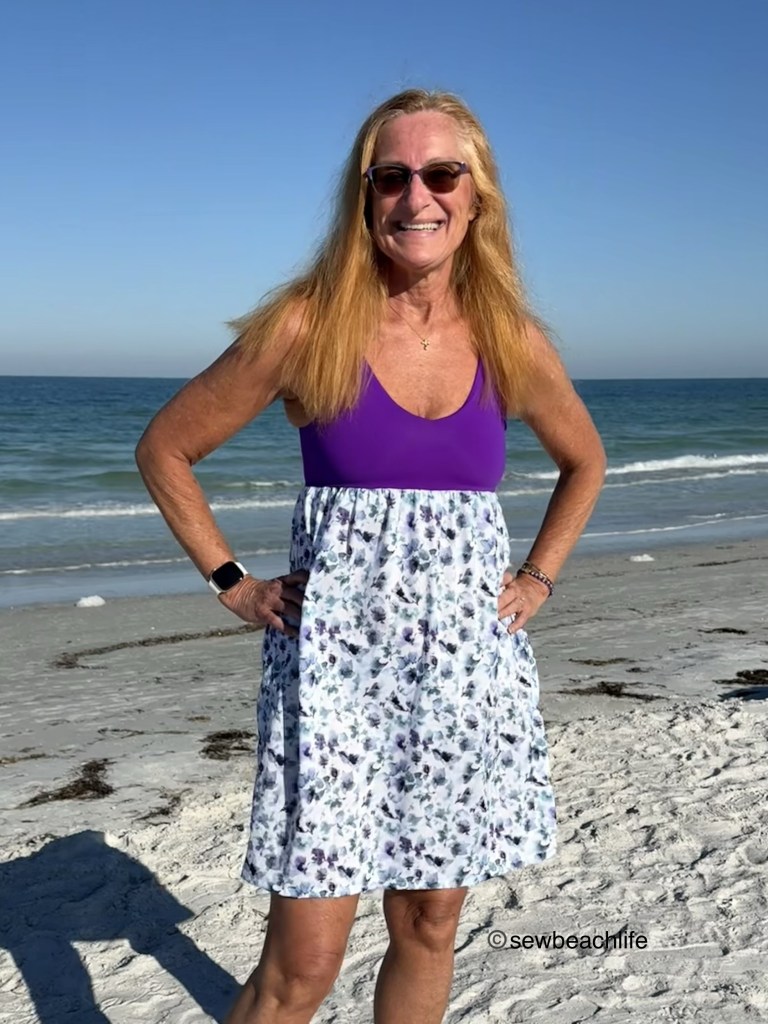
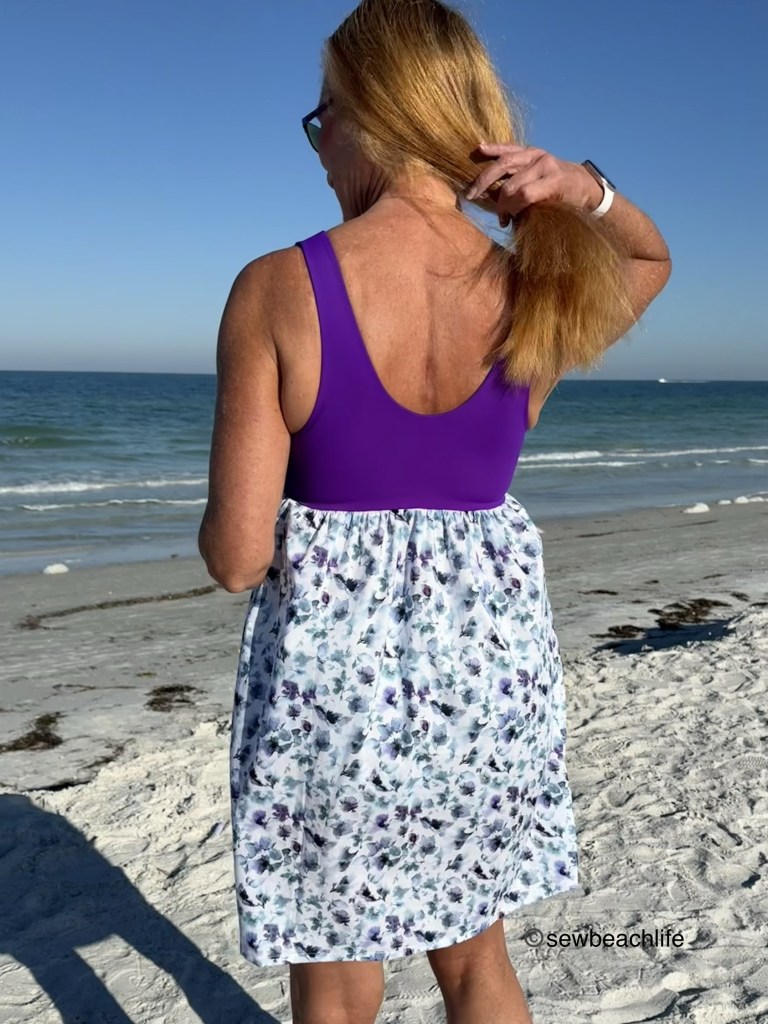
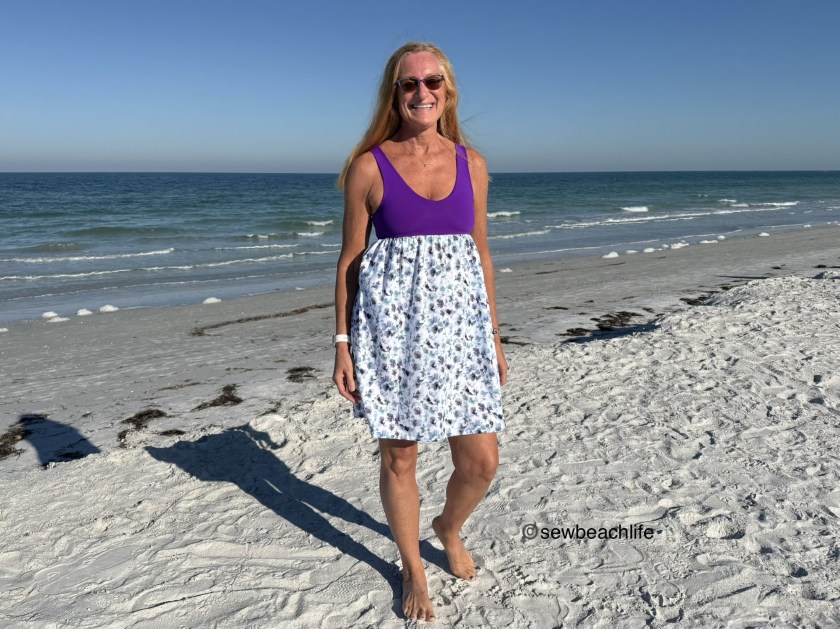
The second Bobbi Brami was cut at bra length, and hacked into a dress. Simply cut two rectangles which when sewn together will be at least 10-12″ greater in circumference than your hips. This is super important if you’re using woven fabric for the skirt. A pretty dress is essential for a weekend away. It can be worn to brunch or dinner. It can also double as a nightgown, so one more opportunity for wear!
Cotton voile makes an easy breezy skirt for this dress
I love having a fitted bodice with a flowy skirt.
I used french seams to sew the side seams of the delicate cotton voile together to ensure that no matter how often this gets washed and worn, it won’t fray. French seams are made by sewing your fabric wrong sides together with a narrow seam allowance, then pressing and sewing the fabric with right sides together, with a slightly wider seam allowance. I love that my Bernina 790+ needle position can be moved five places to the right and five places to the left of center. This really helps with incrementally making your seam allowance bigger or smaller.
I love the empire waistline look of this hack. With the cotton voile skirt, it’s giving me Bridgerton vibes. Since my hips are 40″, I cut two pieces of fabric 27″ wide by 25″ high. Even with the extra fabric the french seams take up, the skirt is perfectly flowy. I used a 1″ hem which is substantial enough, and ended the skirt at just above the knee. I am tall though, so you could probably get a more couture 2″ or 3″ hem out of that 25″ height if you’re shorter than me.
I gathered the top of the skirt until it was the same width as the outer layer of Brami, and attached it with a zigzag stitch, finishing it off with a 4-thread overlock. You can use a soft flowy knit or a soft and/or drapey woven for the skirt. It would look lovely with a maxi length skirt, though I would reinforce the waist seam with elastic if the fabric is heavy or maxi length.
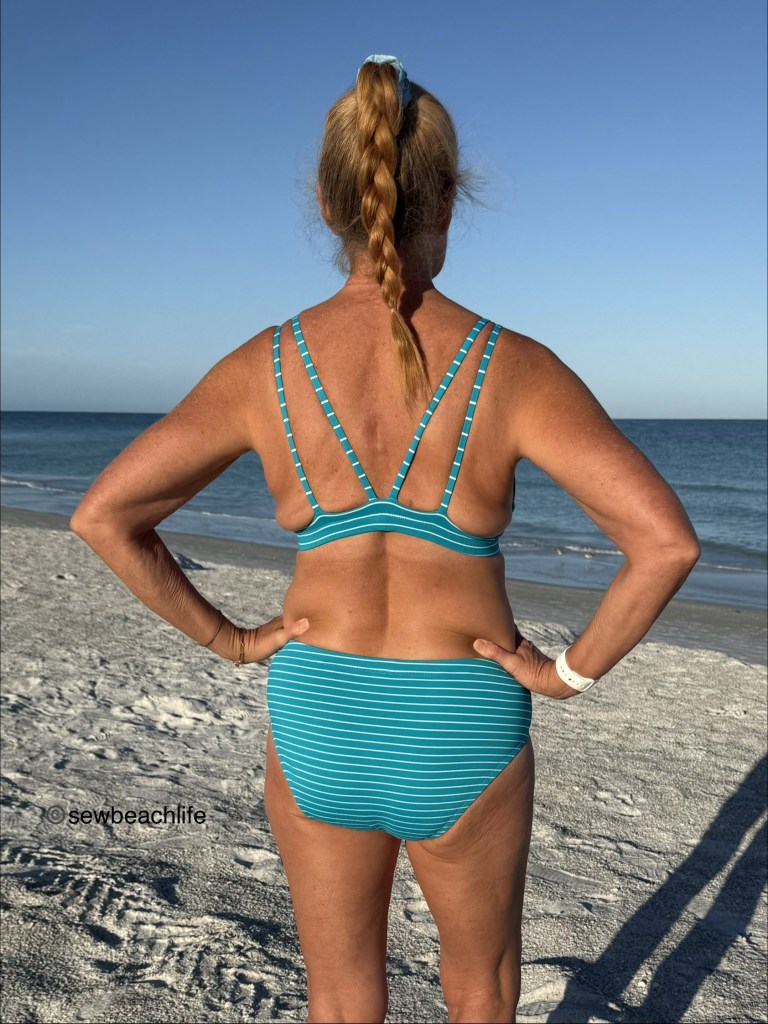
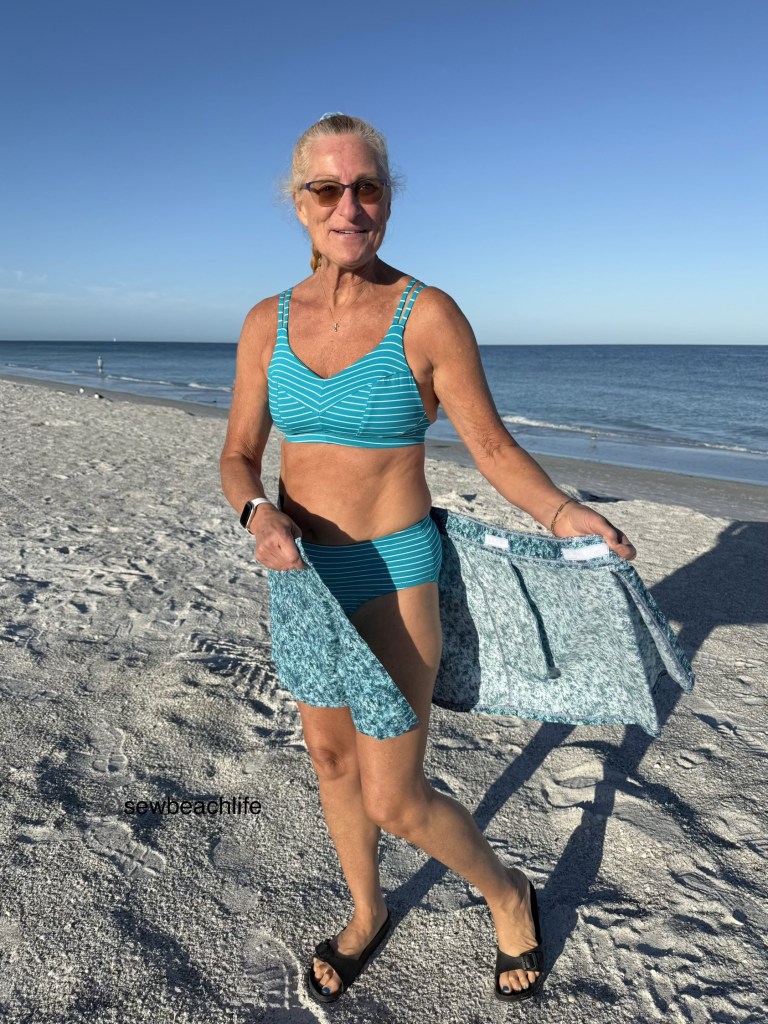
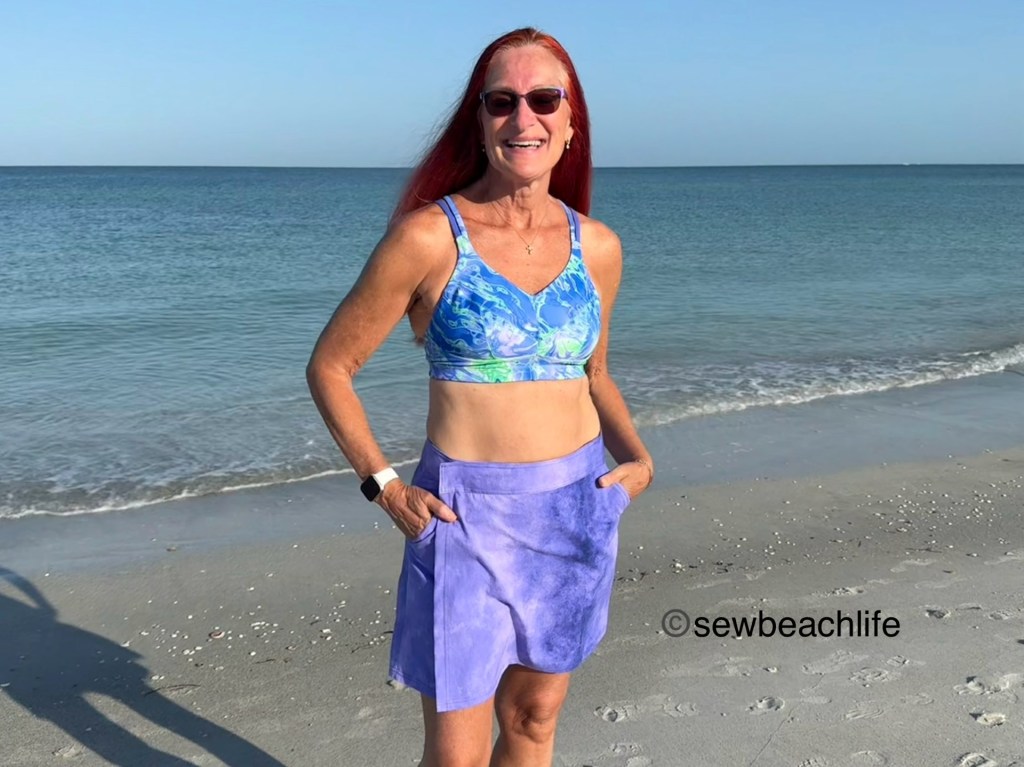
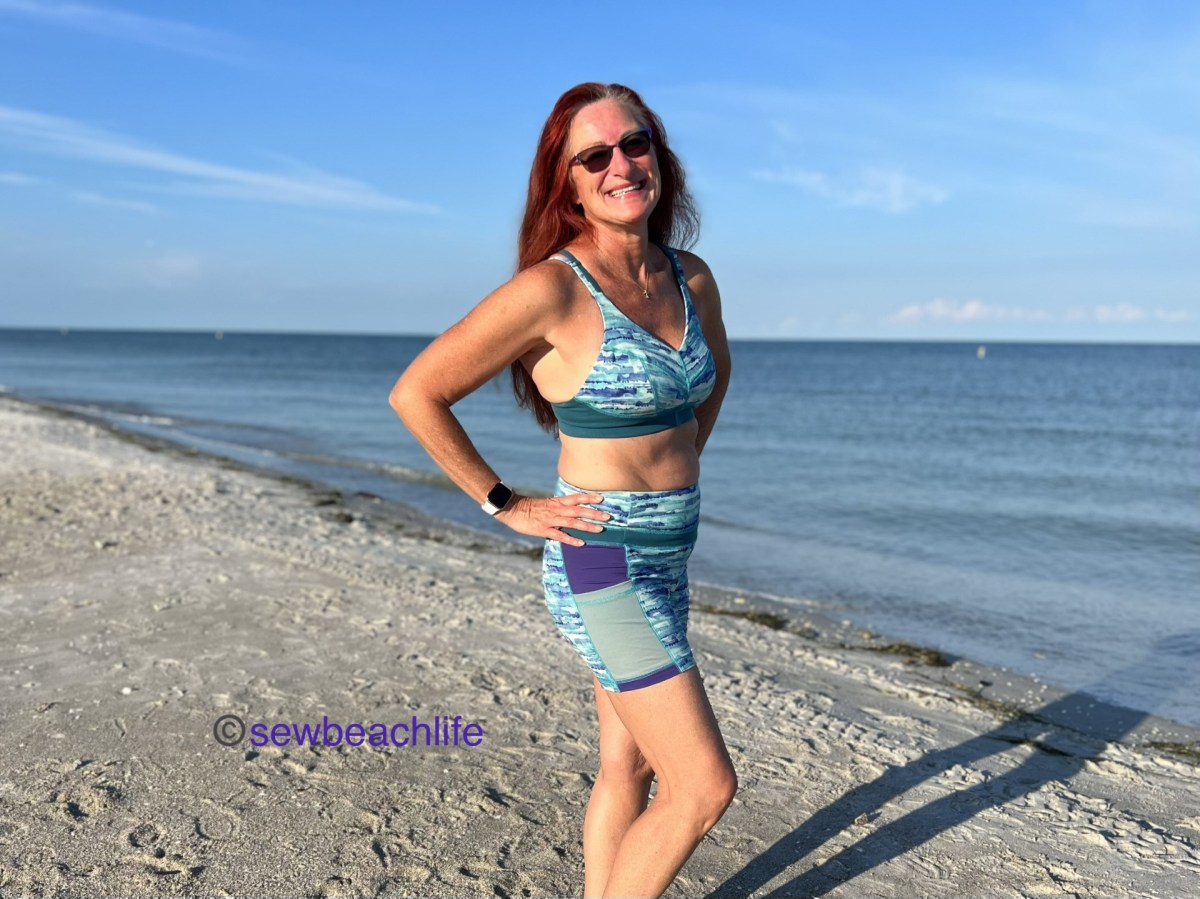
The third and fourth pieces are an Endurance Bra and Tangled Swim Bottom swimsuit. As mentioned in this post, I always hack the Endurance to not have a zipper. And for this make, I also shortened the band by 5/8″ at center front, up to 1-1/4″ at center back to give it a more “swimsuit” look.
I used size 31D and hacked narrow double straps. The Tangled Swim bottom pattern has a separate waistband, but I was working with literal scraps of fabric and just added 1-1/8″ to the height of the bottoms so that I could turn the top under with 3/4″ wide swim elastic, just like you do with the 3/8″ swim elastic around the legs.
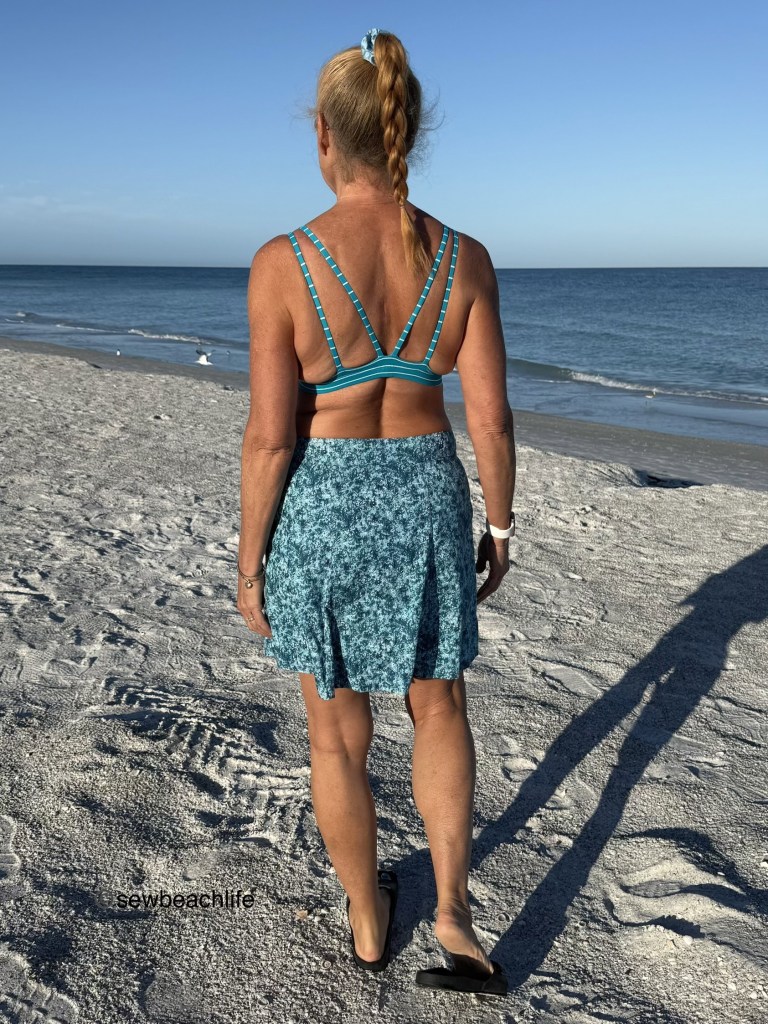
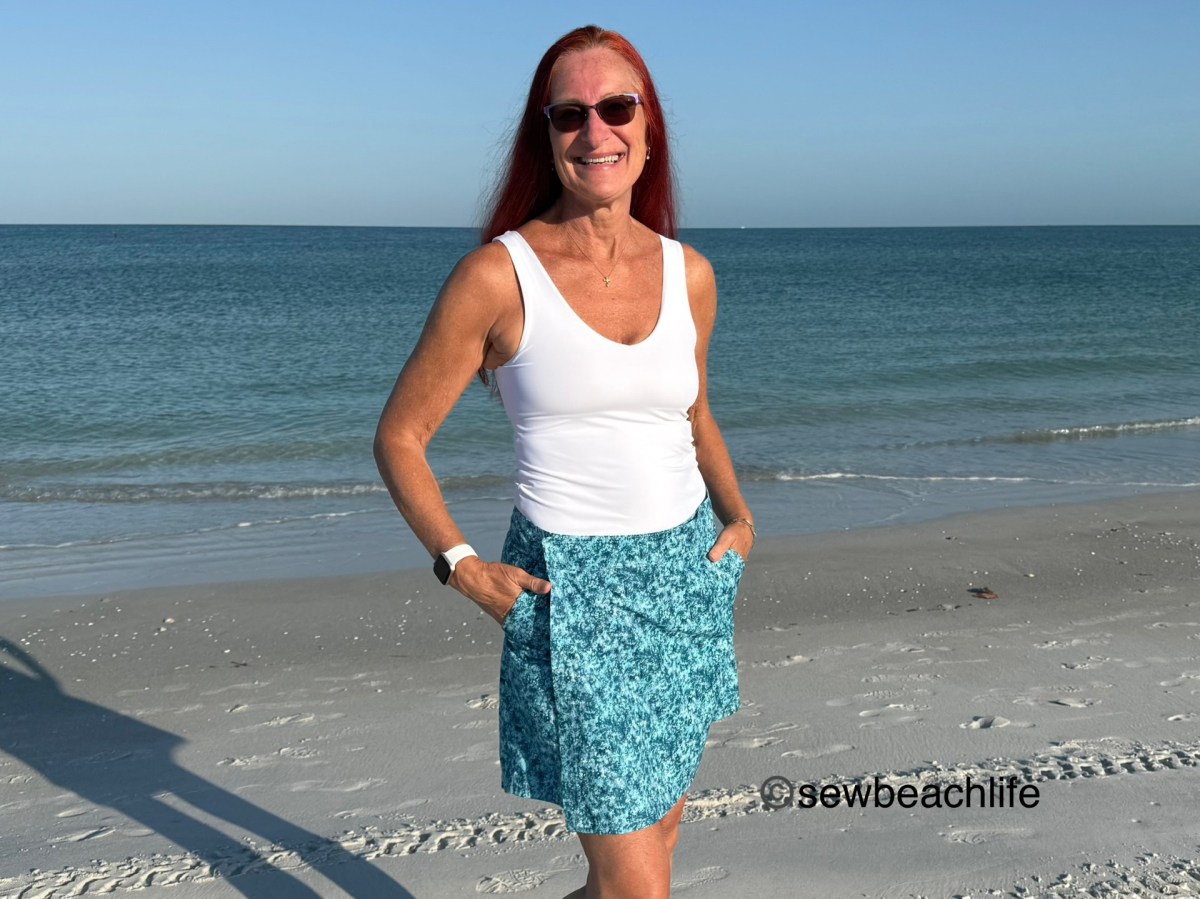
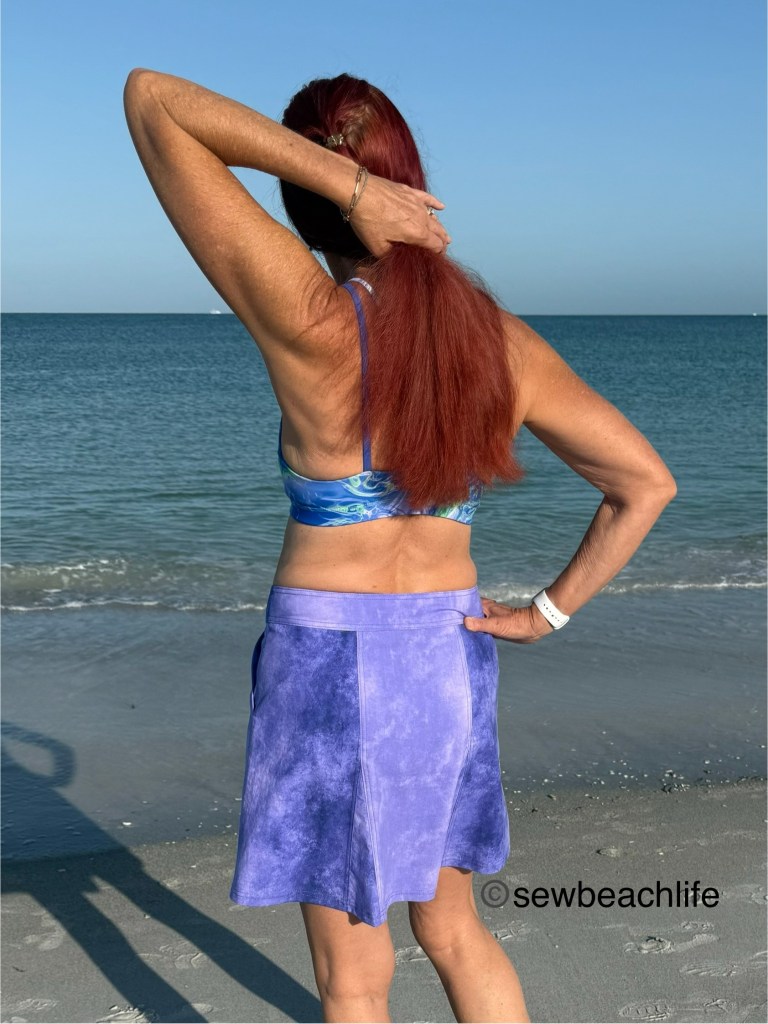
A previously made Tidal Skirt is perfect for throwing on over the swimsuit and walking to the beach. There are pockets for your phone or keys, and it would certainly be a great addition to my weekend bag.
All in all I love every piece I made. I didn’t photograph the combo, but my blue star print Bobbi Brami has turquoise stars in the print. So if you wanted a tankini look, you could pair the Brami with the Tangled Swim Bottoms for an additional swimsuit look.
The details:
The blue star print Bobbi Brami is a nylon spandex deadstock Speedo fabric called stars and stars.
The purple nylon spandex swim for the Bobbi Brami dress was from the sadly defunct Phee Fabrics. The white floral/leaf print cotton voile was from the also defunct JoAnn Fabrics.
The turquoise and white pencil stripe nylon spandex used for the Endurance Bra and Tangled Swim Bottoms was a larger scrap purchased from a fabric destash.
The elastic used in the Bobby Brami’s, Endurance Bra, and Tangled Swim Bottoms came from Wawak and Sew Sassy.
Thank you for reading and sharing my love of patterns, sewing, fabric, and cute weekend wear. The links to GreenStyle may be affiliate links (if I did them properly!) which means that I may earn a few pennies if you use my links without it costing you anything extra. Since this is my blog and represents me, I always give my honest opinion about any patterns, fabric, or supplies that I talk about. I do like knowing whether the time I spend writing posts actually interests people enough that they take a look at the patterns I review, but I write for me. It’s one more creative pursuit that I hope is helpful or interesting to others. I write to share my love of sewing and to encourage others to love it as much as I do! ❤
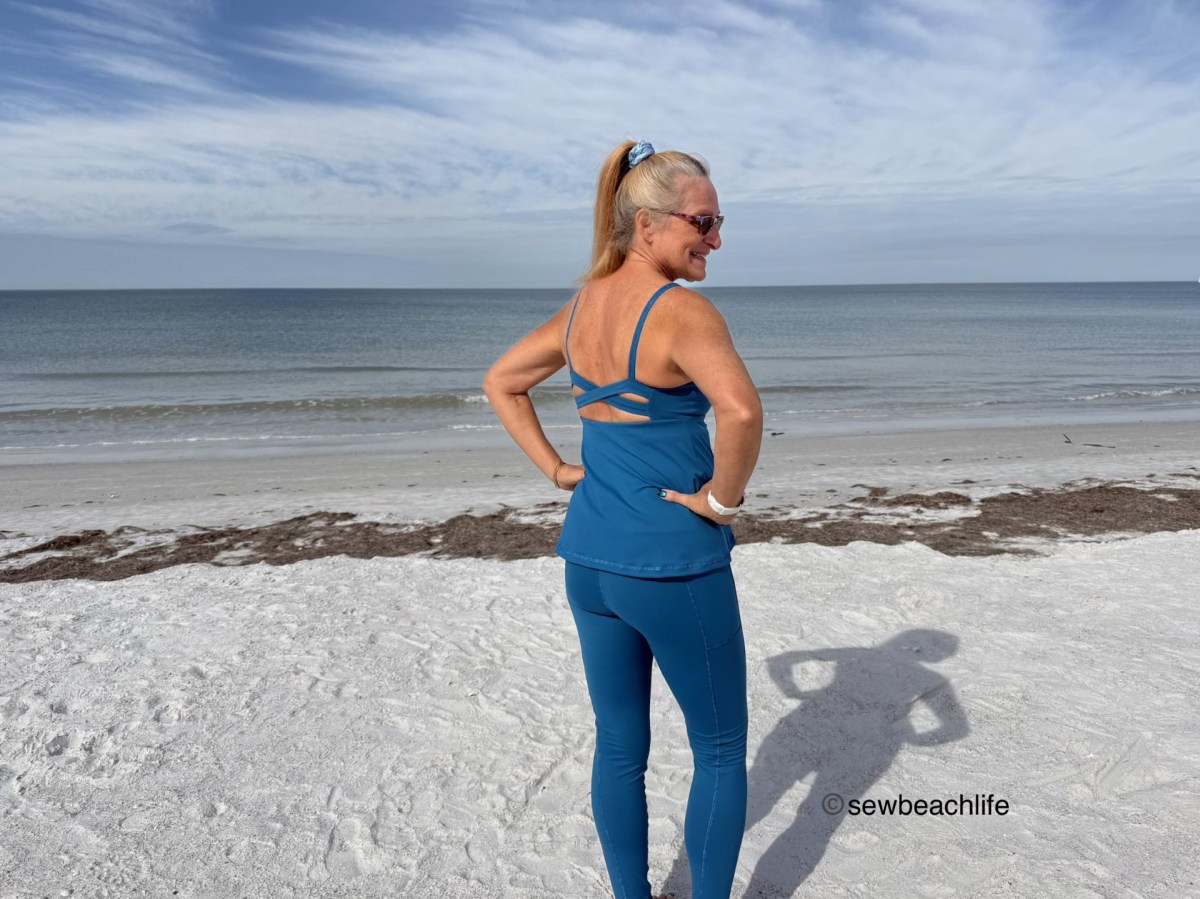
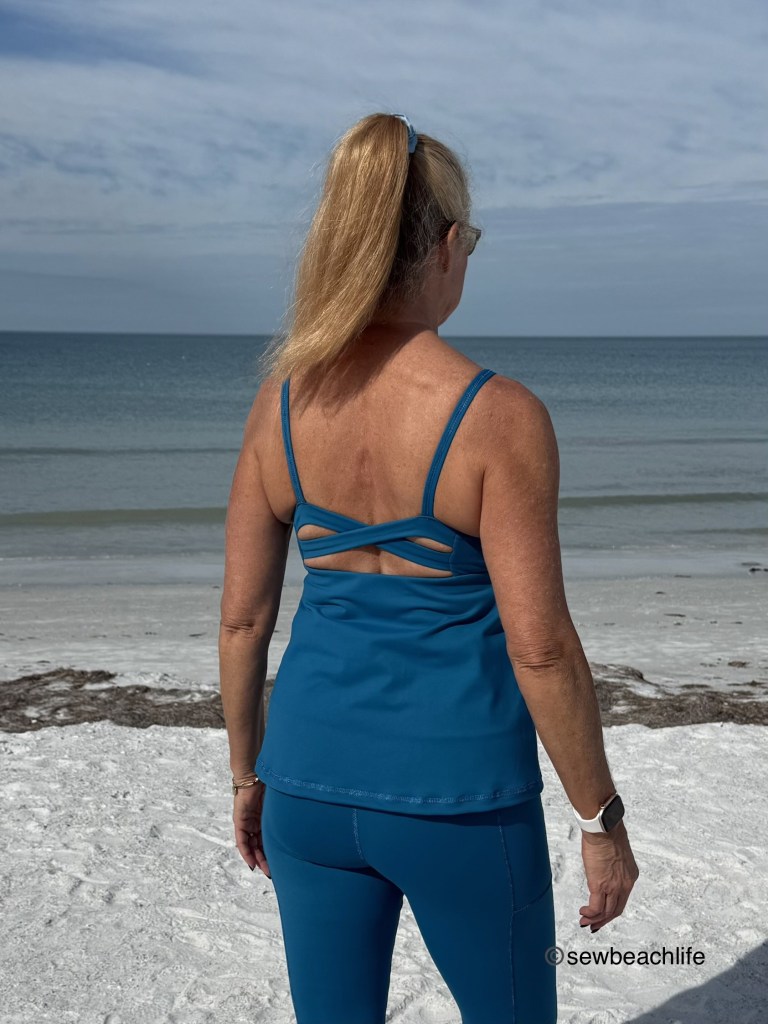
When you go to the gym five days a week, you need a lot of workout wear. My favorite sports bra patterns tend to get hacked into workout tops because if I love it as a bra, I’ll love wearing it as a top too! I couldn’t wait to make the GreenstyleDelphi Bra into a workout top, and doing something simple wasn’t enough of a challenge for me.
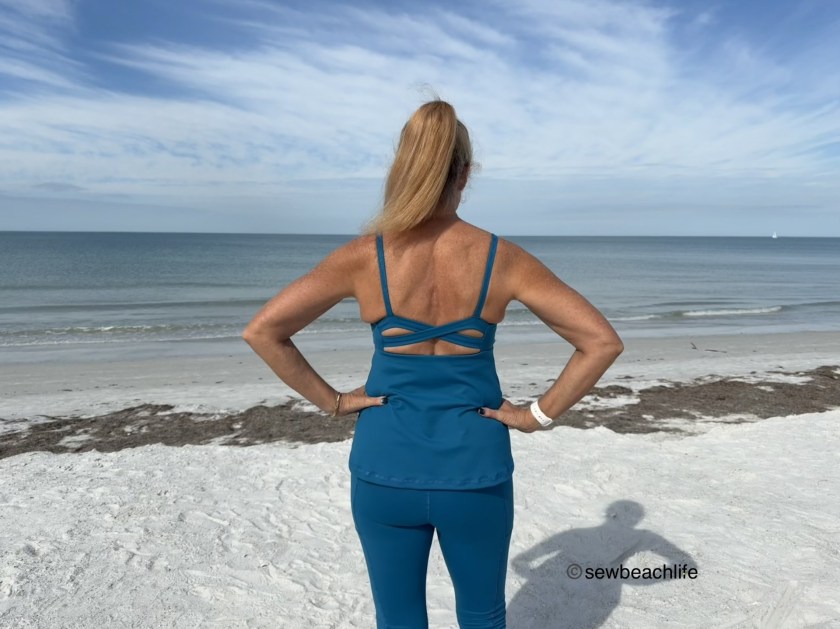
The infinity back on the Delphi is my favorite back option, and I thought it would be fun to make the back infinity straps narrower, with the final back strap width at 1″. So I figured out the strap width, ensuring that when the seam is properly aligned that the back attachment angle would match the original angle, blah, blah, blah. Don’t be like Debora- the pattern is excellent as designed, and it was ridiculous of me to try and over-engineer the back infinity straps. 🙂
I’ve made numerous workout tops using the Greenstyle Power Sports Bra pattern, and love the front princess seams. So I figured, why not mash the two patterns? The side seams are not the same height, so there was a little bit of adjustment to get them to align. It worked out well to get a fun look in the front and the back, and it gave me more seam lines to reverse triple coverstitch.
Since I make so many workout tops, I had front and back bodice pieces already saved in my Power Sports Bra pattern envelope. (I use 14″ x 18″ manilla jumbo catalog envelopes to store all my .pdf patterns, and they work great. The larger size means that my pattern pieces don’t have to be folded as much.) I’m not sure whether I originally used the bottom of the Staple Tank or Cami Tank to make the bodice, but honestly, whatever tank top pattern fits you well can be used as to get the shape.
I wanted to narrow and shorten my previously traced bodice pieces, so I grabbed my Bobby Brami pattern and went sort of halfway between the two different lengths and widths, as I didn’t want it quite as short and fitted as my Bobby Brami tops. Looking at my photos though, I may have gone a bit too narrow at the ribs, and not quite fitted enough at the waist and hips. I can always take it in a bit later.
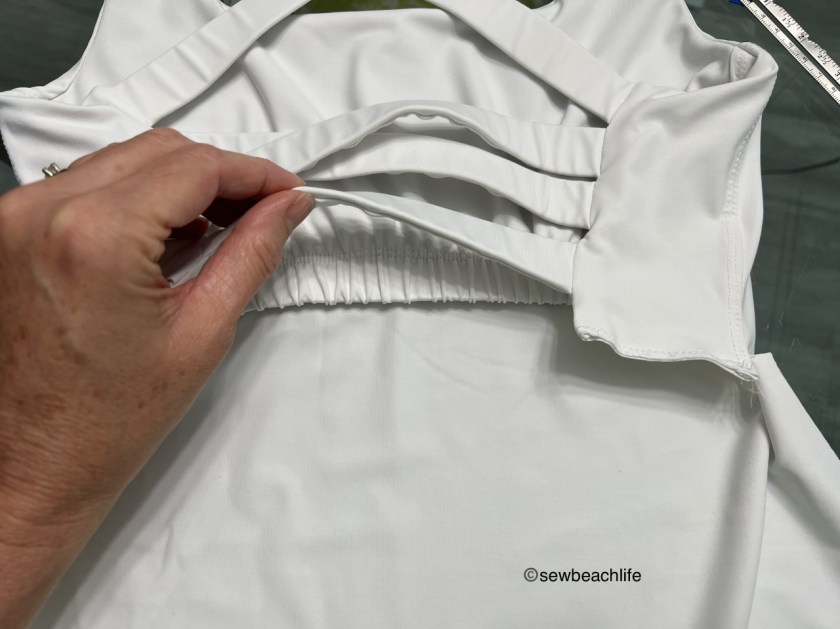
I wanted a super clean finish where the bodice attached to the bra so that the infinity back really stands out. A bra obviously needs a band for compression and support, but I kept it hidden.
For reference, I make a size C1 Delphi Bra, which is where my measurements put me according to the new size chart. My underbust measurement is 30.5″, and I generally use 24″ of 1″ wide knit elastic from Wawak in my bra bands. That’s what feels comfortably snug to me.
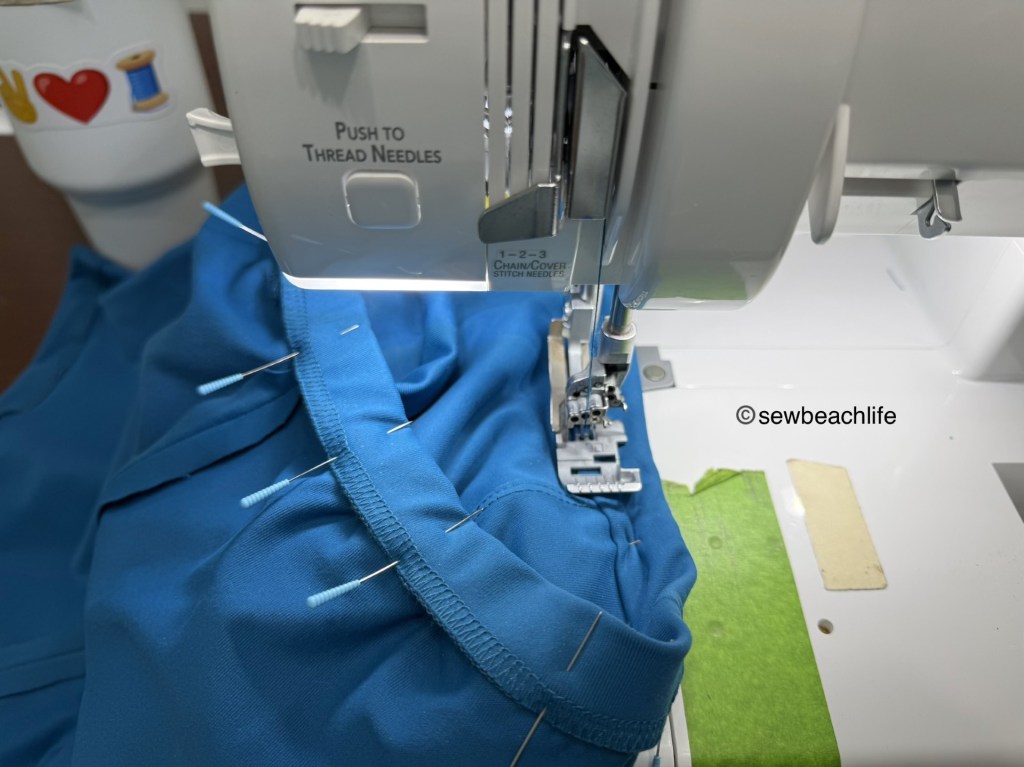
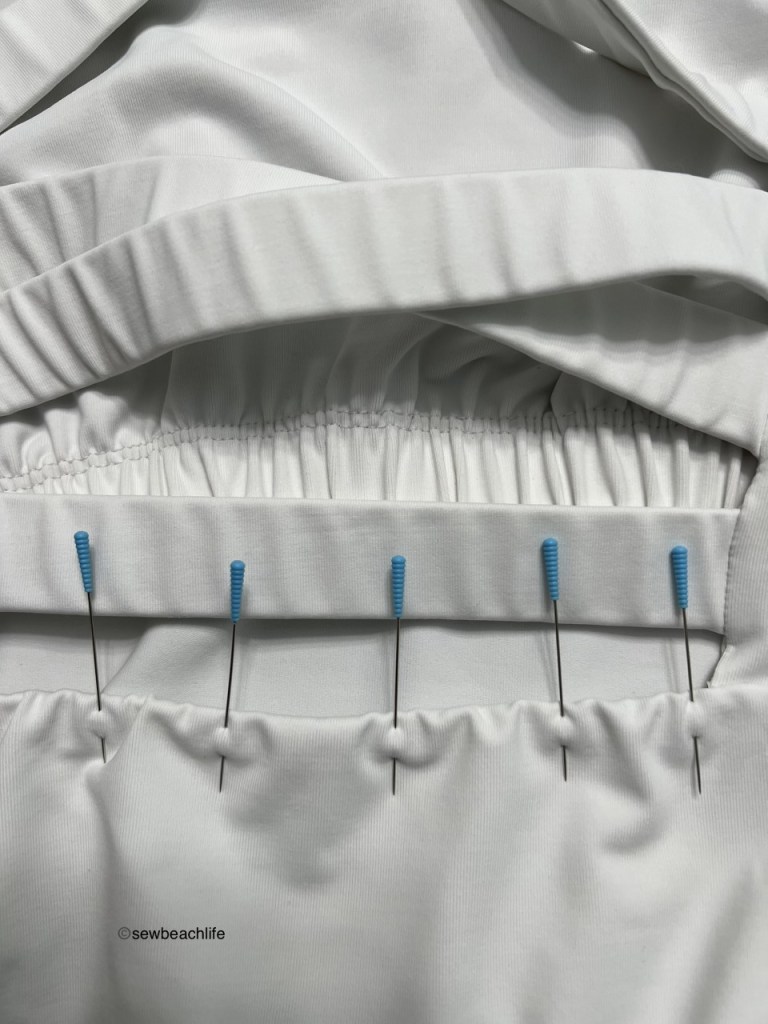
To figure out the length you need, wrap your elastic around you under the bust, pulling it as taut as feels comfortable to you, add .5″ for overlap, and cut your elastic and band to that length. Make your band 2.25″ high. This allows you 1″ for the elastic, 1″ to fold it up, and a quarter inch seam allowance to attach it to the bra and bodice. Assemble the bra as per the pattern tutorial, stopping at the point where you would add the band. Sew the bodice front and back together, and hem the bottom. Sew the short ends of the band together, forming a loop and mark the quarter points. Overlap the ends of the elastic and zig zag together forming a loop and mark the quarter points with a pencil. Align the quarter points of the band and elastic, and serge the elastic to the bottom edge of the wrong side of the band.
Take a look at the back band pattern piece of the Delphi Bra, and measure the distance between the two notches. (On my size, that’s around 7.5″) Use a piece of tailor’s chalk or pins to mark this measurement, centering it on what will be the back of your band.
The next part seems tricky, but it’s really not. It’s more a matter of aligning and pinning. 🙂 To sew the band, bra, and bodice together, align the raw edges in this order: right side of band against wrong side of bra. Align the finished back edges of the bra back with the previously made tailor’s chalk marks. Align the center fronts, as well as the side seams and quarter points. Then align the right side of the bodice with the right side of the bra, matching the quarter points. The bra will be sandwiched between the band and bodice. Pin all around and baste all the layers together. Looking at the photo above see how there’s only two layers of fabric where I’m sewing? That’s the band and bodice at the infinity back opening. Near the bottom of the photo you can see the bra sandwiched in there. Having everything basted together will make it easier to serge the seam. You may want to use a hump jumper when you go from two layers of fabric to four.
Ignore that I put the pins in from the wrong direction when folding the elastic up. 😉
Get the bra and bodice out of the way, fold the band up so that the elastic is hidden, and pin in place covering but not overhanging the seam allowance. Coverstitch (or topstitch with a stretch stitch or double needle) to complete the band. Press your completed top with your iron set at an appropriate temperature for your fabric.
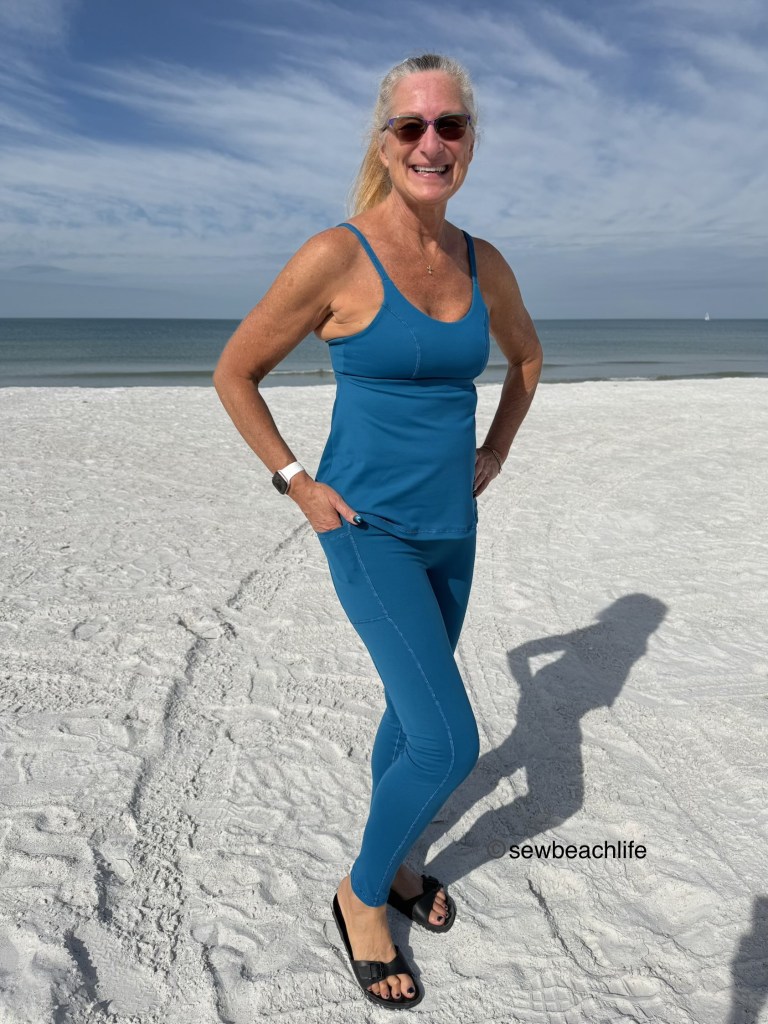
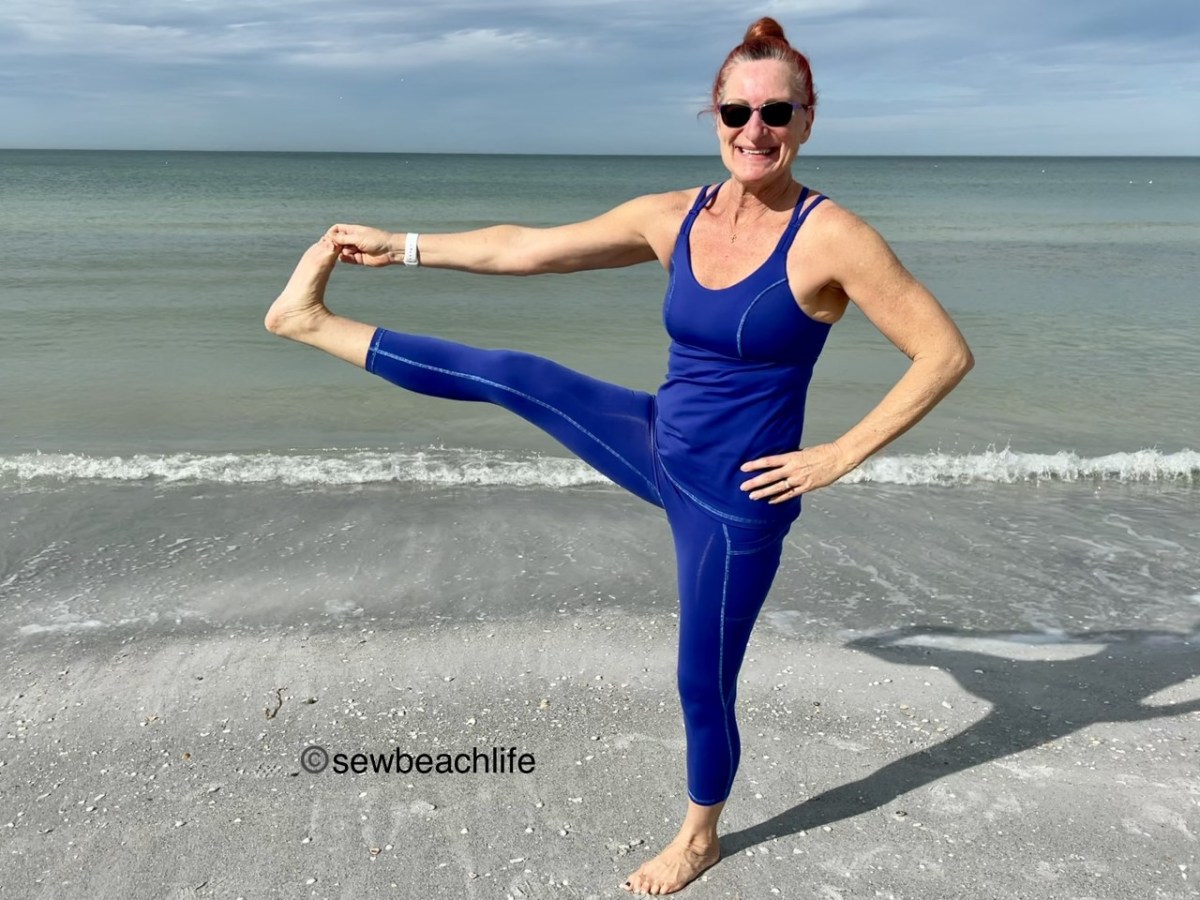
This is the second pair of Sinclair PatternsGlide Leggings that I’ve made. I love that they have pockets and a gusset. It’s nice that they have tall files as well as regular and petite. These are a size 10 tall, and they actually may be about a half inch too long. To see the first pair I made in black supplex, see the previous post. I wore them on my trips to and from Michigan last month. They were comfortable during the flights, long layovers, and walking around in airports.
I have strong (large?) calf muscles from growing up on skates, and graded out a little bit for the calves. I’m thinking about adding maybe another quarter inch of width there.
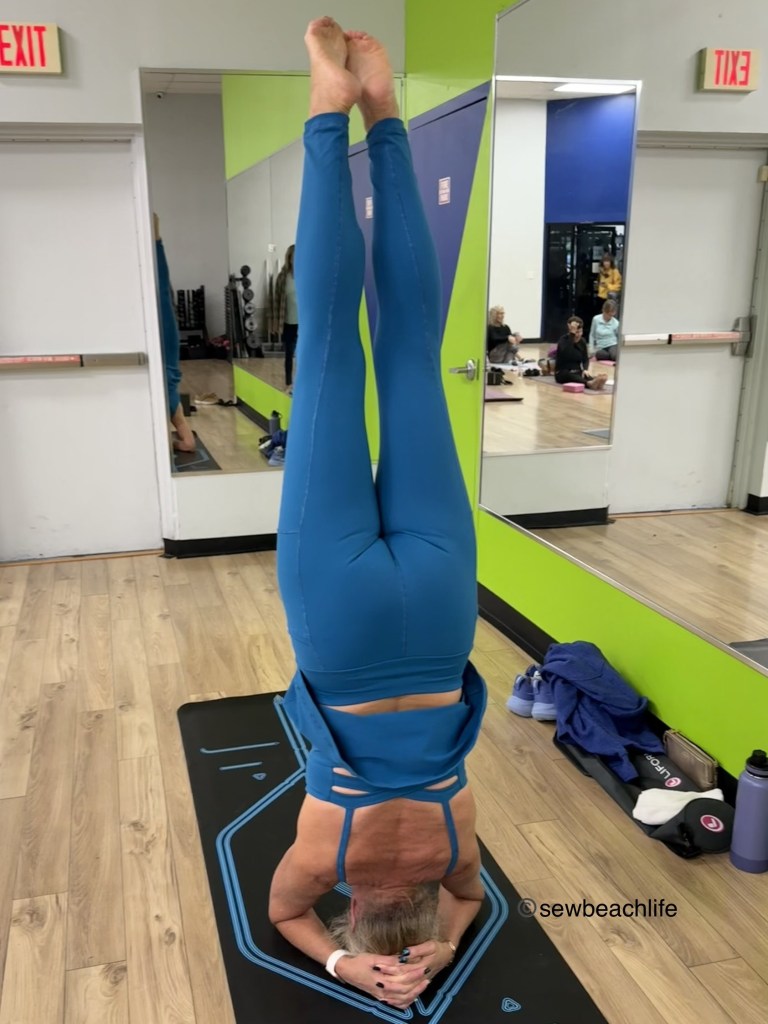
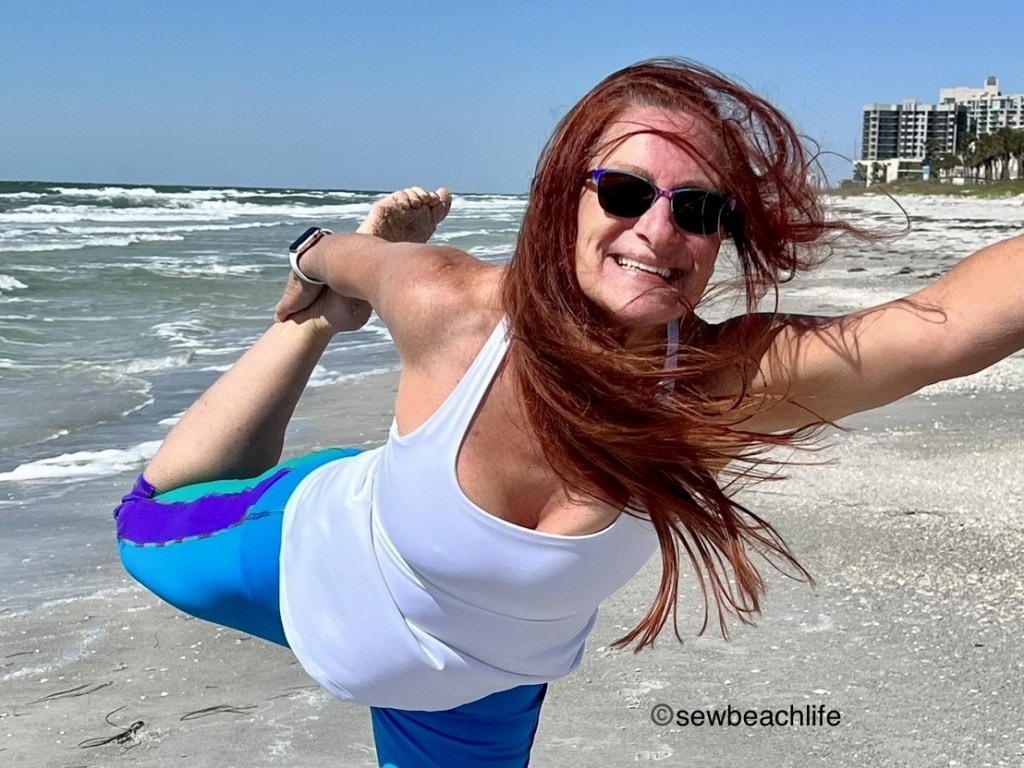
I wore my new workout outfit to Dance Fitness Fusion class and received a couple compliments. Dance class is followed by yoga class, and I had time to play around and asked someone to take a few photos of my headstand.
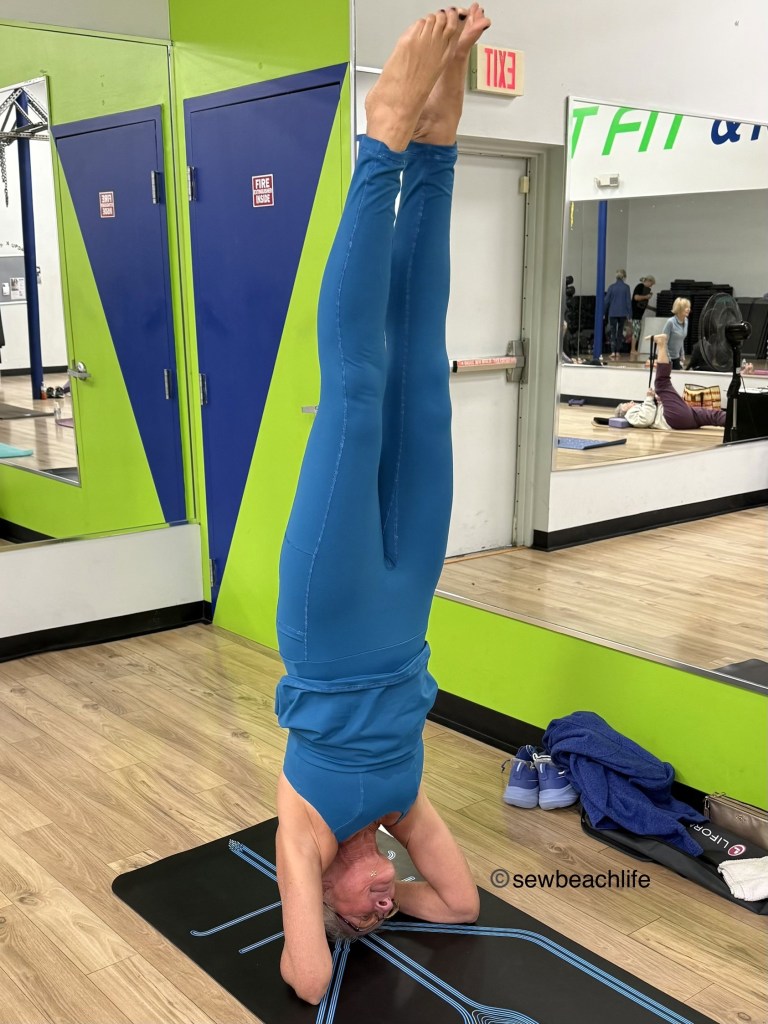
See that perfect triangle formed by my clasped hands, with forearms to elbows pushed firmly down into the floor? That’s the base you need to be able to do a headstand, because the weight of your body isn’t actually on your head, it’s on your base.
It’s interesting to see the look of determination and focus on my face. And lest you think that dance class isn’t really a workout, peep the sweat under my bust. My watch tells me I burn about 400 calories just having fun at dance class. Then I cool down at yoga.
My outfit was reverse triple coverstitched using Superior Threads Fantastico variegated thread #5028 Peacock Plume in the looper. The trickiest seam to complete is that inner leg seam. You’ve just got to remember to go in from the waist (it helps to do it before adding the waistband), scrunch one leg up like you’re putting on pantyhose, and start sewing from the hem of that leg, all the way up to the crotch, continuing down the other leg, pausing to scrunch further and further down the leg to the hem. It’s time consuming, but doable.
The details:
For the top I mashed the Power Sports Bra, Delphi Sports Bra, Cami Tank, and Bobby Brami by Greenstyle Patterns. The bottoms are Glide Leggings by Sinclair Patterns. By playing pattern tetris, I was able to fit all pieces on less than two yards of Greenstyle Align 2 in a teal color. This particular color is no longer available, but I love Align 2 because it is a nylon/spandex blend. I avoid polyester fabrics. I love having a new workout outfit to add to my rotation! Am I likely to make another Delphi Bra workout top? Absolutely!
Thank you for reading and sharing my love of patterns, sewing, fabric, thread, and cute workout wear. The links to GreenStyle may be affiliate links (if I did them properly!) which means that I may earn a few pennies if you use my links without it costing you anything extra. Since this is my blog and represents me, I always give my honest opinion about any patterns, fabric, or supplies that I talk about. I do like knowing whether the time I spend writing posts actually interests people enough that they take a look at the patterns I review, but I write for me. It’s one more creative pursuit that I hope is helpful or interesting to others. I write to share my love of sewing and to encourage others to love it as much as I do! ❤
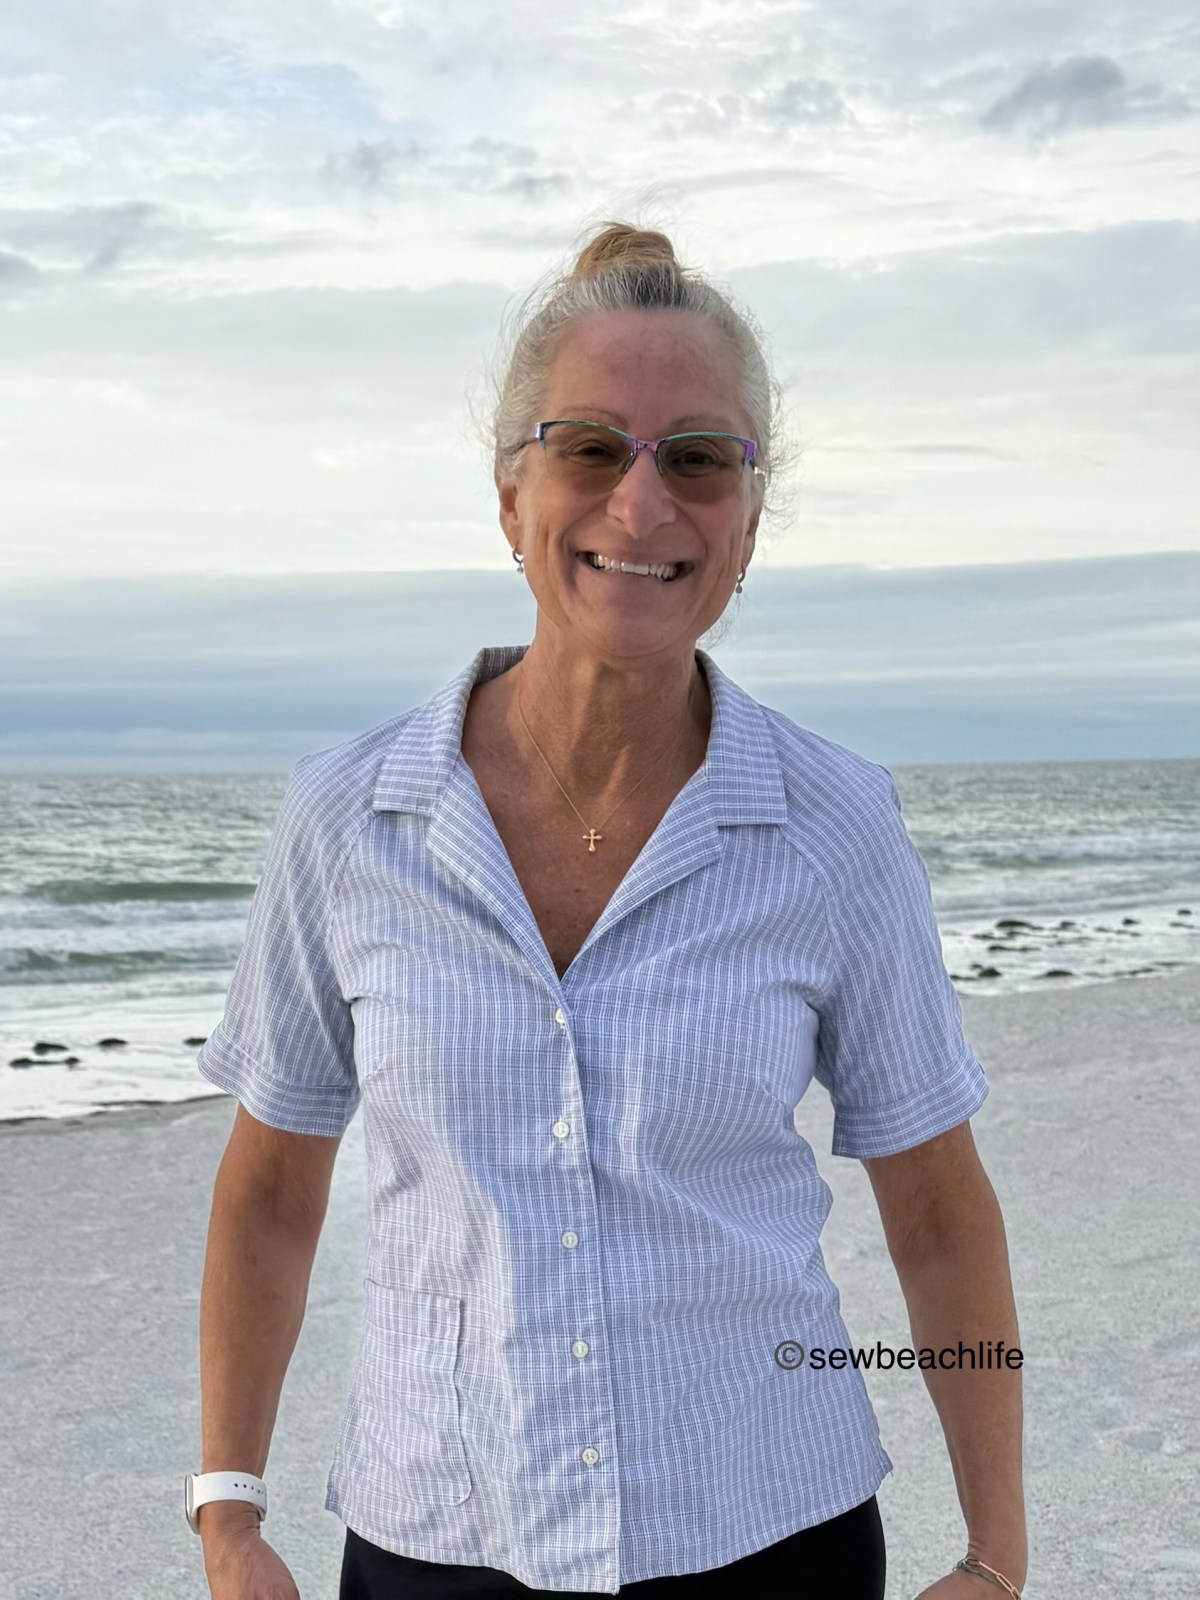
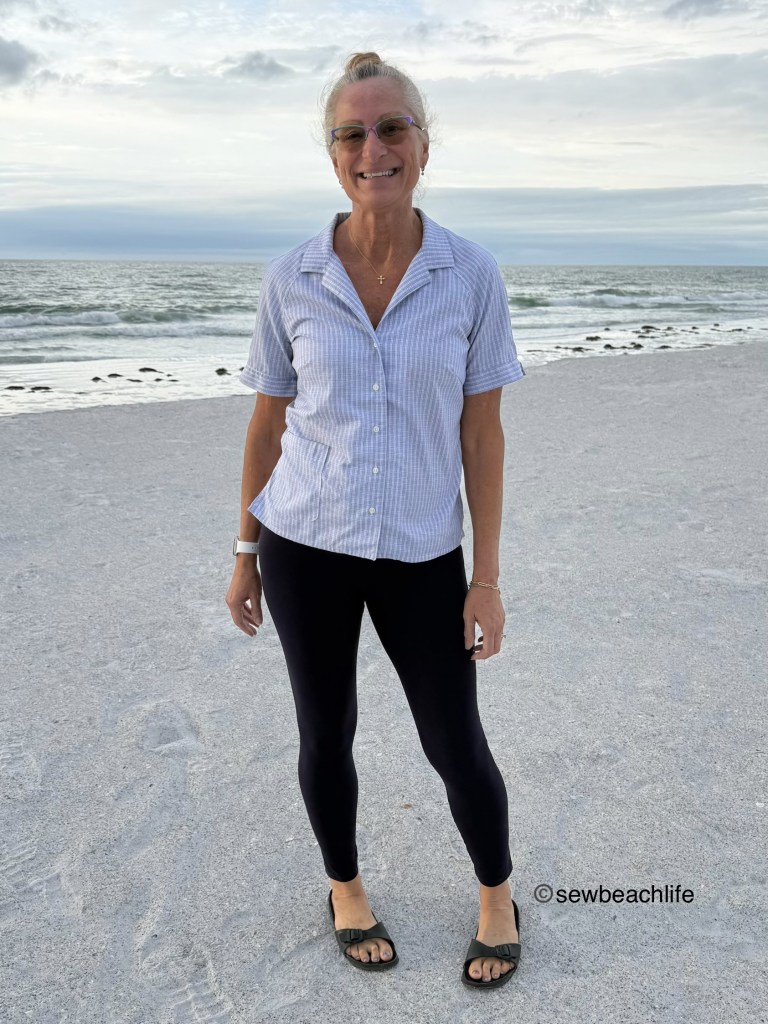
Since winter has arrived in Florida, I figured it was time to make some shirts with sleeves. I’ve made a couple of blouse patterns by a new to me pattern company- Wardrobe By Me, but they’ve all been sleeveless options, and the patterns both had set-in sleeves. This time I wanted to really challenge myself by making a woven raglan shirt. So I went with the Tropicana Shirt pattern.
Raglan styles can be tough, because the sleeve has to fit up over your shoulders. I started by making a muslin, but made a fatal area choosing my base size. In the previous two WBM patterns I’ve sewn, I used a size 4 or 6 at the shoulders, because my upper bust measurement is narrower than my full bust would indicate. Then I’d grade out at the bust (under the armscye), down to the waist and hips. That method works well for a set-in sleeve, or sleeveless shirt. It does NOT work for a raglan style, especially if you have muscular arms. Lesson learned: use your waist and hip measurements to choose a size with this pattern!
Generally speaking, I have to lower bust darts by about an inch, because I am longer than average from shoulder to bust point, and I did that here. I also added an inch to the length because I am tall. These are normal alterations that I make to pretty much any woven pattern. Patterns are designed to an “average”, but most bodies aren’t a perfect “average” size and shape. As you gain experience sewing, you learn to automatically check these things on a pattern, adjust accordingly, and grade to fit your body. It is worth the effort to get a nice fit.
Since I upcycled one of my husbands old shirts to salvage the fabric (and buttons!), there was limited fabric left when it came time to cut out the sleeves. Short sleeves were the solution, and I hacked them to have a contrast split sleeve band. I think it works well with the split hem on the shirt.
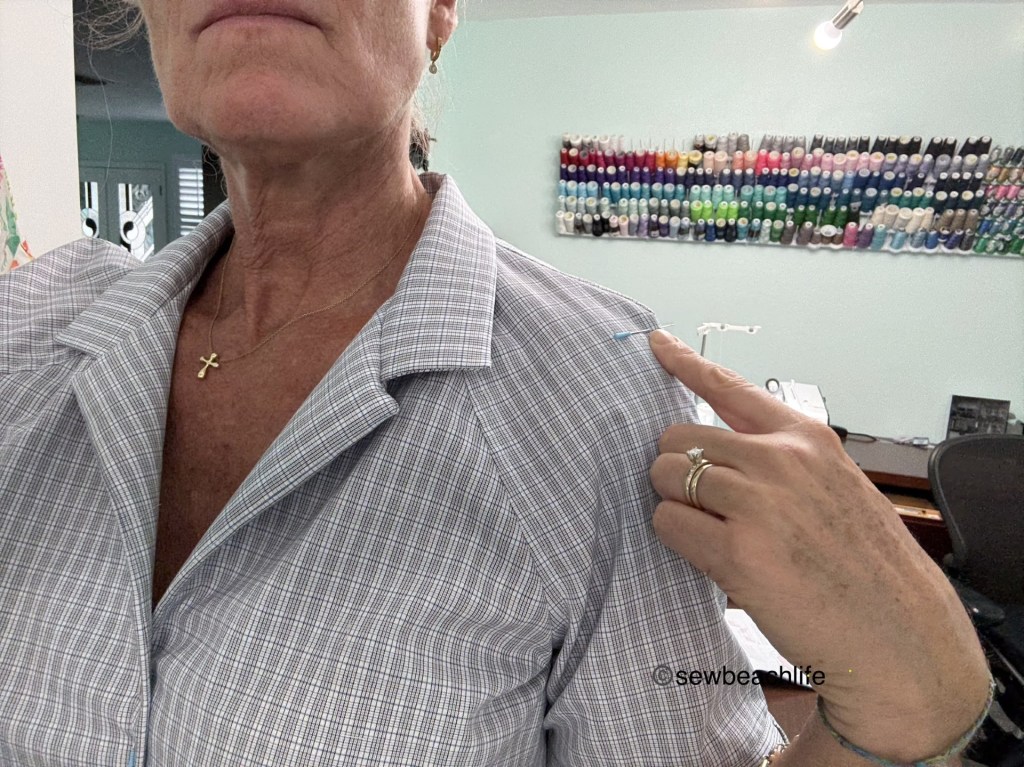
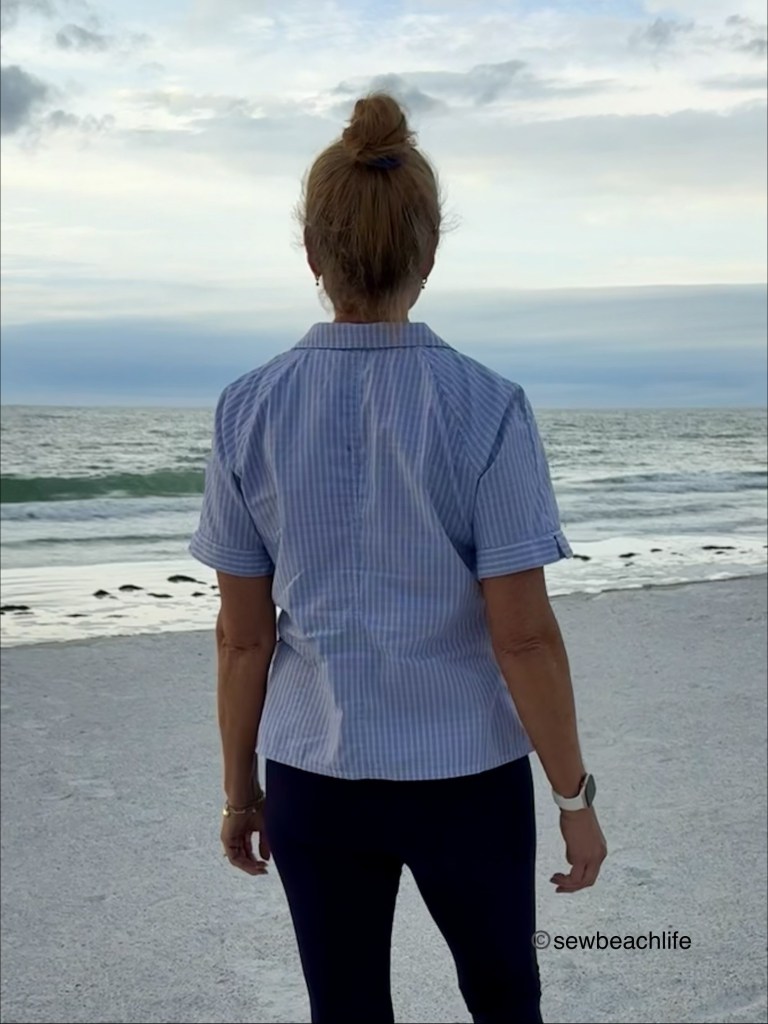
The sleeves, or more precisely, the shoulders were the biggest challenge for me. Like many, many people, my shoulders slope. As I’ve gotten older, I think the sloping angle has increased. 😉
See the pin I’m pointing to in the photo above? That’s where a set-in sleeve seam would be. That is not where the slope of the pattern ended, which is why you can see that puffed up section on the shoulder. Because there isn’t adequate length there, the sleeve couldn’t settle down onto my shoulder. I adjusted the angle of that seam to gain the needed length.
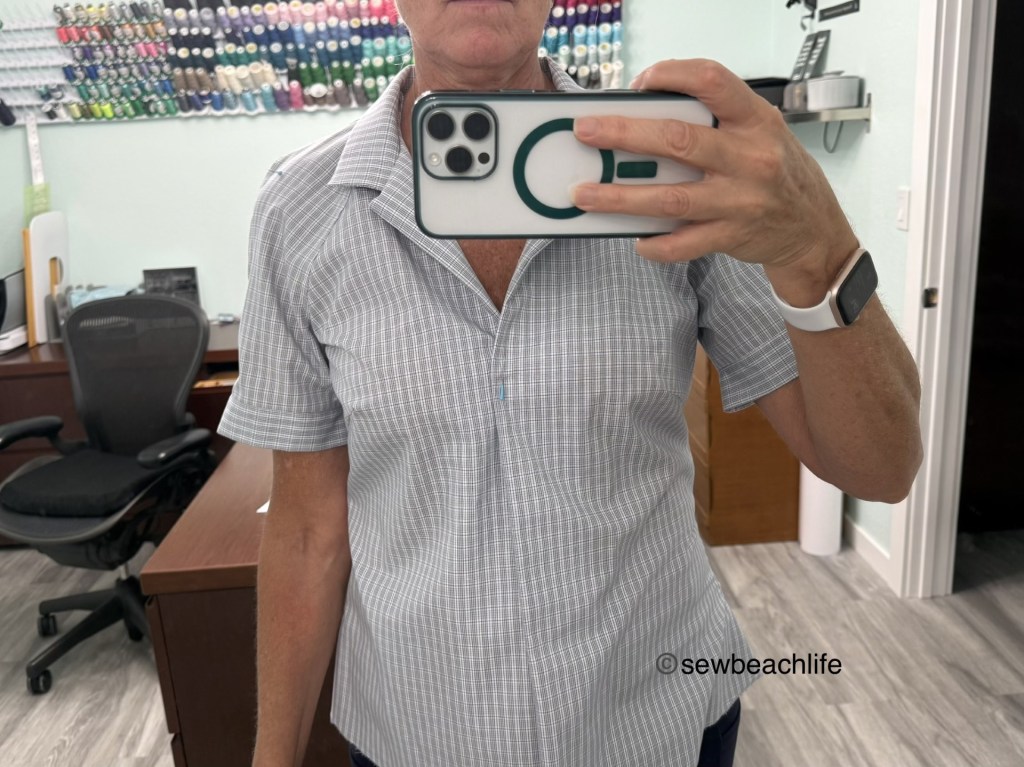
Although the pattern has button and button hole markings, because I lowered the bust dart and added an inch to the length of the pattern, I always wait until I can try a shirt on to mark the buttonhole placement.
I like the top button to sit at the center of the bust, so a pin marks the point for me. Once the shoulder seam adjustment was made and the buttons and buttonholes were done, I figured that there was no reason to waste the pocket from my husbands shirt, but I didn’t want a chest pocket. So the pocket was added to the lower right hand side of the shirt, in case I want to carry my phone, etc. I took the time to carefully match the plaid, and the pocket blends in nicely.
I’m pretty happy with how the Tropicana Shirt turned out. I made it a couple months ago, even though I’m just now writing about it. The tutorial gave good directions for sewing the collar, which is nice, because collars can be intimidating. I’ve worn this shirt numerous times and it is comfortable even under a cardigan. Is it perfect?
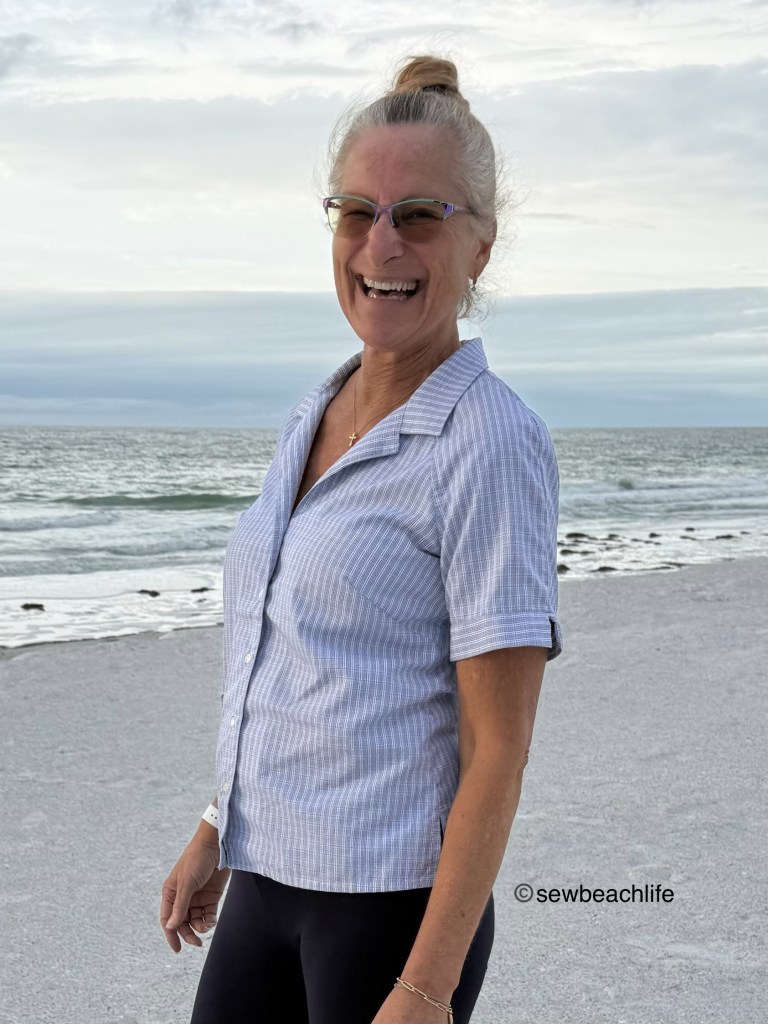
Well, the back could use some work. I’m sure it has something to do with the slope of my shoulders, the depth of the armscye, and my muscular upper back. The perfectionist in me wants to fix it, but frankly, I’m not quite sure how to go about it with the raglan style. If you’ve got ideas on how to improve it, or tips for working with this style, I’d love to hear it!
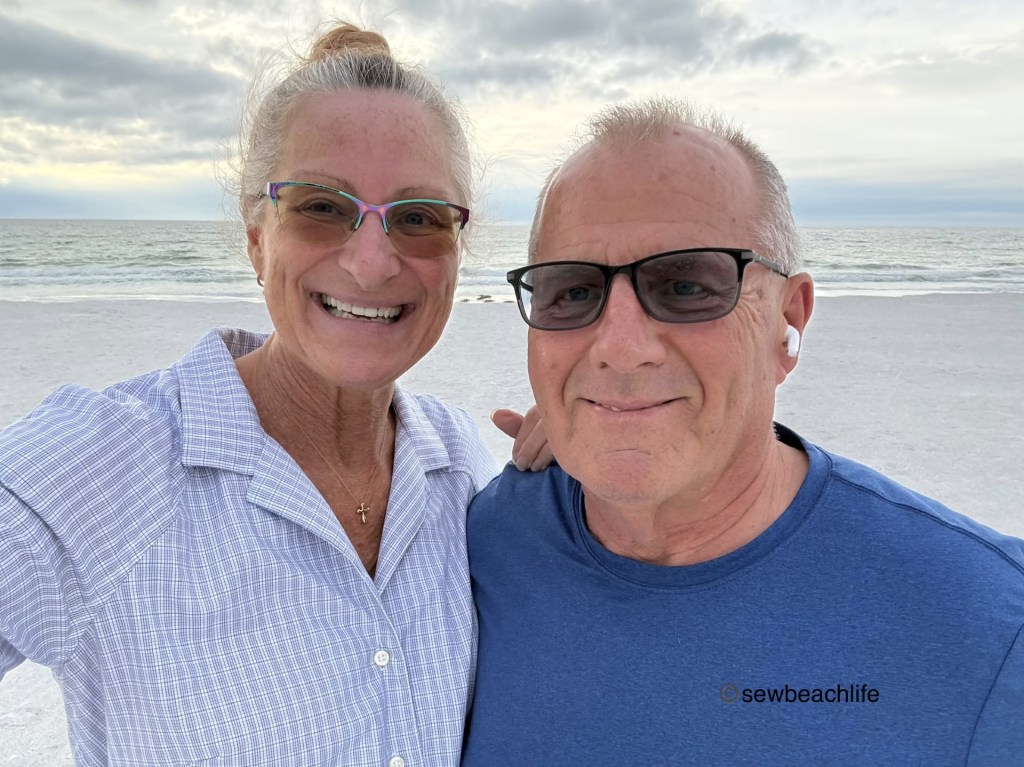
Would I make this pattern again? Yes, but only when I have the time to dedicate to improving the fit of the back. In the meantime, I’ll just enjoy wearing it, and spending time with my true love.
Details: This is the Tropicana Shirt pattern from Wardrobe By Me. I really like the aesthetic of their patterns. I started out by buying three of their patterns. Then I bought two more. 🙂
The fabric was upcycled by completely seam-ripping apart one of my husbands old dress shirts. It was sewn on my Bernina, which does such a great job of sewing perfect buttonholes. I also love the fact that I can move the needle up to five spaces left or right, which really helps when you make a pattern with lots of topstitching!
Thank you for reading and sharing my love of patterns, sewing, fabric, upcycling, and sewing machines! Since this is my blog and represents me, I always give my honest opinion about any patterns, fabric, or supplies that I talk about. I do like knowing whether the time I spend writing posts actually interests people enough that they take a look at the patterns I review, but I write for me. It’s one more creative pursuit that I hope is helpful or interesting to others. I write to share my love of sewing and to encourage others to love it as much as I do! ❤
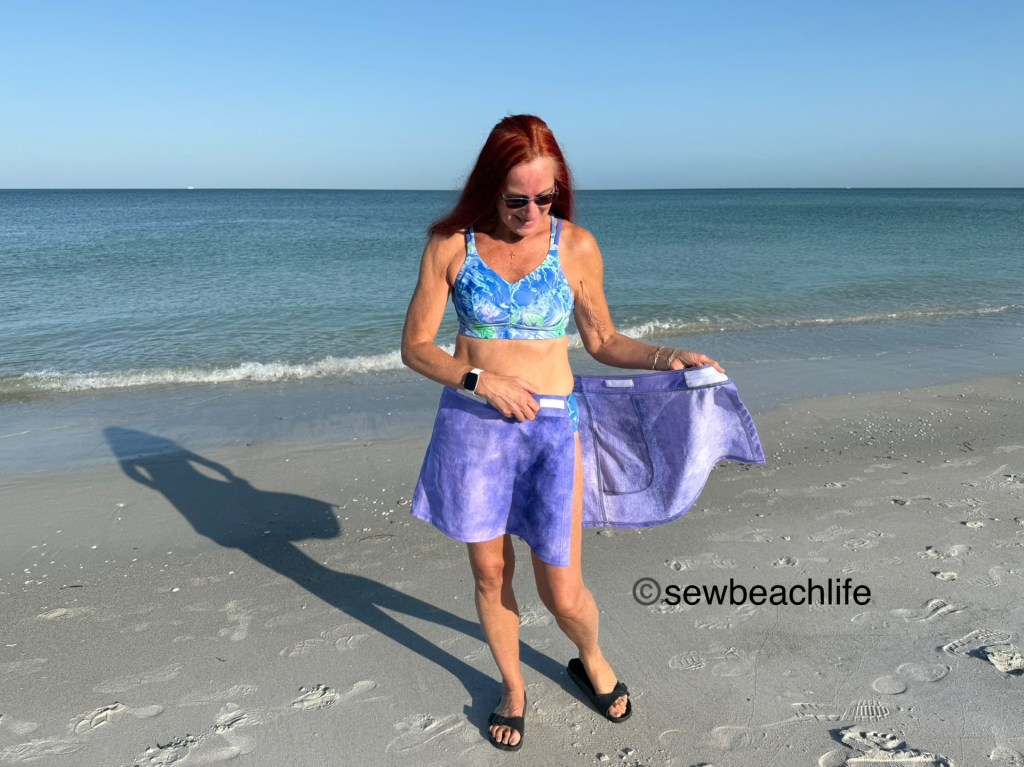
Who doesn’t love a pattern with multiple uses and lots of options? While originally designed as a swim cover up (like the Ripskirt Hawaii), I wear my Tidal skirts for daily use. With 14″, 16″ or 18″ length options, you can go as short as you dare! The pockets are deep enough to safely hold your phone or stash your cards, ID, or a house key.
It’s a fun wrap skirt with godets in the back and a contoured waistband for a perfect fit. The pattern tutorial calls for Velcro closures, but you could use buttons or snaps if you prefer. I chose Velcro, and found Sleek & Thin sew on low profile fastener at Michael’s. It truly is sleek and thin, and is so soft that you could use it for children’s clothing. Even the “hook” side of this variety of hook and loop fastener isn’t scratchy at all. I was surprised and impressed at how different it is from the industrial version.
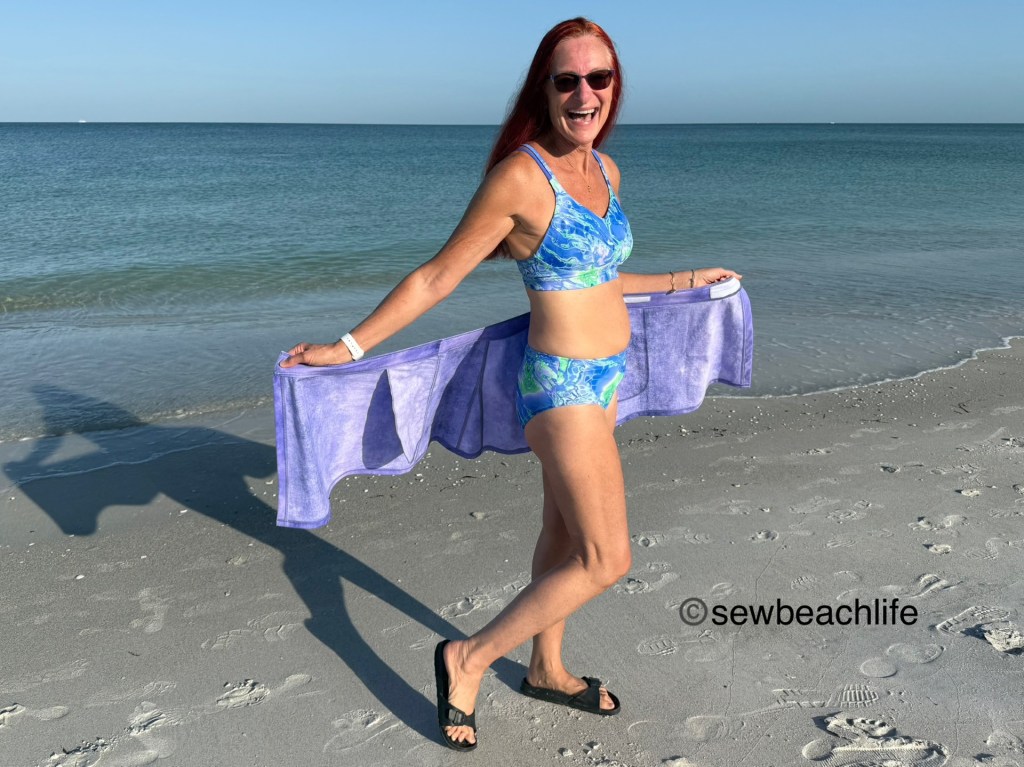
It’s easy to put on or take off the skirt:
And just like that, you’re ready to lounge in the sun, or go for a swim! You’ve got modesty for walking to the beach or pool, and can quickly prep for beach time. It’s simple to slip back on if you’re going out to dinner or walking the neighborhood.
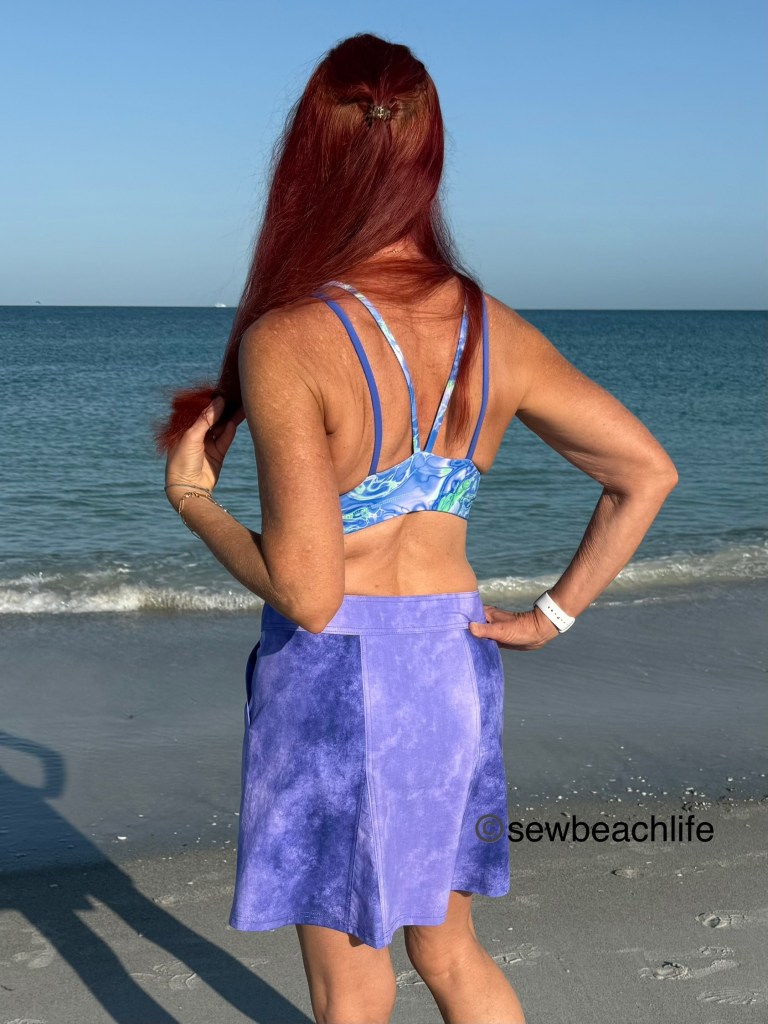
I love the clean finish on the inside of these woven skirts, which is achieved by serging the raw edges of the seams, and top-stitching with a coverstitch. I chose to sew each 3/8″ seam with my sewing machine, then serge the raw edge with a stitch length of 2-2.25 and a stitch width of M without cutting off any of the seam allowance. The seams were pressed in the appropriate directions as per the pattern tutorial, and top-stitched with a wide coverstitch.
I generally use a narrow coverstitch with the needles in C2 and C3 when hemming or wanting a subtle look. But with the fun angles and seams of the Tidal Skirt, I wanted to try the bolder look of a wide coverstitch (with needles in C1 and C3) and accented every single seam!
See how carefully I mirrored each pattern piece on the ombre fabric? I love how the wide coverstitch really pops on all of the seams!
Here are a few tips to make sewing the Tidal Skirt even easier:
When attaching the inner pocket to the outer pocket, I find it helpful to slide my quilting ruler between the pocket pieces and the skirt so that when pinning the curved section of the pocket pieces I can’t accidentally pin into the skirt front.
Ignore the glare of the overhead light fixture reflecting in my ruler, but smile with me at the knowledge that I have a nice bright light fixture to help me see to sew.
To help “tame” the curves when pressing up the hem of the skirt or the bottom of the inner waistband, turn the differential on your serger up to 1.3 (or even 1.5 depending on how deep the curve) and serge the raw edge of the fabric. This will slightly gather it so that when it’s pressed up, the fabric will lay smoothly.
See how smoothly the pressed up hem lays?
The pattern tutorial has you attach the Velcro by sewing through both layers of the waistband. It’s the simplest way to do so. But the perfectionist in me didn’t want to see those stitch lines on the outer waistband. I wanted the Velcro completely hidden. As per the tutorial I attached the outer waistband to the skirt. Then I attached the inner waistband to the outer waistband along the top seam, but I did not sew the short sides at that time. I tried the skirt on, and carefully marked where the Velcro needed to go with pins. (The pattern piece has markings, but it’s always good to try on and adjust placement if needed.) I folded the waistband open so that I could attach the Velcro through the single layer of either the inner or outer waistband. At that point I folded the waistband back down right sides together and stitched the two short edges. Then it’s back to the tutorial and turning right sides out, pressing, and stitching in the ditch.
*Note: it is very important that you top-stitch or coverstitch all the way around your waistband if you use my method to attach the Velcro as it adds the needed stability.
The Tidal Skirt pattern by Greenstyle uses their new, updated size chart that includes sizes A1 through M3 with waist measurements from 24″-53″ and hips from 33″-62″ so it’s very size inclusive.
The details:
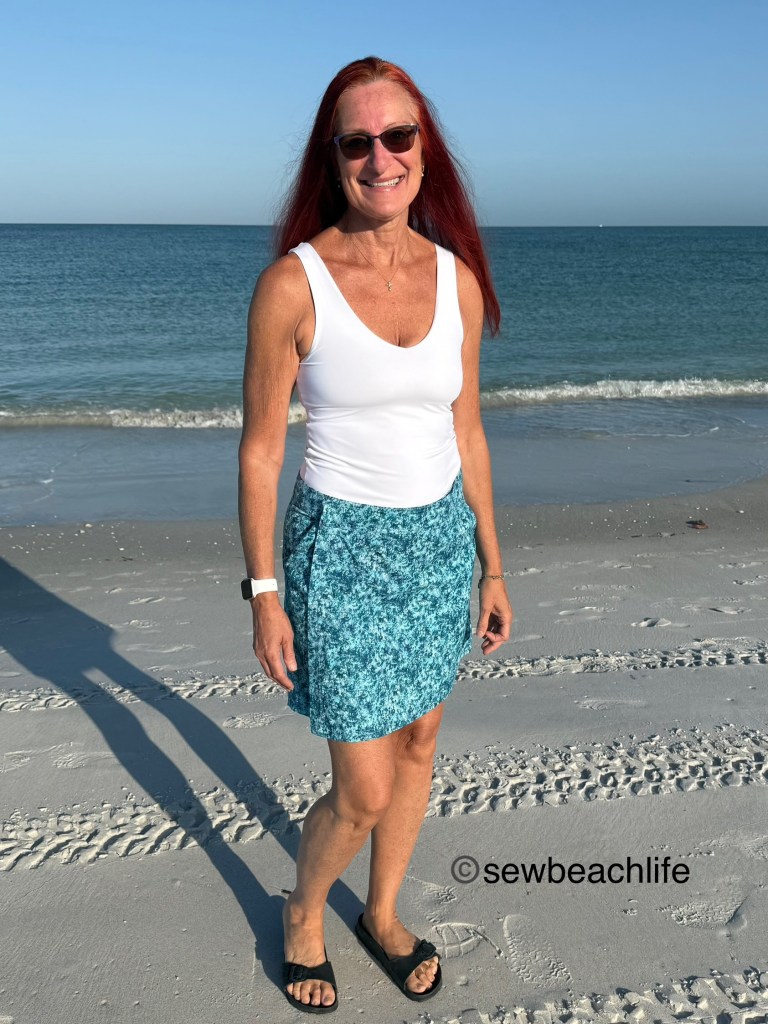
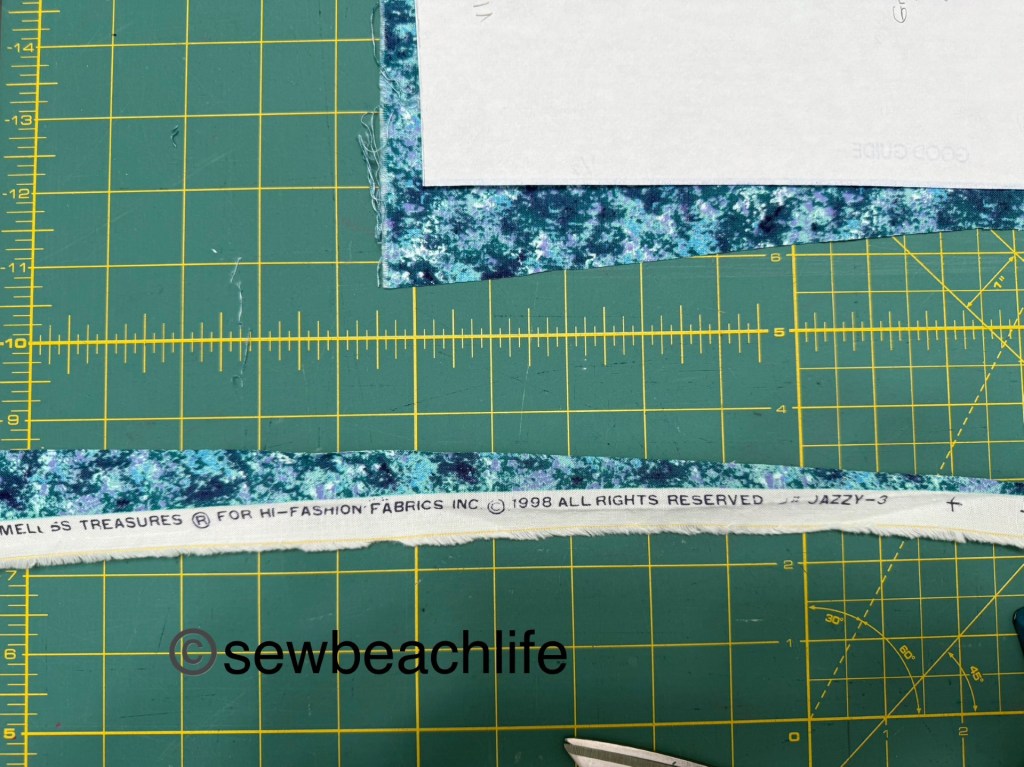
I made size D1 and love that the Tidal Skirt can be made with quilting cotton. I don’t own many woven garment patterns that recommend quilting cotton, so this is a great way to use a fun print or some fabric that’s been languishing in your stash for far, far too long…
This teal print may be 27 years old, but it worked perfectly for this pattern!
There is a bit of purple in the teal print, so I chose to accent it by coverstitching with MaxiLock thread from Wawak in orchid. I wore my teal skirt with a Bobby Brami, which you can read more about here.
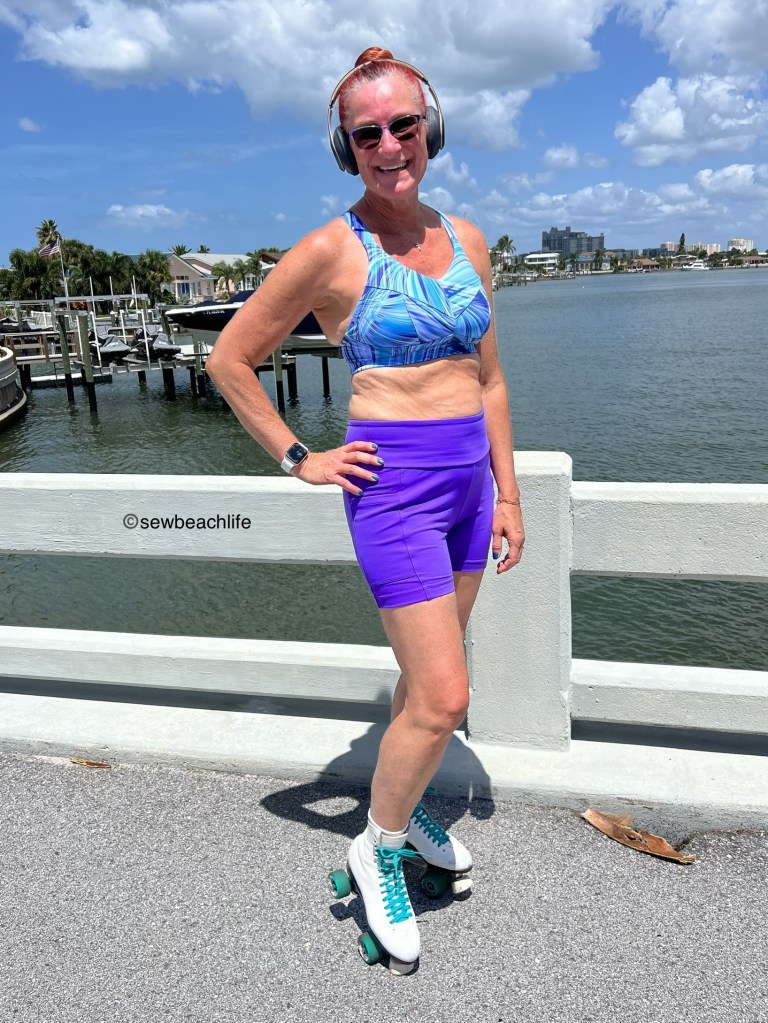
The purple ombre cotton print came from my local(ish) quilt and sewing machine shop in Tampa a couple of years ago. I used Sergin’ General from Superior Threads in periwinkle to serge and coverstitch it. I wore my purple skirt with a slightly hacked Endurance Sports Bra (made with Greenstyle fabric), which you can read more about here. I’ve also worn it with an Azure Tank, shared here.
The links to GreenStylemay be affiliate links (if I did them properly!) which means that I may earn a few pennies if you use my links to purchase, without it costing you anything extra. Since this is my blog and represents me, I always give my honest opinion about any patterns, fabric, or supplies that I talk about. I hope that the time I spend writing posts and sharing sewing tips interests people enough that they take a look at the patterns I review. I write to share my love of sewing, patterns, and fabric, and hope that it encourages others to love sewing as much as I do! ❤
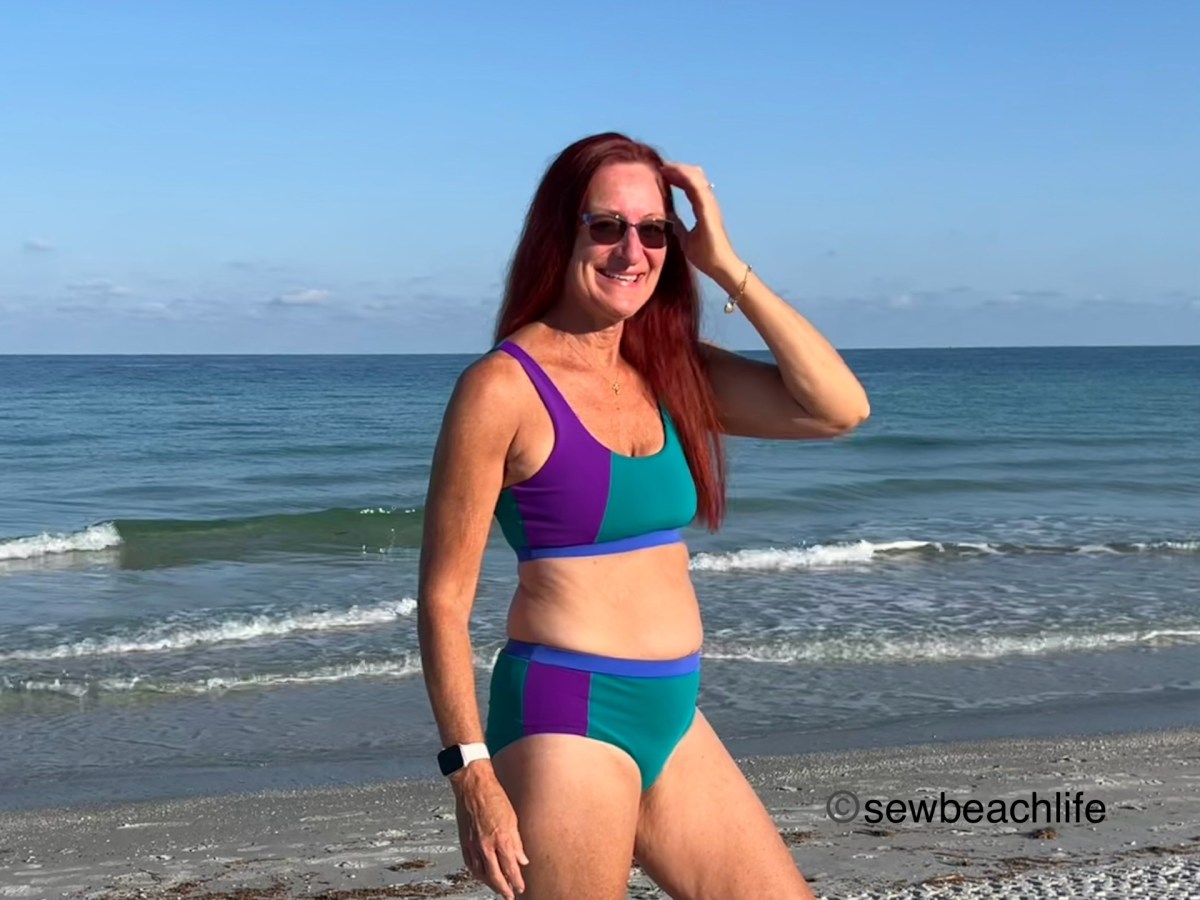
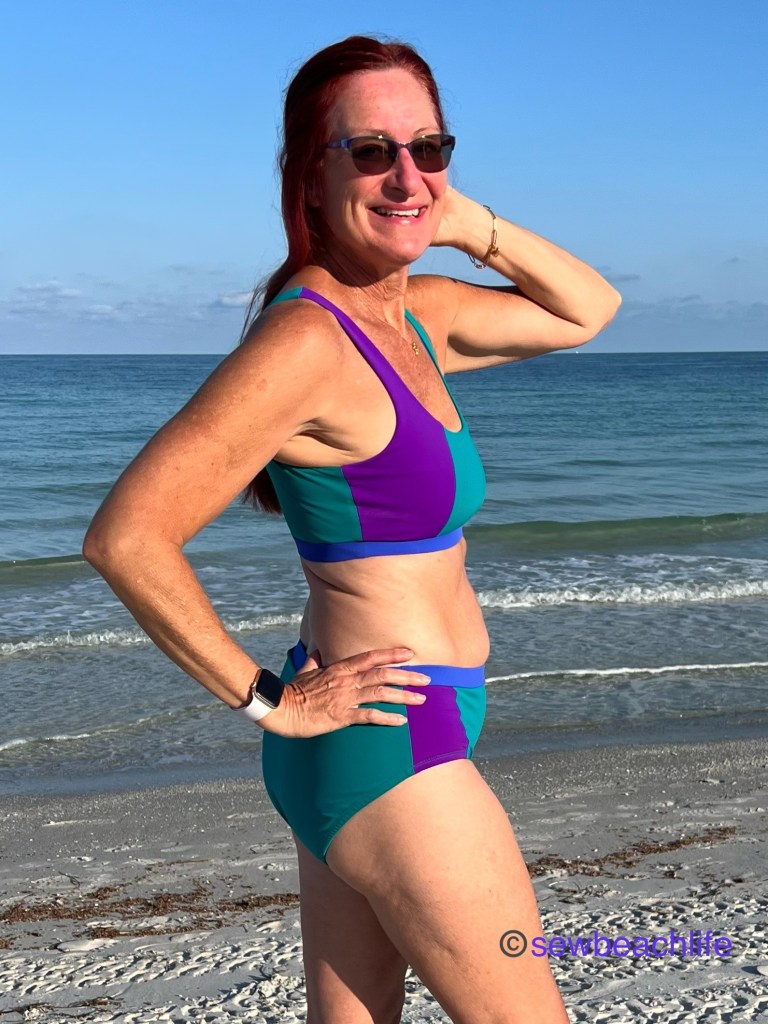
Summer time means new swimwear is in order, and the Tangled Swim Top and Tangled Swim Bottoms have some super fun color-blocking options! The hardest part will be choosing which fabrics and options to use. The top has a scoop neck front, with back options of full coverage, high scoop, and low scoop. Everything from a simple front and back to multiple color-blocked designs give you the chance to use those smaller scraps of fun swim fabrics you’ve been saving.
This shot makes me feel skinny. 🙂 That intermittent fasting is starting to pay off! Don’t get me wrong, healthy eating and exercise are part of the deal.
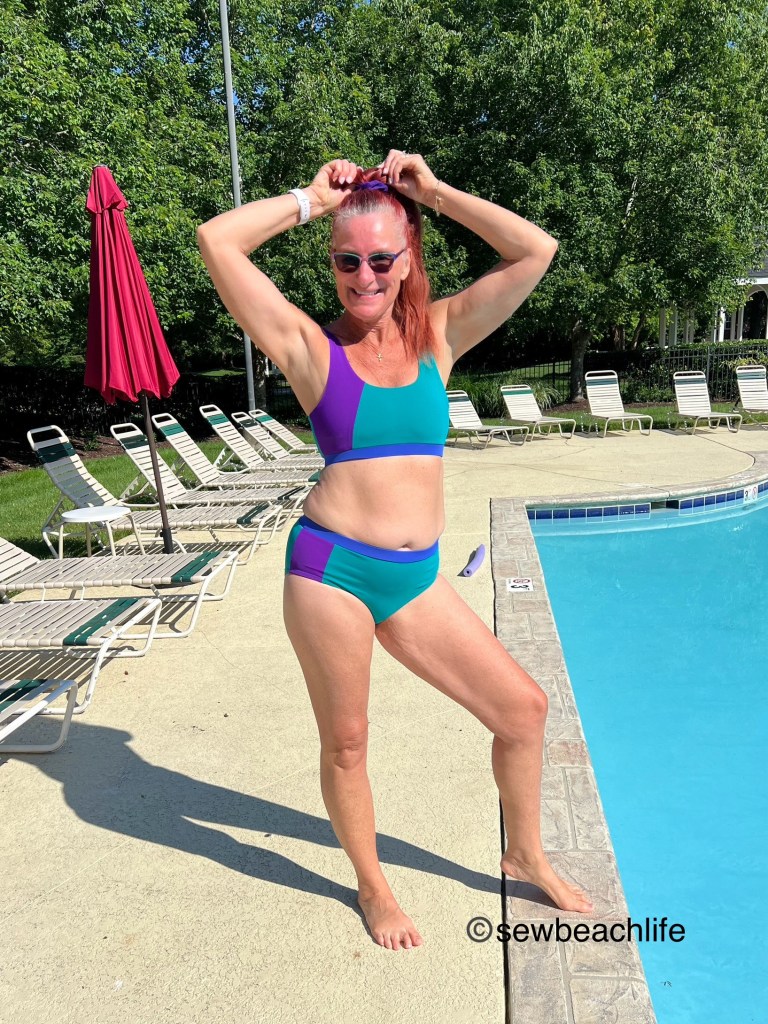
The Tangled swim bottoms have even more color-blocking options than the top! I chose the asymmetrical two-piece color block design for the front and the back, and I love being able to use three fun colors for a nice bright suit. The bottoms have a full coverage and a slightly cheeky back coverage, along with high or low rise options. I used the high rise, elastic waistband option, but there’s also a contour waistband that would make the rise even higher.
I like showing how patterns look while you’re seated too. Because you’re not just going to stand around when you’re out of the water!
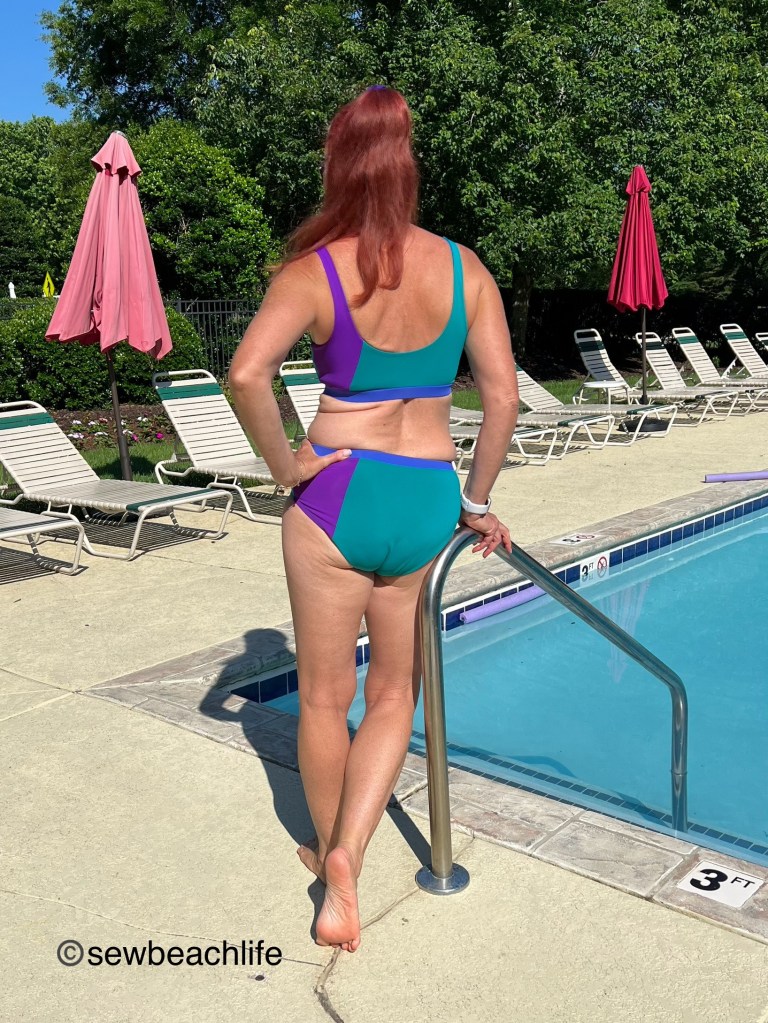
I like the lowest back option, and wanted to make the back have the same asymmetrical two piece look as the front and the bottoms. So of course I had to hack it. 😉 I can never just leave a pattern alone.
Don’t you love the way the design carries from the top down to the bottom?
It was super easy to transfer the design from the front to the back. So, my method of tracing patterns is to consolidate the options I plan to use onto one pattern piece if feasible. I knew I was going to make the simple version of the top and bottoms which I did before moving onto the color-blocked versions.
I didn’t bother adding powernet in the front of the green top, which I kind of regret.
Once I had the simple front and back traced, it was super easy to trace the cutting lines for the asymmetrical two piece front right onto my simple front. That way I don’t have smaller pattern pieces floating around in my pattern envelope. I like to use different colored pencils to mark the left side cutting line and the right side cutting line. I also use arrows to ensure that I cut on the proper line so that I have adequate seam allowance! The marked cutting lines should end up 3/4″ apart (3/8″ seam allowance + 3/8″ seam allowance = 3/4″).
To hack the back to have the same asymmetrical two piece look, I simply laid the simple back pattern piece on top of the marked front piece, and traced the left and right cutting lines, again labeling with my colored pencils.
I always mark my pattern pieces with any changes or notes (as you can see, version 2 of the pattern testing lowered the bottom of the armscye by 1/4″) and always mark the grainlines.
I love how the two-piece asymmetrical back hack brings that extra pop of color to the back and side. And that the angled cut of the top flows right down to the angled cut of the bottoms.
Even though this isn’t a super revealing swim suit, I love that it still looks and makes me feel sort of sexy.
GreenStyle is listing the Tangled Swim Top and Tangled Swim Bottoms patterns separately, so if you want to mix and match with any of their other swim tops or bottoms, you can choose the styles and patterns you want to use.
If you’ve never sewn swimwear before, I encourage you to try it. My best tips are to use fresh needles in your sewing machine and/or serger. Use plenty of pins to line up seams. I like to baste my swim lining to the main fabric of the swim bottoms before attaching the waistband or leg elastic. It keeps the fabric smooth and even, and ensures that you won’t have to rip out the elastic because you somehow didn’t catch a layer of fabric.
Speaking of elastic, the amount of stretch can vary from manufacturer to manufacturer. So rather than just looking at the elastic cut chart, I literally wrap the elastic around my waist and leg to choose a comfortable yet snug length. Then I mark that information right on my pattern piece for the next time I want to make it.
If you’ve ever had leg elastic “flip out” on you, then this next tip will really help you. Once you’ve sewn your leg elastic into a circle, mark the quarter points. I just use a pencil. Then I mark the quarter points of the leg opening with pins. I like to serge on the elastic using a stitch width of M, and a stitch length of 2.25, stretching the elastic so that the mark lines up with the pin. Then I turn the elastic under, and pin in place. Whether you use a coverstitch or a zigzag, be sure to sew along the serged edge, NOT along the fold. This will keep the elastic firmly in place, rather than allowing it to flip out.
I’ve worn my suits in the pool and played in some nice waves in the ocean. Everything stayed in place, even in the big waves. So whether you hit the pool, the lake, the ocean, or a river, the GreenStyle Tangled Swim Top and Bottoms are a fun addition to the season!
The pool photos were taken at a community pool, and I sometimes wonder what other people think when they see me acting silly and posing for the camera. Probably nothing more than they think when I pose at a crowded beach. 🙂 Honestly,I don’t worry about it because A. I’m having fun, and B. There will always be people who look better, or perhaps less fit than me. And we’re all here to enjoy the sunshine, enjoy being near the water, and to have fun! And face it, most people are so caught up in their own lives to even think or worry about what you look like. So get out there in a swimsuit and enjoy life!
Thank you for reading and sharing my love of patterns, sewing, fabric, pattern hacking, and cute swimwear! ❤
The links to GreenStyle may be affiliate links (if I did them properly!) which means that I may earn a few pennies if you use my links without it costing you anything extra. Since this is my blog and represents me, I always give my honest opinion about any patterns, fabric, or supplies that I talk about. I do like knowing whether the time I spend writing posts actually interests people enough that they take a look at the patterns I review, but I write for me. It’s one more creative pursuit that I hope is helpful or interesting to others. I write to share my love of sewing and to encourage others to love it as much as I do! 🙂
Sports Bras are kind of a staple in a lot of women’s wardrobes. Whether you wear them for sports, exercise, work, or just because they’re cute and comfortable. The challenging part is finding one that fits properly. Ready to wear sports bras often only come in basic sizes like XS, small, medium, large, and XL. While sizing like that may give an okay fit on some people, I think that it is unlikely to get a great fit with such limited sizing. Which is why I like making my own.
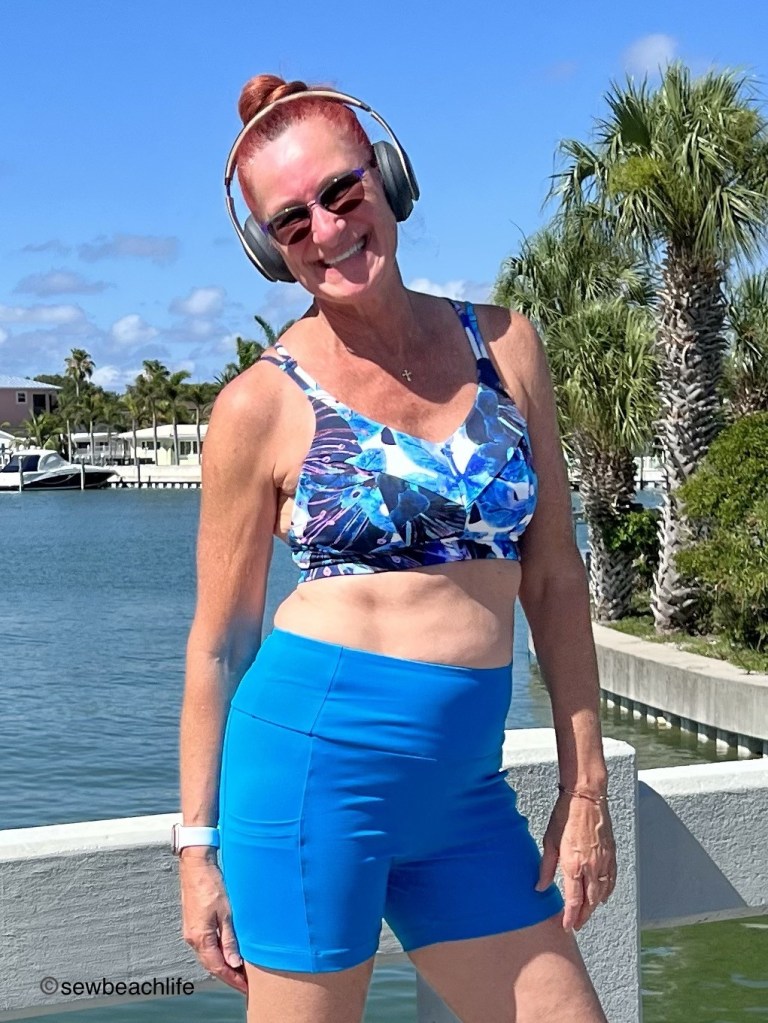
I started making GreenStyleEndurance Sports Bras this summer, and now have three, customized for my style. Funnily enough, none of them are made exactly per pattern directions with a front zipper and bound edges. What can I say? I’m no stranger to pattern hacking, and think it’s fun to try different looks by playing with a pattern.
The great thing about the Endurance bra pattern is that it has specific band and cup sizing. It’s designed to fit a full range of band sizes 28-40, and cup sizes B-H. You get a much better fit when you have cup size options! Speaking of fit, following the measurement chart is the best way to choose your size. My 32″ underbust (ribcage) measurement put me in a 32 band, and my full bust measurement put me in the E cup. The band is a good fit, but I neglected to take into account that the pattern cup pieces are intended to fit over bra foam pieces formed into cups, and I was not using the bra foam layer. So, the 32E sports bra fits, but it’s not snug. I don’t know about you, but I like my sports bras to fit snugly.
It’s still super cute, and I wear it all the time, but I knew that a 32D would fit better, at least with the way that I hack the pattern to use powernet basted to the wrong side of the main fabric, rather than using bra foam. So I made my second Endurance in a 32D.
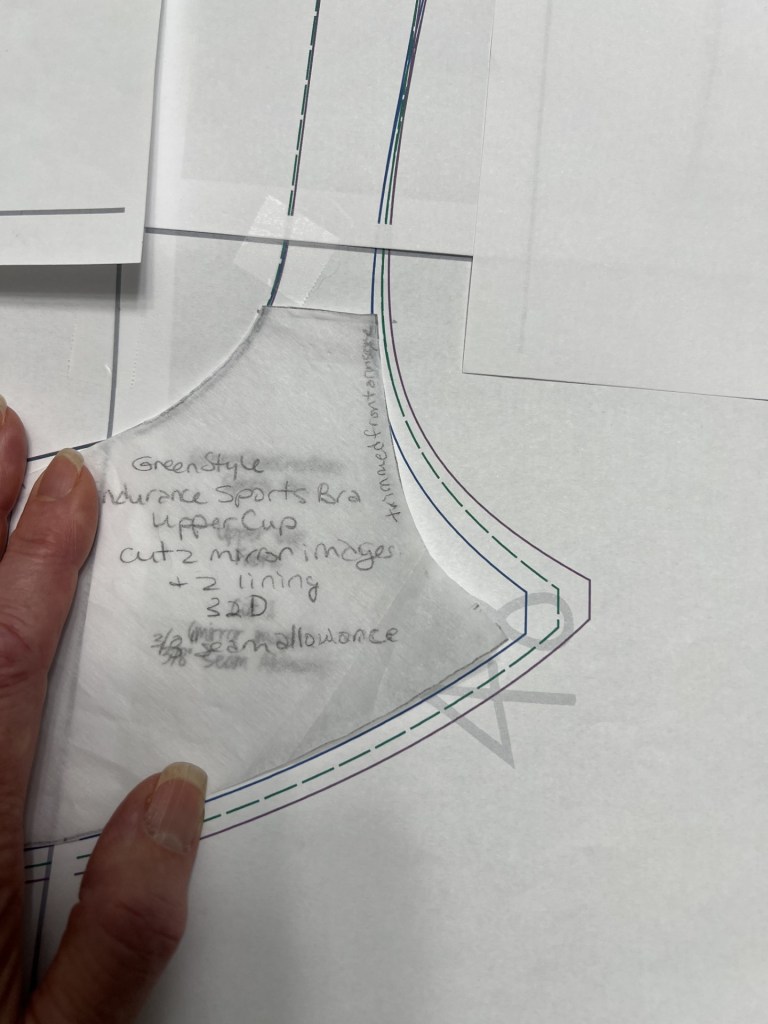
As you may have noticed, beyond hacking the pattern to not use foam, binding, or a zipper, I also changed the straps. Rather than using the all one piece upper cup and strap, I trimmed the strap off about 3/8″ above where the strap starts. Since my bust is fuller at the bottom than the top, I also trimmed back the curve at the armscye.
I don’t show full pattern pieces out of respect for pattern designers hard work, but you can see where I trimmed off the strap and trimmed back the upper portion of the upper cup piece.
I thought it would be fun to have double straps, so I made straps out of 1-1/2 wide strips of fabric folded in half right sides together, zig-zagging over 3/8″ wide knit elastic that was aligned with the raw edge of the fabric, so that the zig just goes off the edge of the elastic and into the middle of the fabric, with the zag into the elastic, then turning the straps right side out and pressing.
The V and straight combination of straps is a unique look, along with providing additional support.
I basted two straps at center back, and placed the other two straps at 2-1/2″ away. After sewing the main and lining together along the top edges (except at the strap opening) and turning right side out, I tried the bra on to judge strap lengths. The center V straps ended up about 15″ long, and the straight straps about 14″ long. The length you need may vary depending upon the stretchiness of your elastic. I threaded the two straps on each side through sliders because it looked cute, and to give a slight amount of adjustability.
Aren’t the sliders a fun touch? And aren’t I lucky to have such a great wingman to ride along with me as I skate?
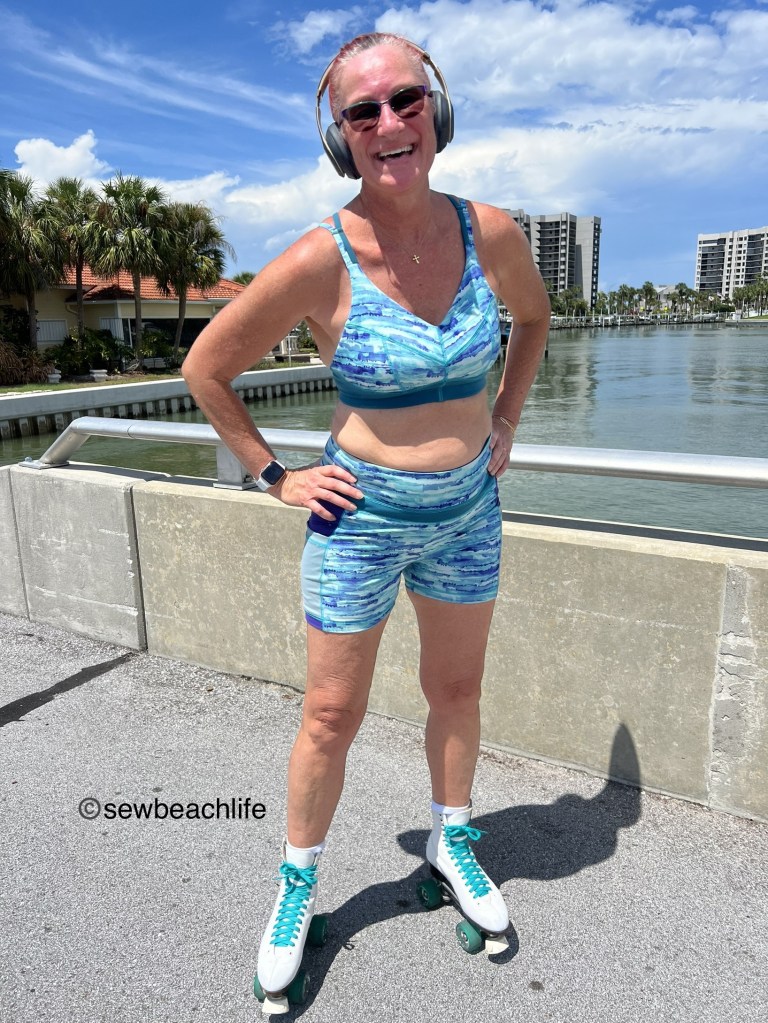
For my second Endurance I used size 32D, and again just sewed the center front together rather than using a zipper. For this version I made straps with 1″ wide knit elastic threaded through them.
The 1″ wide straps give great support!
Instead of skating around the neighborhood like I usually do, we decided to check out a county trail system. It was a workout with the little hills and elevation changes, but fun to have a change of scenery and to see the bicyclists and walkers that use the trail.
The trail is paved, and there are benches along the side every so often. It does cross quite a few busy streets though, so there are 4 way stops. You really have to watch for cars because they have a tendency to do more of a “rolling stop” than a complete stop.
The straps are just crossed in the back for a typical X back look.
Florida sun is intense, so don’t forget the sunscreen!
My new outfit (because of course I *needed* another outfit for skating) is an upcyle. I used some old capri length leggings and a workout top that was too big, unpicking them to salvage the pretty fabric. Working with limited fabric means that you’re going to get a scrappy look, but I tried to get intentional with it.
I managed to get the GreenStyle Moxi bike shorts front and back pieces, along with the Endurance Sports Bra cup pieces out of the capris. The old waistband fabric wasn’t as tall as the Moxi waistband, so the bottom 2″ of waistband was cut from the old teal workout top. Using the teal for the band of the Endurance bra gave it a nice contrast. I had to dig into my stash to cut the lining layer of the bra, along with the side panels of the shorts. The pockets were cut from the mesh panel that was in the center back of the old top. Like I said, it’s a scrappy look!
Looking scrappy (and happy) because I got to skate.
I love the support the bra offers, and the fact that it can double as a swim top. The V and straight straps are my favorite, so I used them on this bra too.
It’s fun to provide entertainment value by trying to take photos with cars occasionally driving by! 🙂 All you can do is laugh when someone rolls down their window and says, “Looking good!”
Reverse triple coverstitching helped soften the look of the multiple fabrics and bring them together. Superior Threads Sergin’ General thread in teal was a great match to the fabrics.
Don’t be afraid to upcycle, to hack, to adjust, to experiment, and to play with patterns and fabric. I also encourage you to rollerskate for fun and exercise. Even if it’s been a while, you’ll pick it back up. And like anything else, the more you practice, the better you get.
The details: I’m wearing the GreenStyle Endurance Sports Bra and the bike shorts from the GreenStyle Moxi Shorts pattern in all these photos. The navy and turquoise floral print is Align 2 fabric from GreenStyle.
Both the turquoise and purple shorts are supplex from Phee Fabrics.
The swirly print fabric used for the X back bra was secondhand fabric so I don’t have any information on where it’s from.
You can make your own sports bra, and can customize it to fit your needs. It’s worth the sew! And a few more photos just because I have so many to share. 😉
Thank you for reading and sharing my love of creating, hacking, sewing, serging, great patterns, fabric, and making beautiful, well-fitting garments! ❤
The links to Greenstyle may be affiliate links, which means that at no extra cost to you, I may receive a few pennies if you purchase through my link. As always, I only give my honest opinion. After all, it is my blog, which represents me!
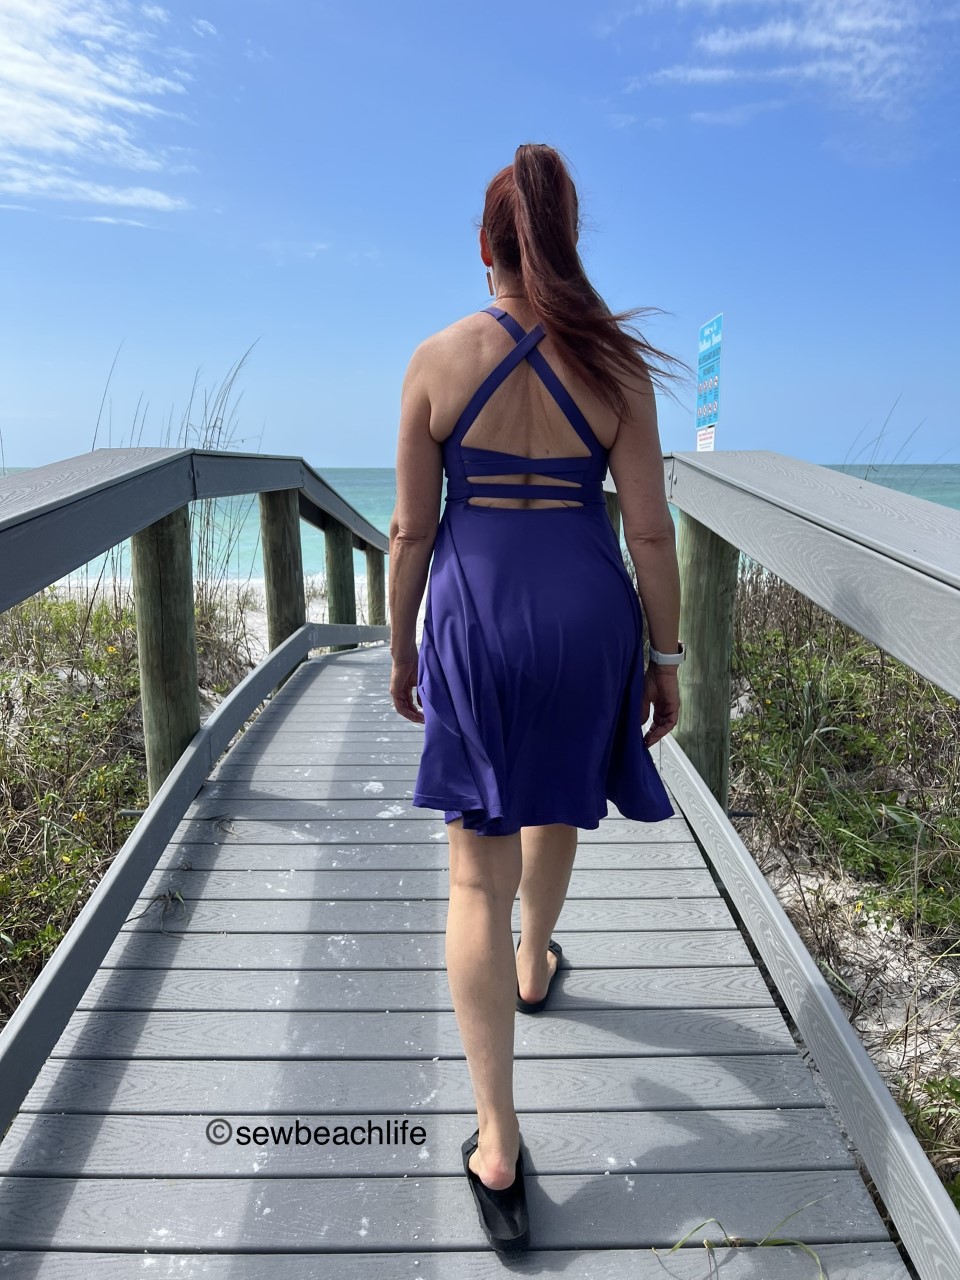
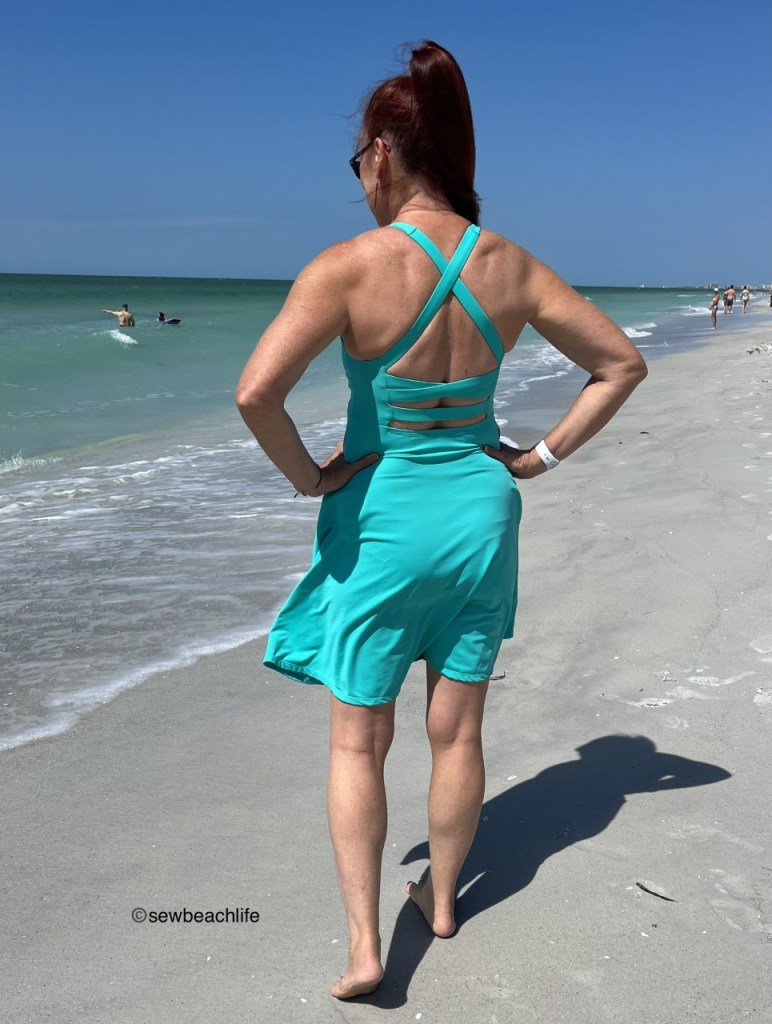
I’m pretty discerning when it comes to pattern testing, and only test when a pattern looks like something that would get a lot of wear. When I saw the tester call for the Stitch Upon A Time Spellbound Bra and Dress, I applied right away. That criss cross back is exactly what I’ve been looking for!
When you’re a bit busty, you’ve got to love a pattern that has cup sizes. Seriously! There don’t seem to be many designers in the .pdf (or paper) pattern world that include multiple cup sizes. Including cup sizes makes a pattern fit so much better. The Spellbound includes sizes XXS to 6X, along with cup sizes A-G (determined by the difference between your full bust and upper bust). Per the measurement chart, I made a size small D cup. The size chart on this is spot on, and did not require any grading. The strap lengths were perfect (which seems amazing to me because obviously there is a lot of math involved to get all five strap pieces the proper length for each size).
Although it is a shelf bra and relies upon compression, I feel quite comfortable with the amount of support. If you wanted to, I suppose you could add bra cups during construction, but I don’t feel the need to do so. This is coming from a girl whose regular bras have underwires, so that is saying something!
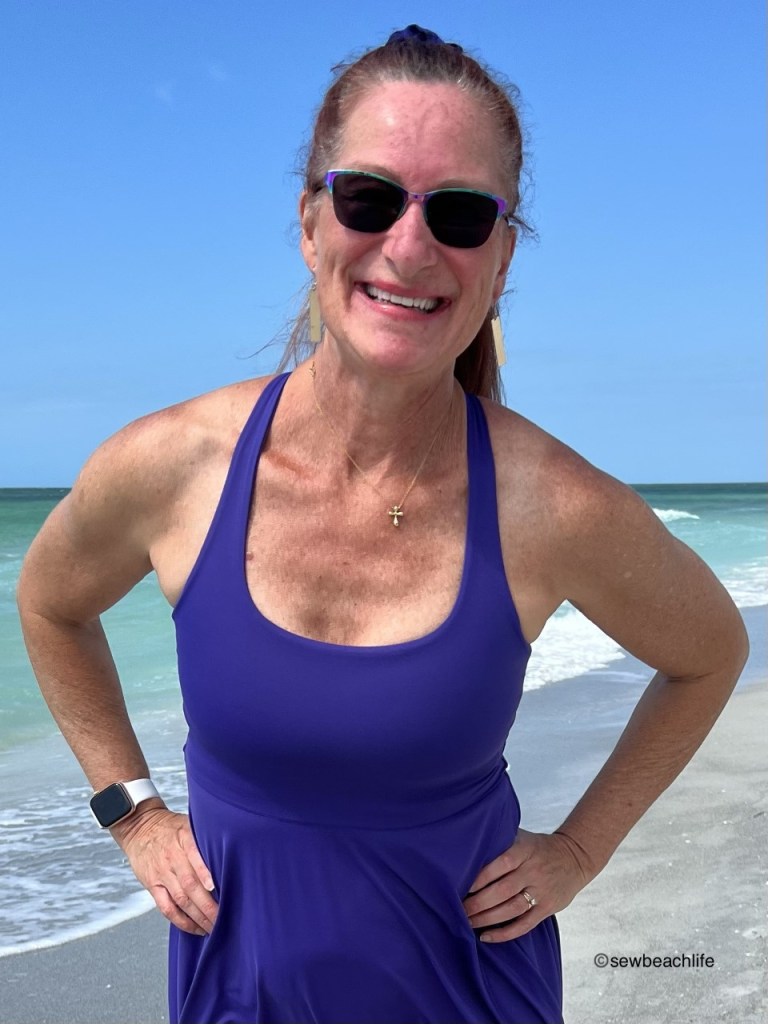
Pretty and supportive!
There are usually changes and updates during testing, which is kind of the point. A designer wants to ensure a great fit on real bodies in a wide range of body shapes and sizes. A higher neckline option was added for anyone that prefers a little more coverage. Another tester and I commented that we wanted to hack the bra into a dress, and Kelly (the designer) made that happen!
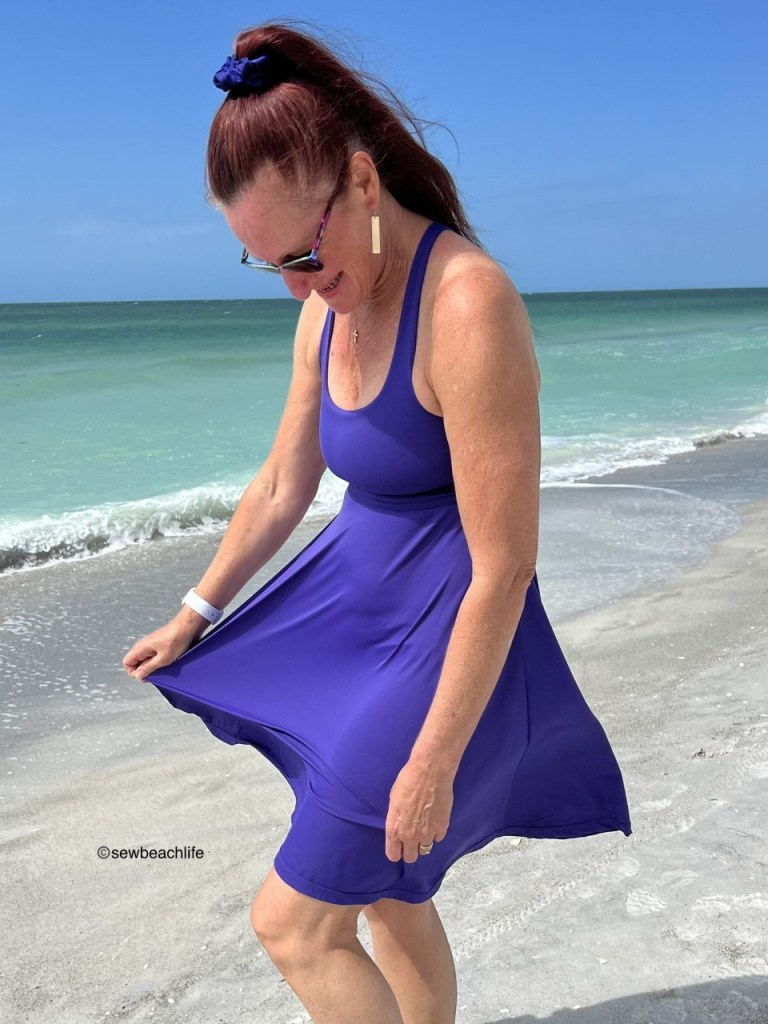
Why does it always seem to be windy when I try to take photos of a new make?
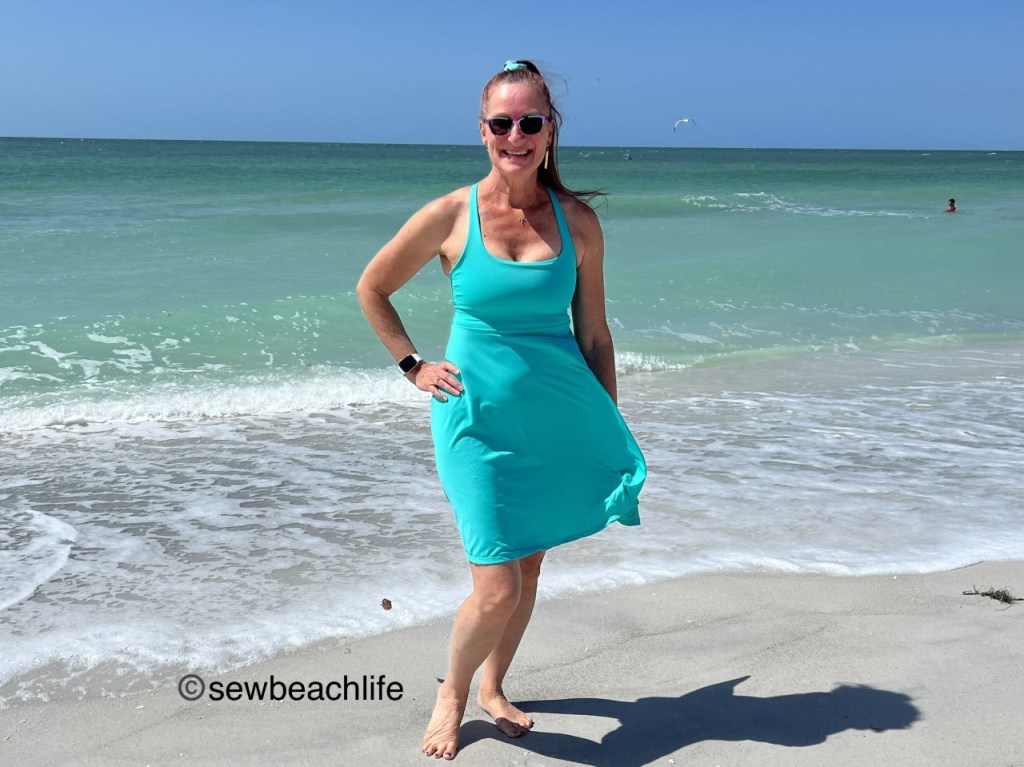
Having this bra pattern turn into dress just makes me so happy! I love, love, love it! The half circle skirt is swishy, but not too full. It’s super easy to get dressed for the day when you can wear a dress with a built-in bra. The knee-length option hits in just the right place, even on a taller girl like me.
I know some people get frustrated when trying to hem a knit skirt with a curved hem, but here’s my not-so-secret tip to make it easy: serge around the raw hem of the skirt with a 4 thread overlock with a stitch width of M, stitch length of 2, and up the differential to 1.5. This will slightly gather the hem, curling it up, which helps it to lay flat to hem. Then I like to pin up a 5/8″ hem and coverstitch it. It turns out perfect every time. Make sure to follow up with a nice press for a professional finish.
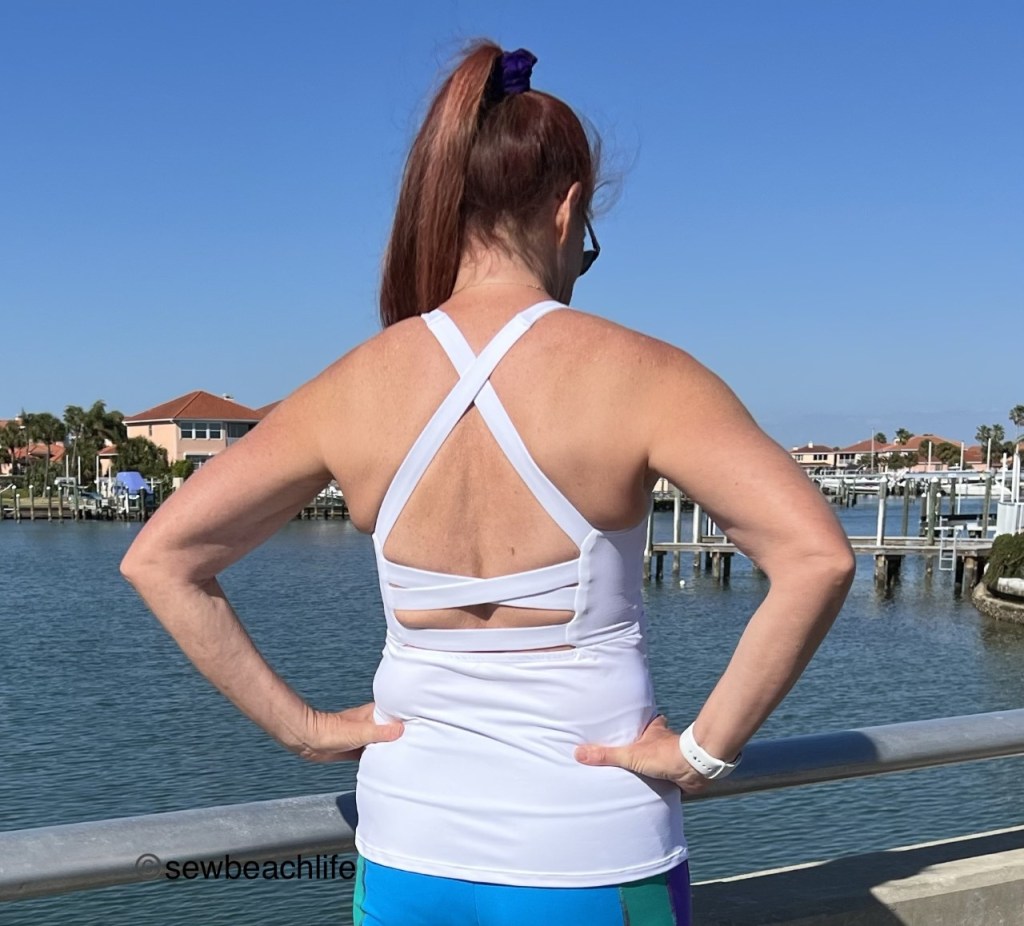
The criss-cross straps show just enough skin to look and feel sexy. Combined with the supportive front, it’s definitely a confidence boosting look for me.
Obviously one dress wasn’t enough for me, 😉 so I’ve already made two. I’m contemplating over what fabric I should try next. The turquoise dress is a nylon spandex tricot (swim) fabric. The purple dress is a nylon spandex circular knit. Both fabrics were purchased from Phee Fabrics a while back, so I don’t know if these particular colors are still in stock. It’s important to use fabric with good stretch and recovery (rebound factor) so that the bra fits well and stays somewhat firmly against the body. If you have a larger cup size, I also recommend using powernet. Though it is optional, I like the extra bust support it provides.
No matter how far forward I lean, I still feel supported.
I can wear my dresses to walk the beach, or go to the grocery store, or out to dinner. (If it’s at a restaurant that has gluten and dairy free food that’s safe for me to eat!) which is quite the challenge for me. My journey of food allergies deserve a discussion of their own on Sew Beach Life, and will probably be my next post.
The Spellbound Bra and Dress is flattering whether I’m sitting or standing. Even on a windy day! 🙂 There is a peplum top cut line on the skirt that will turn the bra into a cute, casual top. But I go to yoga class four days a week, and a flowy top isn’t practical for forward folds and headstands! 🙂
If you follow my page, you know that I can never leave a pattern well enough alone. Especially a pattern that I love as much as this one! So I had to turn this bra into a workout top. I mashed it with the Versa Cami and came up with something fun.
I wanted the front to be one piece, without a seam between the bra and body of the top. The back of course, has to have a seam.
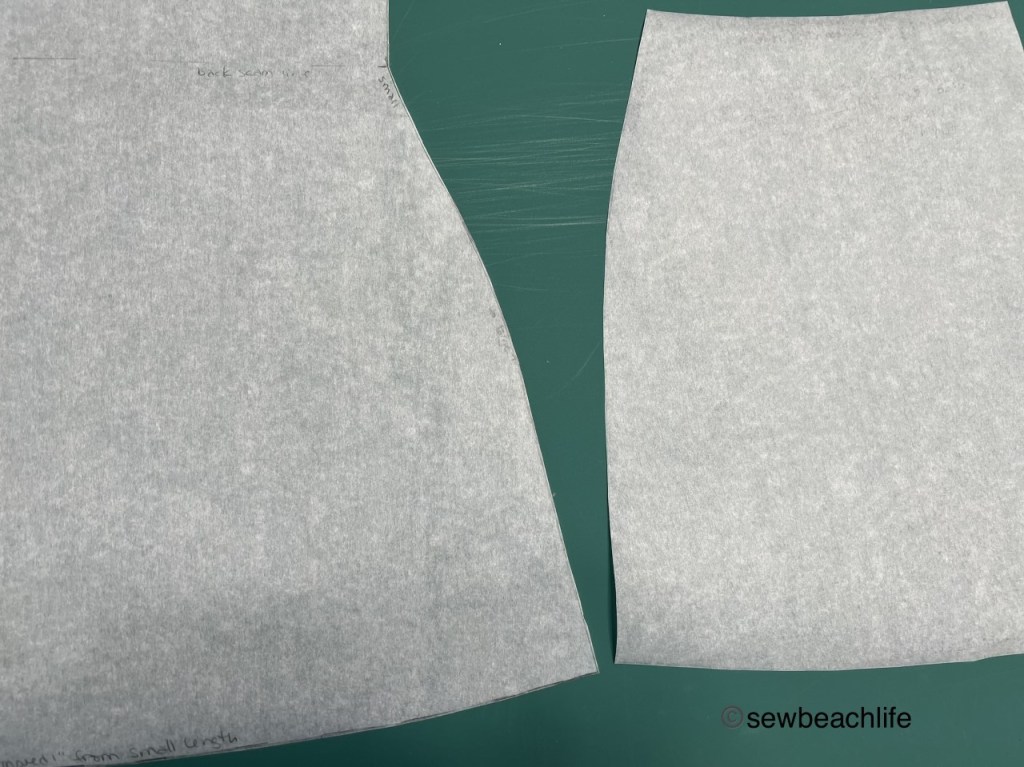
To get the front pattern piece, I lined up the front of the Spellbound at the lining cut line with the front of the Versa Cami at the shorten or lengthen here line on the pattern piece. Once I traced down to the bottom of the bra front piece, I started grading out for my hips. My grading went from small to large, and I removed one inch from the small length and large width at the hemline.
To get the back pattern piece, I started at the shorten or lengthen here line on the Versa Cami, and graded out for my hips. Originally, I just went straight across and cut on the shorten/lengthen line. But after sewing it up, I realized that the straight line gave me too much fabric at center back, and didn’t show the same amount of skin that the dresses show in that area. So I refined the pattern piece and used the curve from hem of the Spellbound skirt at the top of my back piece. In hindsight, I’ll probably just use the top curve of the skirt for the top curve of my top on the next one. My grading went from small to large, and I used the small length and large width at the hemline. You may be wondering why I shortened the front piece an inch but not the back. Two reasons: I like my workout tops to hit at hip level (the Versa is a bit longer than that); and because the back has a 1/2″ seam whereas the front doesn’t.
The pattern pieces I created to hack the bra into a workout top.
As always, I don’t show full pattern pieces out of respect for the designers hard work in creating a pattern. But I am showing enough for you to see the smooth curves of my grading. The front pattern piece is on the left, and the back pattern piece is on the right. A French curve ruler is a very helpful tool for grading and adjusting pattern pieces.
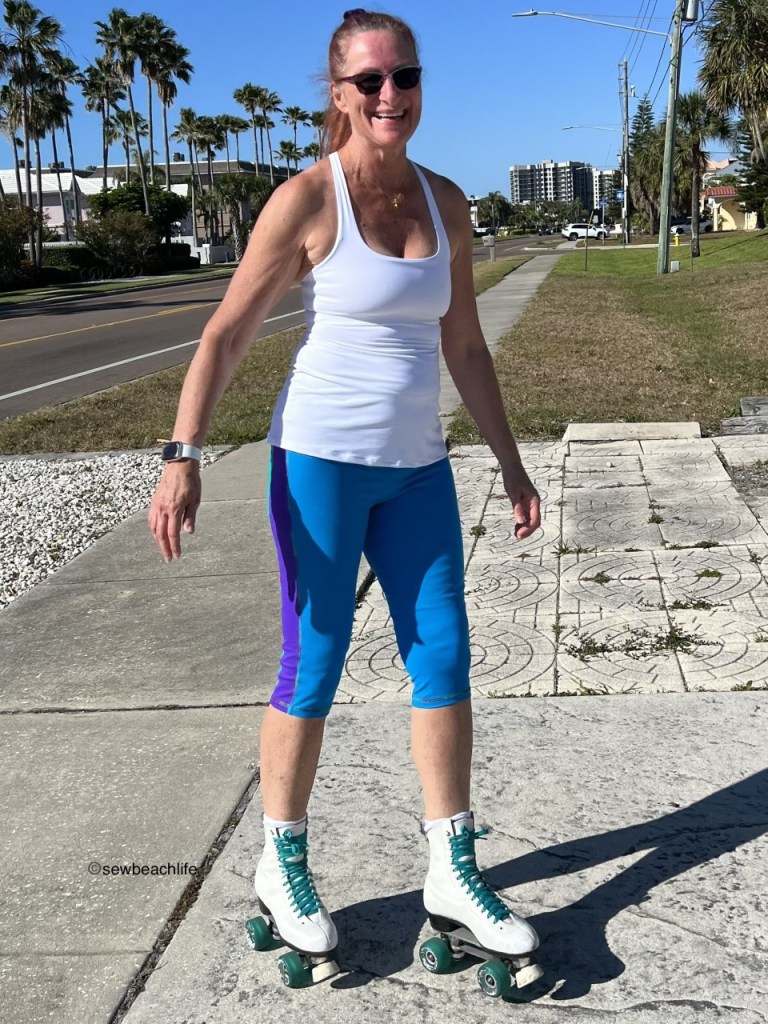
I wear my workout top to skate around the neighborhood as well as to yoga class.
The top is sewn together by following the tutorial for the Spellbound bra up to the point of hemming, except for one thing. When sewing the bra front (turned into a workout top) piece to the bra side piece, don’t sew all the way to the bottom of the side piece. Stop 1/2″ from the bottom to leave yourself fabric for the back seam. Then snip tobut not through the stitching line. This will allow you to press the seam toward the back and top or coverstitch as per the tutorial. You’ll sew the bra lining front and side pieces together as per normal.
I changed the construction of the Spellbound bra lining piece a tiny bit to suit my preferences. I am longer than average from shoulder to bust point and needed to add 5/8″ in order for the elastic to land in the perfect spot under my bust. Although a higher cut line was added to the pattern, my unique body shape requires the elastic lower because I needed the entire bra to slide up, not just add height at the front. This is a common alteration I have to make on a lot of tops and dresses, not just this specific pattern. Just one more reason that I sew- I can make clothing that fits my body. Because I don’t like elastic touching my bare skin, I added another inch so that I could flip the elastic up and have fabric against my skin.
I cut my powernet at the original lining and powernet cut line and the bra main fabric is cut at the original bra cut line. The bra lining is the only piece that I lengthen.
As per the tutorial I basted the powernet to the wrong side of the lining piece. Here’s where I go rogue from the pattern tutorial: I serge the elastic to the wrong side of the lining, then flip it up to fully encase the elastic. Use plenty of pins to hold the elastic in place and coverstitch.
Notice how the serged elastic overlaps the bottom of the basted-in-place powernet?
After top or coverstitching the edge of the elastic in place, remove the basting stitches along the bottom of the powernet. I purposely don’t lengthen the powernet to the same length as the lining because I don’t want the bulk and stiffness of the powernet in the enclosed elastic. It just needs to be long enough to get caught in the topstitching.
My other tip involves the straps. Once you’ve threaded the elastic through the straps, zig zag both ends of the straps to ensure that the elastic stays aligned with the ends of the straps.
You’ll notice how helpful the zig zag basting is when you are pulling the top straps through the bra, and when you’re criss-crossing, pinning, and stitching all the straps at the back.
Here’s how the straps on the workout top hack look once they’re stitched in place.
There are a couple of things to notice in the photo above. First is the clean finish of the enclosed elastic on the liner if you choose to go rogue like I do. The second item of note is the snip on the side seam that will allow the back bottom piece I made be stitched in place.
I add 3/8″ knit elastic along the top of the back workout top or skirt piece. I don’t take the elastic all the way to the side seams, because I don’t want bulky seams. It’s just there to give a little stability to the top of the back of the skirt or workout top bottom back piece. Once the seam connecting the bra to the skirt or workout top back bottom is complete, I fold the elastic down, pin it in place and coverstitch it.
Coverstitching is probably trickier than topstitching in this small area, but I’m so used to working with my machine (I coverstitch a lot) that it isn’t a big deal to me. Either method works and will give nice results.
After that it’s just pinning and stitching the bottom half of the side seam and hemming your new top! You can wear it to the gym, to yoga class, or to skate around your neighborhood.
Even though I skate on a somewhat regular basis, it’s hard to keep from rolling when you’re trying to get photos on the slope of a bridge!
In case you’re wondering what capri length leggings I’m wearing, they are the Stitch Upon A Time Legend Leggings, posted about here. They’re getting a little too big, but I still like them. I should take them apart and make them in a smaller size.
Trying to get nice photos on the beach on a super windy day when it’s not even 60 degrees F makes for some interesting shots!
Luckily the next day was warmer and I got to go for a little skate around the neighborhood.
Whether you make the Spellbound bra, peplum top, or dress version, or play around with my idea of a Versa Cami hack, I’m pretty certain that you are going to love this pattern as much as I do!
Thank you for reading and sharing my love of creating, sewing, serging, great patterns, pattern hacking, fabric, and making beautiful, well-fitting garments! ❤
The links to Stitch Upon A Time may be affiliate links, which means that at no extra cost to you, I may receive a few pennies if you purchase through my link. As always, I only give my honest opinion. After all, it is my blog, which represents me!
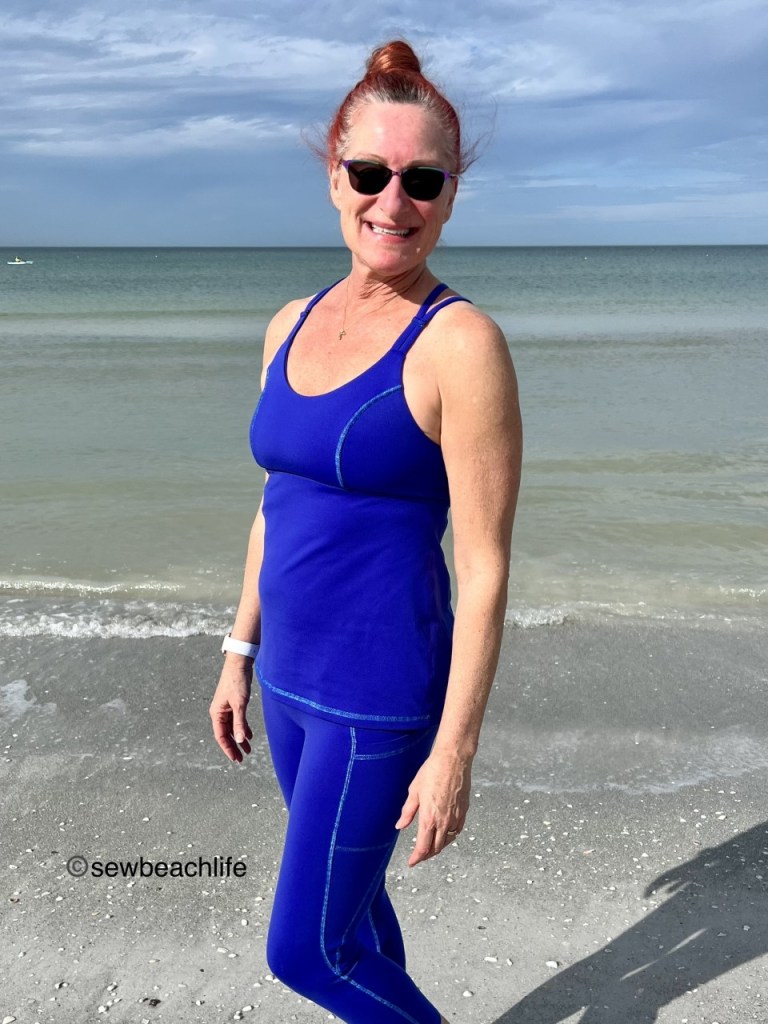
It’s never a bad time to sew yourself some new workout wear, but losing some weight necessitates making new items that fit! My drawer full of workout wear is nearly all too big. Going to yoga class 4 times a week means that I need multiple outfits that fit.
Obviously making new workout wear is much more fun than seam-ripping apart your reverse triple coverstitched old outfits, cutting them down to a smaller size, and then re-sewing them! So I traced off a tried and true pattern (the GreenStyle Power Sports Bra) and tried a new pattern (the Sinclair Flex Leggings).
As a sewist, I always notice when someone in yoga class is wearing a new style. Several women had worn workout leggings with a deep V side panel with pocket, and I knew just the pattern to try. Sinclair Patterns is known for well drafted patterns that include petite, regular, and tall options in their files. There are quite a few Sinclair dresses, skorts, shorts, and tank tops in my wardrobe. They aren’t necessarily known for workout wear, but the Flex Leggings pattern is super cute, so I had to give it a try.
With no center front seam, the leggings fit smoothly across the abdomen and hips. The color-blocked V side inserts can include a pocket, which in my mind is a necessity. The pocket is deep, as in deep enough for even the largest phone to fit securely down into the pocket. I wore my leggings to Christmas dinner at my sister-in-laws house, and my phone never felt like it was going to fall out of my pocket. Of course I had my phone in and out of my pocket all day capturing moments with people that I love! (There’s one of us in every family 😉 and people sort of count on me to catch a few photos to share!)
Me, my sister-in-law, and niece.
This candid photo really highlights how much taller I am than my sisters-in-law. It also highlights the shenanigans present every time we get together! 🙂
The above photo also illustrates the only thing I disliked about the pattern. I need a contoured waistband, and always serge 1/4″ clear elastic into the top waistband seam in other patterns. The front and back waistband pieces on the Flex pattern are contoured, but fold-over. I added powernet to the front waistband piece, basting it to the wrong side of the fabric before sewing the waistband pieces together. Even with a double layer of powernet (since the piece is folded over) the waistband slid down all day long.
In all fairness, the tutorial does include optional directions to add narrow elastic threaded through buttonholes in the inner side of the waistband that could be tied to fit. I own one pair of Athleta leggings with an inner drawstring that in the past I have never bothered to tie. Since I’ve lost weight, I currently have the drawstring pulled tight and tied in a knot. But with a smooth front and smooth waistband, I didn’t really want a knot of elastic bumping out in the front. So I unpicked a small section of the waistband to leggings seam, inserted 1″ wide knit elastic, overlapped the ends by 1/2″ and zig-zagged the overlap, and serged the small section of waisband seam closed. I wore my new outfit to yoga class this week, and they stayed up perfectly! Problem solved!
Adding the 1″ wide elastic was the perfect solution! As always, I added a note to my pattern piece so I know exactly how long to cut the elastic (and remember to add it!) the next time I make these leggings!
As with every pattern, it is important to grade to fit your body. I have well developed calves (thanks to skating and yoga), so I knew I needed to grade my pattern pieces. The size chart doesn’t include calf measurements, but I’ve made enough workout wear and know my body shape well enough to estimate that my calves are about two pattern sizes larger than my hips. My knees are slender and I wanted to ensure that the leggings didn’t get baggy at the knee, so I started my grading just below the knee.
A french curve ruler is super helpful for making smooth transitions between sizes. The ruler helped me make a gradual curve on the outer seams of both the front and back pattern pieces from a size 8 out to a size 12 below the knee.
Since I couldn’t know for sure whether my grading was perfect or not, I basted the outer leg seam and tried the leggings on before serging the seam and reverse triple coverstitching. No one wants to have to seam rip that as an experiment! The grading ended up being just right, and now that I have the pattern perfected for my body, future pairs will sew up much more quickly!
These are the 7/8 length, and of course I want to make a pair with the lower leg color-blocking. So I’ll have to play around with transferring my changes to the color blocked pattern piece. What fun is sewing if you don’t challenge yourself, right? 🙂
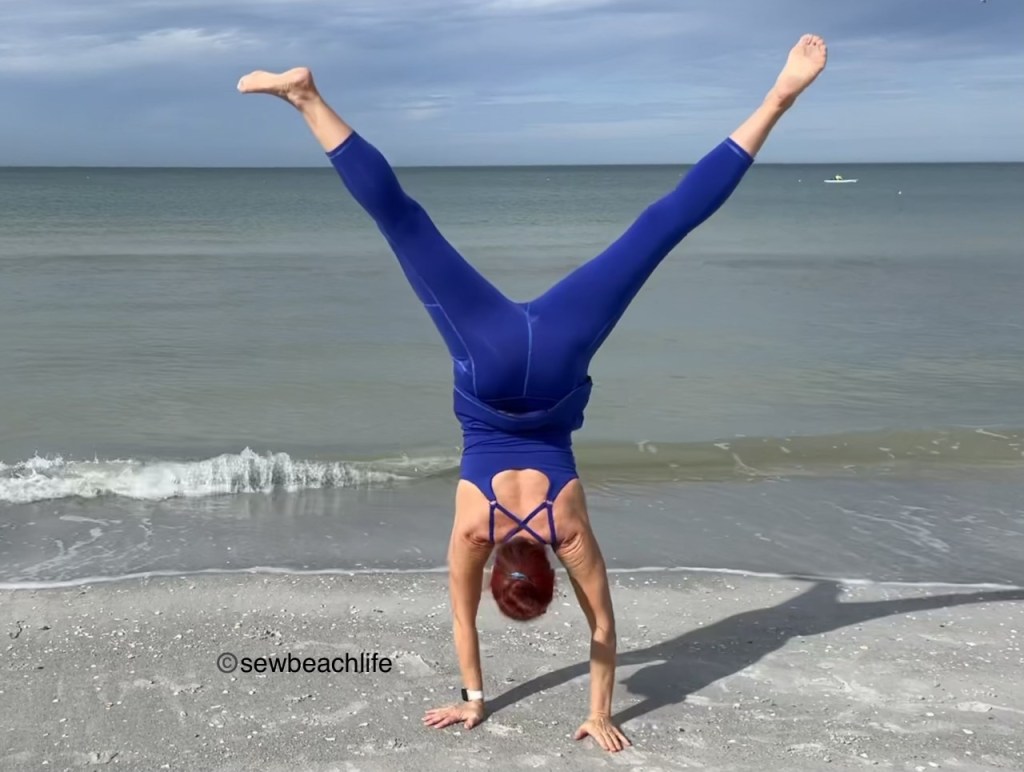
I also like to challenge myself to see if I can still do a cartwheel. Yoga has kept my body strong and maintained my balance. Apparently it is also amusing/fascinating to watch a Grandma do numerous cartwheels while being photographed. As my husband finished our photo session a young woman lounging nearby at the beach smiled, nodded, and gave me a thumbs up. 🙂
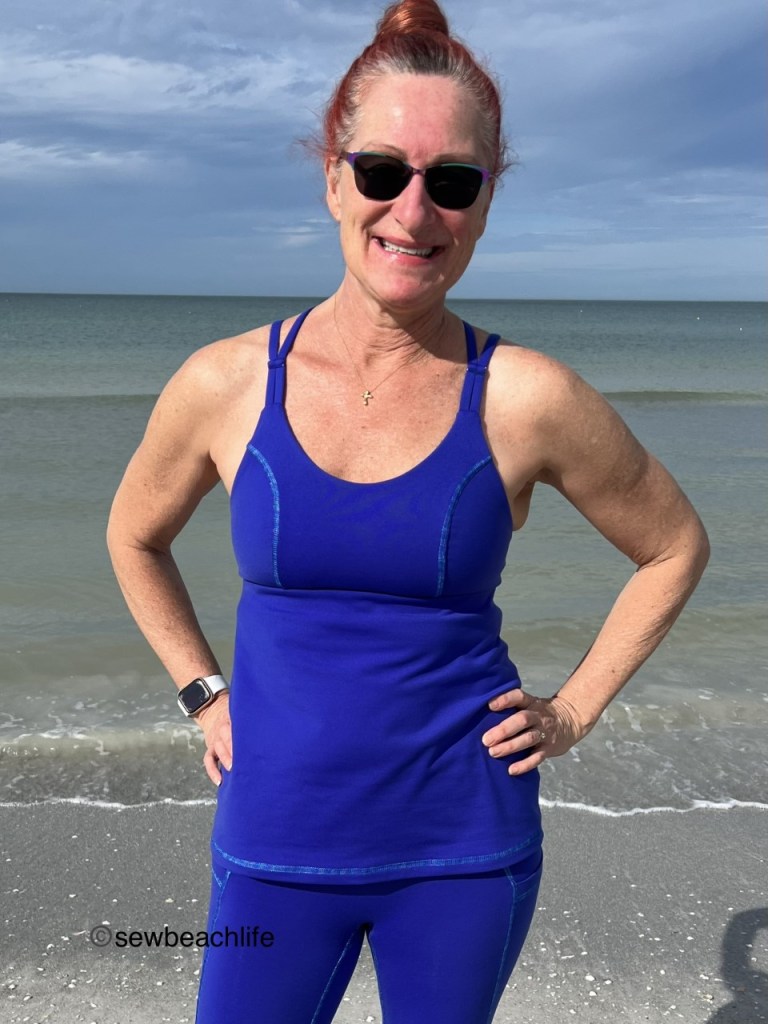
The Power Sports Bra is a staple workout and/or swim top pattern for me. Women with smaller cup sizes can get away with flat front bras/tops, but a fuller bust is curvy and princess seams are great for fitting smoothly over your bust projection. I love playing around with it and trying new hacks. Doing double narrow straps with a criss cross was a fun, easy hack. It’s important to take your measurements and compare them to the size chart on a regular basis. I started by tracing my pattern in a smaller size. Previously I’ve used the 34 band size in cups E/F. The F is a little too high in the armpits, so I blend the E and F. My current measurements put me in a 32F. But my bust is fuller at the bottom than at the top. So I take away a bit of the upper curve on the side cup piece. Customizing the pattern pieces to fit your body is the key to a perfectly fitted garment.
Perfectly fitted princess curves fit smoothly over the bust with no puckering at the seams.
Porcelynne has some really pretty rainbow finish rings and slides that I wanted to incorporate into my top. Generally I use wide straight straps on the U-back Power Sports Bra because I don’t like straps pulling on my traps or up near my neck. I’ve found that I need the 1″ wide (final size) straps to be about 13″ long with either elastic or powernet in them, as in this post.
After cutting my four 1.5″ wide straps longer than needed, I zig-zagged 3/8″ knit elastic into the seam as shown here. It’s important to press your straps after turning, so they are as flat and smooth as possible. Also, pressing as you sew gives your garments a much more polished and professional finish.
Extending the strap connection point on the strappy U-back pattern piece by 1/2″ gave room to add the 3/4″ rings to the back by folding the fabric over the ring and stitching it in place. Then two straps were folded over each ring and stitched in place. The two outer straps were kept straight and the two inner straps were criss-crossed.
I love the fun shape the straight and criss-crossed straps form on the back. Kind of like a stylized W. I also like the muscles that I’ve developed over twenty years of doing yoga. 🙂 Not bad for a Grandma pushing 60, huh?
You control how close to the neck your crossed straps are by the placement of the 3/4″ slides. Slide them up, and the straps are pulled farther from the neck. Slide them down for maximum crossing. Once you’ve found the perfect placement for you, the straps get tucked into the bra front and stitched in place as per the pattern tutorial. My straight straps ended up 13″ long, and the crossed straps ended up 15″ long.
Using sliders not only adds a fun look, but gives you an option to slightly tighten or loosen the straps for comfort.
I’m definitely going to use rings and slides again because it’s just such a fun look! Making even a few small changes to a pattern is not only fun, it personalizes the pattern for your needs. I was also excited to try a new fabric called stretch eclon jersey from Mood Fabrics. Eclon is a brand name of nylon, and if you’ve read my blog before, you know that I am a big fan of nylon spandex. I avoid polyester, especially for workout wear because it doesn’t breathe and tends to absorb sweaty odors. Ewwww! Florida is usually hot, and my workout wear fabric needs to be moisture wicking.
I hope this inspires you to play with your patterns, and work towards a perfect fit as well as trying new looks.
I love the definition that reverse triple cover-stitching adds to accent the seam lines of well designed workout wear.
The details:
Sinclair Flex Leggings and GreenStyle Power Sports Bra, made of stretch eclon jersey from Mood Fabrics. This and several rayon spandex prints were my first purchase from Mood, so it’s a new supplier to me. I have to say that I liked all of the fabric that I ordered, except one (because it’s only a two way stretch instead of four way. Apparently I didn’t notice that in the fabric listing!)
The rings and slides were purchased from Porcelynne, along with some lovely nylon spandex fabric that I need to share. I made the cutest outfits for my granddaughters! Porcelynne isn’t new to me, I’ve purchased from her before but I don’t really think I’ve shared my makes using her findings before.
Seams were accented with a reverse triple coverstitch on my wonderful Babylock Triumph using Fantastico varigated thread #5028 Peacock Plume from Superior Threads in the looper using a stitch length of 3. Fantastico is one of my favorite threads to use for reverse coverstitching. It has such a beautiful sheen, and the short color repeat is perfect for adding a classy look to garments.
I’m very happy with my new favorite workout outfit, and will definitely be making more! Thank you for reading and sharing my love of creating, hacking, sewing, patterns, fabric, notions, thread, and making beautiful, well-fitting garments! ❤
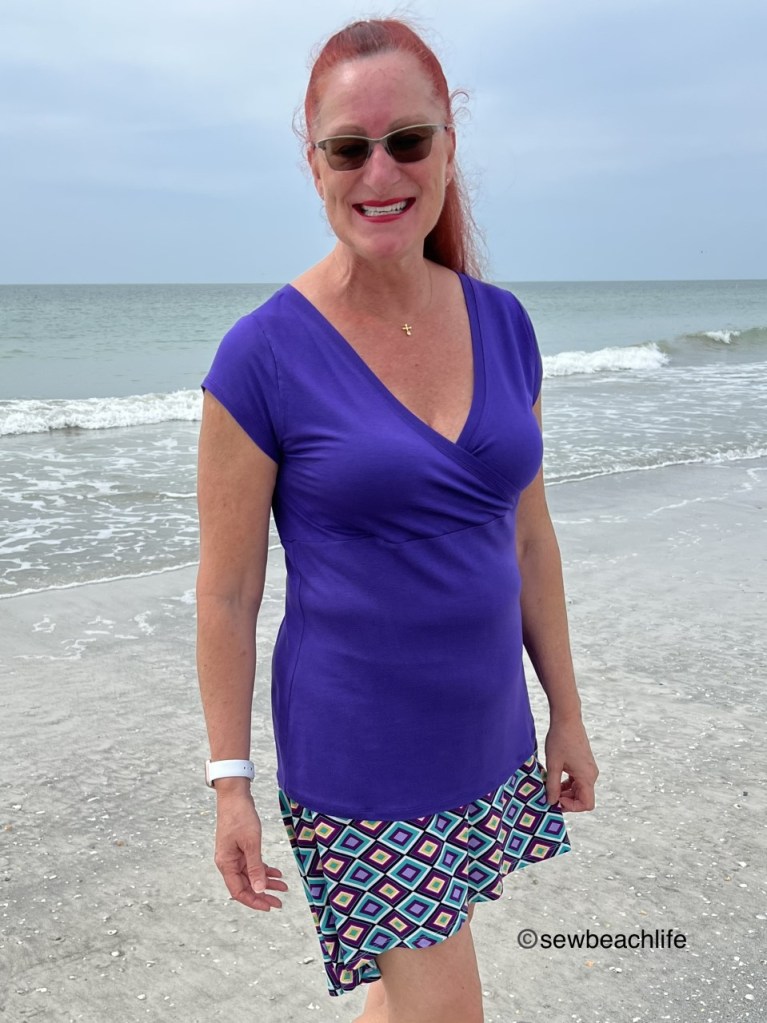
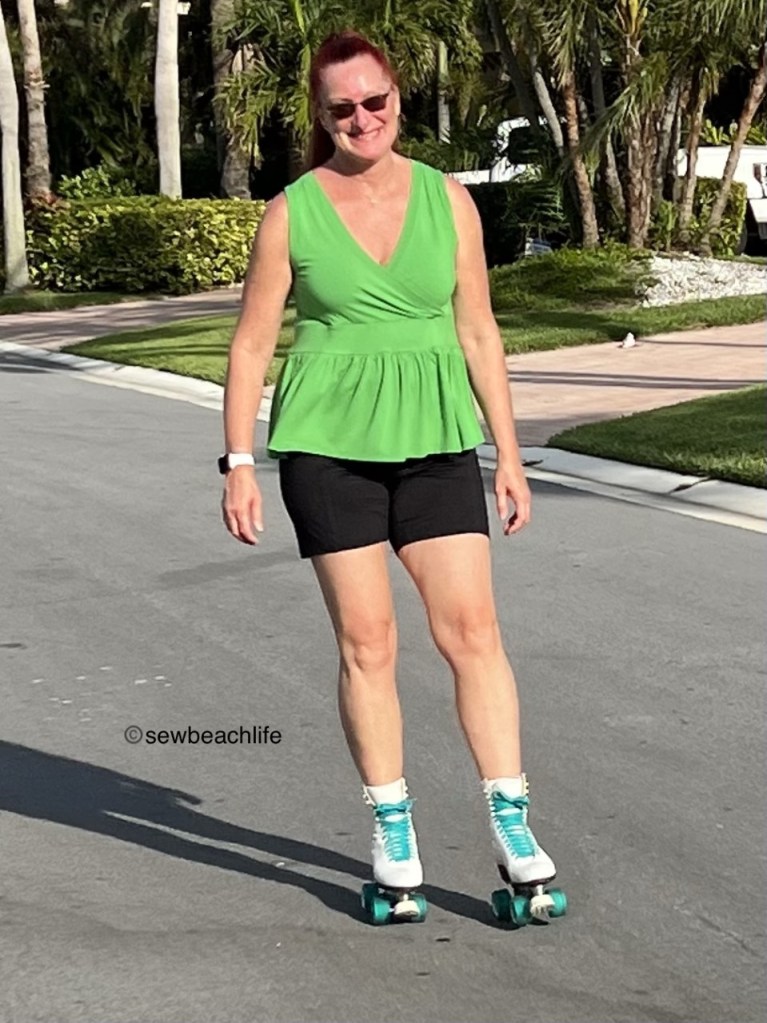
I love pattern testing in the spring and summer, because I love summer clothes! This makes sense since I live in Florida, which has about eleven months of summer, and a month or so of cooler temperatures. 😉 Patterns that have multiple options mean I can make multiple looks with one pattern. I could have gone for the simple scoop or V-neck tops, but I gravitated to the cross-front tops.
Cross-front tops are such a fun, flattering look if they fit well. It’s important that the cross-over doesn’t cut across the bust, but rather, falls below it. Yet the cross-over needs to be high enough to cover your bra. I want to look a little sexy, but don’t want super revealing clothes. This can be a tricky balance, especially if you have a smaller ribcage and shoulders, but a larger bust size. Thankfully, the Max Crop, Top, and Dress patterns includes regular and FBA cross-over pieces.
I love how the cross-over hits at just the right spot!
Testing for designers that listen to feedback from the testers, and make changes accordingly gives me more confidence in their skills. Yeah, they may have made samples, and done some pre-testing, but nobody is going to come up with a “perfect” pattern that fits every unique body. And something that works in theory, may need a little bit of tweaking in the real world. I’m not saying that designers should change everything about their designs, but if a similar issue is noted by several people, it’s probably worth taking a look at.
That being said, it’s important to be a good tester. Take accurate measurements so that you can choose the proper size. Use fabric with the correct stretch requirements (if garment is for knits) and drape/weight (for knit or woven patterns). Be honest in your fit assessments. This doesn’t mean rude or demanding, because hey, the designer is a human being, worthy of respect and kindness. It just means pointing out any and all areas of concern in an appropriate manner. For example, explaining that your shoulders slope more or less than the pattern; or that the bust is too tight/loose/low/high, etc., but the waist fits perfectly. It’s important to take good fit photos so that the designer can see whether the side seams are vertical, whether it’s pulling to the front or back, how the shoulders and sleeves fit, etc. Every body is unique, and though we may fall into the same size, even if sewn exactly per directions, the garment may look different on you than it does on me. The best a designer can do (when designing for a mass market) is get the best possible look on the most bodies in each size range.
See the nice vertical side seams?
That’s why it’s important, (and something you’ll learn as you sew and grow) to know your body. For instance, my shoulders slope a bit, and I am longer than average from shoulder to bust point. Some designers use a more sloped shoulder seam than others, but when I see a shoulder seam that’s nearly square, I automatically know that I’m going to have to increase the slope by raising the seam at the neck edge. If I just angled down from the original shoulder point to the shoulder edge, then the armscye won’t be deep enough for me, and the garment is going to cut into my armpits. This fit issue is way more common than you’d think. It’s worth the time to make tiny tweaks to a pattern so that it fits your body.
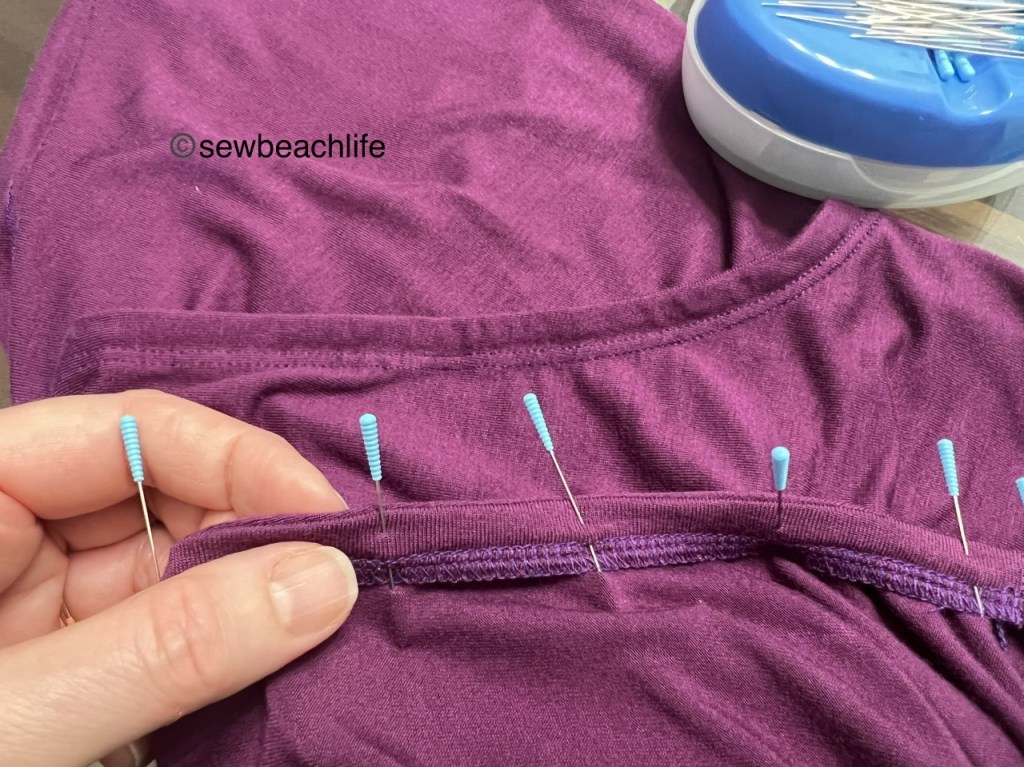
The Stitch Upon A Time Max has sleeve options ranging from cap sleeves, short sleeves, mid sleeves, to long sleeves. It doesn’t however, have a sleeveless option. When you live in a tropical climate, sleeveless is a favorite choice, and it’s not hard to hack to be sleeveless. You can do this to your pattern piece, but if you think you may want to use your pattern for a sleeved version later, it’s easy enough to do to with your garment already cut and sewn. Simply make marks around the armscye 1/2″ in from the raw edge. Trim off that 1/2″ of extra fabric.
A rotary cutter and self-healing mat make cutting and trimming so much easier!
I chose to finish my sleeveless looks with a faux facing. First, measure the new edge of your armscye and multiply that number by .95. I know that sounds weird, since bands and bindings are generally 87.5% of a raw opening. But keep in mind that this pattern was designed for sleeves, which have a much closer fitting armscye that doesn’t need to be “brought in”. The faux facing is just to keep the opening from stretching out of shape. Cut two strips of fabric 7/8″ high, with a width of 95% of the length of your armscye. (In other words, cut the strips so the greatest stretch of the fabric will be going around the opening.)
Using a four thread overlock with a stitch width of M, stitch length of 2, and the differential up to 1.3, serge along one long edge of each strip. Sew the short ends of each strip together with a 1/4″ seam allowance, and mark the quarter points of the raw edge. Mark the quarter points of each armscye and pin the facing to the armscye, only slightly stretching the facing to fit. Add additional pins as needed, then serge, right sides together with the same settings as above, using a 1/4″ seam allowance. Fold the seam allowance to the inside, slightly rolling it so that the facing will be completely hidden, and pin the facing in place. Then coverstitch from the right side.
Notice how you can see just a little bit of the bodice along the top edge of the pinned armscye at the bottom of the photo, while the facing is completely hidden in the coverstitched armscye at the top of the photo? It looks even better once it’s pressed!
One of my favorite looks from the pattern was the cross-front ruffle crop top. But I’m not comfortable wearing cropped length tops. And the height of the waistband piece was a bit too long on my body, looking more like a dropped waist. So I decided to shorten the waistband height so it would end at my natural waist. Then I added length to the ruffle so that it would fall at my high hip, rather than be a crop top. Of course I also made it sleeveless #becauseflorida, and it turned out so cute!
I immediately wore it out skating, and love the fun, flirty ruffle!
Besides yoga, skating is my favorite exercise. It’s great cardio, burns plenty of calories, and is just so fun! My neighborhood doesn’t have sidewalks except for out at a main road with busy traffic. So everyone walks, runs, rides bikes, or skates in the street. My skating route is determined by which streets have newer asphalt, and are therefore smoother to skate on. 🙂
Cul-de-sacs are always fun!
My husband usually rides his bike while I skate. He did a good job of snapping photos while riding! He keeps commenting on how fast I skate lately. I think I’ve gained confidence in skating on rough outdoor surfaces after only having (mostly) skated indoors on a smooth maple wood floor at the skating rink I grew up in. Although I recall skating in more than a few outdoor parades back in the day, the parade pace was definitely slow. I had forgotten how freeing it feels to have the wind in your face, listening to music and flying along like I used to fly around the rink as a child and teen.
Sleeveless tops are more comfortable when skating on a hot day.
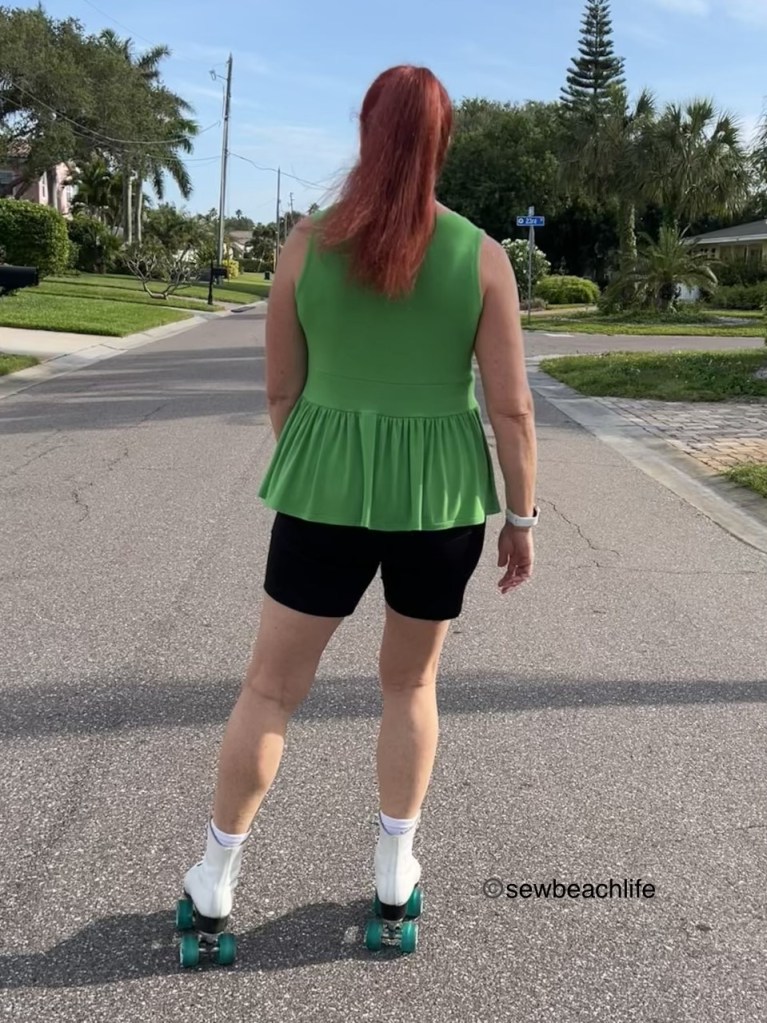
The back view of the Max top is just as good as the front. It’s such a nice, smooth fit. I’m quite pleased with the bodice shaping on these tops. Adjusting the shoulder slope to fit my body means the back lays smooth with no wrinkles or pulling.
I am loving the sleeveless look!
My next hack idea is to add a skirt to the cross front bodice without adding the waistband. I think it would look super cute too, although I’d probably serge clear elastic into the seam line when attaching the skirt to help keep it pulled in against the weight of a longer skirt. And perhaps a tiered skirt… Ah, so many ideas swirling in my head with this cute pattern! Which I guess sums up my feelings about the pattern. It’s a great base pattern with so many options, from simple V-neck or scoop neck, to cross-front, with cap, short, half or long sleeves. (Although it’s obviously easy to hack into sleeveless) 🙂 With lengths from crop, top, and ruffle crop, to dress.
Obviously I need more fabric to try all my pattern hack ideas!
Even the bird approves of my Max Top and Treasure Hunt Skirt! 🙂
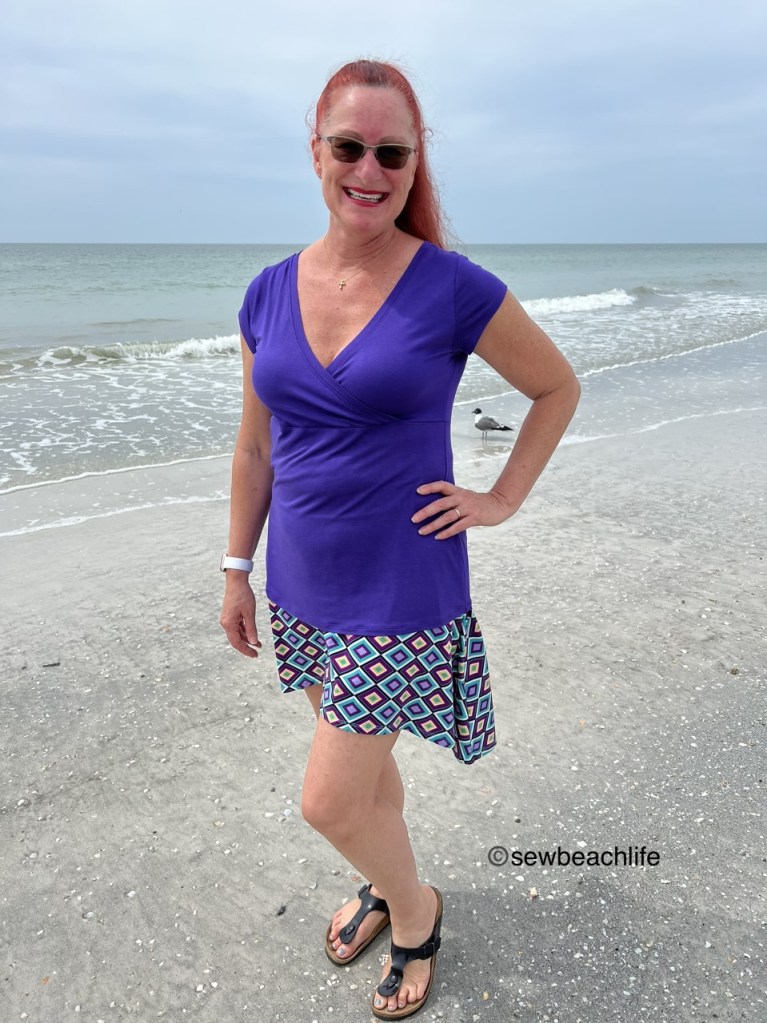
The details: The Max Crop, Top and Dress pattern from Stitch Upon A Time includes sizes XXS-6X. For reference, my hacked green ruffle crop top is size Large, using the Large FBA bodice. My purple cross-front top is a blend of Medium and Large FBA bodice with size Large lower top. The purple top is worn with the Treasure Hunt Skirt, which is blogged about here.
The lime green (and plum shown in my sleeveless hack photos) rayon spandex was purchased from Phee Fabrics. The purple rayon spandex is a lighter weight from my stash. It was probably purchased at JoAnn Fabrics years ago. Can you tell that I love bright, fun colors?
Thank you for reading and sharing my love of creating, sewing, patterns, pattern hacking, fabric, and making beautiful, well-fitting garments! ❤
The links to Stitch Upon A Time may be affiliate links, which means that at no extra cost to you, I may receive a few pennies if you purchase through my link. As always, I only give my honest opinion. After all, it is my blog, which represents me!