
When GreenStyle Creations comes out with a new leggings or tights pattern I get excited. Their patterns always fit me so well, and I always need more workout wear. 😉 I bought the pattern, but made myself finish sewing up outfits for my granddaughters before making something new for myself. Grandma love, you know?
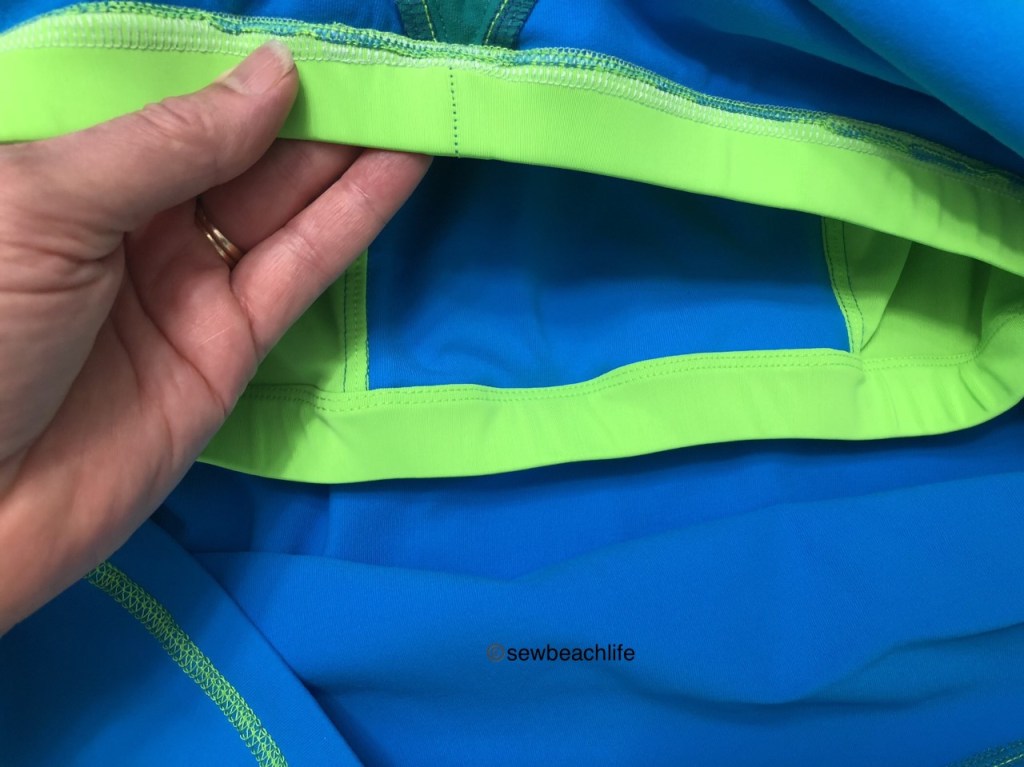
The Spark Tights have a nice gusset, not quite as big as the Super G gusset, but big enough to provide excellent range of motion for yoga class. The pockets are generous, plenty big for even an oversized phone.

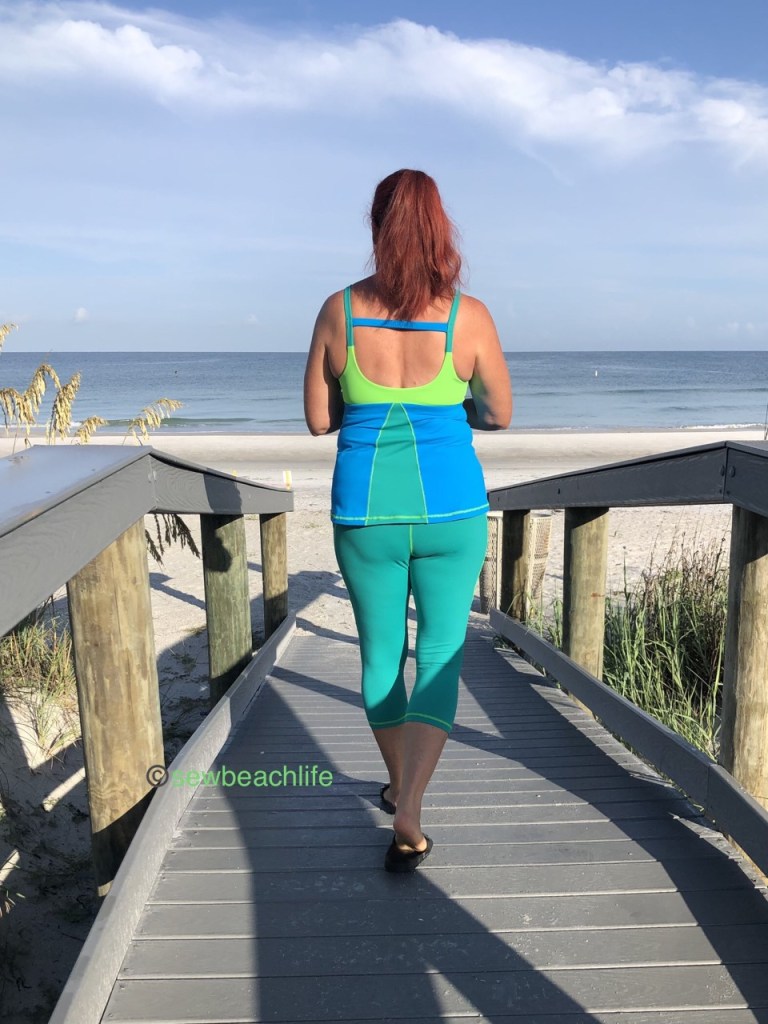
The back of the tights have a “bridge” section for shaping that curves down for the pockets. Sewing it reminded me of the sewing the Motion Shorts for my husband. I love that it’s a perfect opportunity for color blocking.

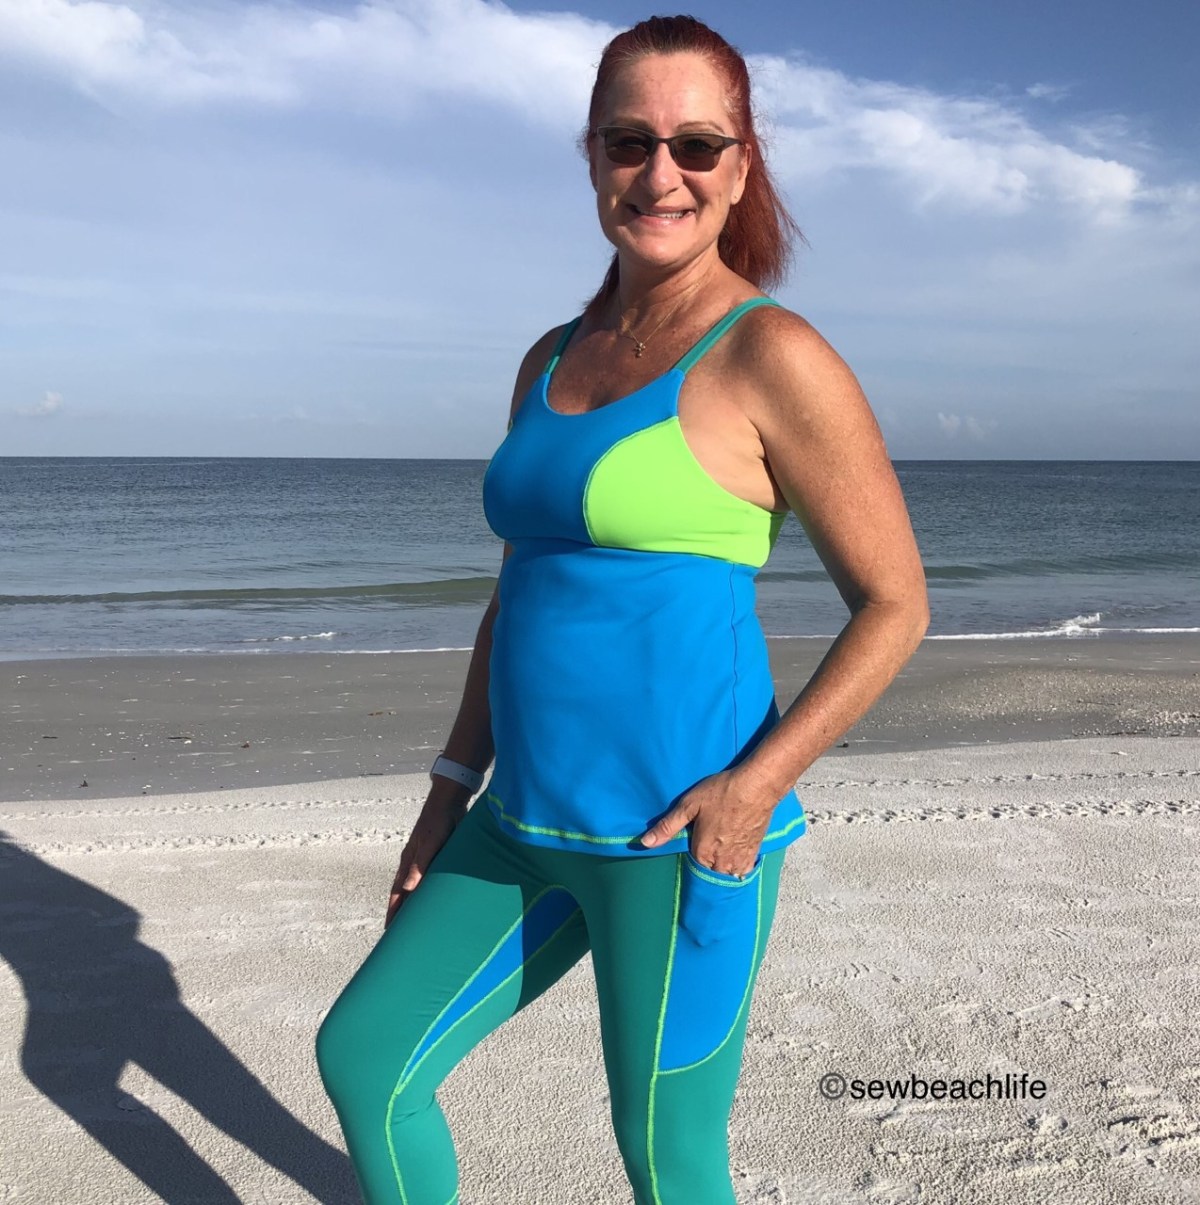
The smooth fit of the legs is another hallmark of the excellent drafting of this pattern. I live in Florida, so I love capri length for my workout tights. The pattern includes thigh and calf measurements so you can grade the pattern to fit your body as needed. I didn’t need to grade at all, and I love that the tights don’t ride up my calves when walking or stretching.

Now, let me tell you about my fabric struggles, or rather the lack of fabric struggle. I thought I had plenty of Supplex in my fabric stash. I originally planned to make some very simple black or charcoal gray tights just accented with scraps from a pair of my Simpatico Leggings, and reverse coverstitched with black thread. Yeah. I only had little scraps of black and gray, and not enough of any one color to make tights and a workout top. I could have just ordered some fabric, but I had already waited to start making the pattern, and didn’t want to wait any longer. So I got super creative with my color blocking.
I knew I wanted to hack a matching Power Sports Bra into a workout top to match my tights. I was working with less than a yard scraps. With a very careful layout and using three colors, somehow, it all worked out.
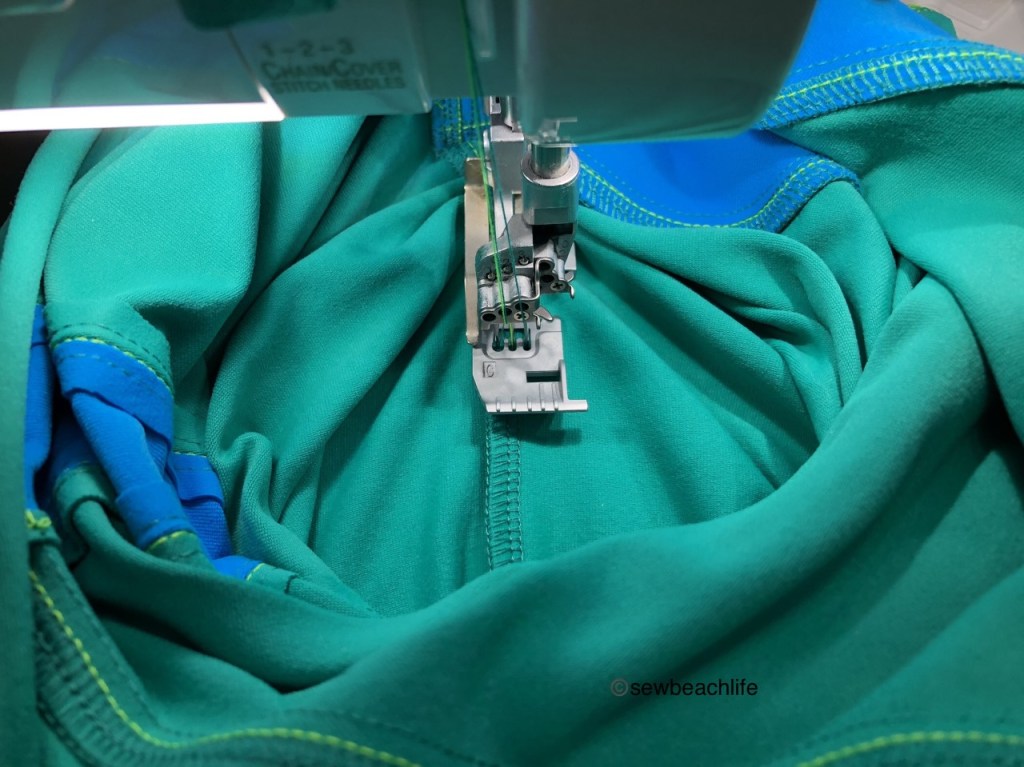
To tie the green and turquoise of the tights to the green, turquoise and neon green of the Power Sports Bra, I decided to use neon green thread to triple reverse coverstitch my Spark tights. Of course I only had two cones on neon green thread, so I used the neon thread in C2 and the looper. I used emerald thread in C1 and C3. Take the time to coverstitch as you go, and the last leg seam will be the only challenging one. Since I was reverse coverstitching, my needles are on the inside of the leg. Start at the top and work your way down toward the ankle. Stitch as far as you can, and keep adjusting the leg so that you can work farther and farther down the seam.
I’ve hacked the Power Sports Bra into a workout top before, but wanted a different look this time. And due to the aforementioned fabric shortage, the back of the top would need to be colorblocked. There was a scrap of green left from cutting out the tights that was shaped like a long curved triangle. So that scrap became the center back of my top.

Once a second line was traced 1/2″ inside the red line, the back body was traced from along the outer edges and over to the inner black line. This gave me a 1/4″ seam allowance for connecting the left and right body pieces to the center triangle. You may be wondering what pattern to use for the body. There are so many options! The Staple Tank, the Cami Tank, the Jillian or Lille Tanks. Which one(s) do you own and love the fit of? I like to add a bit of length to the center back of my tanks, curving up to the side seams. This gives me more booty coverage. If you love the way the Cami or Staple Tank fits, use it as is by folding the pattern under just below the bust, you don’t have to add length or a curve for the booty unless you want to.

Follow the Power Sports Bra tutorial for assembling the bra, but stop before adding the bottom band. You can use any of the variations, I chose the U-back version, but played around with the straps. There have been several discussions in the GreenStyle Facebook group about whether the straps can be made wider instead of strappy, and whether the bra can be made with straight straps instead of crossed in the back. The answer to both of these questions is a resounding yes!

To make the straps wide instead of skinny, cut out four strap pieces as directed, but instead of sewing each strap individually, stitch the straps in place in the back. Then when the inner and outer layers of the bra are stitched together, the two layers of straps got stitched together too. When turning the bra right side out, it helps to feed the straps through with a safety pin, just like you would normally turn straps. Instead of elastic, I used a layer of powernet in the straps, as well as in all of the bra pieces for extra support. Try the bra on, and adjust the straps to the proper length. You will be cutting off a lot of strap length since straight straps don’t need to be as long as crossed straps.

I added a scrap bit of strap crossways like an H just for fun. I’m thinking of adding another cross strap where the neon bra and green strap meet. But since I don’t have any more scrap straps, I’d have to make one. So it’s probably not going to happen! 🙂
Once the triangle was inserted in the back and coverstitched, the front and back body pieces were serged together at the side seams. Mark the quarter points of the bra, and the quarter points of the body, and baste them right sides together. To make the band for the elastic, cut a rectangle of fabric 2-1/4″ by the length of elastic needed. Overlap your elastic to form a circle, zigzagging to secure. Serge along one long edge of the band, then stitch the short ends together. The band and elastic should be the same length. With the elastic on top, serge the elastic on the wrong side of one edge of the band.

Then match the quarter points of the band to the quarter points of the workout top, pin, then baste in place. In the photo above you can see that the right side of the body and the right side of the bra are together. Then the right side of the band is on top of and facing the wrong side of the bra. Once it is serged, pull the basting stitches, and wrap the band around to enclose the seam. Pin it in place with the elasticated edge of the band not quite touching the seam line. Coverstich or top stitch it in place.
Now I’ve got a colorful, comfortable, and completely customized new workout outfit.

Made with all these colorful scraps, and hacked to perfection, you can see me coming or going from a long ways away! 🙂
The details: The Spark Tights and Power Sports Bra patterns, as well as fabric are available at GreenStyle Creations.
The green and turquoise Supplex was purchased from Phee Fabrics, as well as the neon green nylon spandex tricot and powernet used for the bra.
The neon green and emerald serger thread is MaxiLock. The thread and 1″ knit elastic were ordered from Wawak.
The beach photos were taken by my sweet husband. The yoga studio photos were taken by Jaida Christina Wellness.
The links to GreenStyle are affiliate links, which means that at no extra cost to you, I may receive a small commission if you purchase through my link. As always, I only give my honest opinion. After all, it is my blog, which represents me! Thank you for reading and sharing my love of creating, sewing, patterns, fabric, and making beautiful, well-fitting garments! ❤


3 thoughts on “Spark My Interest”