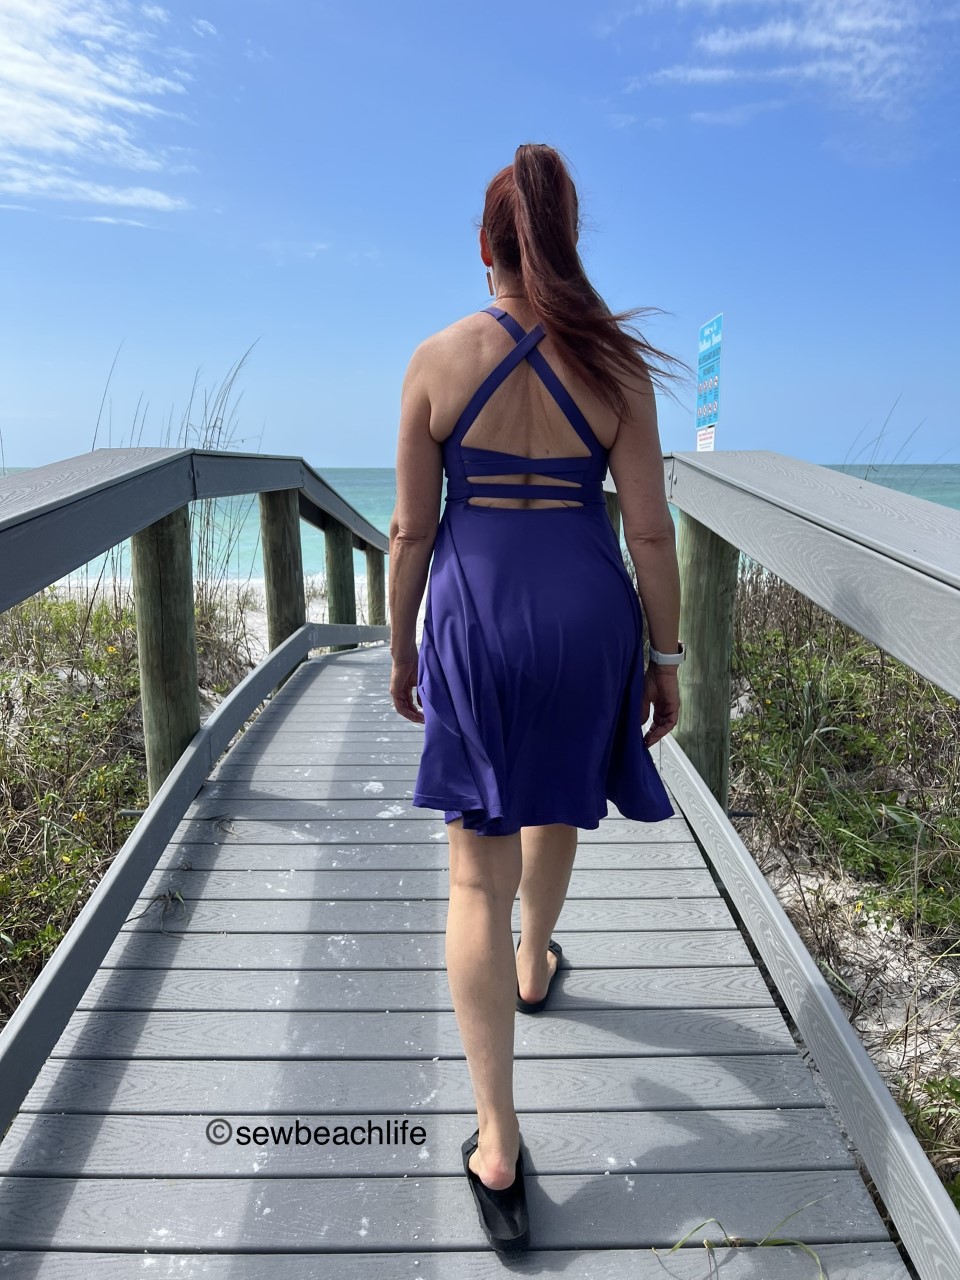
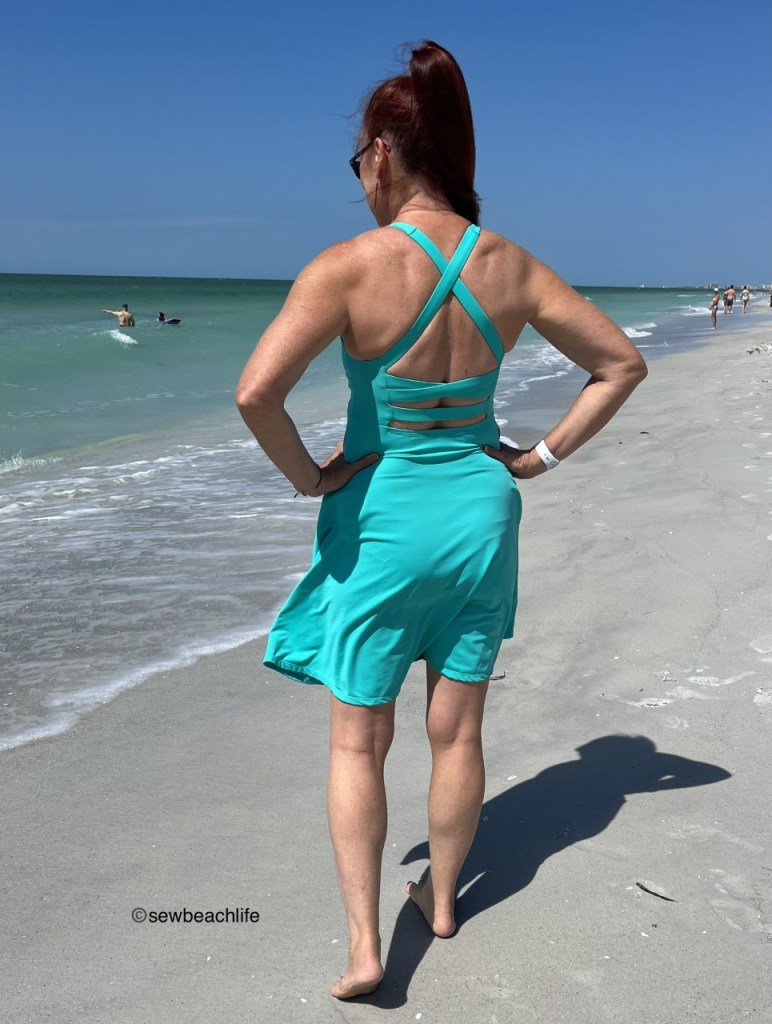
I’m pretty discerning when it comes to pattern testing, and only test when a pattern looks like something that would get a lot of wear. When I saw the tester call for the Stitch Upon A Time Spellbound Bra and Dress, I applied right away. That criss cross back is exactly what I’ve been looking for!
When you’re a bit busty, you’ve got to love a pattern that has cup sizes. Seriously! There don’t seem to be many designers in the .pdf (or paper) pattern world that include multiple cup sizes. Including cup sizes makes a pattern fit so much better. The Spellbound includes sizes XXS to 6X, along with cup sizes A-G (determined by the difference between your full bust and upper bust). Per the measurement chart, I made a size small D cup. The size chart on this is spot on, and did not require any grading. The strap lengths were perfect (which seems amazing to me because obviously there is a lot of math involved to get all five strap pieces the proper length for each size).
Although it is a shelf bra and relies upon compression, I feel quite comfortable with the amount of support. If you wanted to, I suppose you could add bra cups during construction, but I don’t feel the need to do so. This is coming from a girl whose regular bras have underwires, so that is saying something!

There are usually changes and updates during testing, which is kind of the point. A designer wants to ensure a great fit on real bodies in a wide range of body shapes and sizes. A higher neckline option was added for anyone that prefers a little more coverage. Another tester and I commented that we wanted to hack the bra into a dress, and Kelly (the designer) made that happen!
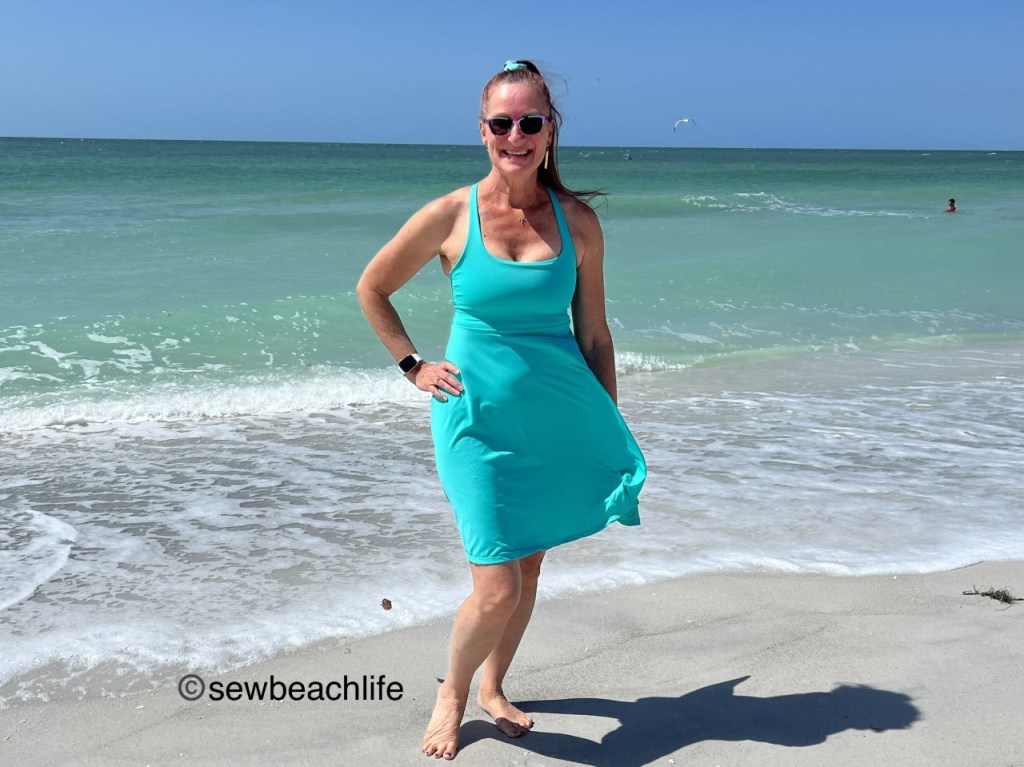
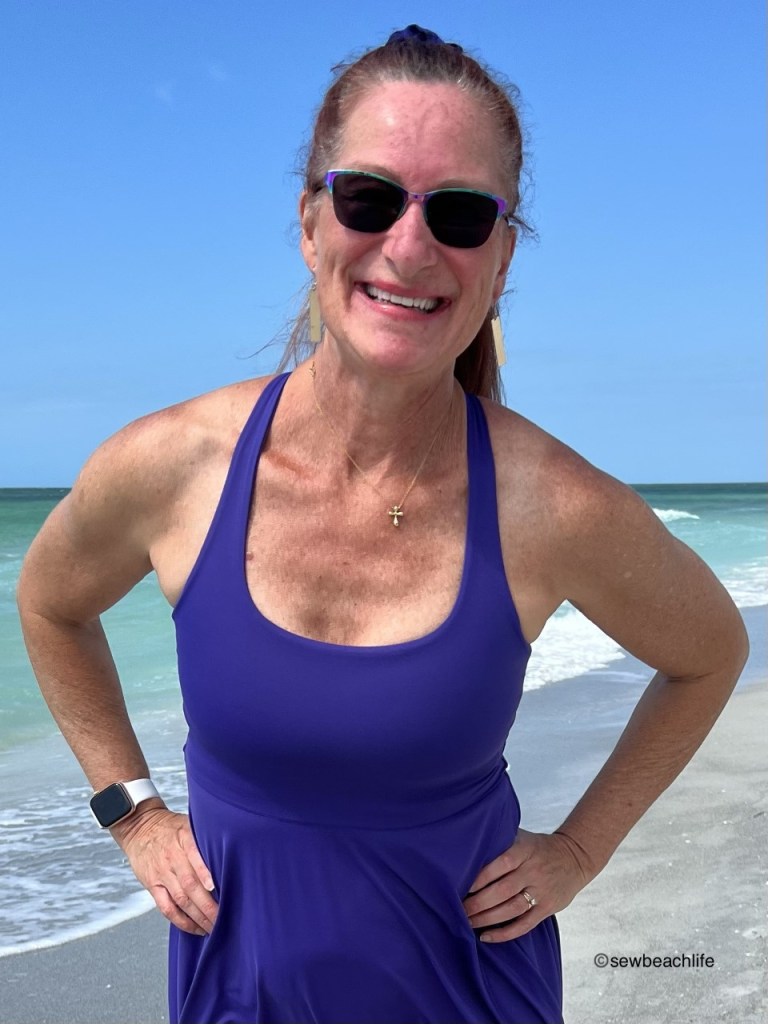
Having this bra pattern turn into dress just makes me so happy! I love, love, love it! The half circle skirt is swishy, but not too full. It’s super easy to get dressed for the day when you can wear a dress with a built-in bra. The knee-length option hits in just the right place, even on a taller girl like me.
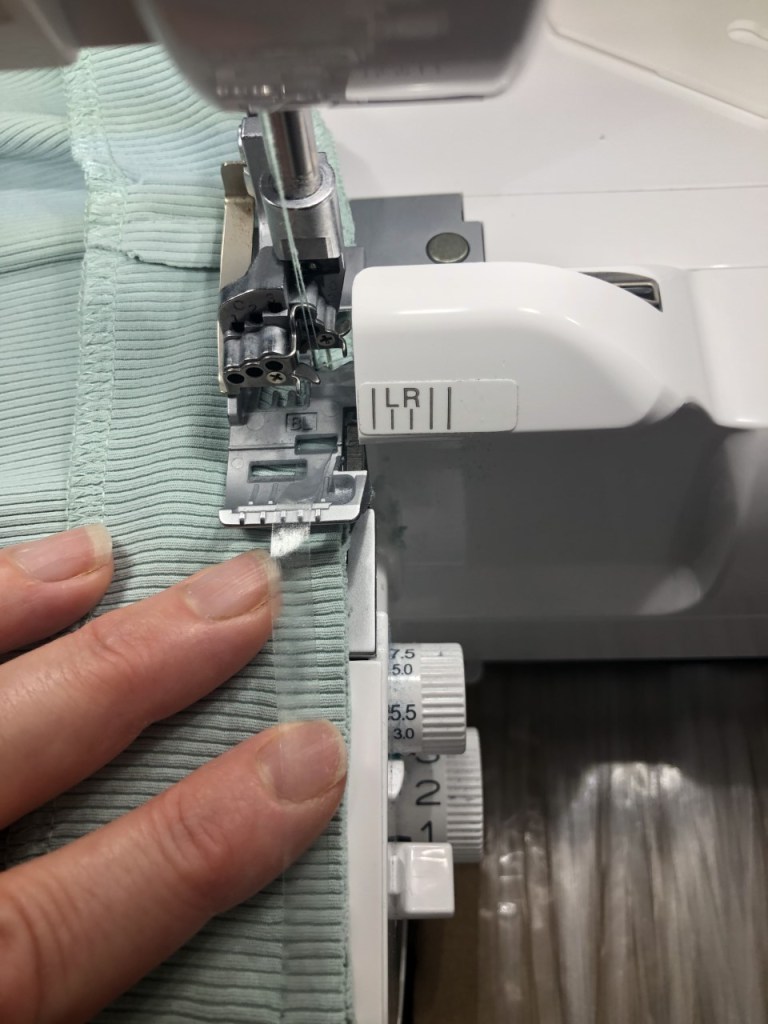
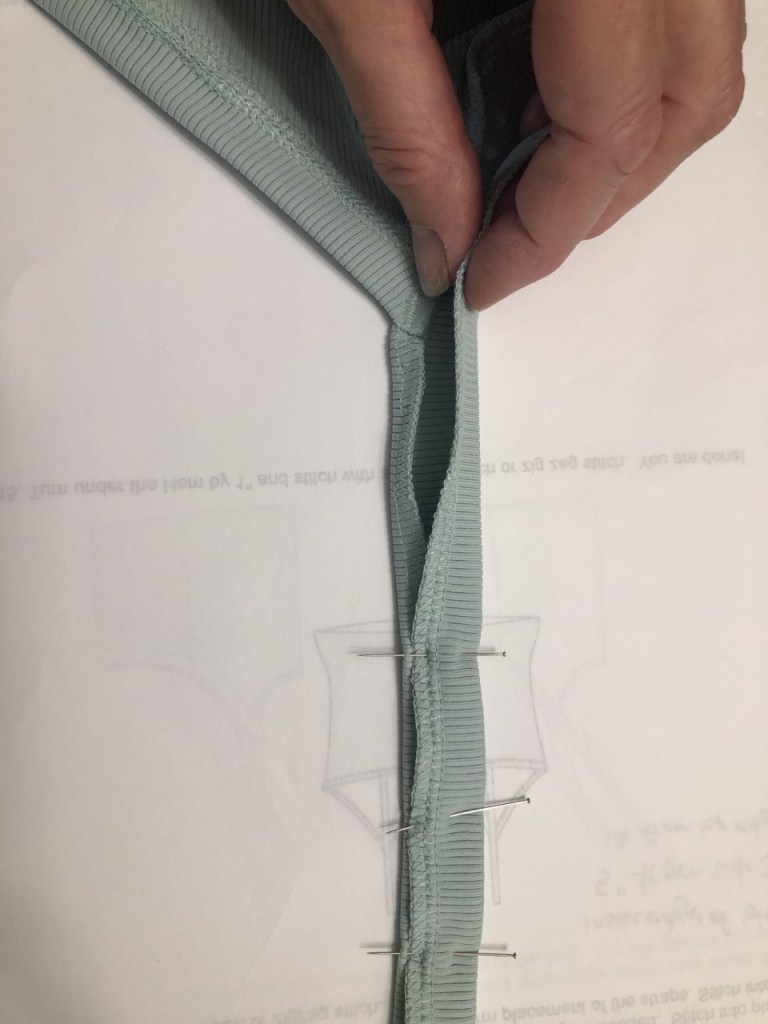
I know some people get frustrated when trying to hem a knit skirt with a curved hem, but here’s my not-so-secret tip to make it easy: serge around the raw hem of the skirt with a 4 thread overlock with a stitch width of M, stitch length of 2, and up the differential to 1.5. This will slightly gather the hem, curling it up, which helps it to lay flat to hem. Then I like to pin up a 5/8″ hem and coverstitch it. It turns out perfect every time. Make sure to follow up with a nice press for a professional finish.

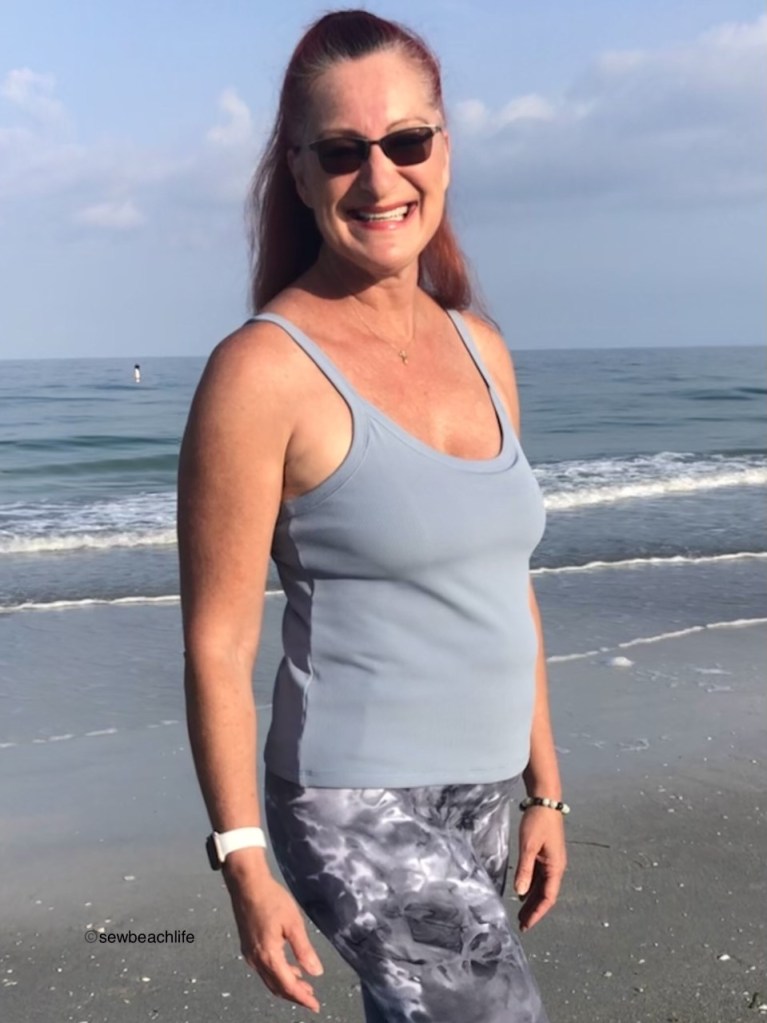
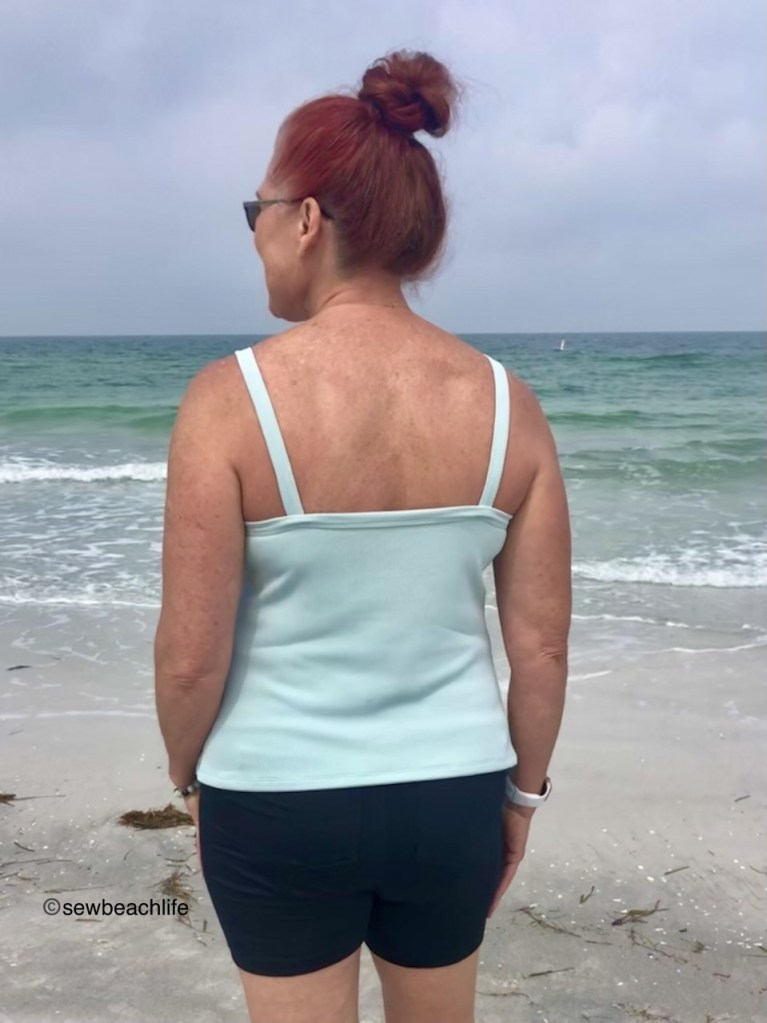
The criss-cross straps show just enough skin to look and feel sexy. Combined with the supportive front, it’s definitely a confidence boosting look for me.
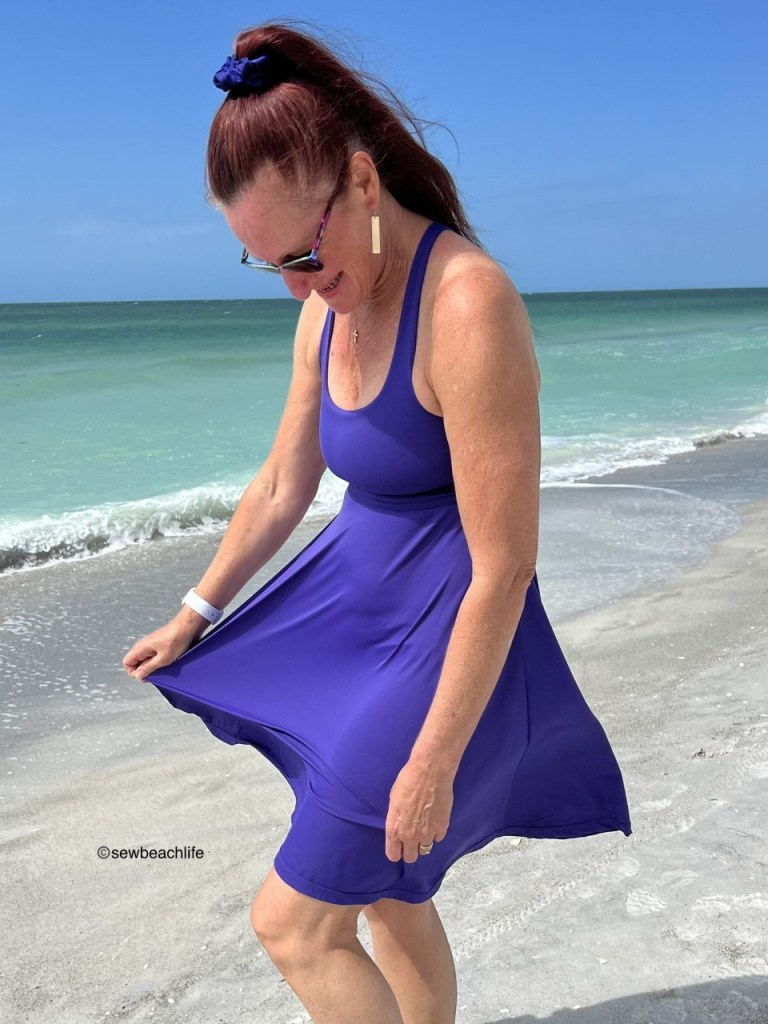
Obviously one dress wasn’t enough for me, 😉 so I’ve already made two. I’m contemplating over what fabric I should try next. The turquoise dress is a nylon spandex tricot (swim) fabric. The purple dress is a nylon spandex circular knit. Both fabrics were purchased from Phee Fabrics a while back, so I don’t know if these particular colors are still in stock. It’s important to use fabric with good stretch and recovery (rebound factor) so that the bra fits well and stays somewhat firmly against the body. If you have a larger cup size, I also recommend using powernet. Though it is optional, I like the extra bust support it provides.
I can wear my dresses to walk the beach, or go to the grocery store, or out to dinner. (If it’s at a restaurant that has gluten and dairy free food that’s safe for me to eat!) which is quite the challenge for me. My journey of food allergies deserve a discussion of their own on Sew Beach Life, and will probably be my next post.

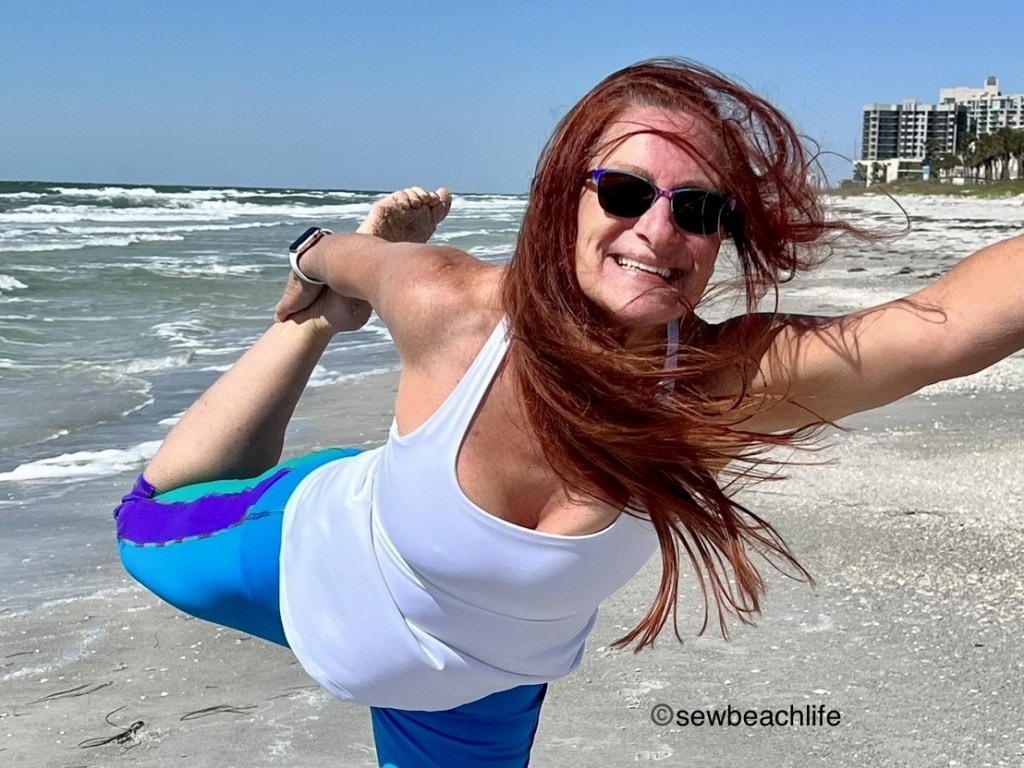
The Spellbound Bra and Dress is flattering whether I’m sitting or standing. Even on a windy day! 🙂 There is a peplum top cut line on the skirt that will turn the bra into a cute, casual top. But I go to yoga class four days a week, and a flowy top isn’t practical for forward folds and headstands! 🙂
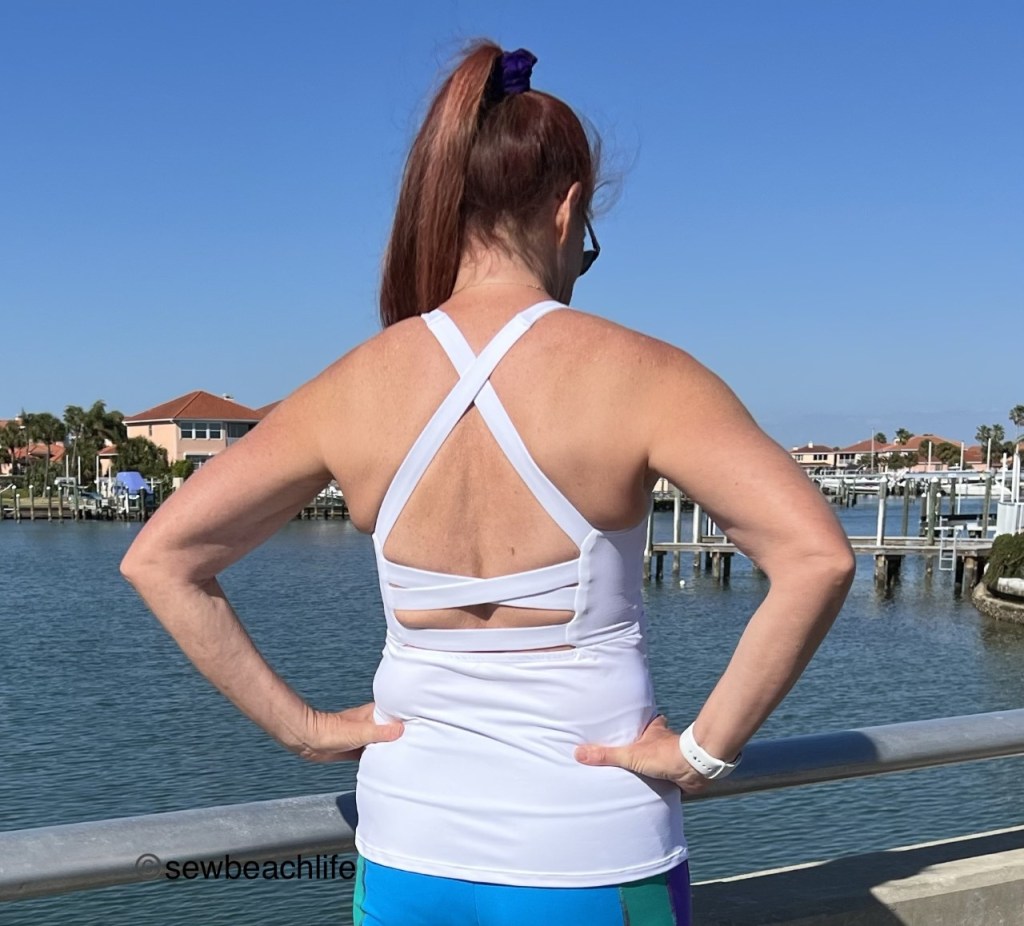
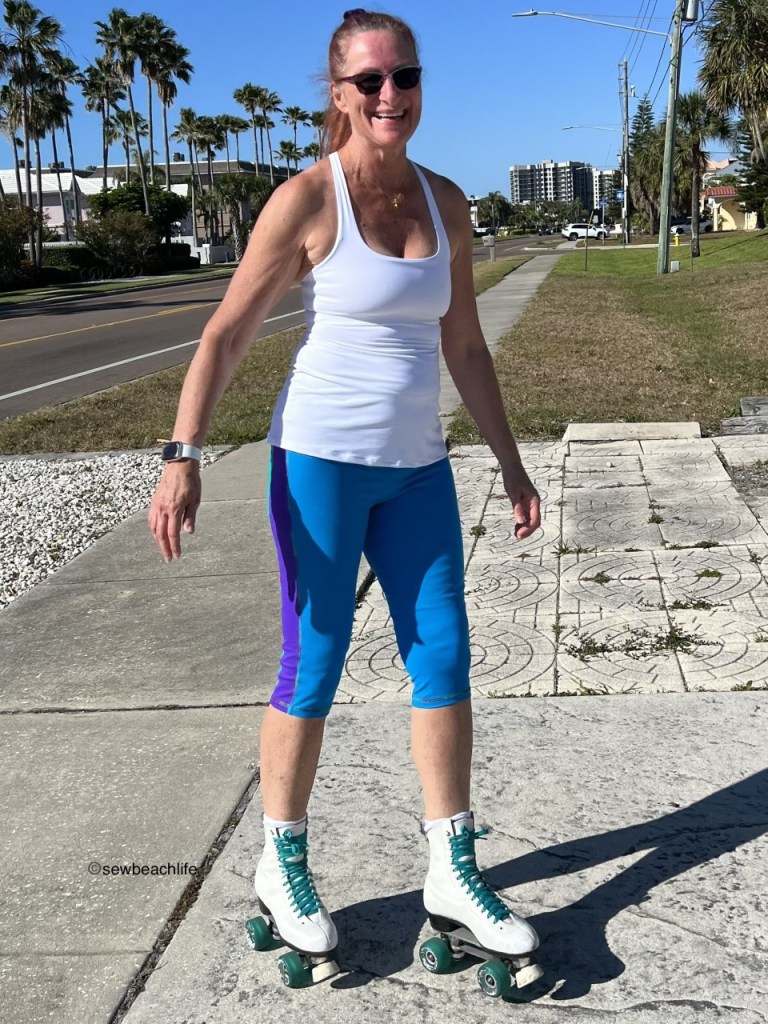
If you follow my page, you know that I can never leave a pattern well enough alone. Especially a pattern that I love as much as this one! So I had to turn this bra into a workout top. I mashed it with the Versa Cami and came up with something fun.

I wanted the front to be one piece, without a seam between the bra and body of the top. The back of course, has to have a seam.
To get the front pattern piece, I lined up the front of the Spellbound at the lining cut line with the front of the Versa Cami at the shorten or lengthen here line on the pattern piece. Once I traced down to the bottom of the bra front piece, I started grading out for my hips. My grading went from small to large, and I removed one inch from the small length and large width at the hemline.
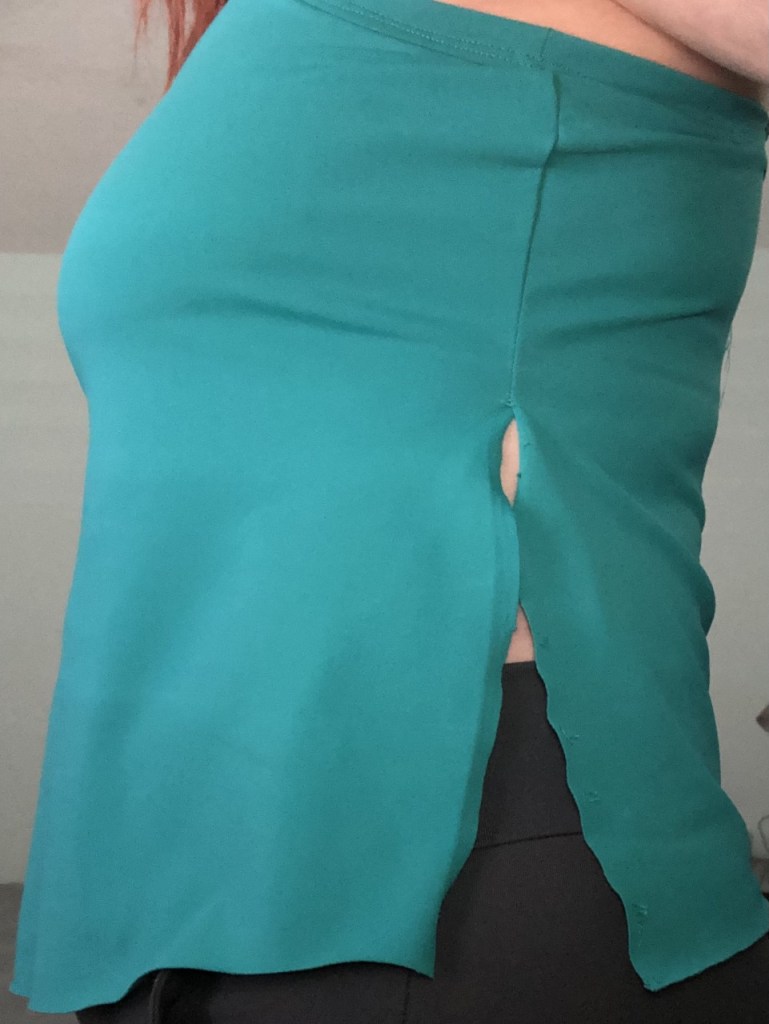
To get the back pattern piece, I started at the shorten or lengthen here line on the Versa Cami, and graded out for my hips. Originally, I just went straight across and cut on the shorten/lengthen line. But after sewing it up, I realized that the straight line gave me too much fabric at center back, and didn’t show the same amount of skin that the dresses show in that area. So I refined the pattern piece and used the curve from hem of the Spellbound skirt at the top of my back piece. In hindsight, I’ll probably just use the top curve of the skirt for the top curve of my top on the next one. My grading went from small to large, and I used the small length and large width at the hemline. You may be wondering why I shortened the front piece an inch but not the back. Two reasons: I like my workout tops to hit at hip level (the Versa is a bit longer than that); and because the back has a 1/2″ seam whereas the front doesn’t.
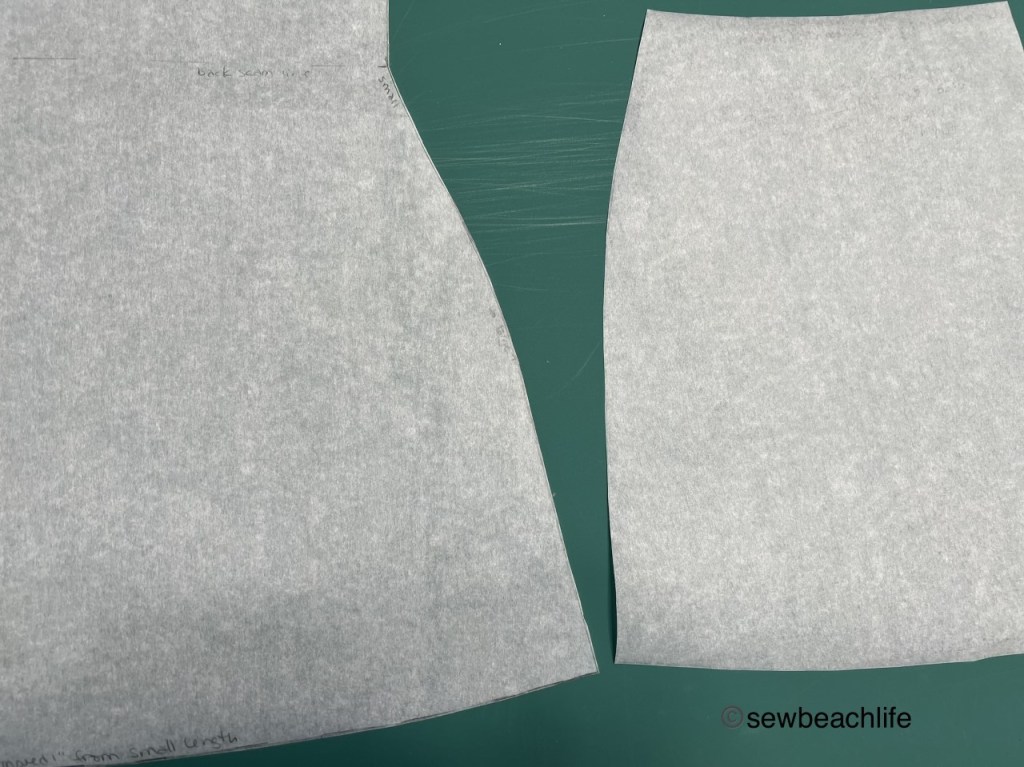
As always, I don’t show full pattern pieces out of respect for the designers hard work in creating a pattern. But I am showing enough for you to see the smooth curves of my grading. The front pattern piece is on the left, and the back pattern piece is on the right. A French curve ruler is a very helpful tool for grading and adjusting pattern pieces.
The top is sewn together by following the tutorial for the Spellbound bra up to the point of hemming, except for one thing. When sewing the bra front (turned into a workout top) piece to the bra side piece, don’t sew all the way to the bottom of the side piece. Stop 1/2″ from the bottom to leave yourself fabric for the back seam. Then snip to but not through the stitching line. This will allow you to press the seam toward the back and top or coverstitch as per the tutorial. You’ll sew the bra lining front and side pieces together as per normal.
I changed the construction of the Spellbound bra lining piece a tiny bit to suit my preferences. I am longer than average from shoulder to bust point and needed to add 5/8″ in order for the elastic to land in the perfect spot under my bust. Although a higher cut line was added to the pattern, my unique body shape requires the elastic lower because I needed the entire bra to slide up, not just add height at the front. This is a common alteration I have to make on a lot of tops and dresses, not just this specific pattern. Just one more reason that I sew- I can make clothing that fits my body. Because I don’t like elastic touching my bare skin, I added another inch so that I could flip the elastic up and have fabric against my skin.

As per the tutorial I basted the powernet to the wrong side of the lining piece. Here’s where I go rogue from the pattern tutorial: I serge the elastic to the wrong side of the lining, then flip it up to fully encase the elastic. Use plenty of pins to hold the elastic in place and coverstitch.

After top or coverstitching the edge of the elastic in place, remove the basting stitches along the bottom of the powernet. I purposely don’t lengthen the powernet to the same length as the lining because I don’t want the bulk and stiffness of the powernet in the enclosed elastic. It just needs to be long enough to get caught in the topstitching.
My other tip involves the straps. Once you’ve threaded the elastic through the straps, zig zag both ends of the straps to ensure that the elastic stays aligned with the ends of the straps.

You’ll notice how helpful the zig zag basting is when you are pulling the top straps through the bra, and when you’re criss-crossing, pinning, and stitching all the straps at the back.
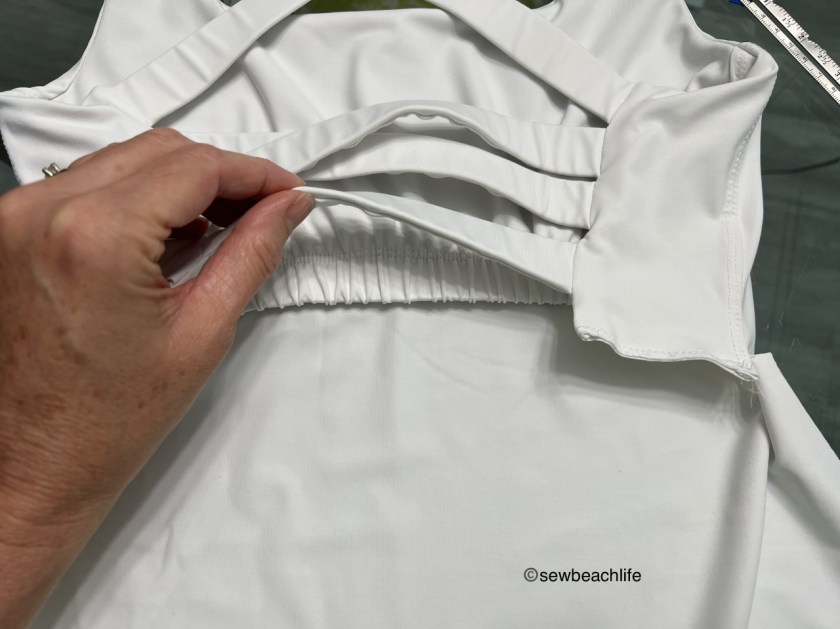
There are a couple of things to notice in the photo above. First is the clean finish of the enclosed elastic on the liner if you choose to go rogue like I do. The second item of note is the snip on the side seam that will allow the back bottom piece I made be stitched in place.
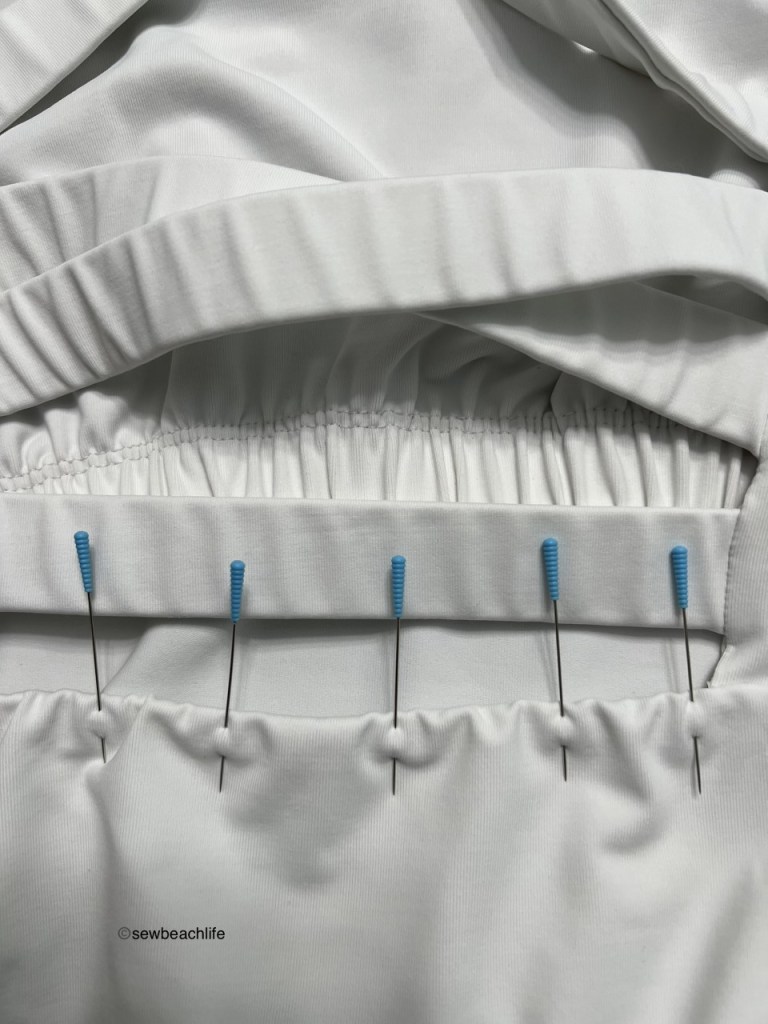
I add 3/8″ knit elastic along the top of the back workout top or skirt piece. I don’t take the elastic all the way to the side seams, because I don’t want bulky seams. It’s just there to give a little stability to the top of the back of the skirt or workout top bottom back piece. Once the seam connecting the bra to the skirt or workout top back bottom is complete, I fold the elastic down, pin it in place and coverstitch it.
After that it’s just pinning and stitching the bottom half of the side seam and hemming your new top! You can wear it to the gym, to yoga class, or to skate around your neighborhood.

In case you’re wondering what capri length leggings I’m wearing, they are the Stitch Upon A Time Legend Leggings, posted about here. They’re getting a little too big, but I still like them. I should take them apart and make them in a smaller size.

Whether you make the Spellbound bra, peplum top, or dress version, or play around with my idea of a Versa Cami hack, I’m pretty certain that you are going to love this pattern as much as I do!
Thank you for reading and sharing my love of creating, sewing, serging, great patterns, pattern hacking, fabric, and making beautiful, well-fitting garments! ❤
The links to Stitch Upon A Time may be affiliate links, which means that at no extra cost to you, I may receive a few pennies if you purchase through my link. As always, I only give my honest opinion. After all, it is my blog, which represents me!