Sports Bras are kind of a staple in a lot of women’s wardrobes. Whether you wear them for sports, exercise, work, or just because they’re cute and comfortable. The challenging part is finding one that fits properly. Ready to wear sports bras often only come in basic sizes like XS, small, medium, large, and XL. While sizing like that may give an okay fit on some people, I think that it is unlikely to get a great fit with such limited sizing. Which is why I like making my own.
I started making GreenStyle Endurance Sports Bras this summer, and now have three, customized for my style. Funnily enough, none of them are made exactly per pattern directions with a front zipper and bound edges. What can I say? I’m no stranger to pattern hacking, and think it’s fun to try different looks by playing with a pattern.
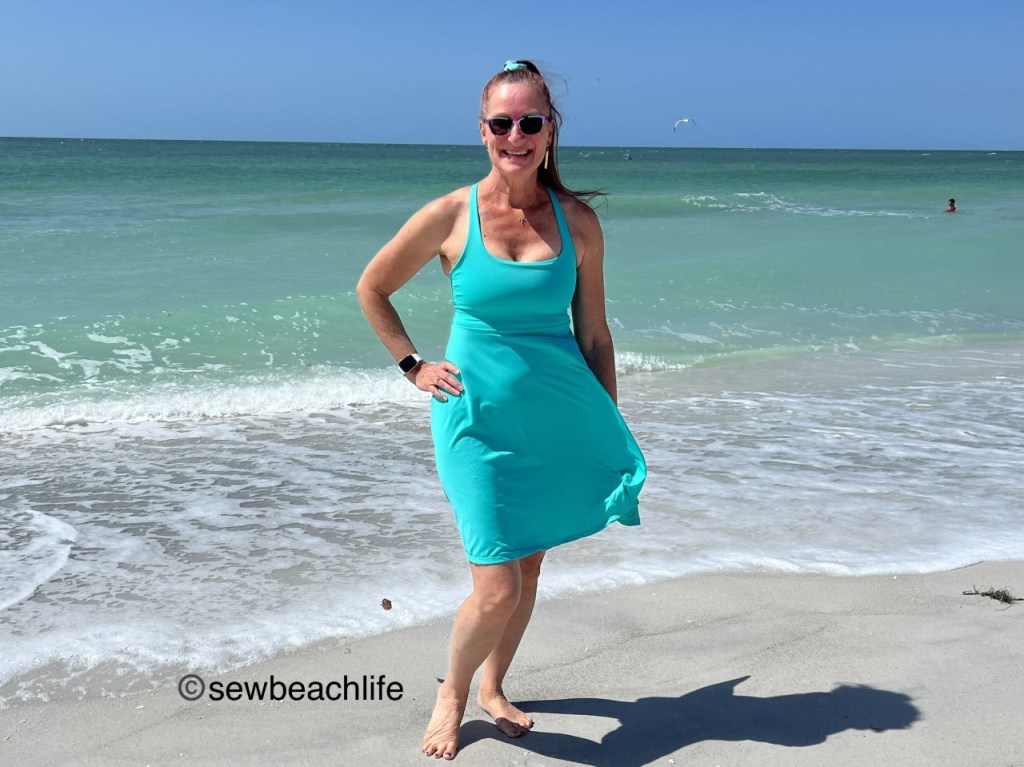
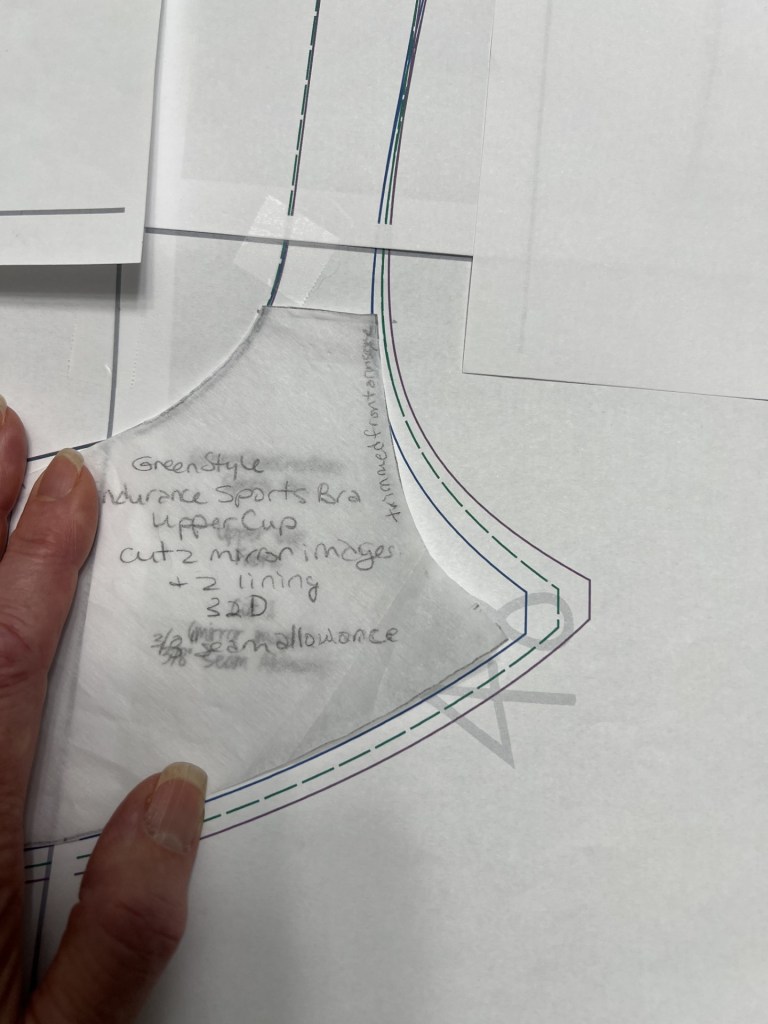
The great thing about the Endurance bra pattern is that it has specific band and cup sizing. It’s designed to fit a full range of band sizes 28-40, and cup sizes B-H. You get a much better fit when you have cup size options! Speaking of fit, following the measurement chart is the best way to choose your size. My 32″ underbust (ribcage) measurement put me in a 32 band, and my full bust measurement put me in the E cup. The band is a good fit, but I neglected to take into account that the pattern cup pieces are intended to fit over bra foam pieces formed into cups, and I was not using the bra foam layer. So, the 32E sports bra fits, but it’s not snug. I don’t know about you, but I like my sports bras to fit snugly.
It’s still super cute, and I wear it all the time, but I knew that a 32D would fit better, at least with the way that I hack the pattern to use powernet basted to the wrong side of the main fabric, rather than using bra foam. So I made my second Endurance in a 32D.
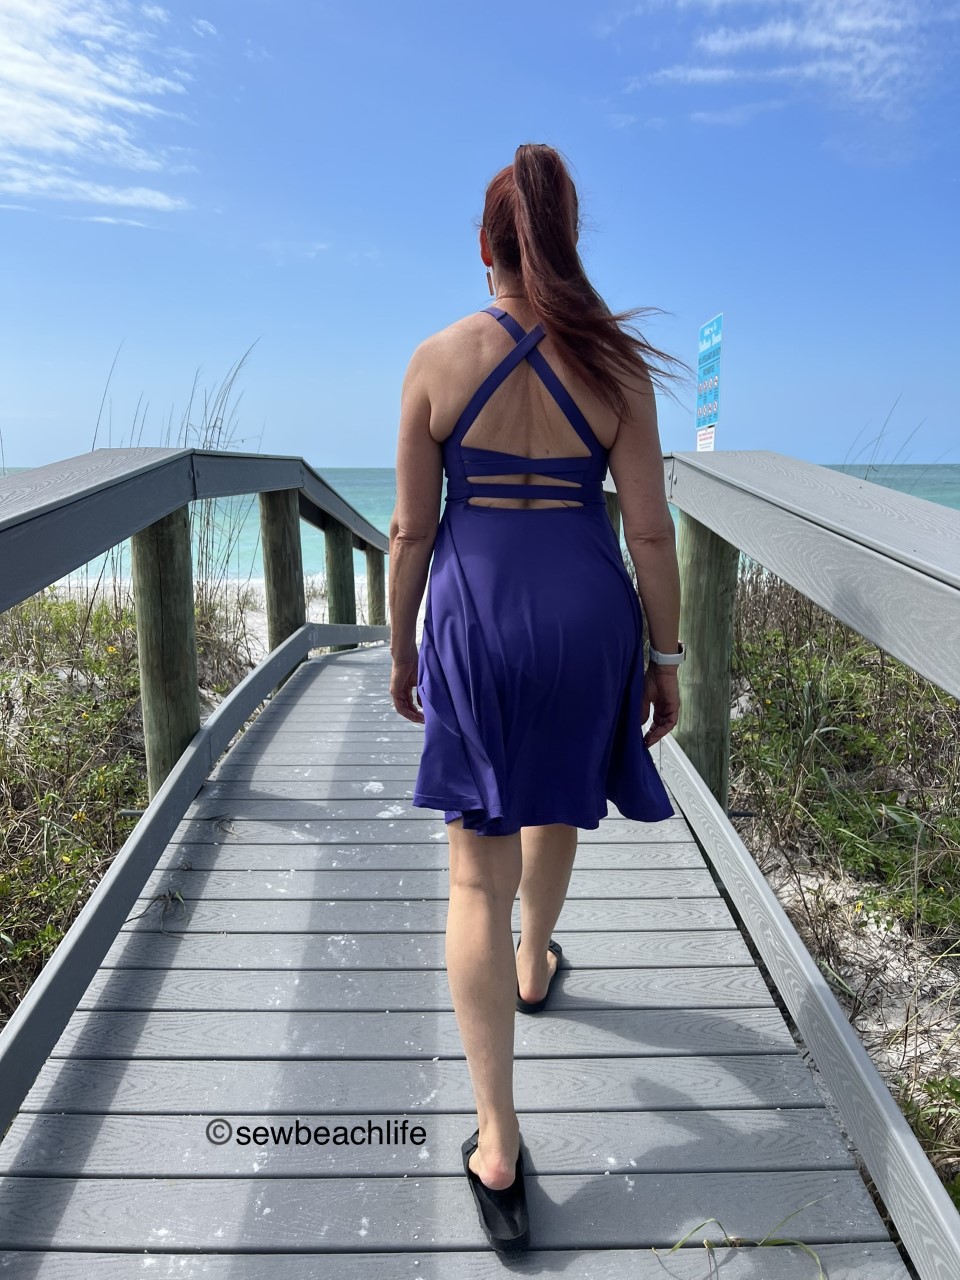
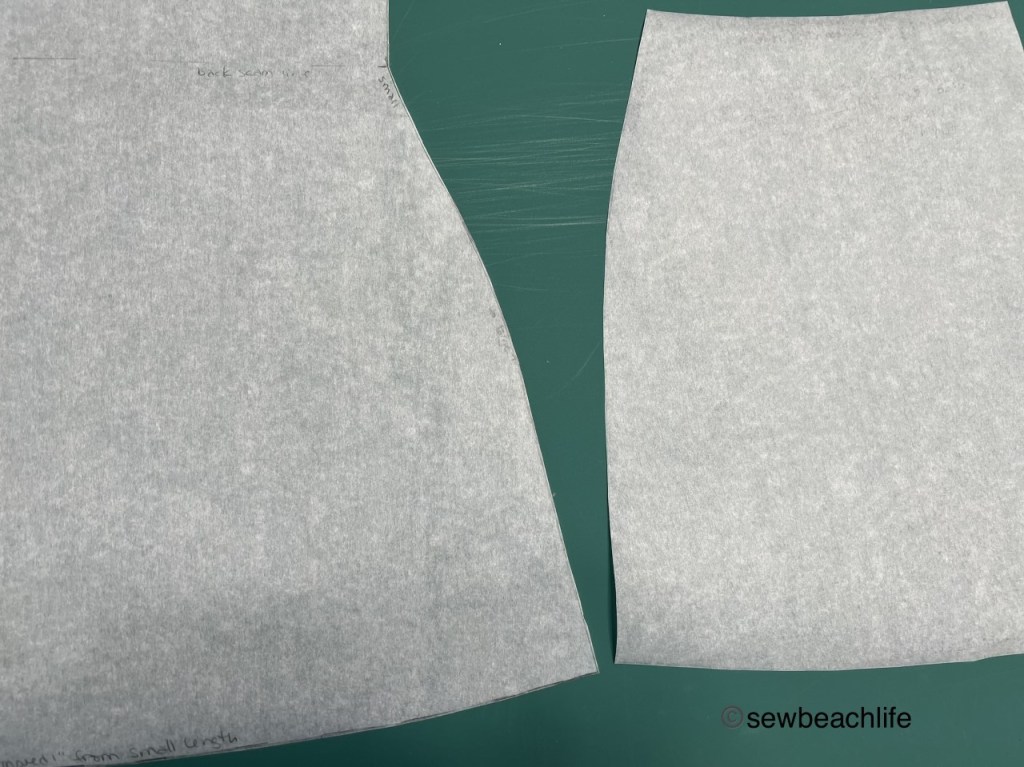
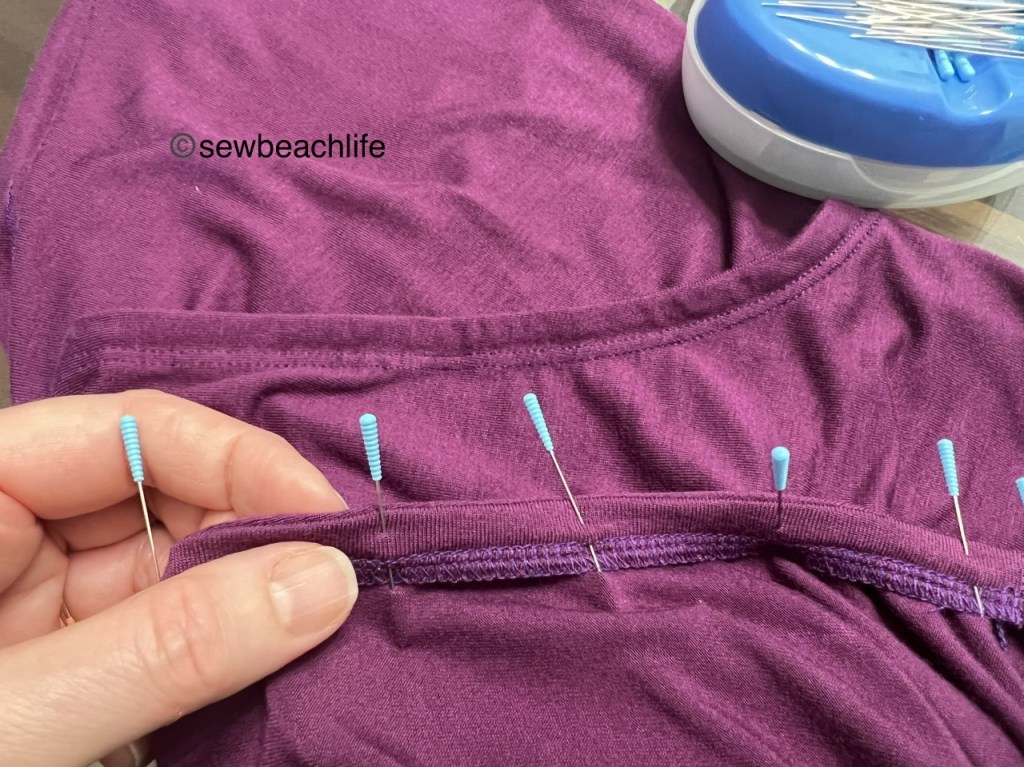
As you may have noticed, beyond hacking the pattern to not use foam, binding, or a zipper, I also changed the straps. Rather than using the all one piece upper cup and strap, I trimmed the strap off about 3/8″ above where the strap starts. Since my bust is fuller at the bottom than the top, I also trimmed back the curve at the armscye.
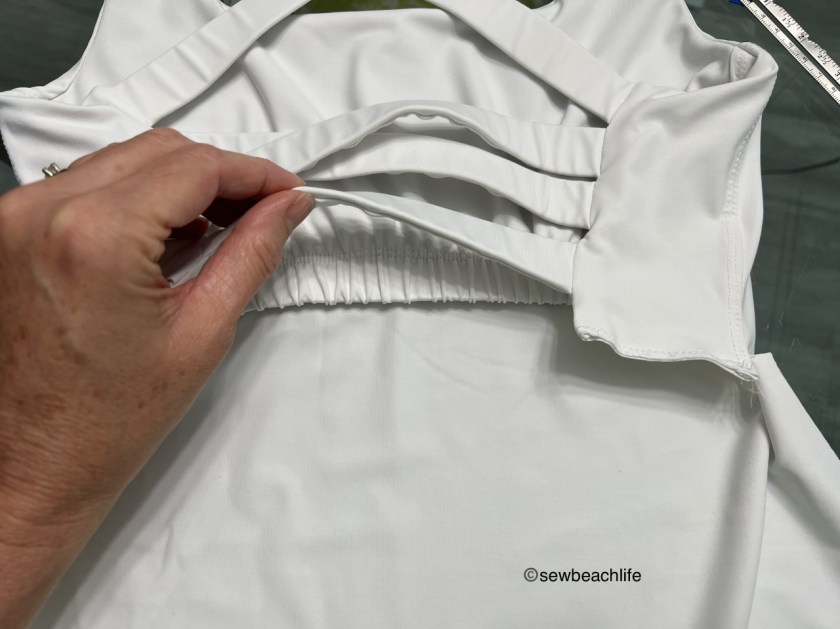
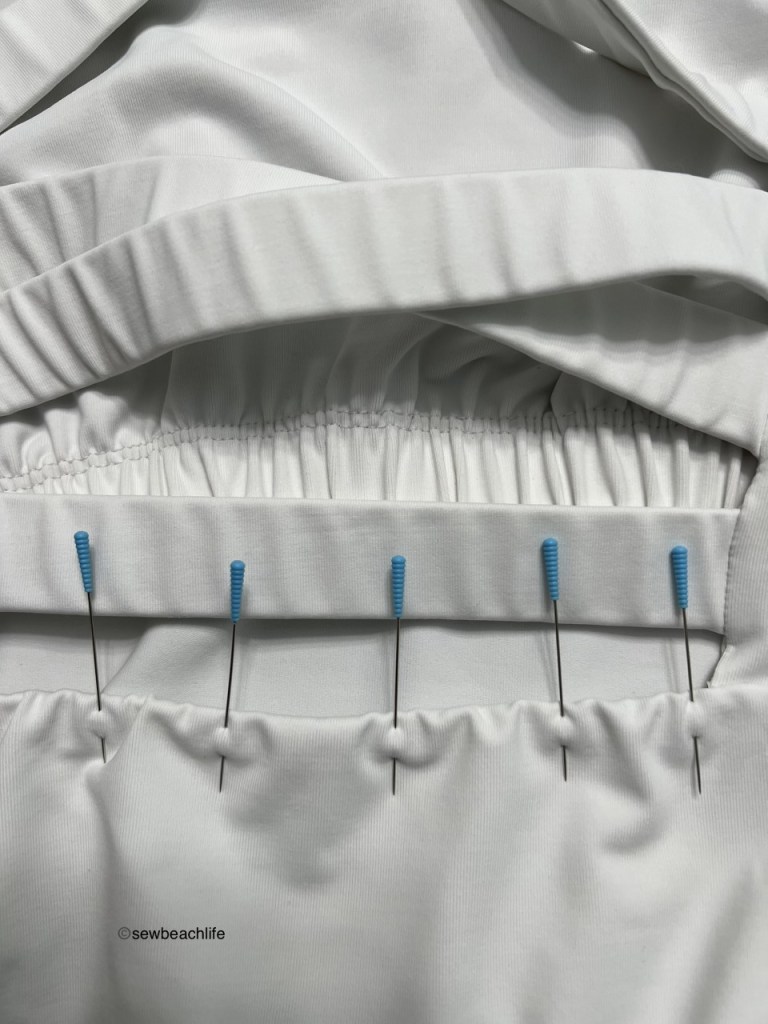
I thought it would be fun to have double straps, so I made straps out of 1-1/2 wide strips of fabric folded in half right sides together, zig-zagging over 3/8″ wide knit elastic that was aligned with the raw edge of the fabric, so that the zig just goes off the edge of the elastic and into the middle of the fabric, with the zag into the elastic, then turning the straps right side out and pressing.

I basted two straps at center back, and placed the other two straps at 2-1/2″ away. After sewing the main and lining together along the top edges (except at the strap opening) and turning right side out, I tried the bra on to judge strap lengths. The center V straps ended up about 15″ long, and the straight straps about 14″ long. The length you need may vary depending upon the stretchiness of your elastic. I threaded the two straps on each side through sliders because it looked cute, and to give a slight amount of adjustability.

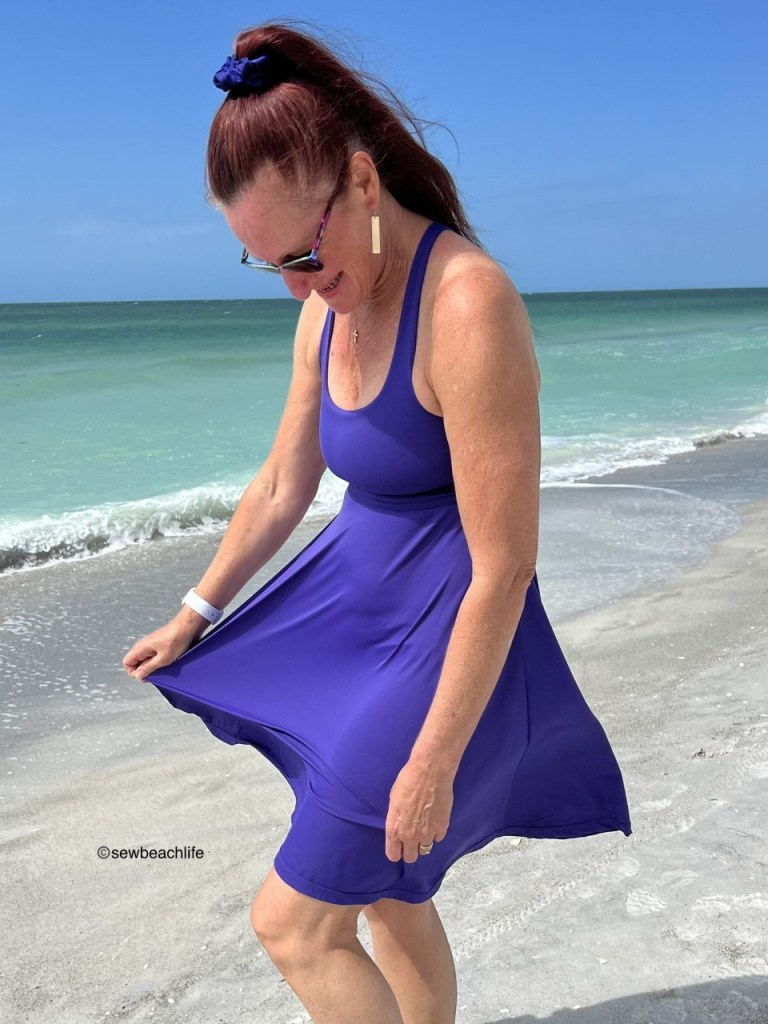
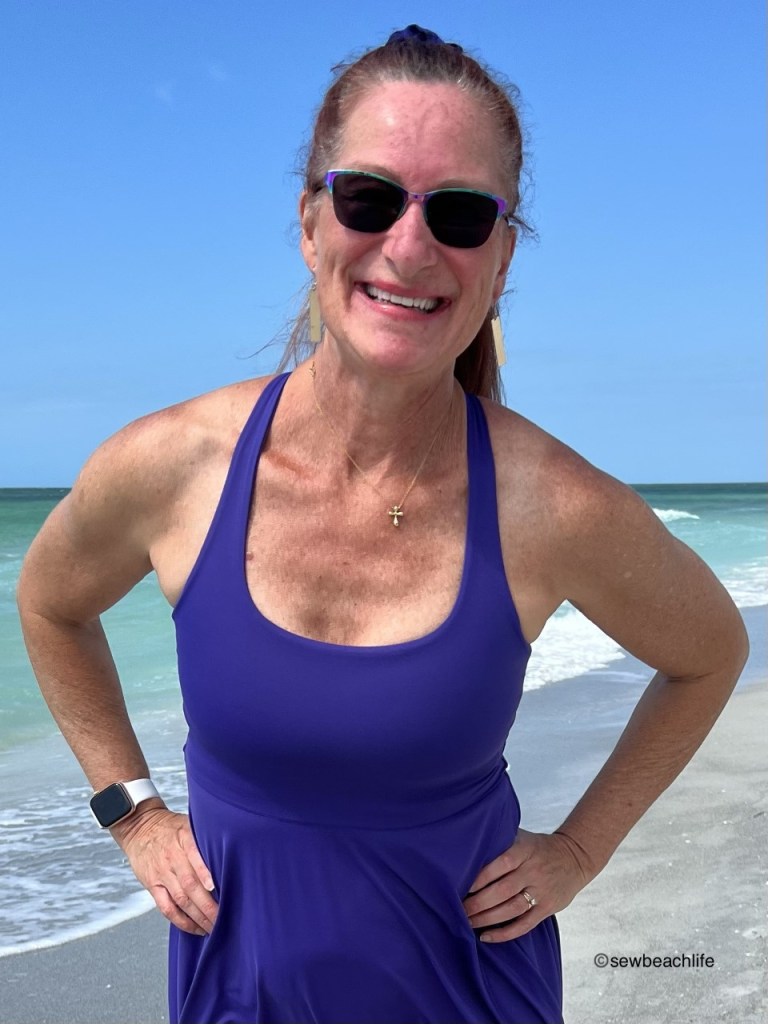
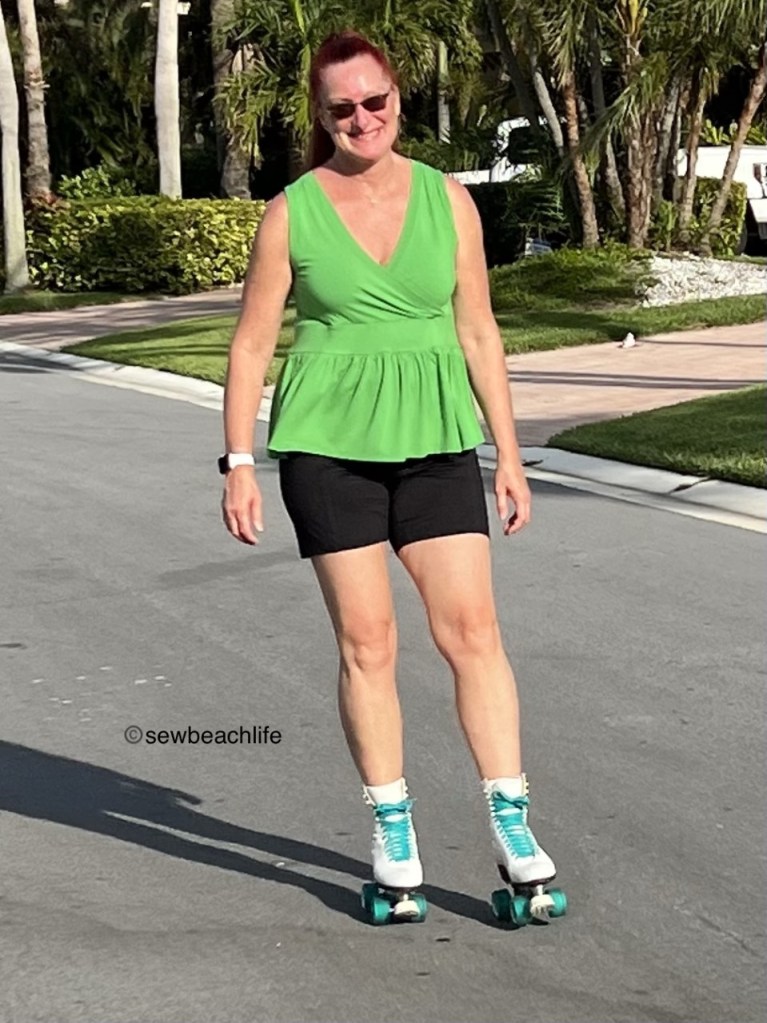
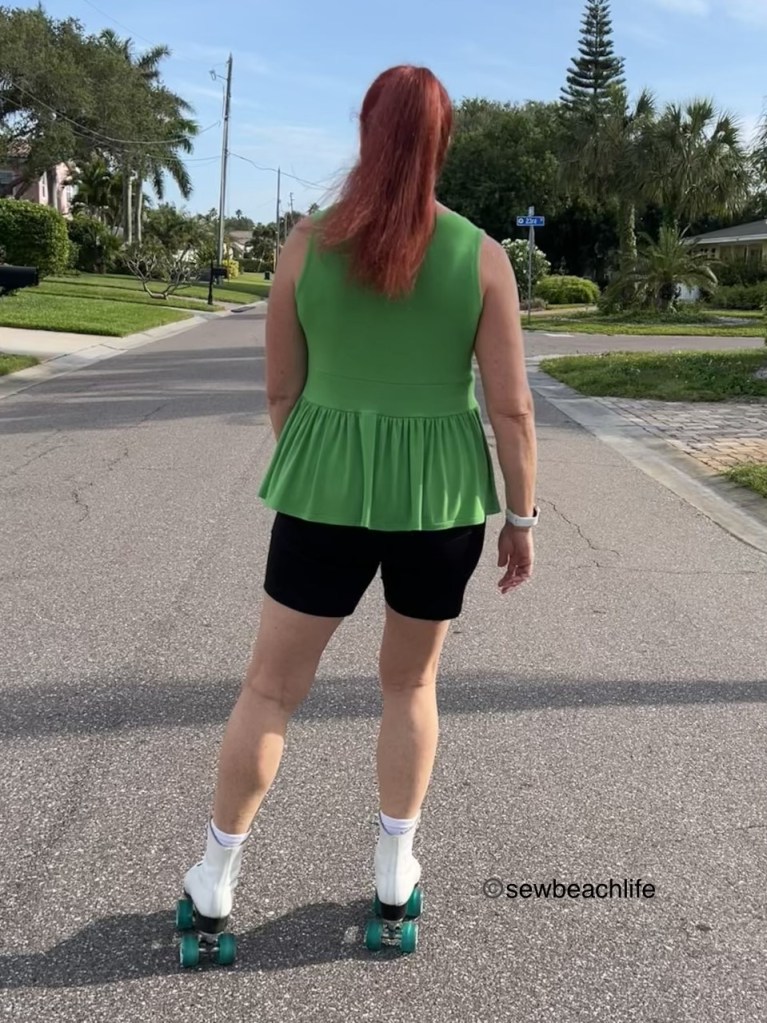
For my second Endurance I used size 32D, and again just sewed the center front together rather than using a zipper. For this version I made straps with 1″ wide knit elastic threaded through them.

Instead of skating around the neighborhood like I usually do, we decided to check out a county trail system. It was a workout with the little hills and elevation changes, but fun to have a change of scenery and to see the bicyclists and walkers that use the trail.

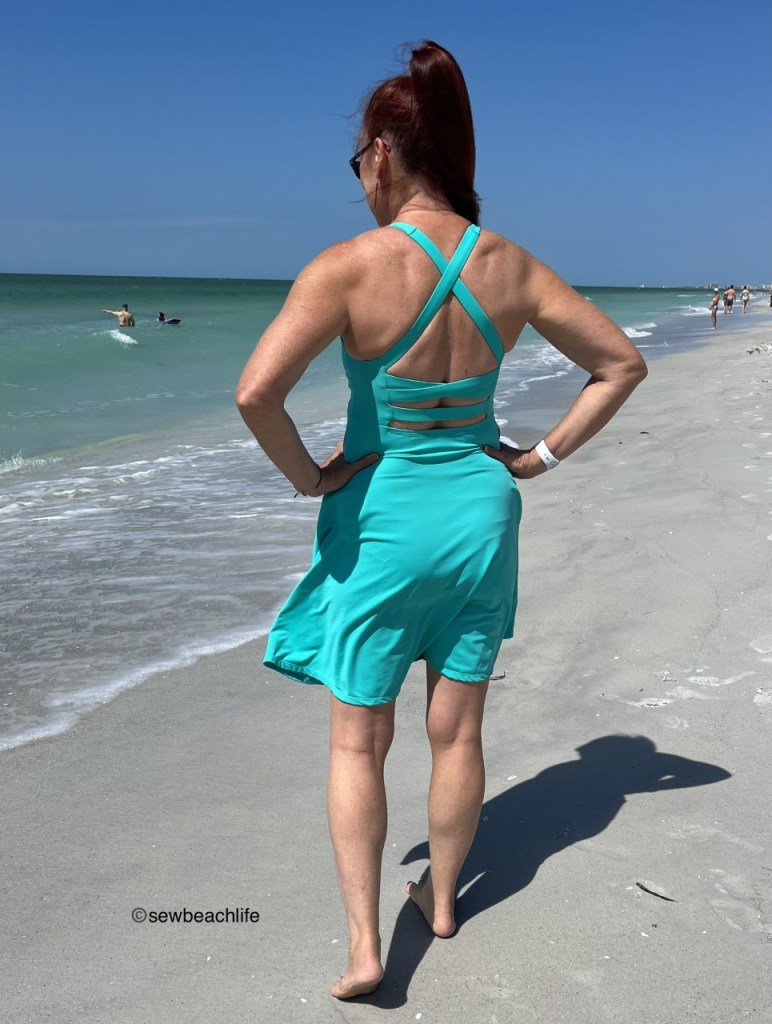
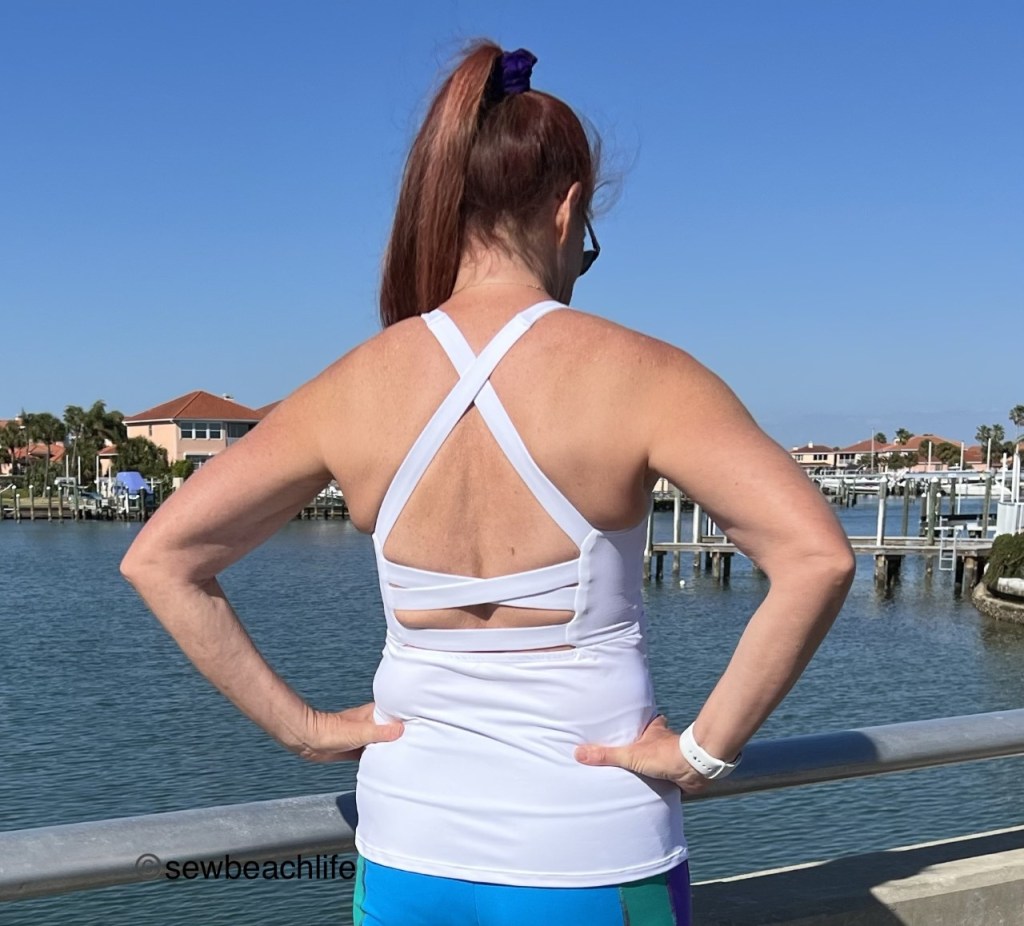
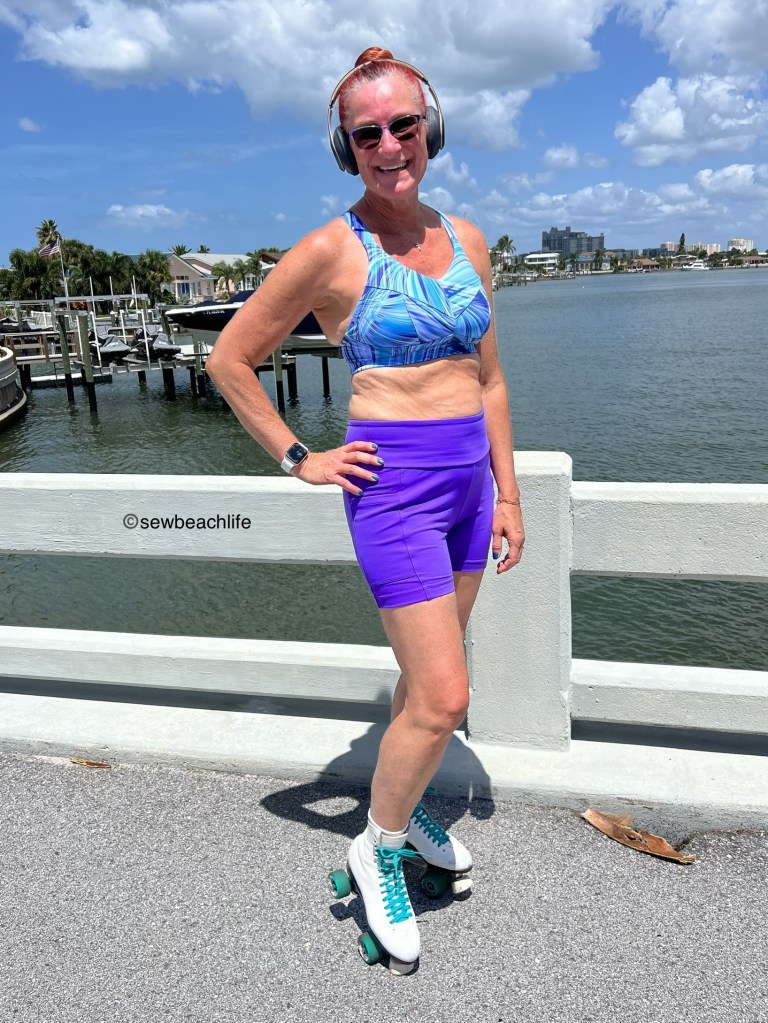
The straps are just crossed in the back for a typical X back look.

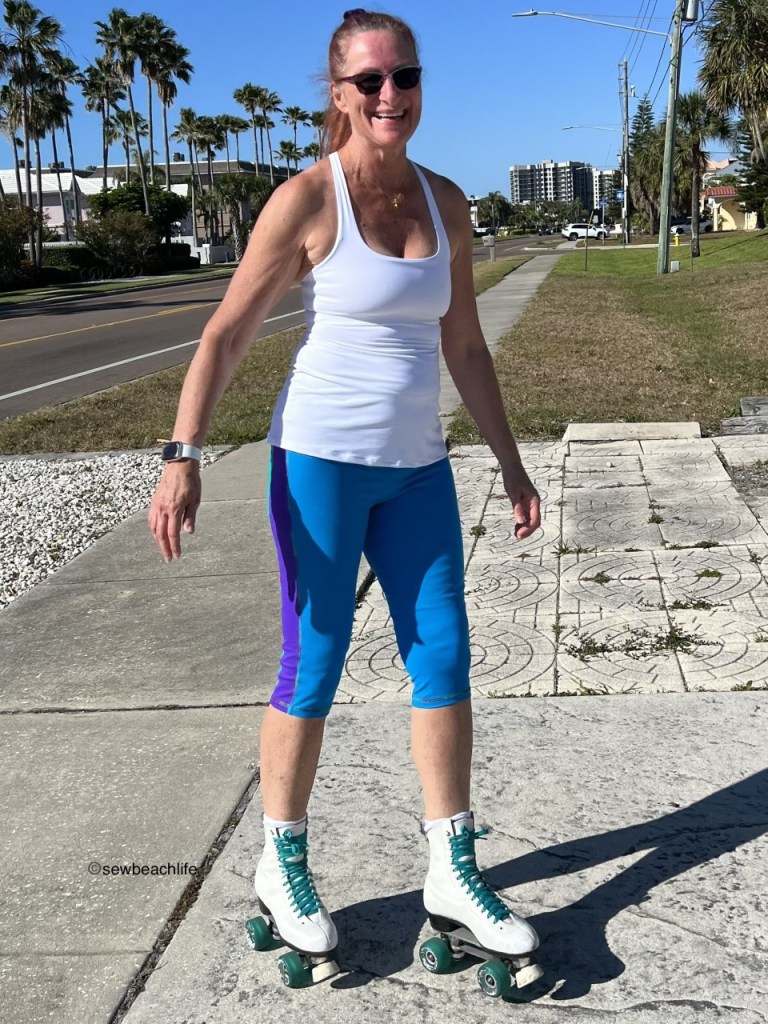
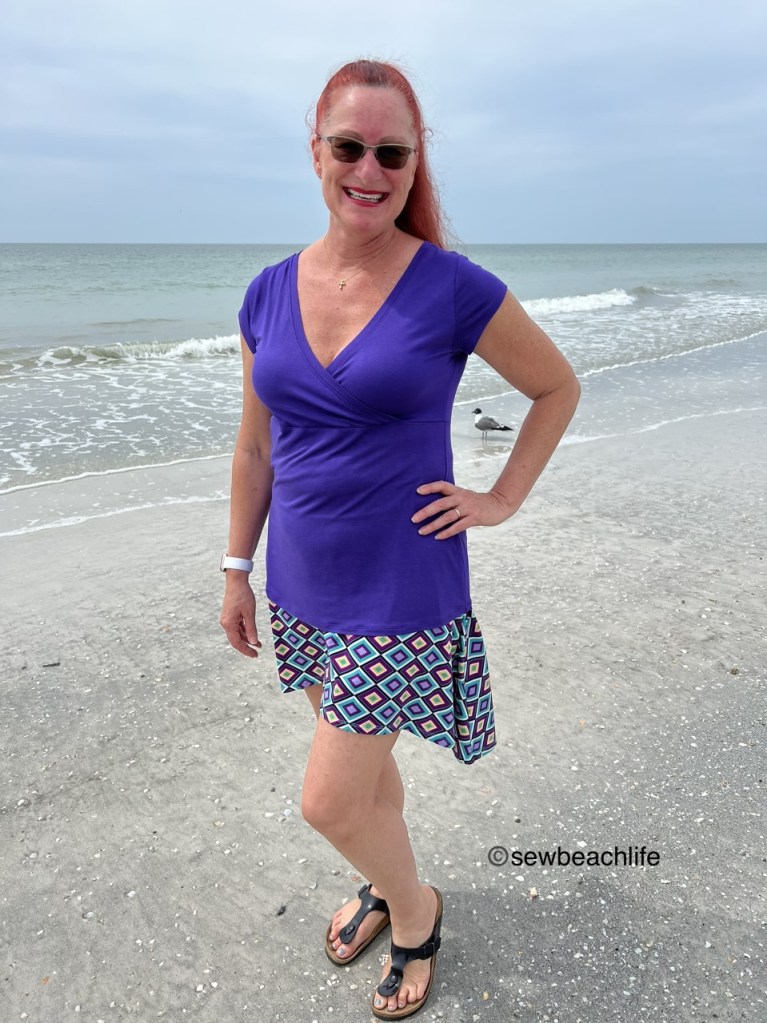
My new outfit (because of course I *needed* another outfit for skating) is an upcyle. I used some old capri length leggings and a workout top that was too big, unpicking them to salvage the pretty fabric. Working with limited fabric means that you’re going to get a scrappy look, but I tried to get intentional with it.
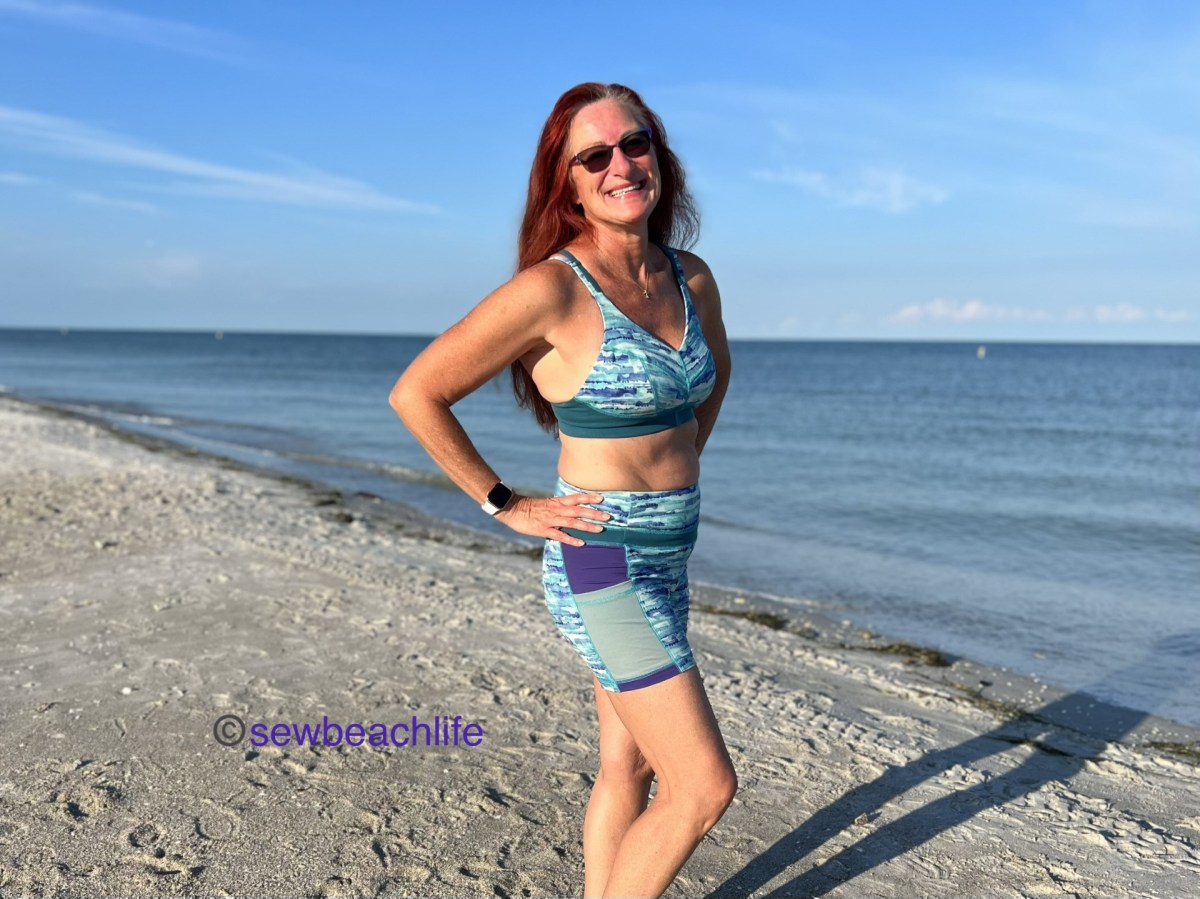
I managed to get the GreenStyle Moxi bike shorts front and back pieces, along with the Endurance Sports Bra cup pieces out of the capris. The old waistband fabric wasn’t as tall as the Moxi waistband, so the bottom 2″ of waistband was cut from the old teal workout top. Using the teal for the band of the Endurance bra gave it a nice contrast. I had to dig into my stash to cut the lining layer of the bra, along with the side panels of the shorts. The pockets were cut from the mesh panel that was in the center back of the old top. Like I said, it’s a scrappy look!

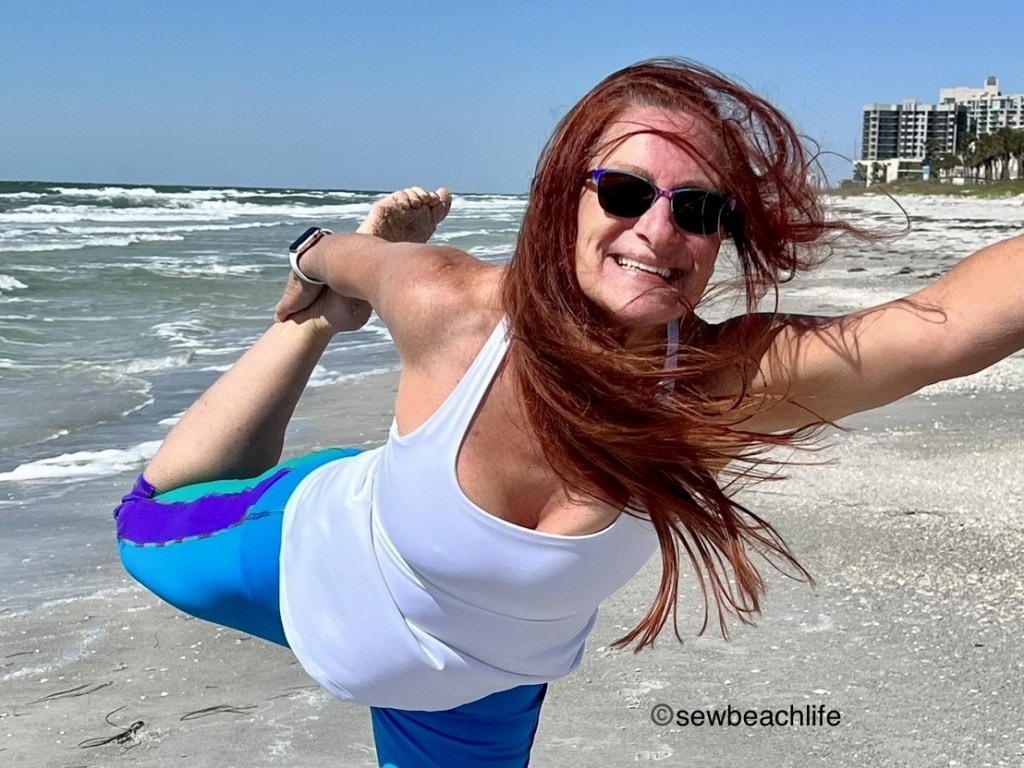
I love the support the bra offers, and the fact that it can double as a swim top. The V and straight straps are my favorite, so I used them on this bra too.

It’s fun to provide entertainment value by trying to take photos with cars occasionally driving by! 🙂 All you can do is laugh when someone rolls down their window and says, “Looking good!”
Reverse triple coverstitching helped soften the look of the multiple fabrics and bring them together. Superior Threads Sergin’ General thread in teal was a great match to the fabrics.

Don’t be afraid to upcycle, to hack, to adjust, to experiment, and to play with patterns and fabric. I also encourage you to rollerskate for fun and exercise. Even if it’s been a while, you’ll pick it back up. And like anything else, the more you practice, the better you get.
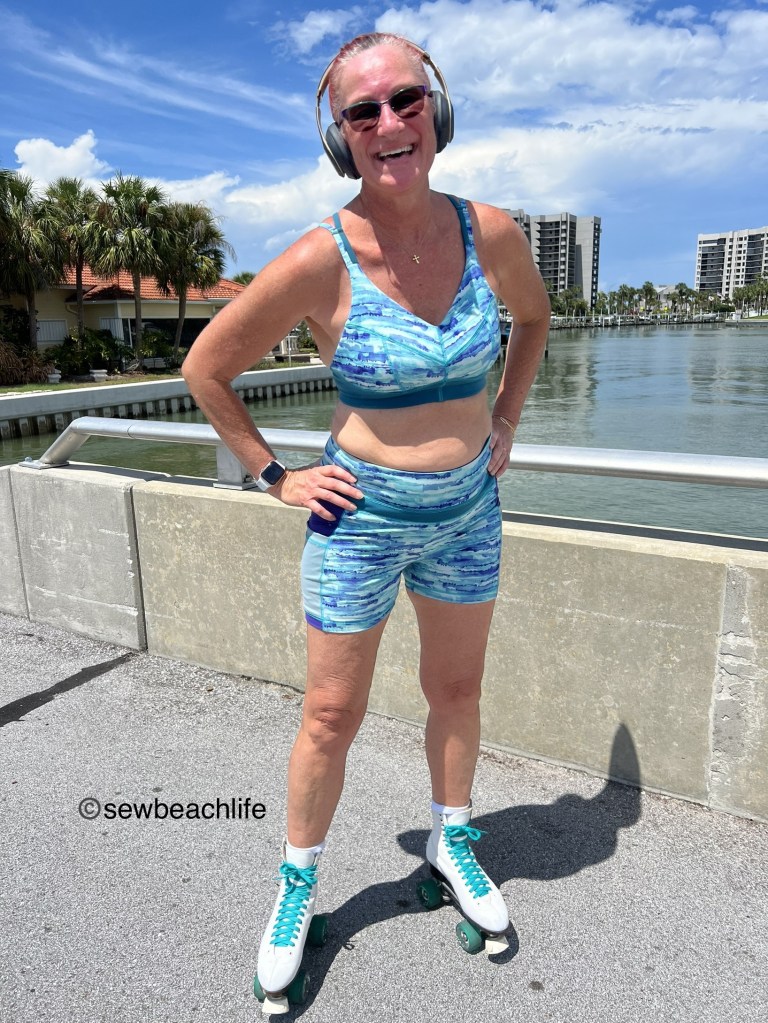
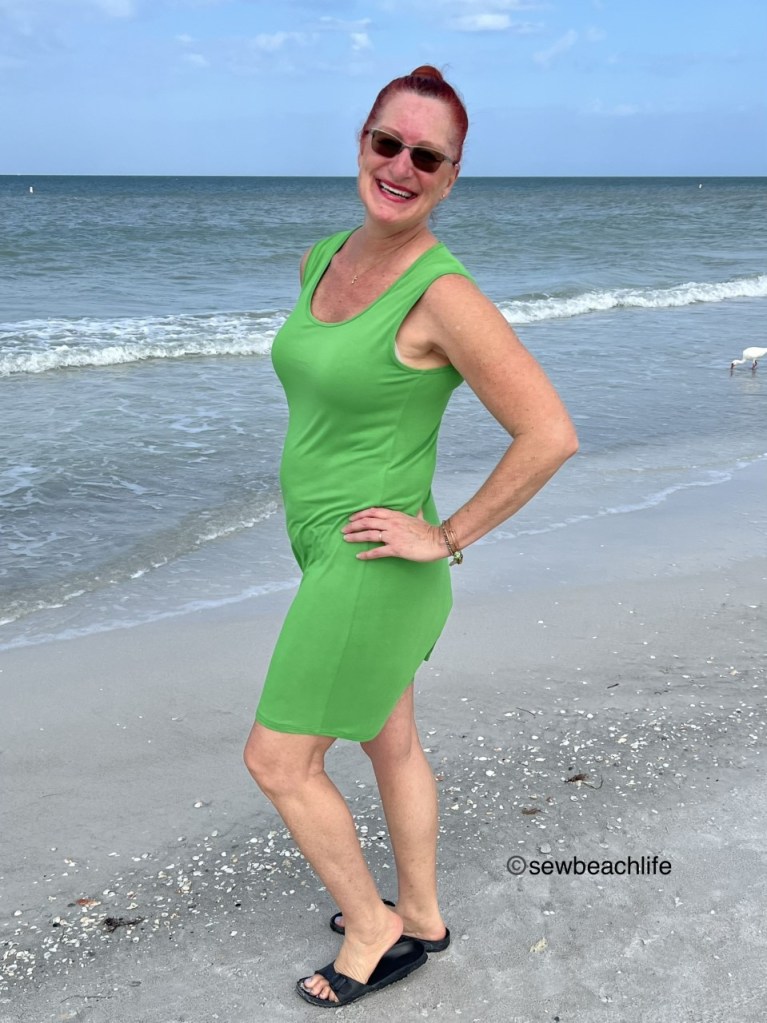
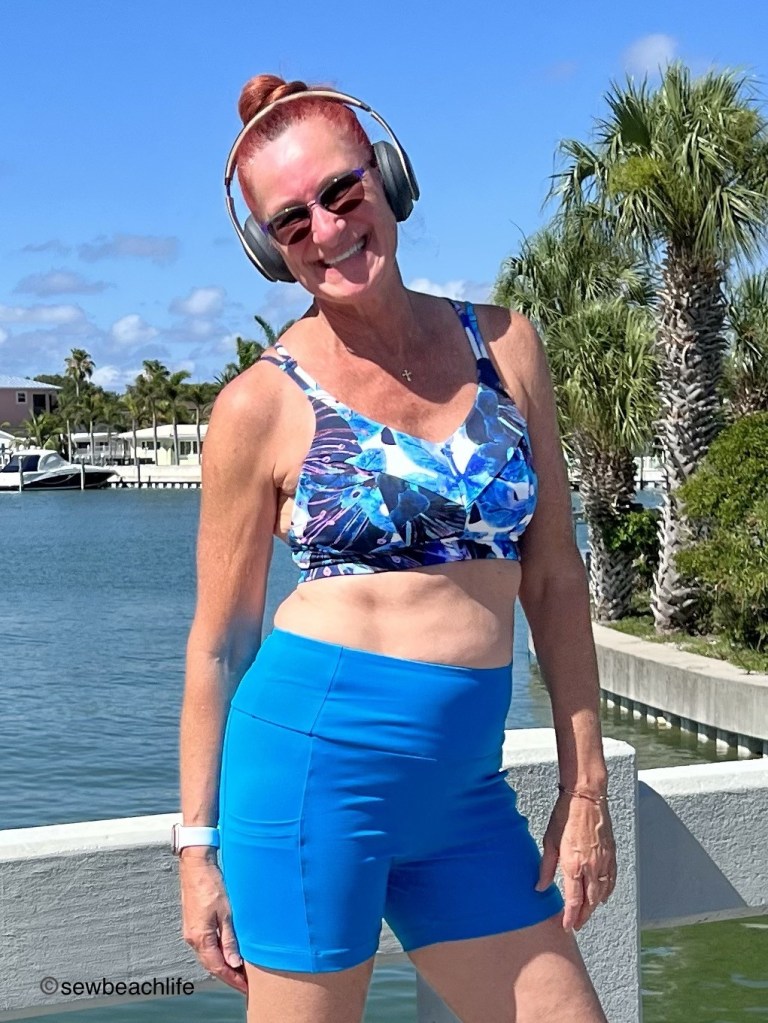
The details: I’m wearing the GreenStyle Endurance Sports Bra and the bike shorts from the GreenStyle Moxi Shorts pattern in all these photos. The navy and turquoise floral print is Align 2 fabric from GreenStyle.
Both the turquoise and purple shorts are supplex from Phee Fabrics.
The swirly print fabric used for the X back bra was secondhand fabric so I don’t have any information on where it’s from.
The rainbow finish sliders used on the double straps were purchased from Porcelynne.
You can make your own sports bra, and can customize it to fit your needs. It’s worth the sew! And a few more photos just because I have so many to share. 😉

Thank you for reading and sharing my love of creating, hacking, sewing, serging, great patterns, fabric, and making beautiful, well-fitting garments! ❤
The links to Greenstyle may be affiliate links, which means that at no extra cost to you, I may receive a few pennies if you purchase through my link. As always, I only give my honest opinion. After all, it is my blog, which represents me!