Sewing A Sonata

Adjusting The Love Notions Sonata For A Perfect Fit

I just can’t help but be drawn to pretty woven dresses. They are light and breezy in Florida’s heat, and the structure of woven dresses generally supports pockets. What’s not to love about that? The Love Notions Sonata Dress definitely caught my eye.

Well, there are a couple reasons I rarely seem to sew them. The first being that I much prefer sewing knits. Construction seems to go so much faster. 🙂 I can sew a pair of workout leggings with pockets, some kind of panel or shaping design, inner and outer waistband pieces, and a gusset much faster! But I think the main reason that I tend to skip over woven dress patterns is because I know that I’ll need to make pattern adjustments.

I am longer than average from shoulder to bust point, and I always need to lower the armscye on woven patterns. These are relatively common adjustments, and really aren’t that hard to make, they just take a little time. If you’ve ever tried on a top or dress, and noticed that the bust dart is above, or quite high on the bust, this fit issue may apply to you too.

The Sonata Dress pattern has cup sizes, which is what really drew me to it. Depending upon the block that pattern designers use, many pattern companies tend to design for an “average” B and sometimes C sewing cup size. They only seem to venture into a D cup in larger size patterns. But the Sonata includes a D sewing cup size, which is what I measured into according to their sizing chart. I love when size charts include upper and full bust measurements, because it’s so much easier to determine what size to make.

Your upper bust measurement tells you what size to make the shoulders of your dress. Have you ever made a dress according to your full bust measurement (which is sometimes the only bust measurement on a size chart) and had it seem too wide at the neck, perhaps showing your bra straps, and with the shoulder seam overhanging your shoulders? Using the upper bust measurement will help you choose the size that fits the frame of your body.

A pattern that fits my shoulders properly makes me happy!

The pattern tutorial shows how to raise or lower the bust dart. I find it easiest to trace the front bodice pattern except for the side seam, and then slide the tracing paper up, keeping the edge of the tracing paper aligned with the center fold edge of the printed out pattern so that everything stays straight on grain. In order to know how far to slide it up, you need to measure from your shoulder (where the front and back seam intersect on top of the shoulder) to your bust point (generally the nipple area) wearing the bra that you plan to wear with the dress. Note that measurement (for instance 12″), and transfer the bust point to your traced pattern piece from the shoulder seam line (3/8″ away from the pattern edge) down that same measurement (ie: 12″). Slide your tracing paper up until your marked bust point aligns with the bust point marked on the printed pattern piece. Now you can trace the side seam and dart marking and it will be in the right spot for your body.

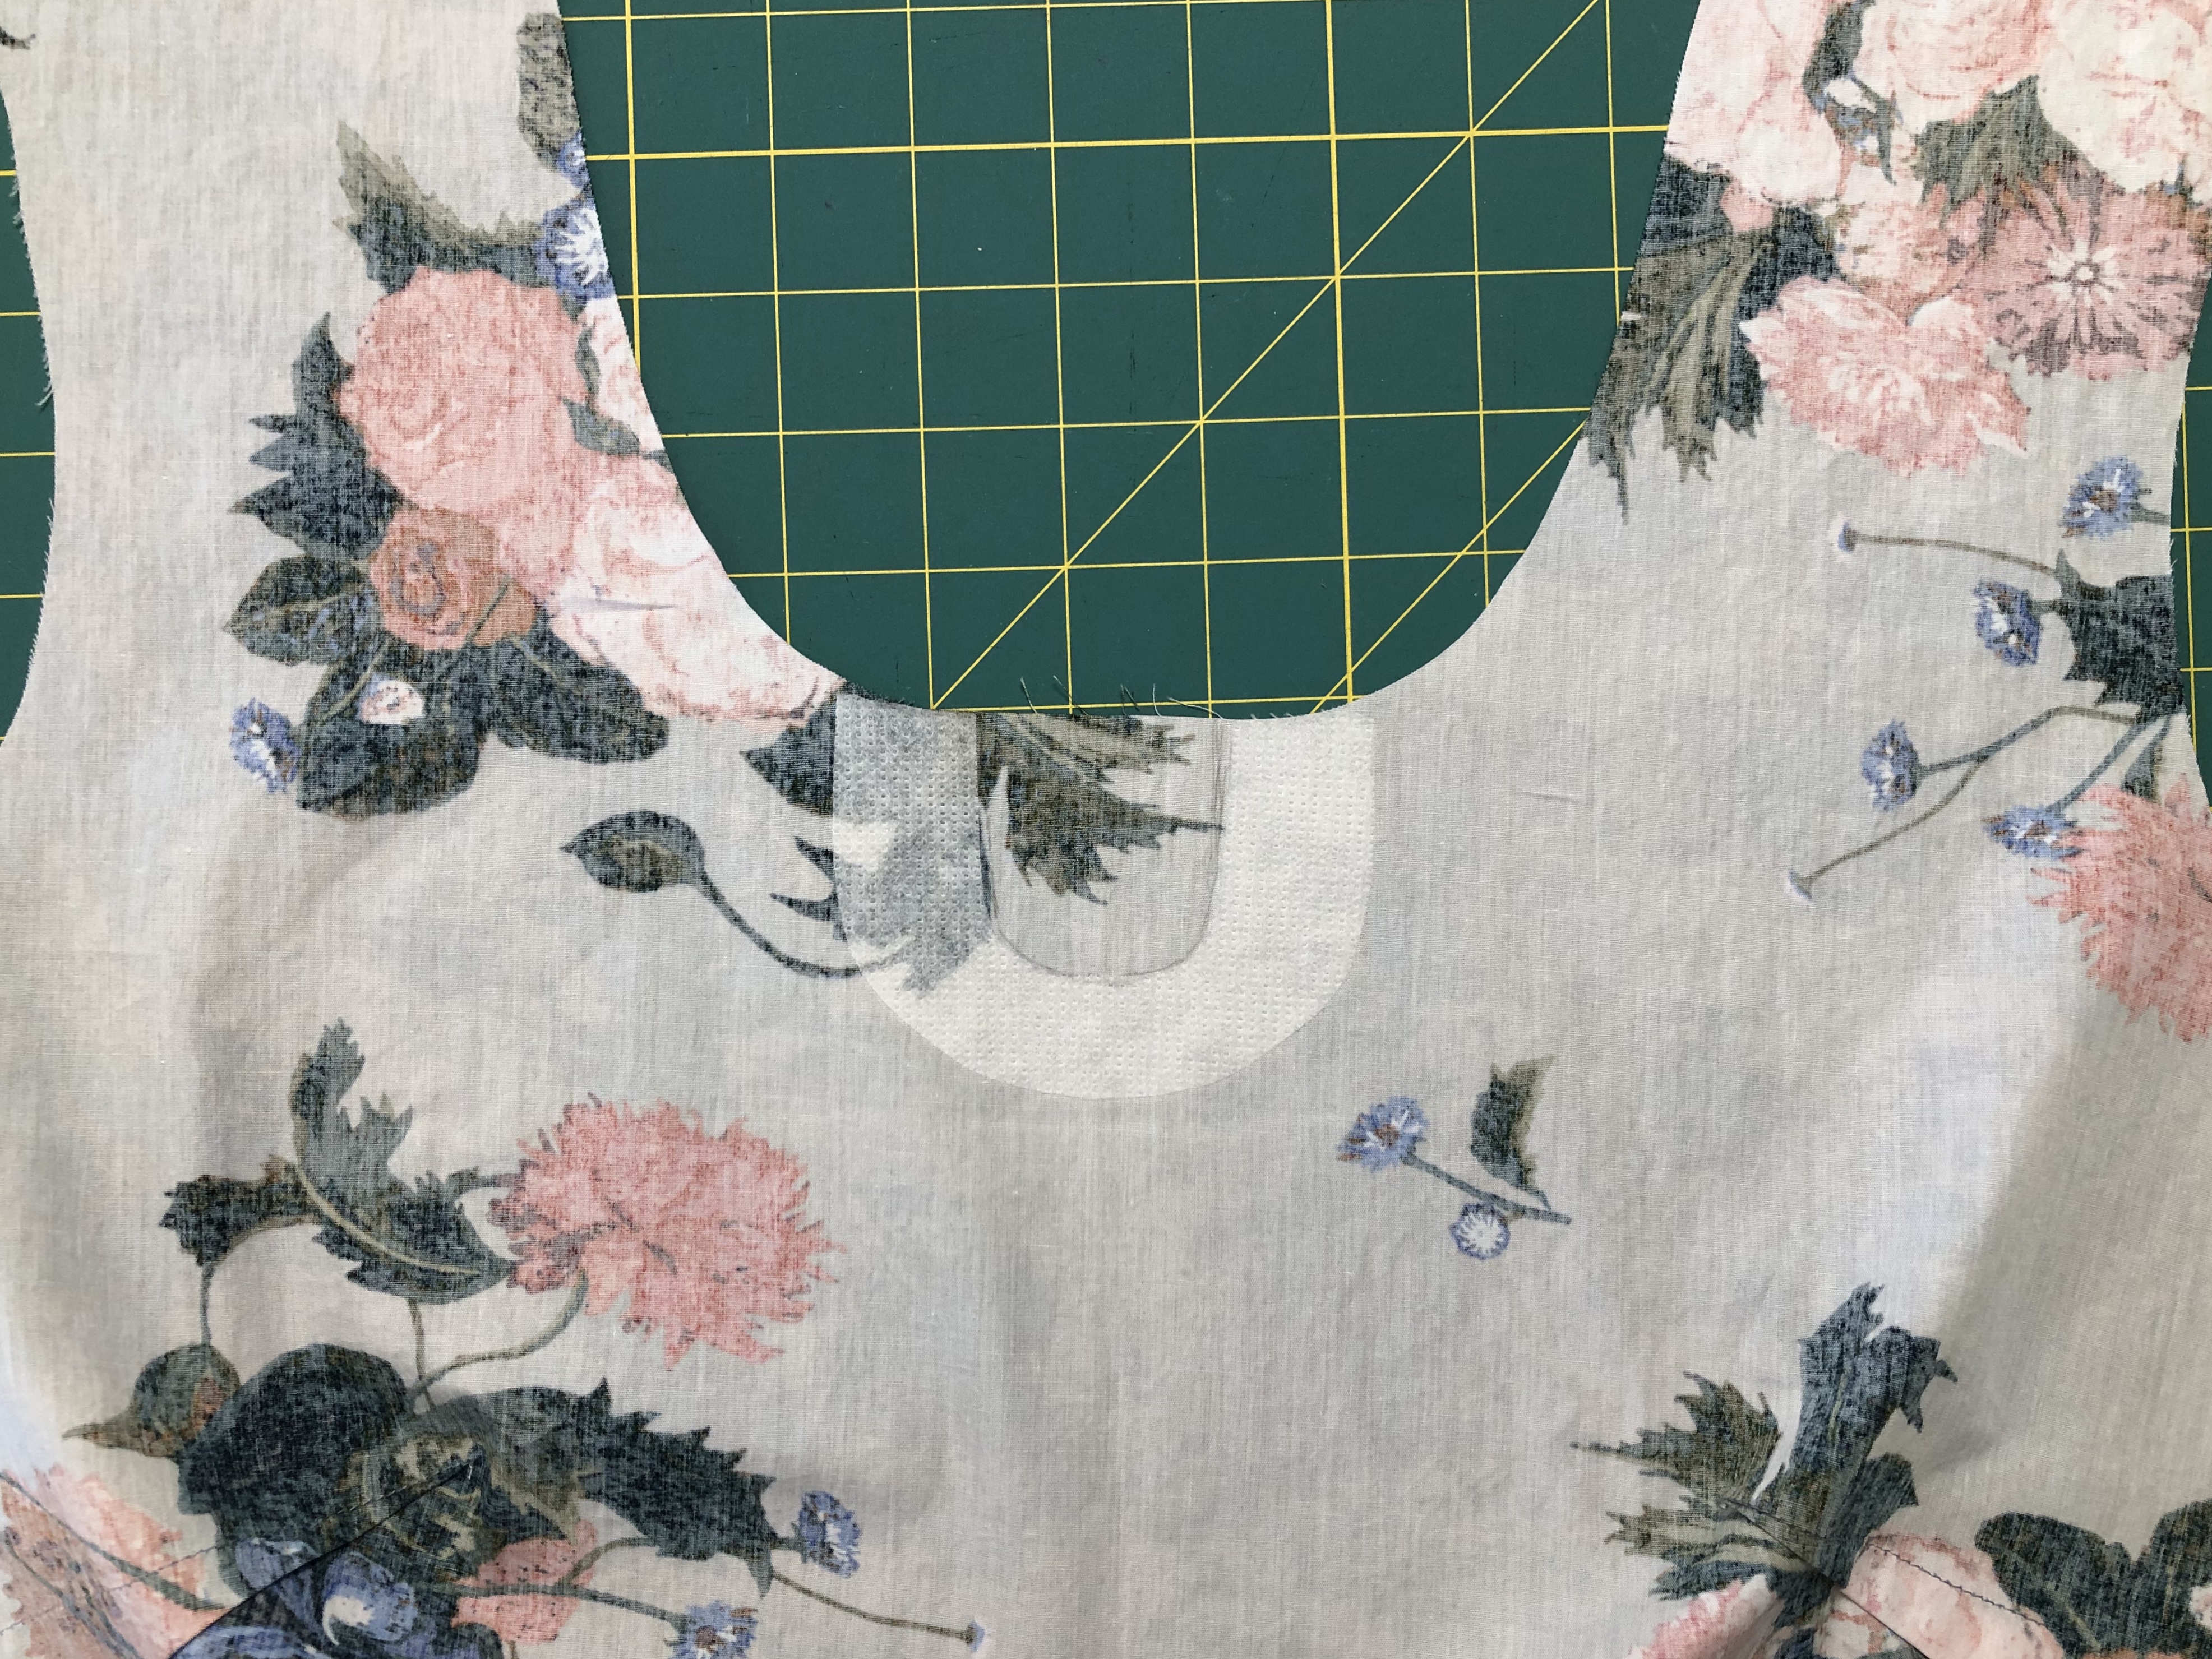
If patterns tend to cut into your armpit, you probably need to lower the armscye too. When I trace the lowered bust point and side seams, I need to trace the bottom half of the armscye too. Apparently I am average from armpit to waist, because if I try to stick with the original pattern armscye depth, and then trim away until it fits comfortably, guess what my trimmed away shape ends up being? EXACTLY matching the original pattern if I trace the bottom half of the armscye when I trace the lowered bust point. Gosh I would have saved myself a lot of time if I had just done that in the first place! 🙂

I love the elastic in the back.

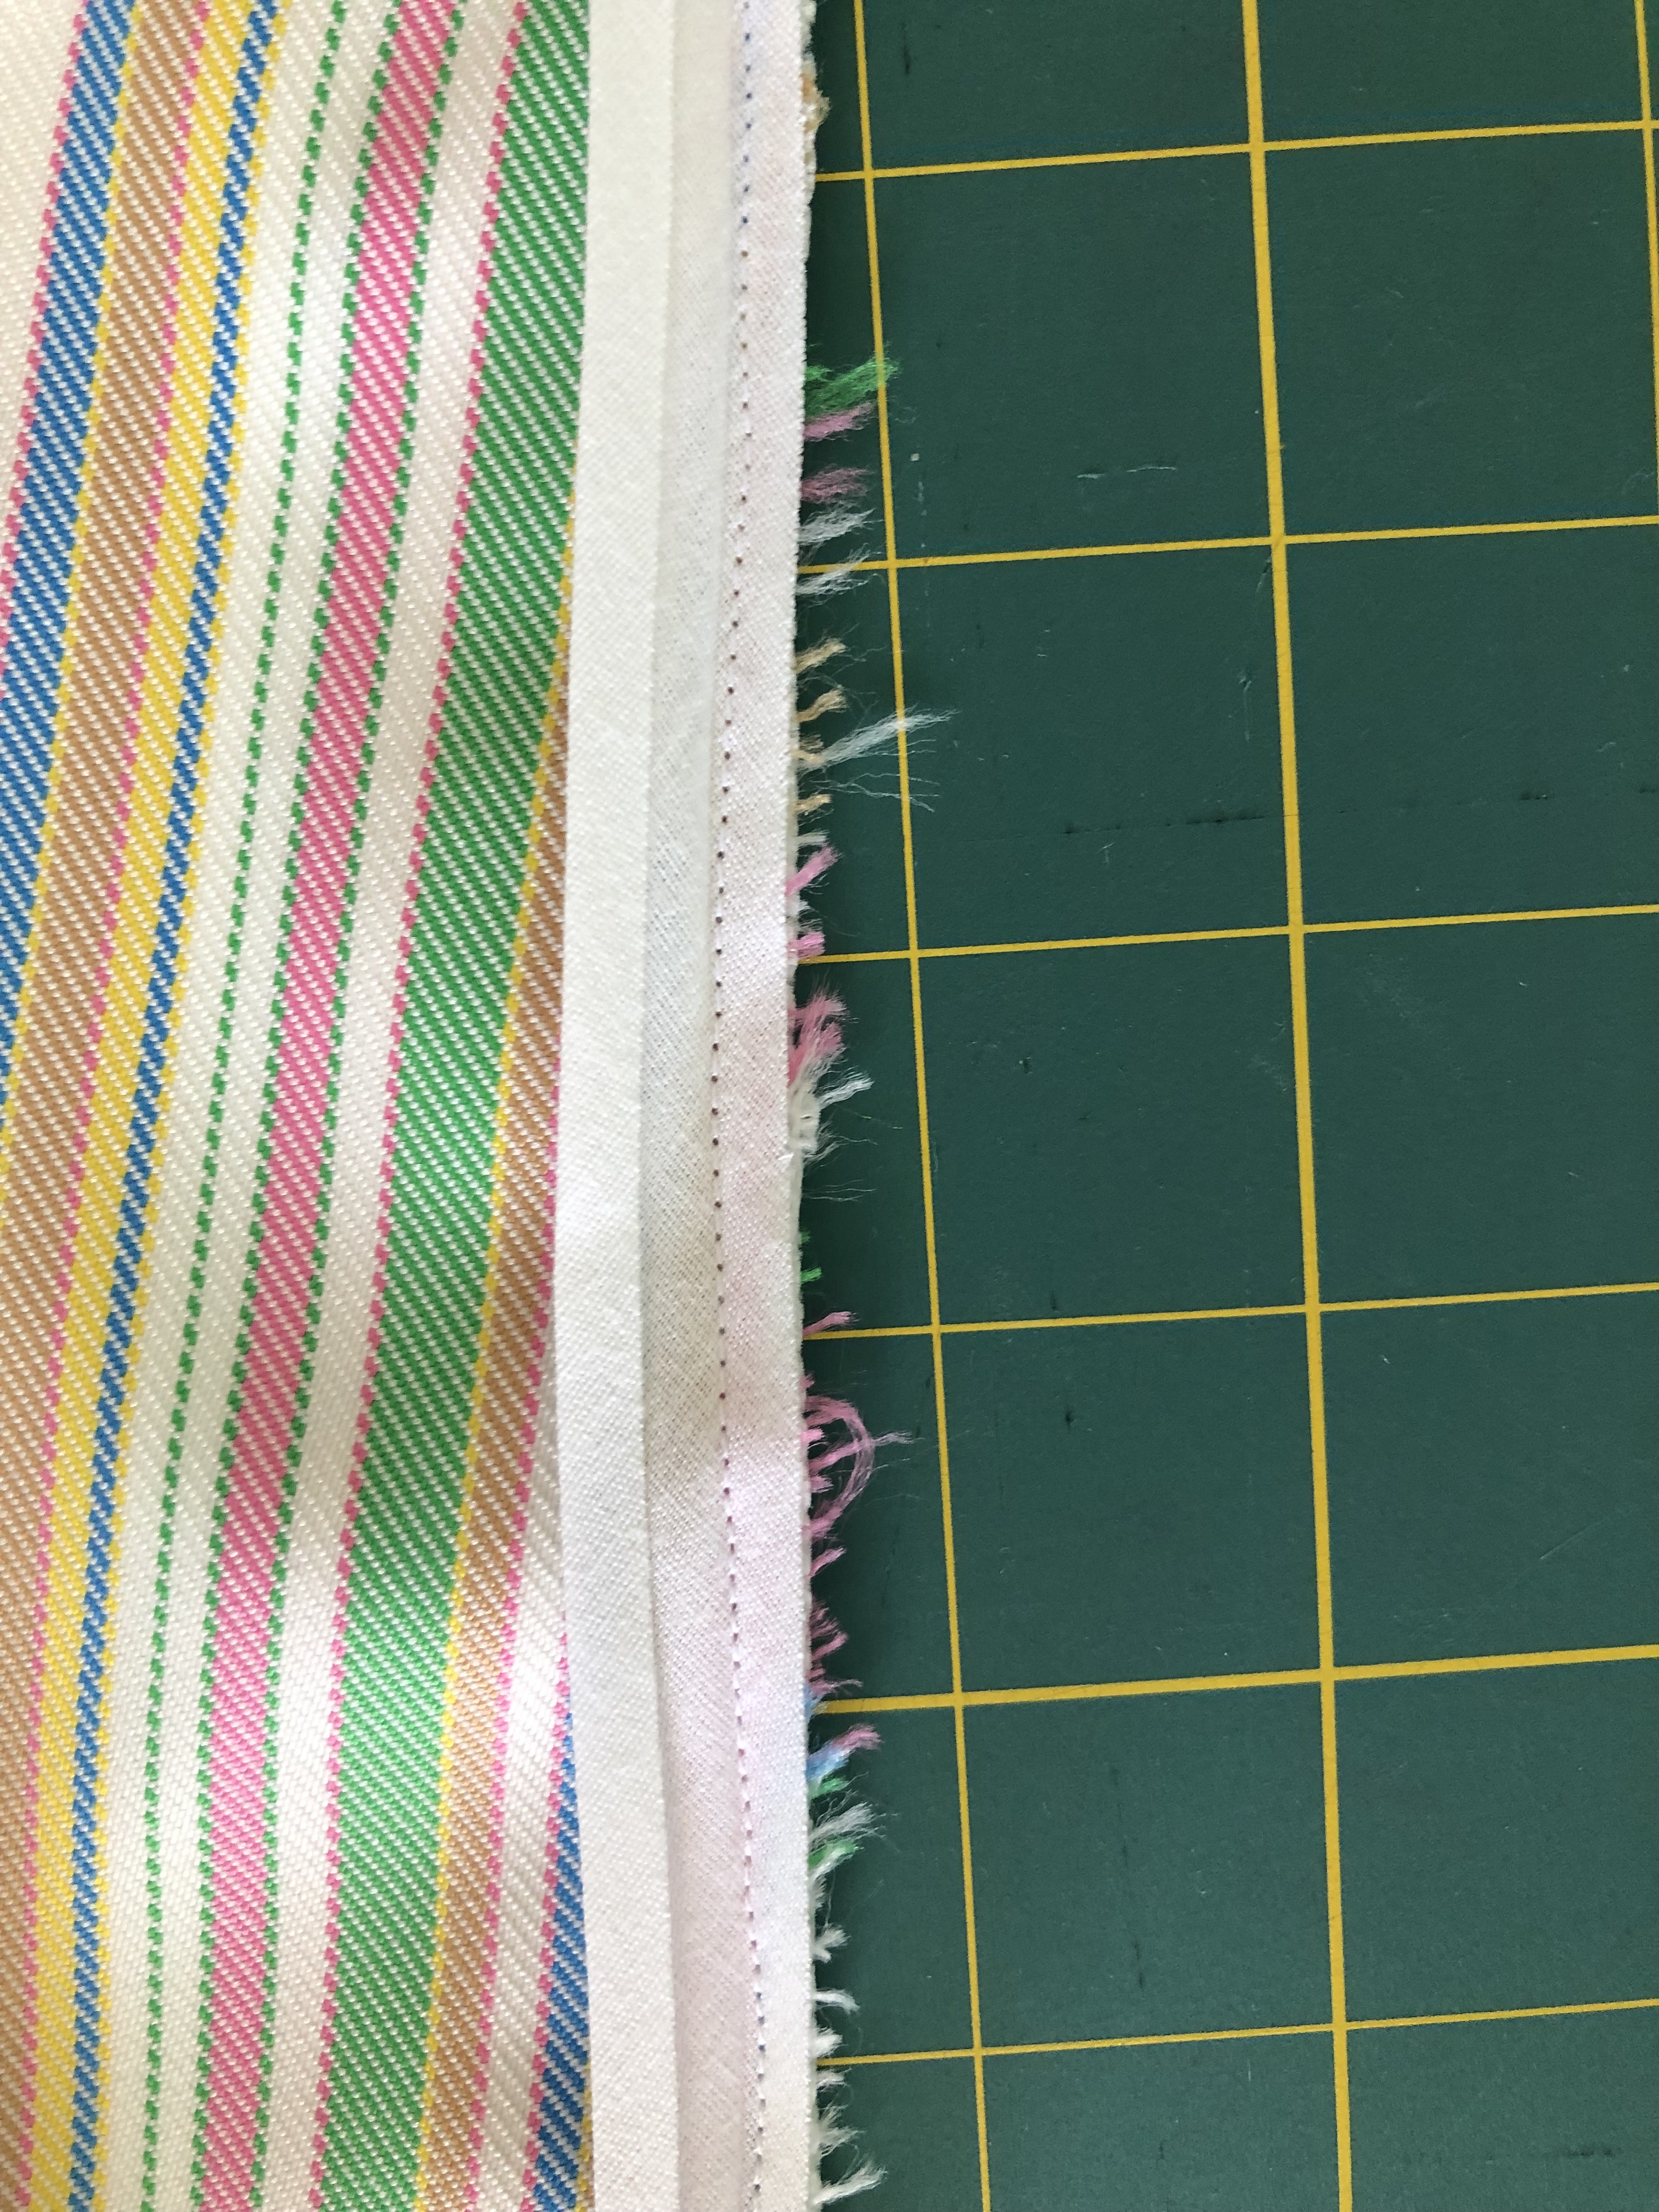
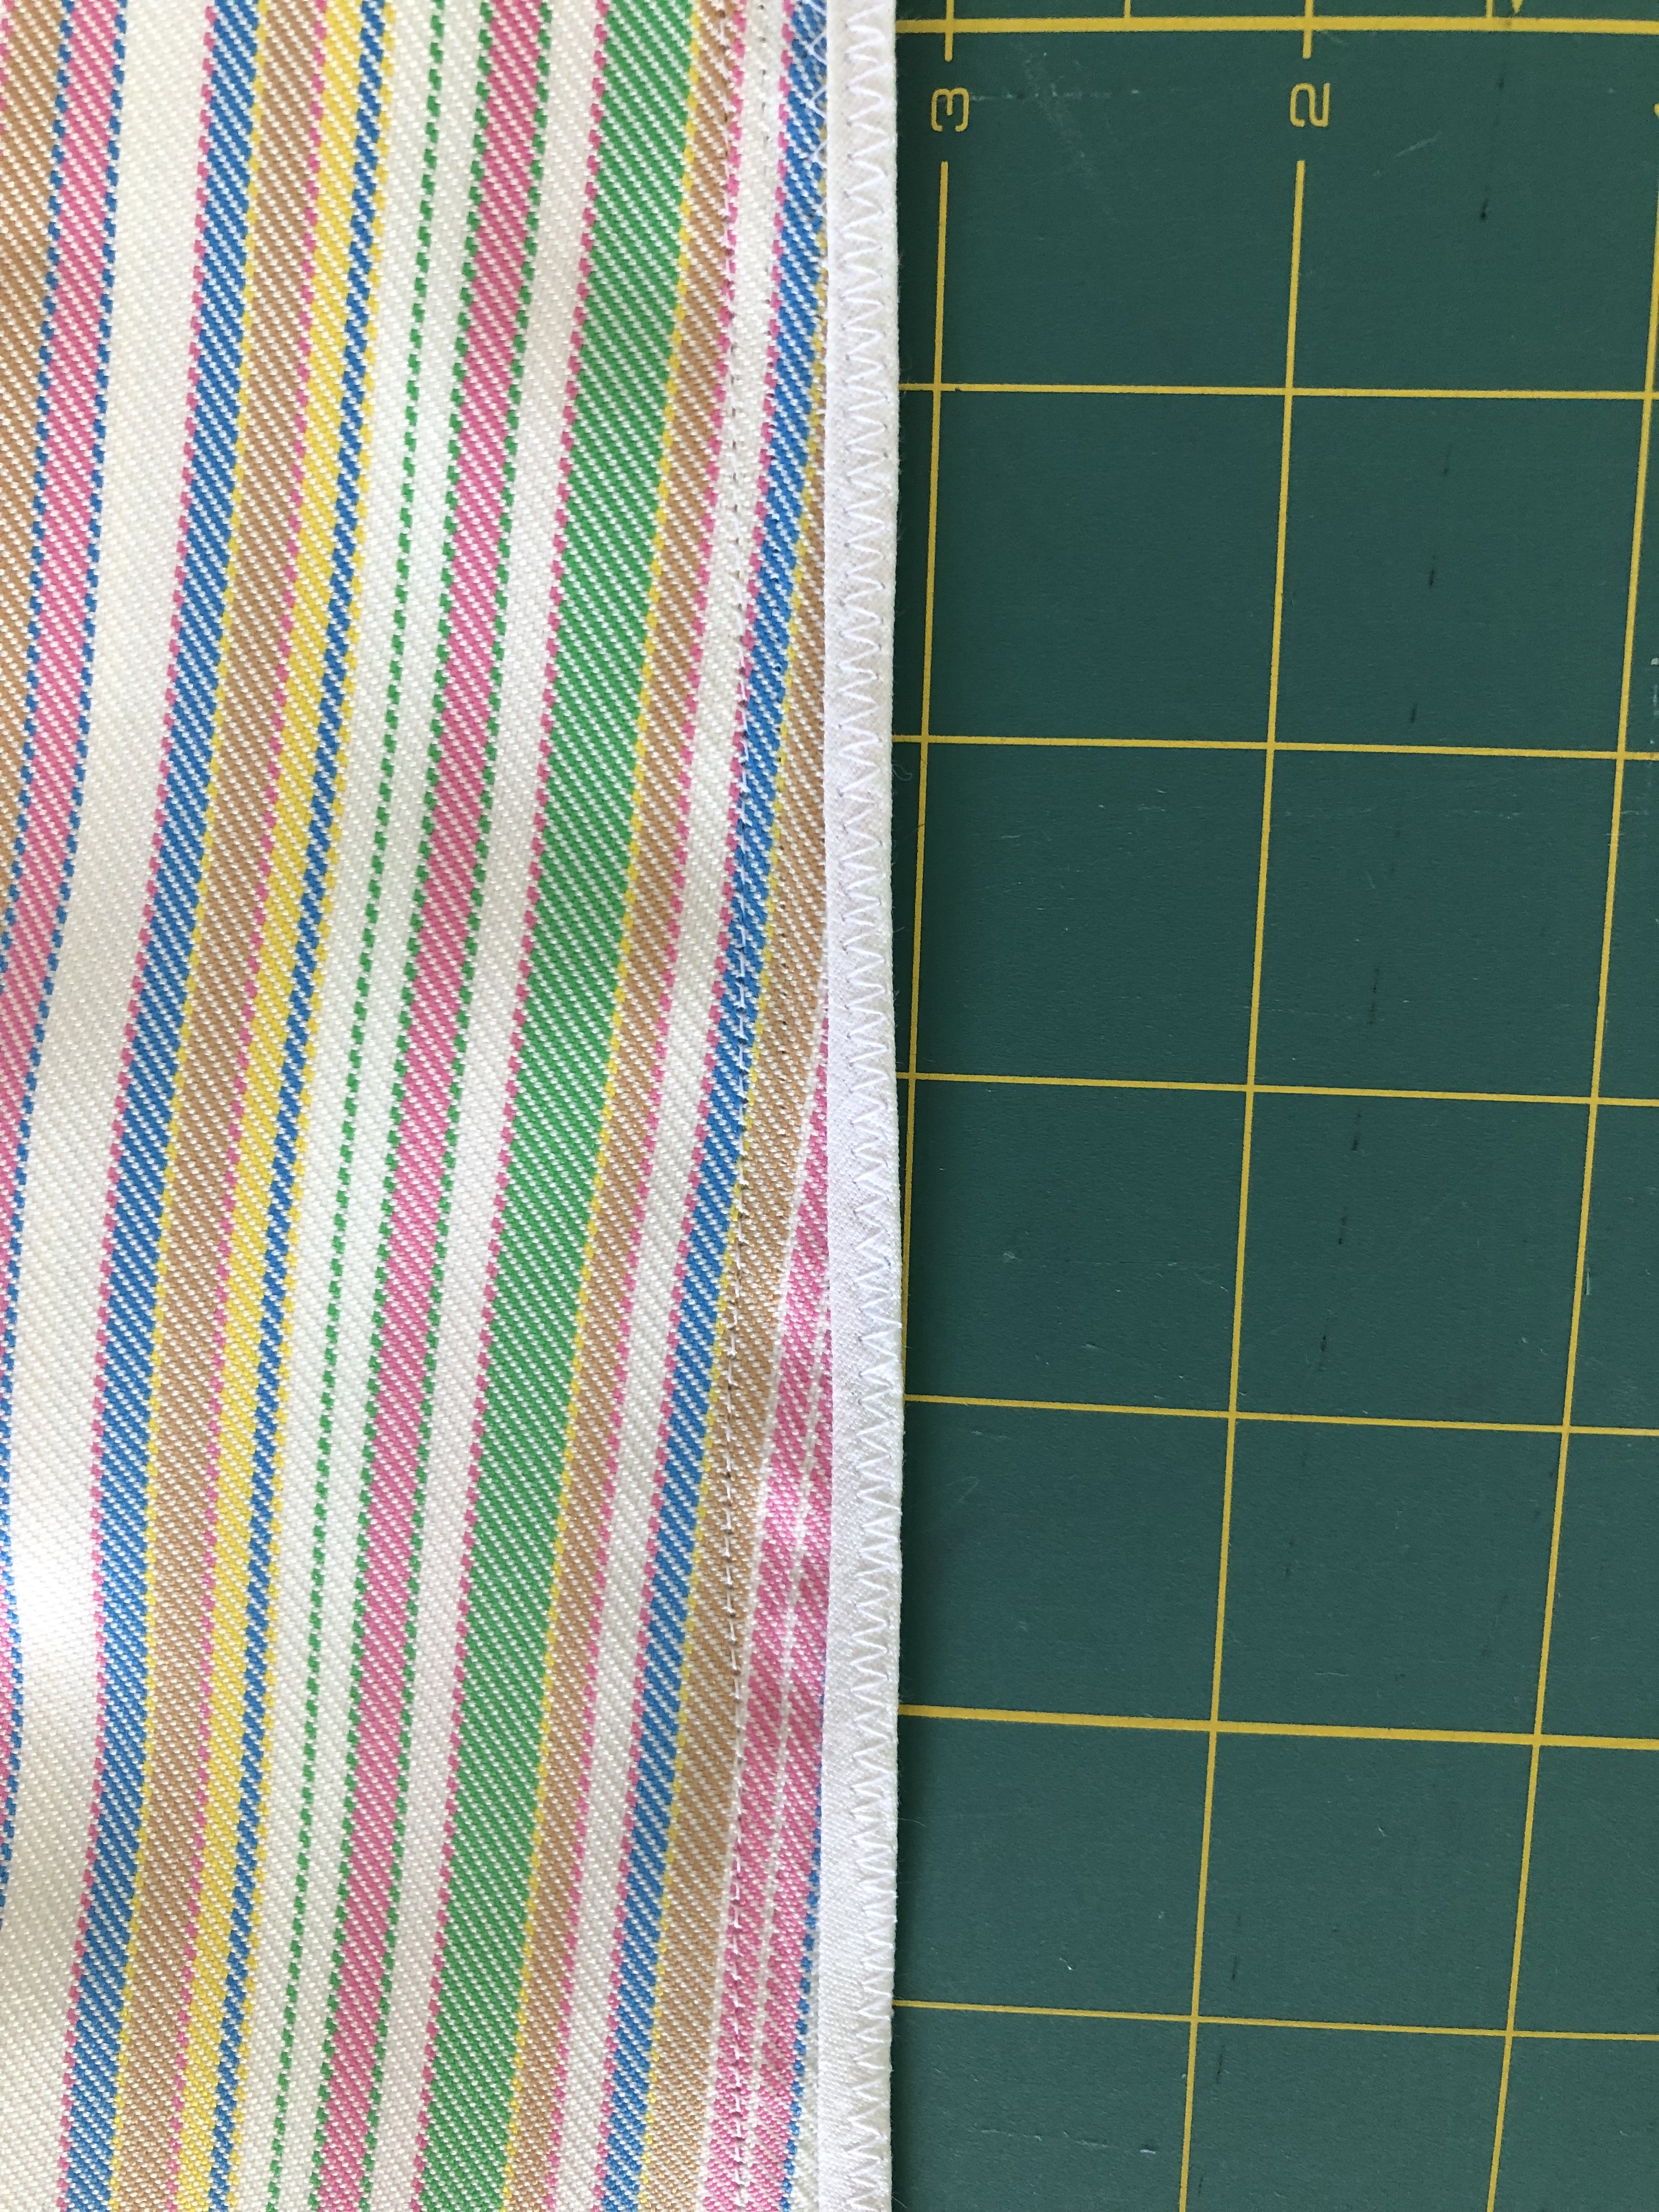
The elastic at the back waist makes the Sonata such an easy fit. It gives the dress some shaping even if your waist doesn’t really curve in all that much. 😉 I’ll admit that I kind of cheated when installing the elastic. After sewing the bodice and skirt back pieces together with a 1″ seam allowance, you’re supposed to stitch the casing to the bodice and run elastic through the casing. My “cheat” was to stitch the 1″ seam allowance, slip my elastic in between the two layers of fabric, and anchor the two ends with a zig zag stitch. Then stretching the elastic until it lay flat in the fabric, I pinned the center, then serged along the raw edge, keeping the fabric and enclosed elastic flat and even.

Then press the enclosed elastic seam up, stretch it flat and pin it in place. Coverstitch 7/8″ from the seam line, stitching the serged elastic edge in place. Tip: it will be easier to keep a straight line while coverstitching if you mark the line with chalk or a disappearing marker before adding the elastic.

I’m always excited about having pockets.

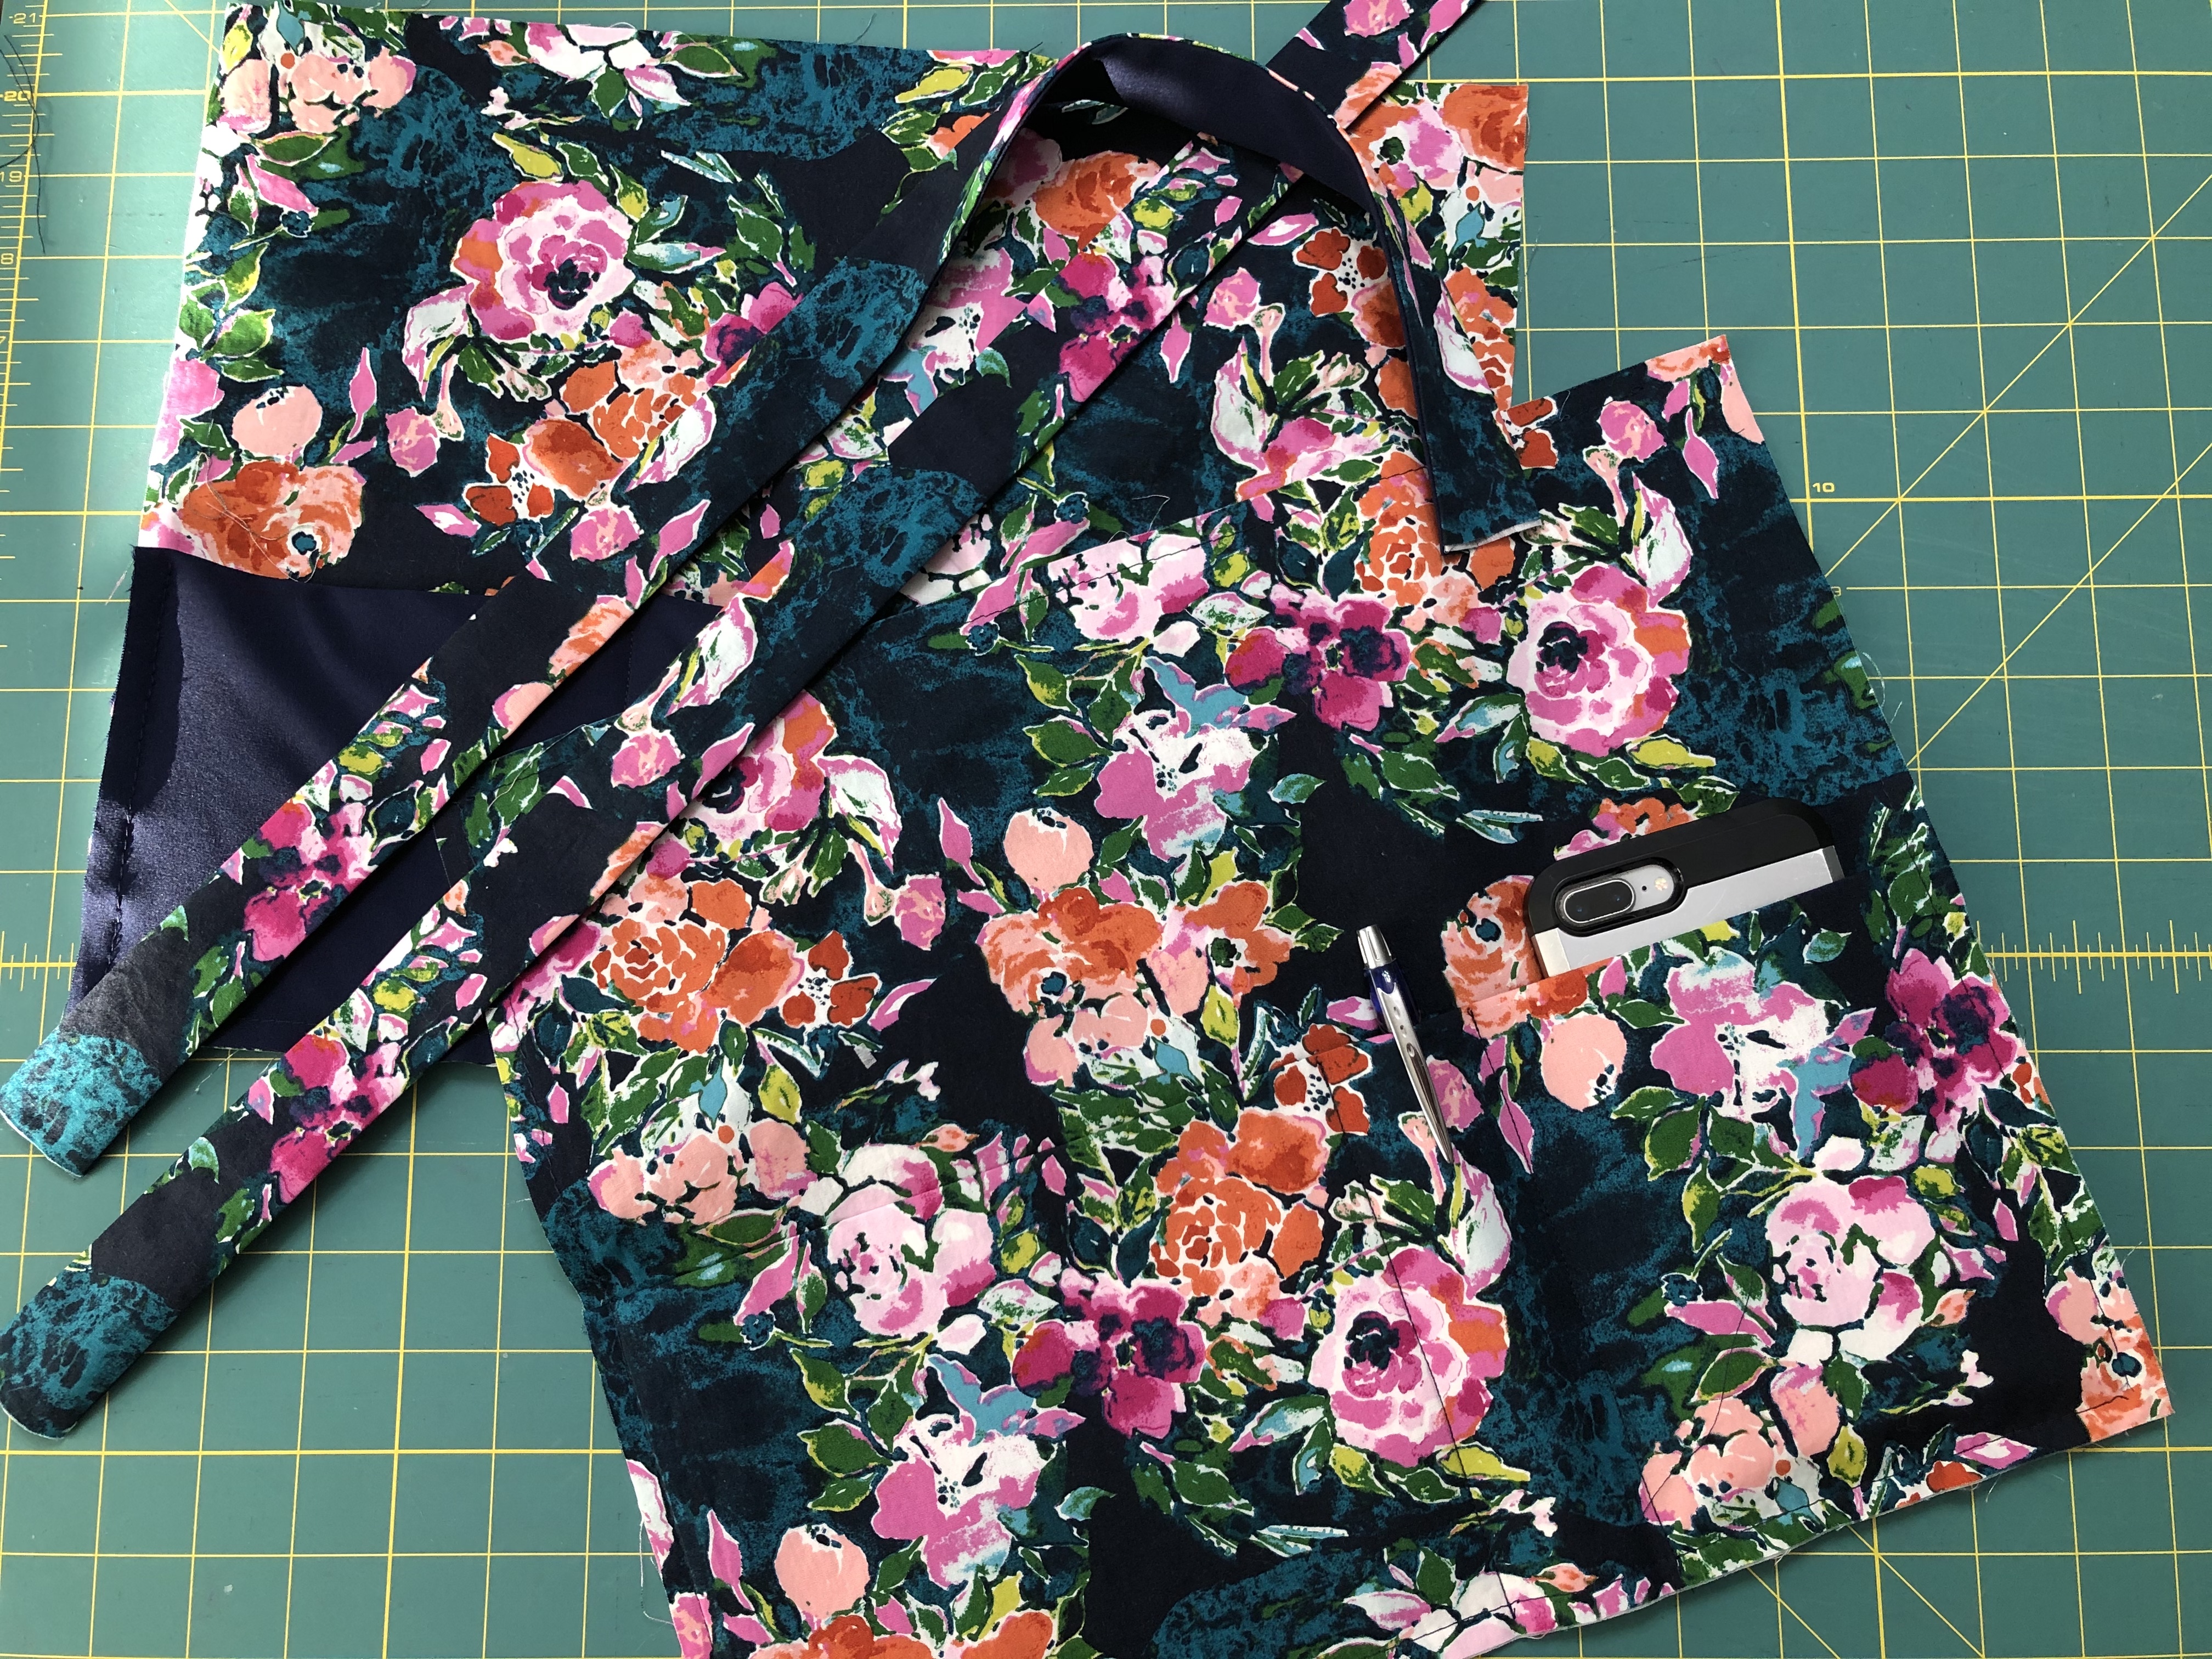
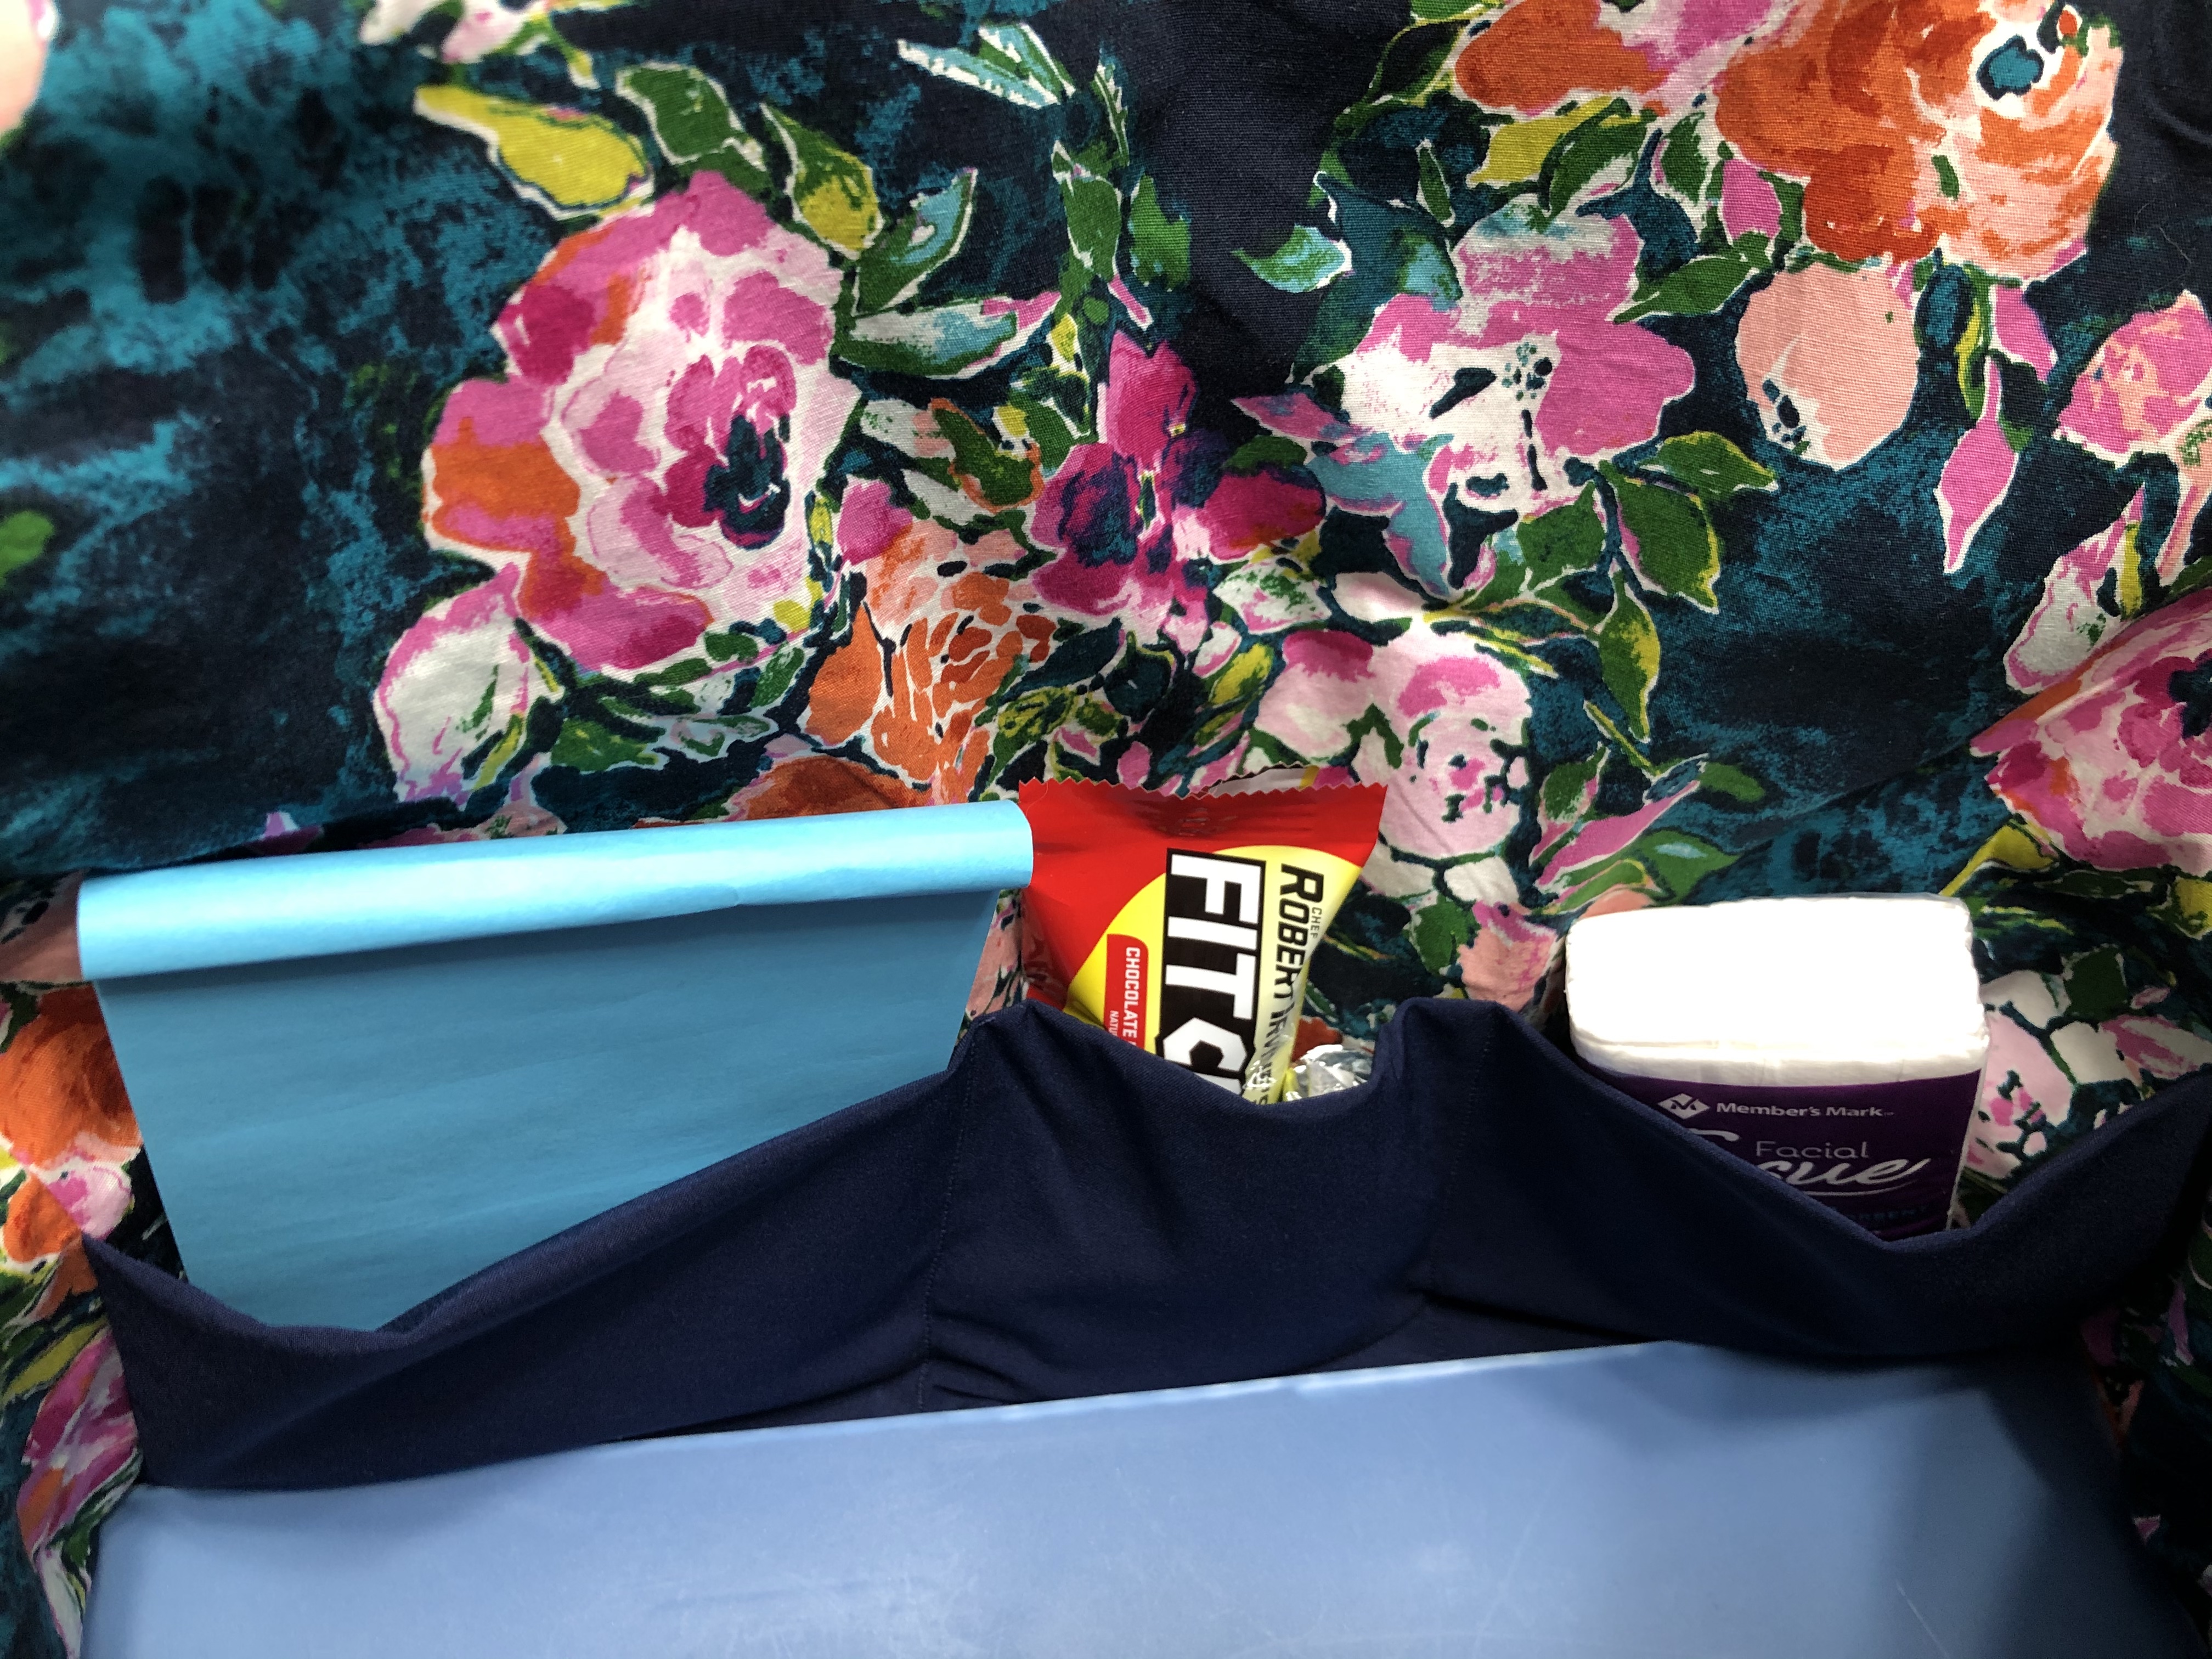
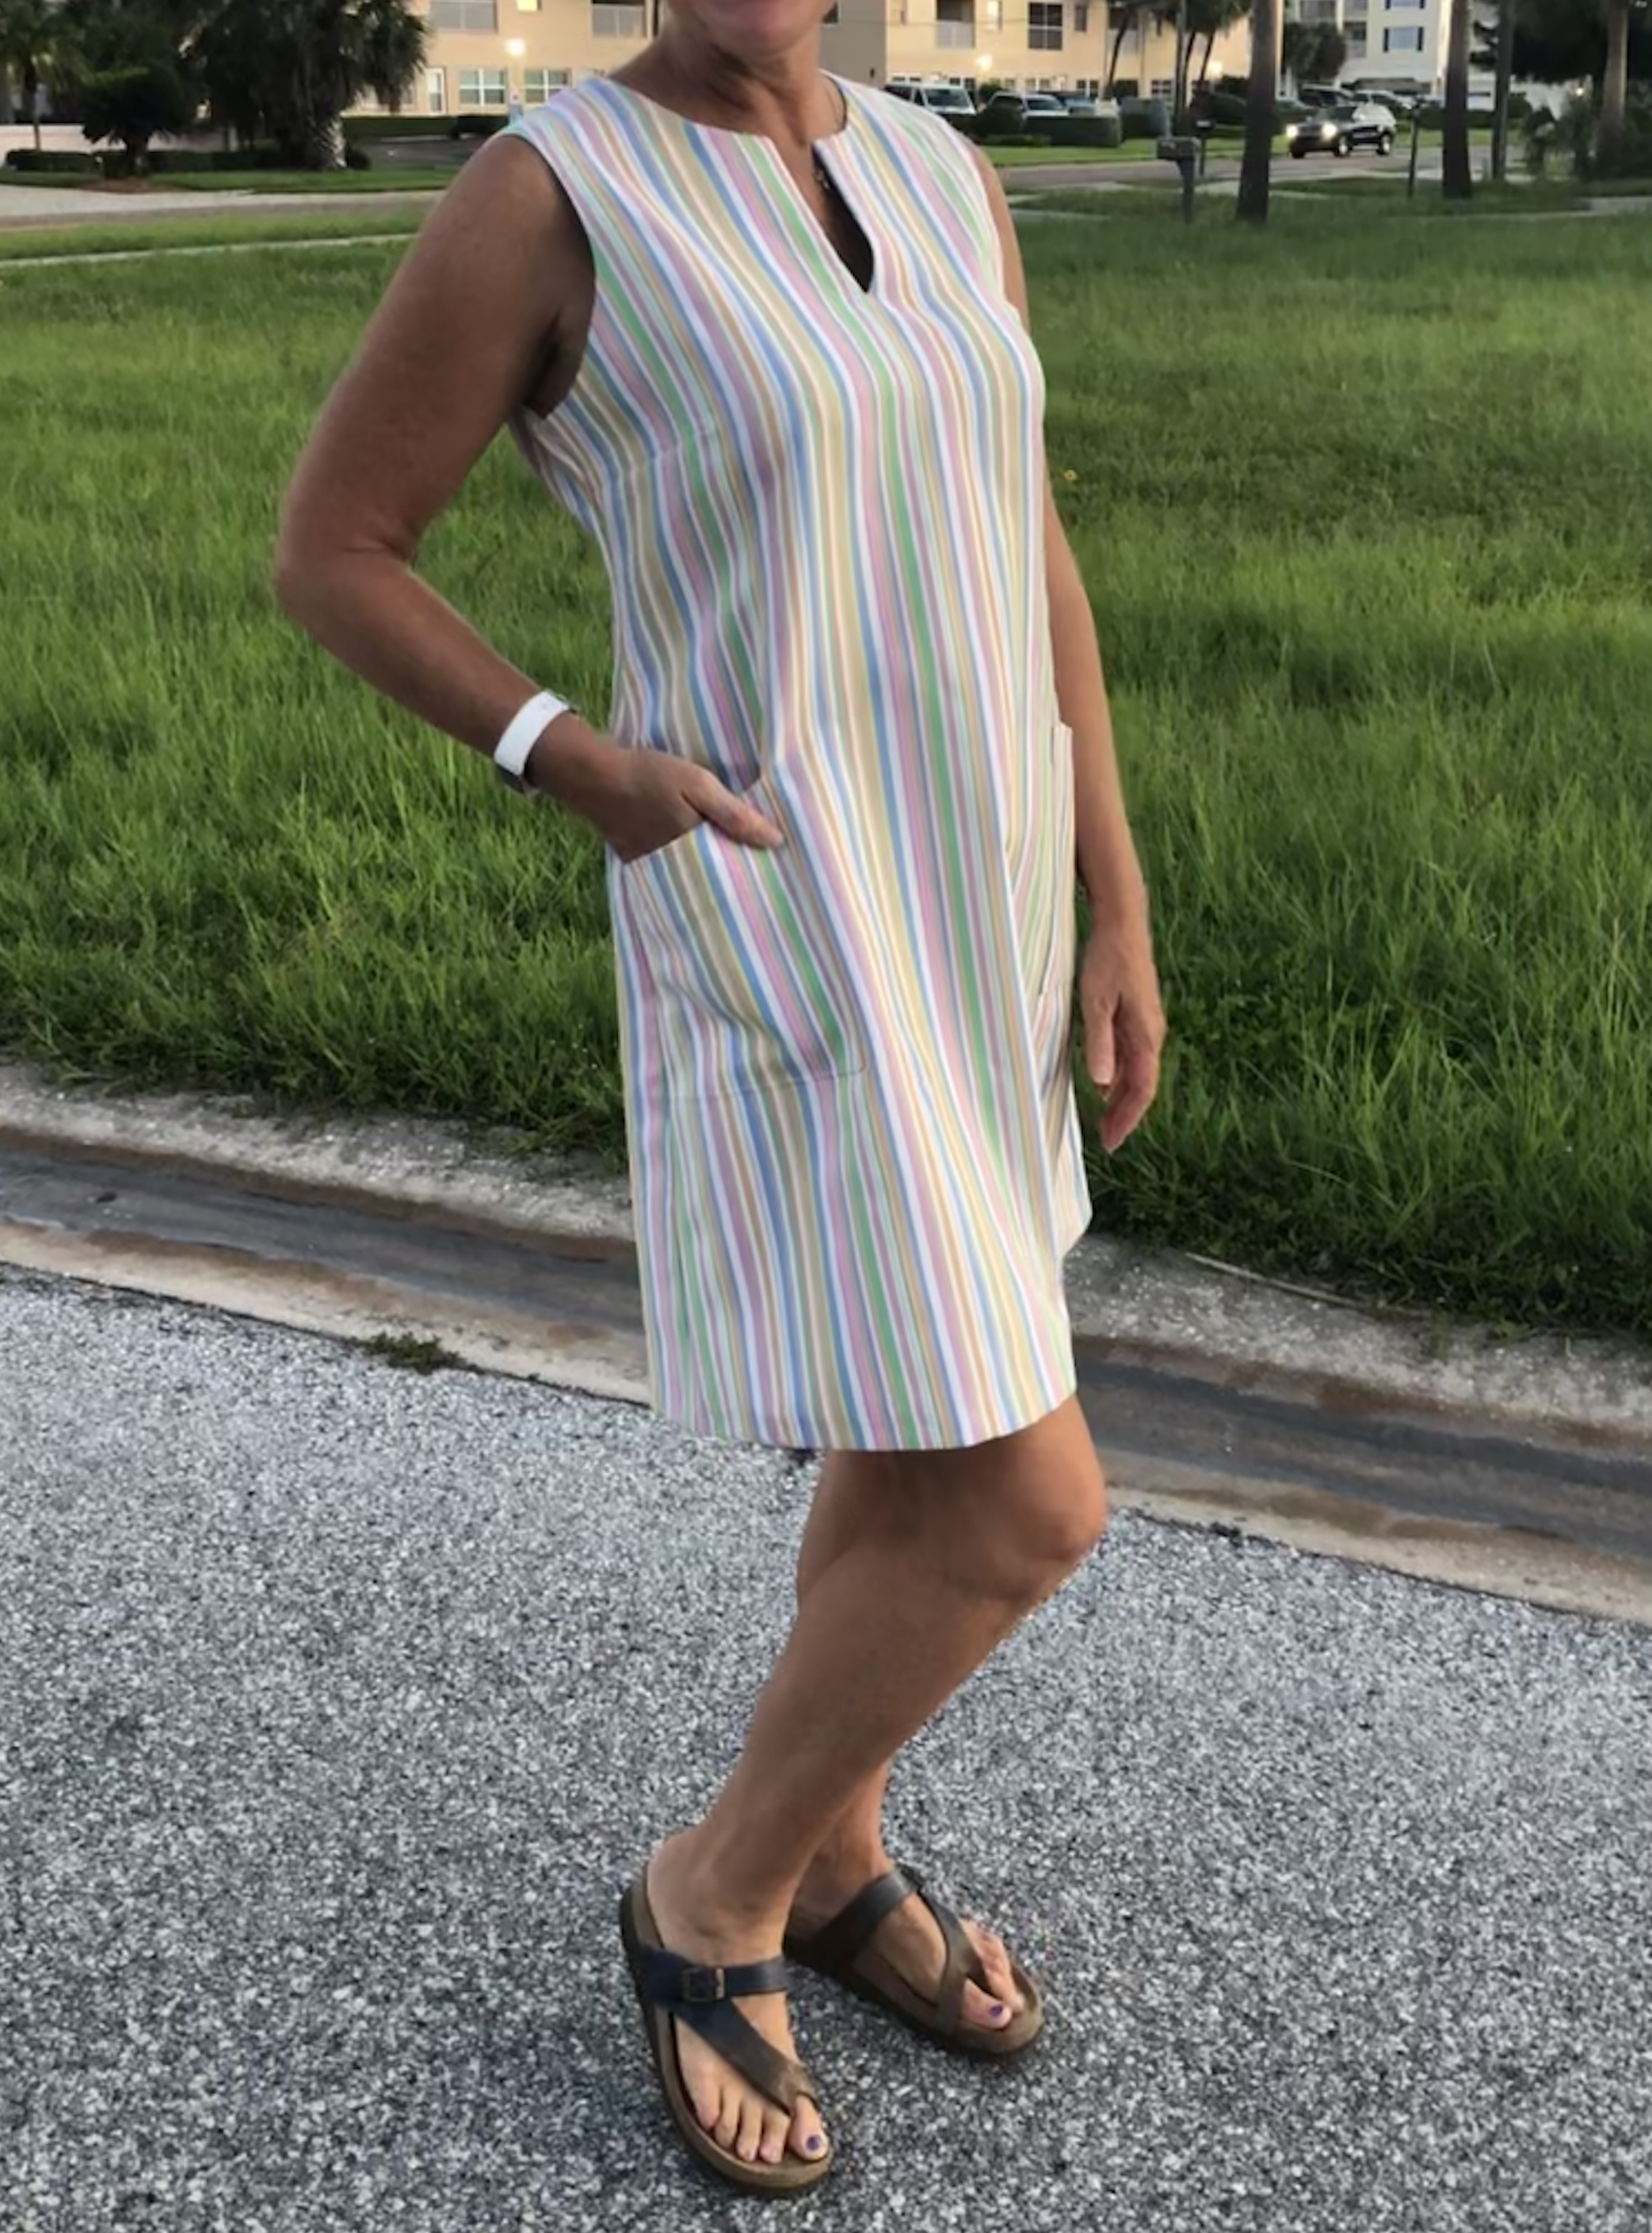
Integrated side seam pockets are such a handy thing on a woven dress. Even when carrying a phone or car keys, your pocket doesn’t get pulled out of shape. Here’s my favorite tip for sewing side seam pockets with a serger: starting a couple of inches below the pocket, use your sewing machine to stitch up to the marked pivot point, and with the needle down, rotate the fabric and stitch around the pocket to the top pivot point. Keeping the needle down, rotate the fabric and continue stitching up the side of the skirt. Then snip the corners up to but not through the stitching line. Then when you serge the seam, you can easily straighten out the stitching line to finish the pocket edges.

Stiching, then snipping up to the pivot point makes it super easy to serge the side seam pockets.

A cute new dress with pockets? What’s not to love about that? I’m super happy that I took the time to adjust the fit and perfect the pattern so that I can make more Sonata dresses. The skirt length is a perfectly flattering above knee length. And it was totally worth the time to make matching bias tape so that my armscye finish looks as pretty as the rest of my dress.

Store bought bias tape wouldn’t match this wild fabric!

After nearly burning my fingers while pressing my hand-made bias tape, I’m thinking it would be worth spending the money to buy a bias tape maker. So, here’s to more Sonata’s in my future!

The details:

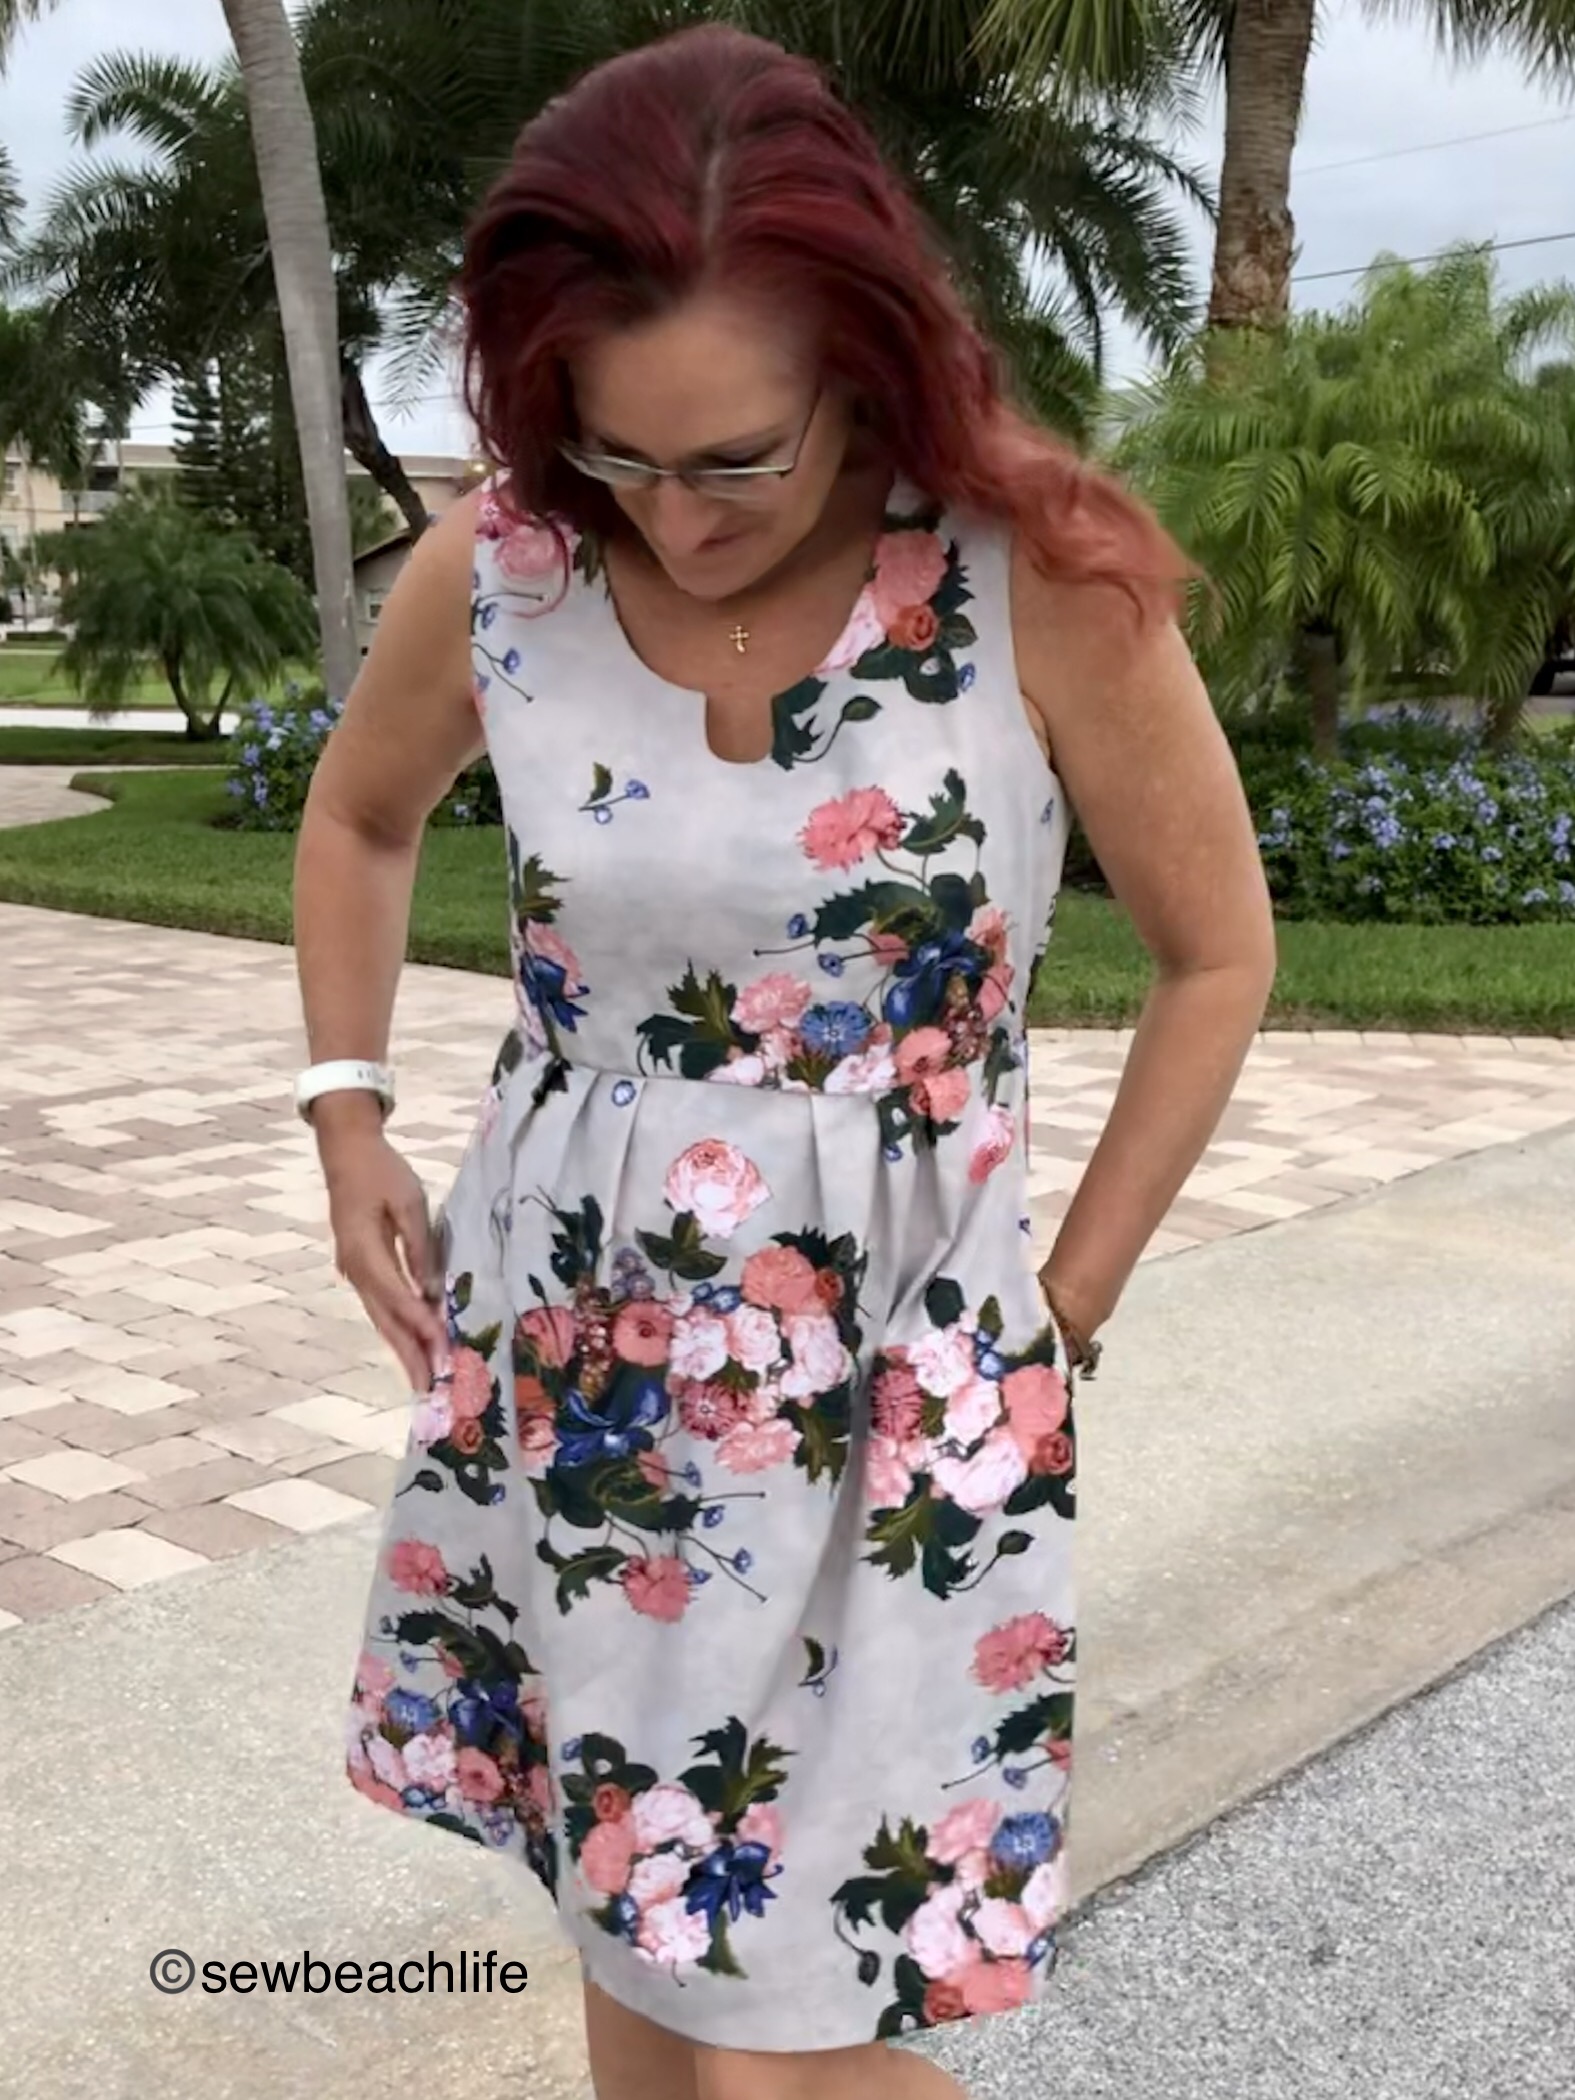
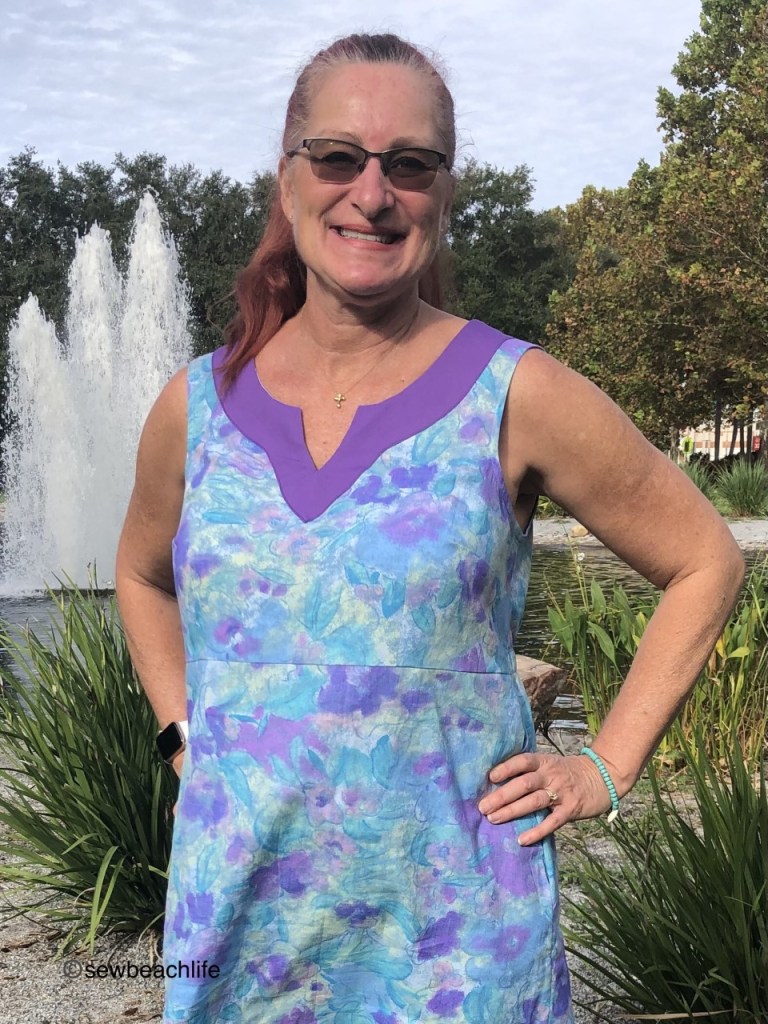
My Love Notions Sonata Dress is sleeveless, but the pattern includes short, flutter, and bishop sleeves. The neckline facing can be sewn on the outside for a fun punch of contrasting color, or inside for a more invisible look.

The watercolor floral fabric is a vintage cotton from my stash. If I had to guess by looking at the colors and print, I’d have to say I probably bought it in the early ’90s to make a dress for my daughter. I made her a lot of dresses back then, but work probably got in the way of me making one out of this fabric. Which works out well for me now. 😉

The purple facing fabric was a scrap of Art Gallery Fabrics cotton purchased from Phee Fabrics.

Thank you for reading and sharing my love of creating, sewing, patterns, fabric, and making beautiful, well-fitting garments! ❤

Jackets For The Girls

The Stitch Upon A Time Gnome Jacket

Colder weather moved into Tennessee, and my granddaughters needed jackets. Sewing a jacket just sounds so overwhelming, doesn’t it? Especially if the the jackets are reversible, and require reversible separating zippers! 😮 But Grandma love prevails, so it was time to get sewing!

For some reason, zippers seem to intimidate me. It’s silly really, because as a teenager I made a pants suit with a bomber style jacket and both pieces had zippers. (I recall that my mother saved that jacket for years after I quit wearing it, probably because she was just so impressed that I made it. 🙂 )

Let me put your mind to rest now, installing the zipper in the Stitch Upon A Time Gnome Jacket is no big deal. The tutorial is well written, and the directions are easy to follow. Seriously, the only challenging part was shortening the zippers. And that’s only because I purchased super heavy duty brass zippers and my husband had to help me remove the teeth by cutting them off with nippers! 😉 Plastic coil zippers would have been easier, but I love the sturdiness and bold look of the brass zippers!

Can you tell Lila loves playing with vehicles of all kinds? 🙂

The Gnome Jacket calls for woven fabric, and JoAnn Fabrics happened to have some quilting cotton and beautiful batiks on sale. I wanted the girls jackets to match, so the main sides were made with a swirl pattern quilting cotton. I personalized the lining side with pretty batiks in complementing colors. Lila likes purple and turquoise, and blues really bring out her eyes, so this “salt dye” batik was perfect for her.

When looking through some photos from a few years ago, I noticed how nice green looked on my son-in-law. So I figured a green would really flatter Zoey’s darker coloring. The green and turquoise circle print batik was a perfect choice for the lining of her jacket.

(Before anyone becomes concerned, Mama just sat her in the swing for a quick photo. She is ALWAYS strapped in when she’s actually swinging.)

Construction of the jackets really is easy. Honestly, the fancy gathered, completely finished pockets were the most time-consuming part! 🙂 I like finished pockets, especially on wovens, because you never have to worry about the fabric unraveling. The pockets are just as smooth and pretty on the inside as they are on the outside.

Doesn’t the zipper guard give the jacket a nice couture finished look? It also keeps the zipper from rubbing against the sensitive skin at the neck.

I made life easier by using simple rectangular pockets on the lining side of the jackets. Because of course little ones need pockets, no matter which way they wear their jackets! Where else are you going to store your snacks, random pebbles, and whatever other treasures you find?

The jackets got a little crumpled during shipping, and what Mama with two little ones, including a VERY active 3 year old dares get out a hot iron and ironing board?

The jacket has a plain back or a gathered two-piece flared back option. The gathered back is a sweet feminine touch, and only takes a few minutes longer. It’s worth the extra time for the extra girly touch!

Mama got in a little walk by pushing the girls to the playground.

Double strollers are SO handy!

The girls got plenty of play time at the playground. Climbing, perching, sliding, swinging and playing outside are always fun.

Look at that big girl sitting up by herself!

They headed over to the swings, where lots of giggling commenced! Lila was so excited to push Zoey on the swing. Zoey loved her very first time playing on the swings.

Look at that happy baby giggle!
Swings are always fun!

The Stitch Upon A Time Gnome Jackets are well worth the sew! The foldover cuff option gives a little extra “grow” room, so hopefully they’ll be able to wear them for quite a while. I am super happy with the outcome, and have already made (actually hacked to personalize!) another one for Lila. So you can tell I really like the pattern. 🙂

Slides are great for climbing too!

No matter how rough and tumble the play, or how wild the child 😉 my girls are wearing the cutest jackets at the playground!

The details:

Kid’s Gnome Jacket by Stitch Upon A Time (it doesn’t cost you anything extra to use my affiliate link, but I may earn a few pennies to buy more patterns! 😉 )

Quilting cotton and batik fabrics from JoAnn Fabrics

Reversible separating zippers from Wawak. Don’t forget to order zipper stops in the coordinating coil size if you use metal zippers!

This post may contain affiliate links.  This means that at no extra cost to you, I may receive a small commission if you purchase through my link.  As always, I only give my honest opinion.  After all, it is my blog, which represents me! 🙂 Thank you for reading and sharing my love of creating, sewing, patterns, fabric, and making beautiful things for my granddaughters! ❤


How I “Prettied Up” A Play Dress

I love sewing clothes for my granddaughter!  First of all, since she’s a growing toddler, she always needs clothes.  Secondly, since children’s clothes are small, they’re generally a pretty quick sew. 😉 And thirdly, they usually don’t take too much fabric.  Sometimes I can get away with using the larger leftover scraps of fabric from previous sews, which is what I was able to do here.

I bought a yard of the Cozy French Terry from Phee Fabrics to make Lila some joggers and a cardigan.  They turned out cute, and she wore them the day we flew up to visit.  I had a bit of the French Terry left, and thought a sweatshirt dress with a woven skirt would make a cute, comfortable play dress.  It turns out that I didn’t have enough French Terry for the sleeves, so I turned to my trusty rayon spandex for the sleeves and neck band.  Remember my Made By Rae Washi Dress blogged here?  There was just enough of the Art Gallery Fabrics 100% Premium Cotton left from my dress to make the skirt.

The Stitch Upon A Time Wendybird Dress (aff link) recently jumped into my cart the last time they had a pattern sale, so I couldn’t wait to print out the pattern.  Since there was only enough of the Art Gallery cotton left to make an 11″ long by 45″ wide rectangular skirt, I lengthened the Wendybird bodice by 2″.  Although the skirt fabric is a floral, it’s not in overly girly colors, so I decided to “pretty up” the dress by adding a ruffled placket.

To make the placket, I cut a 1-3/4″w x 4″h center base out of rayon spandex.  The two inner rayon spandex ruffles are 1-3/4″w x 8″h.  The two outer AGF cotton ruffles are 2-3/4″w x 8″h.  The center French Terry ruffle is 3/4″w x 5″h.

WB placket pieces

To make the double ruffles, fold the outer cotton ruffles in half lengthwise, right sides together, and stitch along one short end.  Fold the inner rayon spandex ruffles in half lengthwise, right sides together, and stitch along one short end.  Clip the corners, being careful to not cut through the stitching line, turn the ruffles right sides out and press.  Lay an inner ruffle on top of an outer ruffle with the cut sides and finished ends aligned.  Sew a long basting stitch with a 1/4″ seam allowance, and pull the bobbin thread to gather the ruffles.  Repeat with the other double ruffle.

Fold the bottom edge of the center base under 1/4″ and baste or use Wash Away Wonder tape to keep the fold in place.  Lay a double ruffle on the center base right sides together, with the finished edge of the ruffle toward the bottom.  Stitch along the side with a 3/8″ seam allowance.  Press the ruffle to the outside and repeat with the other double ruffle.

Next we add the center ruffle.  Because the French Terry won’t fray,  the edges are left raw.  Run a basting stitch down the middle of the center ruffle, and gather it to fit the placket base.  Keeping the center ruffle 3/8″ away from the top, zig zag down the center of the ruffle to stitch it in place.

Mark the center front of the bodice with a pin.  Use tailor’s chalk, or a washable fabric marker to mark the ruffle placket placement, which should be a rectangle 1″ wide by 4″ high.

WB mark

Line the ruffle placket up at the top of the neckline and with the markings, and top-stitch around the center base to secure it to the bodice.  Baste the unfinished edges of the double ruffles in place at the neckline.  Sew on the neckband as per the pattern directions, being sure to catch the top of the double ruffles and placket in the band.

WB placket

To make the skirt, cut two 11″h x 22-1/2″w (I would have preferred 12 or 13″ high, but that was all the fabric that I had!) panels out of the AGF cotton.  Place the panels right sides together and stitch along the side seams.  Press the bottom up 1/2″, and another 1/2″ and stitch the hem.  You can run a long basting stitch around the top of the skirt to gather it, but since it’s being sewn onto a knit bodice, I like using cotton swim elastic to gather.  Measure the bottom of the bodice, and cut the elastic to that length.  Overlap the ends of the elastic 3/4″ and zigzag to form a loop.  Use a pencil to mark the quarter points of the elastic.  Mark the centers of the skirt front and back, and they and the side seams will be the quarter points of the skirt.  Line up the quarter points of the elastic along the top of the skirt, and stretch the elastic to fit as you zigzag it in place.  It should gather the skirt to fit the bodice perfectly.

WB flat

With the skirt inside out, slide the bodice down inside the skirt, right sides together, matching side seams and center points.  Sew the bodice to the skirt, then give everything a good press.  Ta dah!  A simple play dress turns into a pretty, party-worthy dress!

Since Lila only recently turned two, she doesn’t attend a lot of parties.  But she is always ready to run and play outside, picking up sticks and leaves on her way to and from the park.

WB dress sticks

And I love that she is able to play outside in nature nearly every day.  I hope that she never forgets the joy and wonder of exploring, learning new things, and playing every day.

WB dress oh

WB dress up

When you’re done sewing, don’t forget to go for a walk, and enjoy the fresh air and sunshine.  Maybe you’ll find some sticks to play with too! 🙂

Thank you for reading and sharing my love of sewing, fabric, patterns, designing, and creating. ❤


Sew Simple Tote Tutorial

Whether you’re participating in a Secret Santa or handmade holiday gift exchange, or just want a useful tote bag to have on hand, I’ve got a simple tutorial for you.  If you’re a bag maker, you probably already have some wonderful patterns.  But if you’re like me, and only randomly make bags when the need arises, this idea should work for you.

I was originally going to use an old McCall’s Crafts pattern I had in my stash.  But once I started digging through the tissue paper pattern, trying to find all of the pieces for the view I wanted to make, (with my cat batting at and biting the tissue paper) I decided it was easier to make up my own pattern!  Since all of the pieces are rectangles, if you use a quilting ruler and rotary cutter and mat, you don’t need actual pattern pieces.

The tote bag is designed to be reversible, with a row of pockets on both the inside and outer side.  You can use all the same fabric, two (or more) coordinating fabrics, or just use an accent fabric for certain pieces like I did.  Here are the measurements for all of the pieces you will need:

  • 4@ 12″h x 15″w for the side panels (you can make two of them in coordinates if you’d like)
  • 4@ 12″h x 5″w for the end panels (again, two can be coordinating fabric)
  • 2@ 5″ x 15″ for the bottom (one can be a coordinate)
  • 1@ 12″h x 15″w for the outer pocket
  • 1@ 11″h x 15″w for the shorter inner pocket
  • 4@ 2″ x 24″ for the straps (two can be coordinates)
  • You will also cut all of the above out of interfacing, (a heavier weight is better at stiffening the bag)

tote pieces Phee

I used Art Gallery Fabrics 100% premium cotton, (the AGF canvas would also work great!), and stretch twill that I purchased from Phee Fabrics.  This print is called Botanists Essay, and it is one of my favorite prints.  The stretch twill is actually navy, though it almost looks black in my photos.  I like the simple contrast of the solid twill against the floral print.

The first step is ironing the interfacing to the wrong side of all your pieces.  Of course I ran out of iron-on interfacing and instead had to baste regular interfacing to my pieces. 😦  Let’s just say that iron-on works better. 🙂

The next step is making the pockets.  Fold the pocket pieces in half, wrong sides together so that they are still 15″ wide.  Lay the outer pocket on top of one of the side panels, lining it up with the bottom and sides.  Baste the pocket to the side panel along the bottom and sides.  To form pockets, measure over 8″ from the left hand side and stitch, being sure to tack at the top of the pocket.  Measure 5-1/4″ from the right hand side and stitch, again tacking at the top of the pocket.  These pockets are sized to work great for your phone, a pen, your keys, etc.

draw out pock

The inner pockets are made in a similar way.  Lay the inner pocket on top of a side panel, lining it up with the sides and the bottom.  Baste the pocket to the side panel along the sides and bottom.  Measure 5-1/2″ from each side and stitch, tacking at the top of the pockets.  These pockets are sized to hold a notepad or tissues, and perhaps some gum or snacks!  Feel free to adjust the pocket sizes to suit your needs.

draw in pock

Now it’s time to assemble the tote bag.  Lay an end panel on the outer pocket side panel, right sides together and stitch along the side seam, using a 1/2″ seam allowance.  Then line up another side panel with the long unsewn side of the end panel, and stitch.  Then line up the other end panel on that side panel, and stitch.  Finally, line up the edges of the end panel and the pocket side panel and sew them together so that you end up with a rectangular tube.

To assist with sewing the bottom onto the tote, I like to mark the four corners 1/2″ from the edges on the wrong side of the fabric.  Line the bottom piece up with the bottom of one of the side panels ensuring that the 1/2″ markings line up with the seams, and that they are right sides together.  Stitch, being sure to back stitch at both ends.

tote bottom pins

Rotate the bottom so that one of the short sides lines up with the end panel, and stitch from one 1/2″ mark to the next.  The marks should line up with the seams.  Then rotate the bag again to line up the other long edge of the bottom with the other side panel, matching the 1/2″ marks and seams, and stitch.  Finally, rotate one last time to line up the final short side of the bottom with the final end panel, and stitch.  Clip the corners, being sure to not cut through the stitching line.

tote bottom sewn

Repeat this process of sewing the sides and ends together, then adding the bag bottom with the “lining” or inner side of the bag.  Then it’s time to make the bag straps.

tote straps

I used contrasting fabric so that one side of the straps are floral, and the other side is solid.  Place the two strap pieces right sides together, and stitch the two long sides.  Repeat with the other two strap pieces, and turn both straps right sides out.  Press and top stitch the long edges of the straps.  Measure 3″ from the seam on the side panels and pin an end of the strap in place, lining up the ends of the strap with the top of the bag.  Stitch each end of the strap in place, being sure not to twist the strap.  Repeat with the second strap on the other side panel.

tote sew layers

It’s finally time to sew the inner and outer layers together.  Turn one bag inside out.  Place the other bag inside of it, so that they are right sides are together.  Ensure that the straps are safely tucked between the two layers, and pin along the top of the bag.  Stitch along the top of the bag, leaving a 2-3″ opening so that you can turn the bag right side out.  Once the bag is right sides out, press and top-stitch along the top edge.

You’ve got a handy dandy tote with three pockets on the outside.

tote pockets full

And three pockets on the inside.  (Since it’s reversible, it can also be flipped so that the inner pockets are on the outside.)

tote reversed


To add stability to the bottom of the bag, I needed a hard thin piece of plastic to stick in the bottom of the tote.  Originally, I considered sewing a piece of plastic canvas between the two bottom layers.  Apparently my local craft store no longer carries plastic canvas, so that idea was out.  My husband came up with a solution when he mentioned that he had a couple of plastic lids in the garage that didn’t match any of the storage bins.   After moving and reorganizing the garage, he threw away the cracked and broken bins, but had kept the lids.  So I drew a 4″ x 14″ rectangle on one of the lids, and cut it out with some tin snips (my husband likes tools, and almost always has the proper tool for the job on hand!)  I sanded the cut edges to ensure that they were smooth, and slid the plastic in place at the bottom of the tote.

tote inner pockets full

The plastic insert can be removed and wiped clean, and the tote can be thrown in the washer and dryer in case of a spill.  I always wash and dry my fabric before sewing, so I never have to worry whether anything will shrink after making it.

And there you have it!  A simple tutorial and a new tote bag to use or gift.  Once you’ve sewn a tote, you can always personalize the size and shape and pocket formation of the next one to suit your needs.

Thank you for reading and sharing my love of sewing, patterns, fabric, creating, and design. ❤


The Wonderful Woven Washi Dress

High quality fabric and quality finishes truly make the garment!

When Phee Fabrics started stocking Art Gallery Fabrics in 100% premium cotton OEKO-TEX certified fabric, I knew it was time to search for a new pattern.  I have a couple of woven dress patterns that I like, (blogged here and here) but they are quite similar, and I wanted something with a little more detail to showcase the pretty fabric.

One of my sewing friends who also likes dresses, suggested a few pattern companies to me.  She forewarned me that the patterns were not inexpensive, but felt that they were worth the money.  I scrolled through a few companies, and kept coming back to the Made By Rae Washi Dress.  The simple pleats, neck detail, and of course- pockets, spoke to me.

Whenever I get a new pattern (especially for wovens), I like to compare it to a pattern that I know fits me well, to see how similar or different the fit is.  Since wovens don’t have any give, making sure that you’ve got a good fit is very important!  Right away I could tell that this pattern was drafted for a much smaller cup size, so I knew I was going to have to do some work to get a perfect fit.  I traced the bodice and taped the dart together, and held it against my body to see how far off the fit was.  The dart ended up a couple of inches above my bust apex, and the bodice didn’t cover the bottom of my bust.  Sigh!

Washi bust

Since this is kind of a common issue for me with woven patterns, it wasn’t exactly unexpected.  I needed some length between the armscye and the dart, so the simple fix was slashing the bodice front and adding in a 1.5″ wide strip of waxed paper.  I also added 1.5″ length to the pattern back.

Washi pattern adj

I cut out a bodice front and the upper back of the pattern in some cheap fabric and basted it together to check my fit.  I decided another half inch added to the front at the shoulder seam would give me that extra little bit I needed, and cut into my good fabric.  I took some time with my pattern layout, because every sewist knows that if you’re working with a floral fabric, it’s nearly impossible to avoid having flowers on your bust.  And I wanted an intentional placement versus an awkward one! 🙂

The pattern tutorial suggests using interfacing on the front around the U-notch to help keep the corners laying smoothly.  Tracing around the stitch line gave me the perfect shape to iron on to the bodice front.

Washi interfacing

It also calls for facings at the front and back neckline, and bias trim along the armscyes. But a finished bodice lining is just so much nicer, and would also make it easy to stich a couple of lines 1/2″ apart across the back to make a casing for my elastic.  To make a bodice lining, cut another bodice front, and cut a bodice back by folding the pattern back 1/2″ below the bottom shirring line marking.  Sew the front and back linings together at the shoulder seams.  Sew the bodice front and dress back pieces together at the shoulder seams.  Place the lining over the dress, right sides together, and stitch around the neckline.  Clip the curves, turn right side out and press.

Then you will need to “burrito roll” the bodice to sew the armscyes.  If you’ve never done the “burrito roll” method, it’s almost magical how it works!  Basically you are rolling the garment up from one side, then flipping the opposite sides over and around (enclosing the rolled portion in the shoulder strap area) and stitching the armscye, then pulling it through.  There are plenty of video tutorials online if you are a visual learner.  Again you will clip the curves, turn the bodice right side out and press carefully.  Stitch the side seams and press.  Turn the bottom edge of the lining under 1/4″ and press.

You’re supposed to do 5 or 6 lines of shirring along the back, to give a nice fitted look.  Since shirring didn’t really sound fun, and wasn’t the look I was going for, I opted to use elastic in a casing.  Keeping your fabric smooth, stitch the bodice back lining to the dress back along the bottom two marked shirring lines.  This will give you the casing for the back elastic. To determine the proper length of elastic, measure your body around the bottom of the bodice.  Divide the measurement in two, and use 3/8″ wide cotton swimwear elastic, marked at that length.  Thread the elastic through, stitching it in place at both ends.  Then stitch the bodice front lining in place by stitching in the ditch along the front seam line.

The interior back bodice:

Washi int backThe interior front bodice:

Washi int front

Can you see why lining the bodice is worth the effort?  There is just something so satisfying about a garment that is as nicely finished on the inside as it is on the outside!  You can always feel proud about making a quality garment that will last!

Washi frontWashi back

I love my new dress!  And it has pockets!  It’s cool and comfortable, and can be layered under a jacket or cardigan for year round use.

Washi pocketsWashi down

Using a blind hem stitch on my sewing machine was the only way to do the hem.  It’s a nice deep hem, folded under an inch, zigzagged and pressed, then folded under another two inches.  It reminds me of the type of sewing my beloved grandmother used to do. ❤  High quality fabrics, quality finishes, and a nice deep hem.

Now that I’ve got my pattern perfected, I need to decide on some more Art Gallery Fabric so that I can make another dress!


This post may contain affiliate links.  This means that at no extra cost to you, I may receive a small commission/credit if you purchase through my link.  As always, I only give my honest opinion.  After all, it is my blog, which represents me! 🙂  Thank you for reading and sharing my love of sewing, patterns, fabric, and pattern hacking. ❤


The V&A Mary Quant Style Minidress

I’ve never had the opportunity to visit the Victoria & Albert Museum, as I’ve never been to England.  A visit to any museum of art and design sounds fabulous!  I spent hours and hours wandering through the Chicago Art Institute about 10 years ago and would gladly visit again.  Being able to stand mere feet from priceless Monet’s and other treasures is fascinating.

A post on one of the Facebook sewing groups I belong to noted that as part of a Mary Quant exhibit at the V&A, there was a free Mary Quant Style Minidress pattern and tutorial available, designed by Alice & Co Patterns.  A-line dresses are a generally flattering look, so I thought I would give it a try.  The pattern includes plenty of options, so you can personalize it to suit you.  A keyhole neckline or zip front; a rounded or pointed collar, or necktie; curved or angled pockets; and sleeveless, or fluted or gathered sleeves.

It’s warm pretty much year round where I live, so I went with sleeveless, and adapted the front to be a slight V, rather than zip.  The angled pockets are a unique look, and more than large enough to hold my phone.  Taking care to line up the stripes on the pocket pieces with the stripes on the dress paid off.  The pockets are nearly invisible!

VAMQ pocket

My measurements fell between two sizes, so I printed the larger size, knowing that I could take it in as needed.  I definitely should have gone with the smaller size.  Even using extra large seam allowances wasn’t enough to make it fit.  Putting the dress on inside out and pinning and sewing the excess fabric gave me a much better fit.  And tracing the change onto the pattern gave me a reference for next time.  Since I have long arms, lowering the pocket placement 2″ worked out best for ease of use.

VAMQ pattern

I was pleasantly surprised that I didn’t need to lower the bust dart.  I was unsurprised that I had to make the same shoulder adjustments as I did when using The Tunic Bible pattern.  Namely, narrowing the shoulders in the front and changing the angle from the top of the shoulders slightly in the back.  Using a smaller size would have helped, but I still think I would have needed to adjust.

The pattern includes an all-in-one neck and armhole facing when making the sleeveless version.  It gives a clean finish, and you get to practice your burrito roll.  Since the fabric I used frayed terribly, I was glad that I had taken such large seam allowances.  It meant that I could trim off the frayed edges, and wrap them in bias tape.  This gave me a clean finish, and kept the fabric from fraying further.  A wider bias tape probably would have been easier, but I just used what I had on hand.

VAMQ frayedVAMQ biasVAMQ bias wrap

The fabric is an unknown blend, probably some combination of polyester and cotton, that my Mom gave me when she was clearing out her house.  It was quite old, since the tag that had been stapled to the selvage was from a store that hasn’t been around in 30 years! 🙂  The fabric is rather stiff, and had probably been purchased to make curtains, rather than a dress.  Whatever!  It was on hand and it worked.  And I think it suits the style of the dress just fine!

VAMQ back

It’s a fun dress pattern, and will give you a chance to use up some of the woven fabric in your stash.  Happy sewing!