Ready For Some Cute New Shorts?

Stitch Upon A Time Midsummer Pants, Capris, and Shorts

When the tester call for the Stitch Upon A Time Midsummer Pants, Capris, and Shorts came out, I was quick to respond as soon as I saw the line drawings.  Being a Florida girl, I wear shorts eleven months out of the year, and I needed these shorts in my life!

It’s surprising how much the shorts appealed to me, considering that pretty much all my shorts are a variation of slim fit jogger style.  I’m a Grandma.  I don’t wear shortie shorts. But the wrap-around running shorts look is just so fun!  So I expanded my horizons and tried a whole brand new look, and I love it!

midsummer cat front

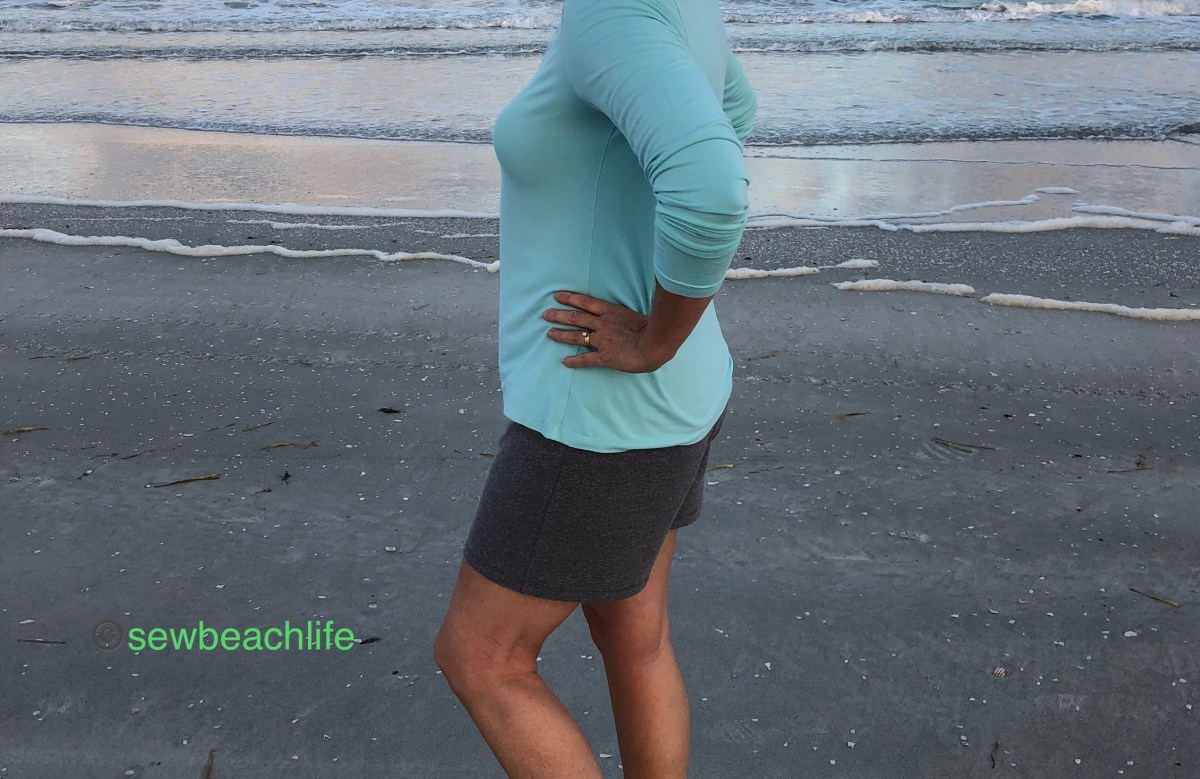
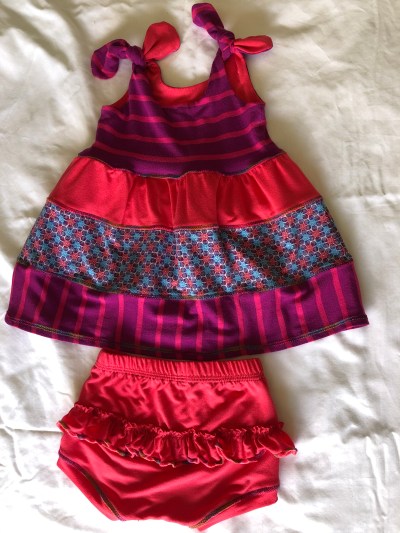
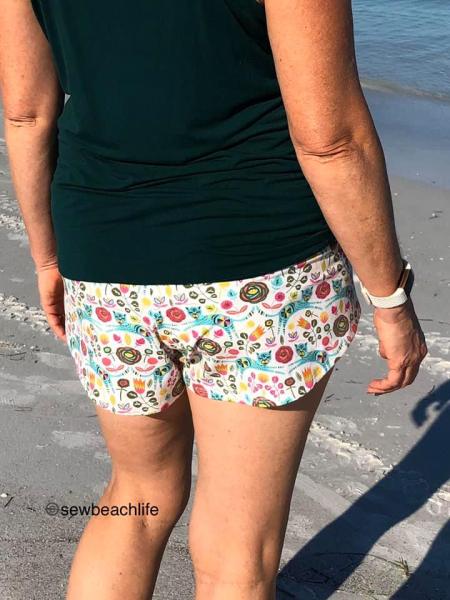
The curved edges give a sporty look that accentuates your legs.  And they can be wrapped to the front or the back.

midsummer cat back

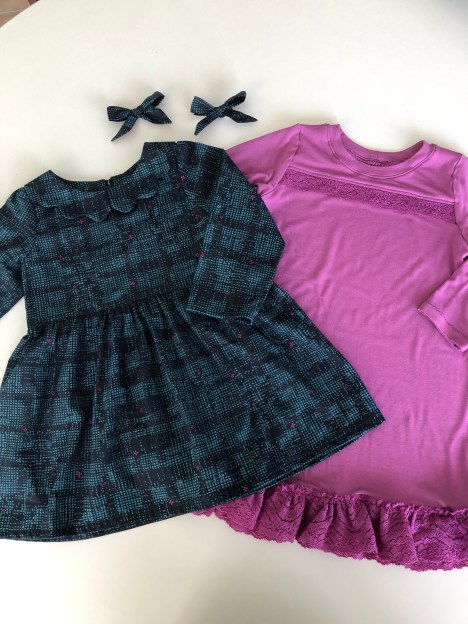
My favorite pair were made with an Art Gallery Fabrics cotton lycra knit.  The softness of the AGF fabric gives it a nice drape, better than what you would get for an average cotton lycra.

midsummer cat hip

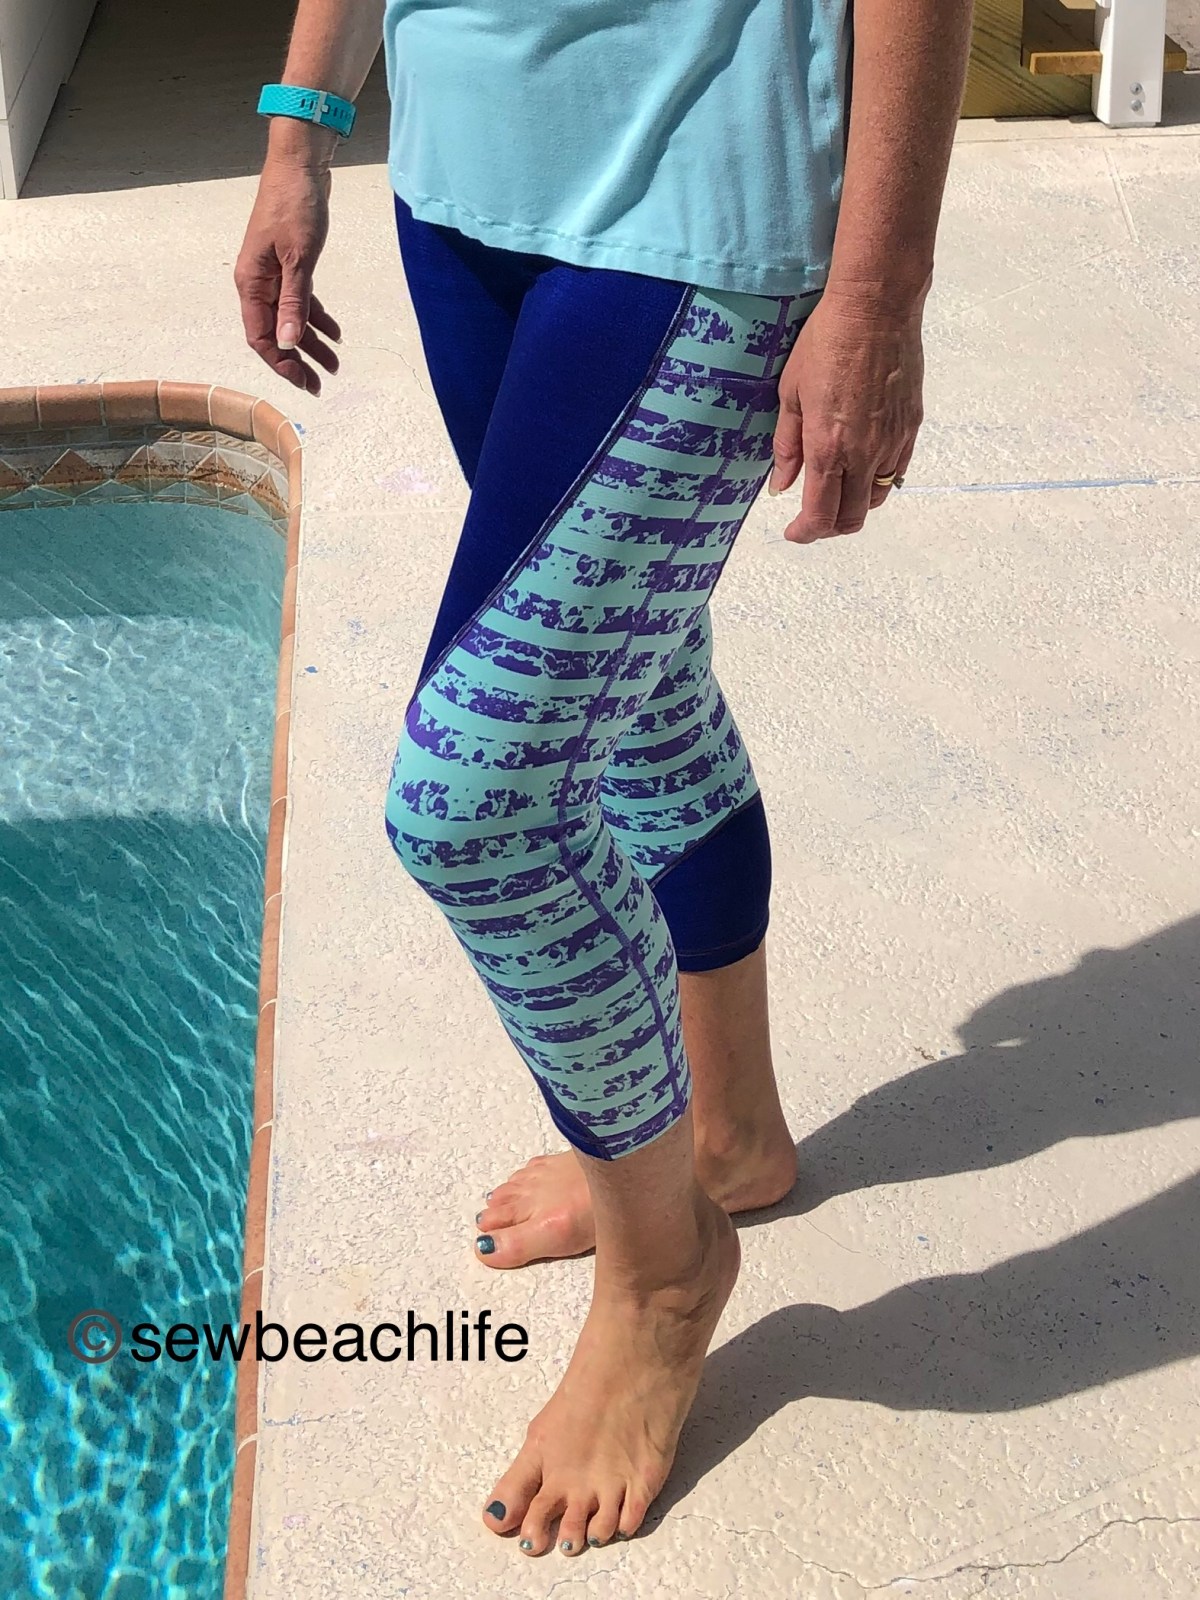
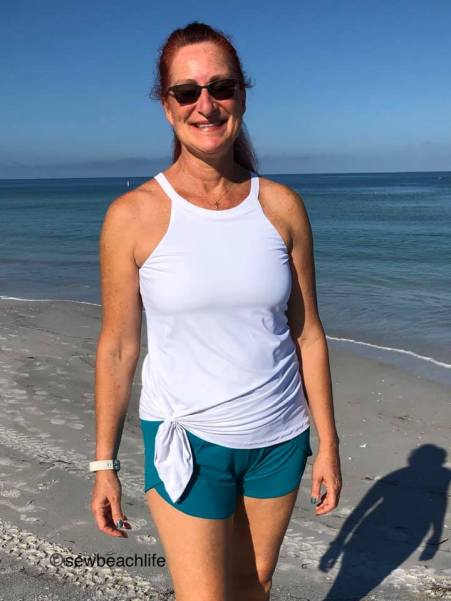
I also made a pair using nylon spandex tricot.  The quick drying fabric would make them perfect for throwing on over a swimsuit.  And they’re great for those beach walks when you might wander into the water because it’s so hot!

midsummer teal front

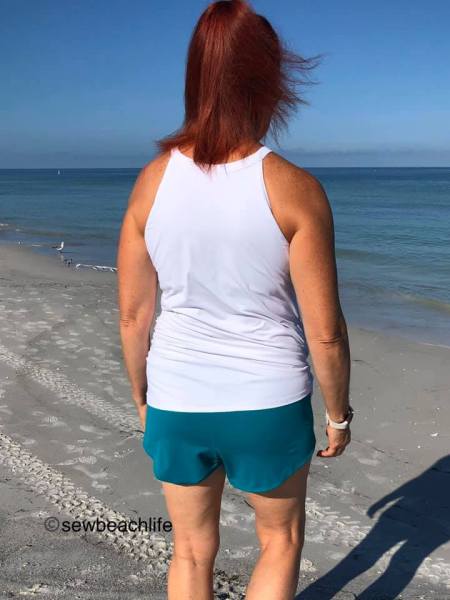
Fabric choice makes a difference in the fit.  Because nylon spandex has a lot of recovery, the waistband will try to migrate to the narrowest part of your body.  My natural waist is much higher than my belly button, so I think I’ll hack a higher waistband the next time I use this fabric.

midsummer teal back

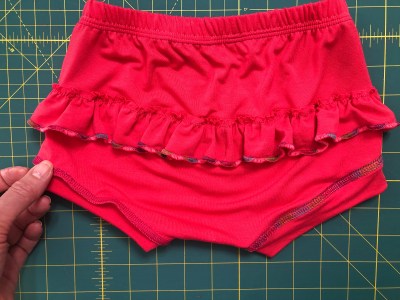
I like that the shorts give decent booty coverage, while still looking sexy.  The shorts are a quick sew, even including cover-stitching the curved hem.  Seriously!  Center front seam, center back seam, crotch seam, hem, baste, and add the waistband.

midsummer teal full

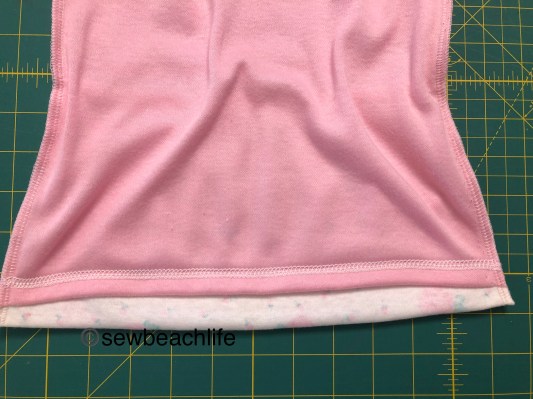
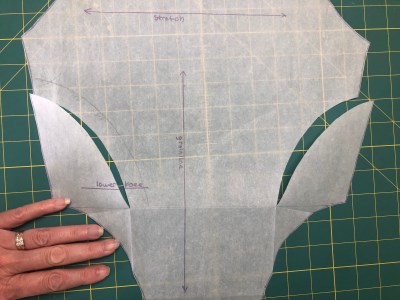
Which brings me to my sewing tips for the Midsummer Shorts.  I like to up the differential to 1.3 while using a 4 thread overlock on the edge of the hem.  This helps keep knits from stretching out, and makes getting a smooth curved hem a little easier by slightly easing the curve.  Then when you fold it up, you don’t end up with a bumpy hem and it’s easy to top or cover-stitch.  I also recommend top-stitching the wrap over section  for about 4 inches down, starting at the waistband.  This helps keep the wrap flat and in place whether you run or kick or stretch.

Are you ready to try a new look?  Even if you’re not a shorts wearer, I can foresee some soft comfy lounge pant or capris for bumming around town.

Get the look:  the Midsummer Pants, Capris and shorts pattern.

The emerald rayon spandex for the Aushui Tank was purchased from Phee Fabrics.  You can read more about the Aushui Tank (including a fun hack!) here.  The Art Gallery Le Tigre fabric was purchased from my local sewing store, but Stitch Upon A Time and Phee Fabrics both carry a selection of Art Gallery Fabrics cotton lycra knits.

The Titania Tunic was made with white circular knit and I used powernet in the shelf bra.   You can read more about the Titania Tunic, and my workout top hack here.  The teal shorts are nylon spandex tricot.

So, are you ready for some cute new shorts (or capris, or pants)?


This post may contain affiliate links.  This means that at no extra cost to you, I may receive a small commission if you purchase through my link.  As always, I only give my honest opinion.  After all, it is my blog, which represents me! 🙂  Thank you for reading and sharing my love of sewing, patterns, and fabric. ❤

Follow Me Wrap Dress

And How To Simplify Hemming The Flounce

I couldn’t resist purchasing the Pattern Emporium Follow Me Wrap Dress when it first released, even though I am not a flounce or ruffles kind of girl.  A girly girl, absolutely!  I love dresses and all sorts of womanly things.  But frills, flounces and ruffles?  Not my gig.  The pattern includes a plain wrap version, and four lengths from mini to below knee.  But the flounce version just spoke to me, and I knew a knee length sleeveless dress would be the most worn.

When I traced the pattern in my size, I originally added 2″ to the length of the skirt because a lot of my height is in my legs.  And I wanted it a flattering knee length that could also be worn to church.  Then I tried laying the pattern out.  No matter how hard I tried to Tetris the pattern pieces, I could not make them fit on a two yard cut of fabric.  After debating whether to skip the flounce, and deciding not to, I set the pattern aside for a while.

Most of the knit fabric in my stash is a one or two yard cut, depending upon the weight and intended use of the fabric.  I could have just ordered two and a half yards of fabric, but I prefer to place a larger fabric order to save on shipping costs.  Then the pandemic hit, and I kind of lost the desire to sew for myself.  I made masks for family members, and found sewing joy making clothes for my granddaughters.  It was fun to upcycle unworn clothing and to use some of the older fabric in my stash to make cute toddler and baby clothes.  Finally, it sounded fun to sew something pretty for myself.

So I pulled out the pattern and decided to just go for it as written.  I cut the added length off the traced skirt pieces, and kept the only other pattern alterations.  The seam on the back bodice bugged me, so I folded over the center back seam allowance and cut the piece on the fold instead.  To slightly widen the straps, the low round neckline was traced and cut one size smaller than the rest of the pattern.

Follow Me side

The ingenious design of the wrap means that even when taking a walk along the windy shoreline, I didn’t have to worry about accidental undie exposure.  The wrap crosses over far enough that even when the top panel is lifted by the wind, you still have full frontal coverage.

The dress feels fun and flirty, sexy and yet modest.  You can also increase the modesty factor by using the higher neckline, and adding the cap, short, flounce, or long sleeves.  The below knee length would change the look as well.

Follow Me laugh

The dress was sewn entirely on my serger, and the actual sewing time was much faster than the pinning time! 🙂  It takes more than a minute to pin all that flounce to the bottom of the skirt.  But it is such a fun touch that I definitely plan to use it on the next one.  I also figured out a way to make hemming the flounce simple and easy.

Although you may be tempted to skip hemming, especially when using a high quality knit that doesn’t curl, if I’ve taken the time to sew a nice garment, you can bet that I’m going to finish it off nicely!  Hemming curved skirts, or in this case a very curved flounce can be challenging.  When you pin the hem up, there’s all this extra fabric (due to the curve) and it can get “bunchy” and wrinkly.  But, if you serge along the bottom edge of the hem or flounce, and up the differential feed, it will very neatly, slightly “gather” the edge.  I upped the differential to 1.3 on my machine, which is one click up from N(eutral) on most of the curve.  On the more curved ends, I upped it to 1.5, which is two clicks up.

Follow Me flounce

As you can see on this inside view of the flounce, I used a four-thread overlock stitch.  The darker gray thread is my overlock, and the light gray thread is the looper thread of the coverstitched hem.  On the bottom left where the flounce has a slighter curve the 1.3 differential made slight gathers.  At the center bottom where the curve is sharper, upping the differential to 1.5 kind of gathered it a bit more, while still keeping the fabric smooth and unwrinkled.  All I had to do at that point was take it over to my ironing board and press the hem up into place.  I used a few clips to keep it in place while the fabric cooled, but it was super easy to coverstitch (or topstitch with a single or twin needle if you don’t have a coverstitch machine) at that point.

Once you start playing with a coverstitch, you tend to coverstitch everything.  The binding at the neckline and armscye was coverstitched, the hem was coverstitched, and the seam where the flounce was attached to the skirt got coverstitched.  I did not coverstitch the waist seam, because who wants to draw attention to that area? 😉

Technically, this is my “muslin” or “toile”, as I went straight to my nice nylon/spandex tricot from Phee Fabrics, rather than making a test garment.  But I know that Pattern Emporium patterns are a good fit with only minor tweaking for my body shape.  And sewing with high quality fabric is so much easier than wasting time with flimsy fabric.

I really like my dress, but as with every garment I make, I’d like to perfect it.  I’m thinking of raising the waist seam on the next one by approximately 1″ to hit closer to my natural waist.  I’m also considering going down a size in the bodice, but doing a full bust adjustment to address the wrinkling across the bust and pulling up into the armpit area.  Should I add an inch of length to the skirt to make up for the inch I plan to take out of the bodice?  Do you think I’m on the right track with a smaller size and FBA?

Follow Me back

Because I need more of these easy breezy summer dresses!  Hmmmm, maybe some soft rayon spandex for the next one?

I hope you have found your sewing joy.  But if you’re struggling, take the time to breathe deeply, then dive back in to a project that sounds fun to you. ❤

Shorts Or Swim Trunks? How About Both!

Sewing For Men, Episode 3

My husband isn’t often interested in patterns, or in being my model for a pattern test. 🙂  He did however, really like the line drawings for the new GreenStyle Motion Athletic Shorts.  Since he basically lives in athletic shorts, he was more than happy to let me sew them for him!

The Motion Shorts are designed for stretch wovens, with an optional liner layer made in 4-way stretch fabric.  The front pockets are deep and large, so no matter how big your phone, there’s plenty of room for that, and all the other stuff guys tend to carry!  The curved back gives shaping and is quite flattering on the booty.  And the side and back panels give an opportunity for contrast fabric and pretty top-stitching.

Motion back

The liner layer can be made of mesh for a traditional swim trunk style, or Supplex or other compressive fabric for support for working out.  I chose to use nylon/spandex tricot so Dan can wear his shorts for workouts and swimming.  Moisture wicking, quick drying fabric is key when making swim or workout wear.  I use the same Phee Fabrics tricot for my swimwear and dresses, and he’s lucky I had this khaki steel color in my stash and used it for him, rather than the dress I had intended to make with it! 😉

Motion lining

After I made the first pair of shorts, he requested that I add a “hammock hack” to the liner layer, so that they would fit like ready-to-wear Saxx, and all the underwear I make for him.  No problem sweetie, I can do that! ❤  Powernet is the fabric of choice for the gusset hammock, just as it is added to bras and swimwear, because of its supportive nature.

The hammock is a partial moon shape, with the straight edges toward the center, and the curved edges sewn to the center panel of the liner layer.  After cutting out the mirror image hammock pieces, I do a tight rolled hem on the straighter side of both pieces.  If you don’t have a serger, you can also use cotton swimwear elastic tautly stretched and zig-zag stitched to the straighter edges.  Lay the hammock pieces on the lining center panel and pin along the curved edge.  Then baste along the sides and across the top with a zig zag stitch set at 2.5 or 3.0.  Then stitch the dart at the bottom of the center panel.  Snip the top of the dart up to, but not through the stitch line, and press the seam open.  Then baste it in place.  Notice how having a larger curve on the hammock piece, compared to the curve on the center panel gives the wearer space to tuck everything in?  (I’m trying hard here to be descriptive without being too descriptive if you know what I mean!)  This is a family friendly blog!

Motion gusset

At this point, the center panel can be sewn to the liner pieces as per the pattern tutorial, and the shorts can be completed.  Here’s a photo of the inside of the finished shorts.

Motion gusset complete

The pattern has options for 5″, 7″, and 9″ inseam lengths, which is great because they can be customized to fit your needs.  Dan prefers the 7″ inseam, because he doesn’t like longer shorts that get caught on his knees when he’s working out.  If I were making myself a pair, I’d choose the 5″ length.  And yes, I tried his shorts on.  I’d need a smaller size, but they were pretty cute on me too!  The pockets are so much bigger than any other shorts I’ve made, so who wouldn’t want that?

Motion pocket

They are flattering from every angle, and I am so excited that the beach has reopened so we can go for walks along the shore again.

Motion right side

And no photo session with a guy is complete without plenty of silly poses for your viewing pleasure! 😉

Motion guns Motion buff

Obviously I need to make him a few more pairs, because he is loving the look!

I used stretch twill from Phee Fabrics as the main fabric, with a scrap of (no longer available) reflective chevron as a fun accent.  It’s funny how making them out of all one fabric color gives them a dressy look, while using an accent fabric gives them a more sporty look.  And I know that I’ve found a winning pattern when he starts asking me to customize and hack it for him! 🙂

This post may contain affiliate links.  This means that at no extra cost to you, I may receive a small commission if you purchase through my link.  As always, I only give my honest opinion.  After all, it is my blog, which represents me! 🙂  Thank you for reading and sharing my love of sewing, fabric, patterns, and pattern hacking. ❤

Keep It Simple & Add Some Flair

Keeping it simple sounds like a great idea right about now, during a time of uncertainty.  And I (mostly) have been!  My days are filled with sewing, cooking, cleaning, spending time with my husband, prayer and reflection, and texting and FaceTiming family.  Like most people, I also probably spend too much time reading about the virus, watching TV, and on social media. 😦  So it’s time to get back to writing about sewing and patterns and fabric and all the other things that make me happy! 🙂

There were some chilly days here in Florida last month, so I decided to make the Pattern Emporium Keep It Simple Babe Tee shirt.  Patterns with lots of options can be overwhelming and wonderfully useful!  The Keep It Simple Babe has high and low square necks, high and low round necks, boat and crew necks, turtlenecks, and a V-neck.  And everything from cap to long sleeves, so there are definitely options.

Since Florida is hot most of the year, tank tops make up a good portion of my wardrobe.  But there are chilly days, so a long sleeved tee is a practical make.  Super soft rayon spandex is my favorite fabric for tops and flowy dresses, and I had enough of this turquoise from Phee Fabrics in my stash to make the long sleeved tee.  The sleeves are slim enough to stay in place when pushed up to 3/4 length, but not feel too tight.

KISB Urban front

The V-neck is a good depth, not too high or too deep, and the neck-band came out perfectly.  The bodice skims over the body and doesn’t cling or show off the fact that I’ve probably eaten too many cookies while staying “safer at home”!  The Keep It Simple is a solid pattern choice.  Now for the Flair!

I had a small bit of Cozy French Terry left after sewing some fuzzy slipper socks for my sister, and managed to squeeze a pair of shorts on the fabric.  The Pattern Emporium Urban Flair Pants are one of my favorite pants patterns.  There are three leg width options and I chose the wide leg version to make a pair of basic black pants a couple months ago.  I love them!  They are super comfortable, the back darts smooth over the booty, and other than adding length I didn’t need to alter the pattern at all!  If you’ve ever sewn pants, that is saying something!

Urban Flair pants

So that’s why I decided to use the pattern to make a pair of shorts.  I marked the pattern to give me a 5-1/4″ inseam, and cut the legs straight across.  Since I was using scraps, I had to cut the pockets out of rayon spandex, and used Supplex and the rayon spandex for the waistband.  Supplex makes great waistbands, because it has excellent recovery.  So instead of folding the waistband pattern piece in half, I hacked it to have an inner waistband of Supplex, and an outer waistband of rayon spandex, so it would match the pockets.  I slightly contoured it, and added a seam allowance so that the finished waistband would be the same height as the pattern called for.

waistband

It’s a fun accent, and worked out great.  I will say that it’s imperative to use a substantial weight of rayon spandex.  Flimsy rayon spandex won’t hold the weight of your phone and will get stretched out of shape.  This is 13oz. rayon spandex, the same as I used for my tee.  My phone easily fits in the generously sized pockets, and the shorts are super comfortable.

KISB Urban pocket

More shorts are definitely on the agenda, along with more walks along the beach!

KISB Urban side

Both patterns were great additions to my collection, and I’m glad I bought and made (more of) them.  I hope that you are doing lots of sewing, and enjoying spending time communicating with the people you love.  So keep it simple, give yourself some grace, and don’t forget to add a bit of flair and fun to your life! ❤


Baby Gowns With Fold-Over Cuffs

I’ve been sewing a summer wardrobe for my granddaughter, because sewing pretty things brings me joy while we’re all under “safer at home” orders.  I texted my daughter to see if she needs any baby gowns for Lila’s soon-to-be-arriving baby sister, and if so, what size she needs.  Since she only has one newborn gown, and a couple of 3 months size gowns, newborn gowns are definitely on her need list!

It would have been easiest to buy a baby gown pattern, but where’s the fun and challenge in that? 🙂  Hacking the Patterns for Pirates Wee Lap Tee into a gown was simple enough.  Adding 12-3/4″ to the length of the tee, and angling the pattern out from the bottom of the armscye, to 6″ wide at the bottom of both the front and back pattern pieces worked perfectly.  I also curved the bottoms up slightly at the side seam.

WL pattern

To keep baby from accidentally scratching herself, (and to keep tiny fingers warm at night) fold-over mitten cuffs were needed.  So I cut the sleeves at the normal hem cut-line and hacked some cuffs to add to them.  You need two pieces of fabric 5-3/4″ high x 2-3/4″ wide, and two pieces 9-3/4 high x 2-3/4 wide.  (The direction of greatest stretch is across the width.)  Use 3/8″ seams to construct the cuffs, rather than the 1/2″ called for in the Wee Lap Tee pattern.

To assemble each cuff, fold the 9-3/4″ high piece (the pink fabric) in half, wrong sides together, lining up the 2-3/4″ ends .  Lay it on top of a 5-3/4″ high piece (the flamingo fabric) that is right side of fabric up (but with the print upside down if using a directional fabric), aligning the 2-3/4″ ends at the top, like below left.  Then carefully fold the bottom of this sandwich up, until it lines up at the top, and pin the sides, like below right.

WL cuffs step 1

Stitch along the two pinned sides.  When you turn the cuff right sides out, the seams will be completely enclosed inside the cuff, and the mitten can be folded back as a cuff, or folded over like a mitten.  It’s almost magical when you try it! 🙂

WL cuffs sewn

Follow the pattern tutorial for basic construction, except you will need to sew the side seams and then set-in the sleeves, rather than sewing the sleeves in flat.  Personally, that is how I always sew sleeves, because I think set-in sleeves are easier and cleaner.  Keep in mind that it’s easier to sew the tiny cuffs to the sleeves, by leaving the sleeve right sides together after sewing the sleeve seam.  Slide the cuff inside the end of the sleeve, carefully quartering and pinning it in place.  You may have to wrangle the sewing machine foot inside the cuff, and slowly sew it on.  But the finish is so much more professional than having an unfinished edge on a basic cuff sewn on flat!

WL gowns top

I also chose to finish the neck edges by binding rather than banding.  But that’s because I now have a cover-stitch and seem to be binding everything I sew! 😉  I played around and did a reverse triple cover stitch on the neckline of the flamingo gown, using a variegated thread in the looper.

It was fun to try different methods of finishing the bottom of the gowns.  The white and teal striped gown was finished with a band.  It’s super important to use a fabric with excellent recovery if you want to do a band.  The main fabric was some old interlock from my stash, with poor recovery, so I knew I would need to use fabric with great recovery for all the finished edges.  I chose teal nylon spandex tricot from Phee Fabrics for the cuffs, binding, and band on the gown, and it worked out perfectly.  The 2-1/4″ high, by 13″ wide strip was folded in half, and the short ends sewn together to make the band.  The band was folded wrong sides together, and carefully pinned to the bottom of the gown at the quarter and eighths points, then sewn.  The band really needs to stretch to get the bottom evenly gathered.

The flamingo gown was finished with elastic at the bottom, stitched, then turned under and top-stitched.

The pink gown was finished with an envelope flap.  Mostly out of necessity because I didn’t have enough fabric! 🙂  The front was cut out as normal.  The back was as long as I could make it.  So the rosebud print fabric was folded in half, then half the opposite way, then the balance of the gown back bottom (plus seam allowance) was cut out.  The gown front was hemmed.  One end of the rosebud extension piece was sewn to the gown back, and the seam top stitched.  The other end of the extension was slightly gathered with elastic to keep the envelope flap from being floppy.  Then the elastic was folded under and top-stitched.

To complete the envelope bottom, with the gown back right side up, fold the back extension piece up, so that it is right sides together.  Lay the gown front on the gown back, right sides together, and stitch the side seams.

envelope seam

When you turn the gown right sides out, the seam will be enclosed inside the back extension.

WL bottoms

It felt good to use up the old cotton interlock fabric in my stash that really isn’t useful for anything other than baby and children’s clothes.  The stripe, pink, and rosebud fabrics are super old, and I couldn’t begin to tell you where they were purchased.  It’s pretty likely that the stores they came from are no longer in existence!  The flamingo fabric came from JoAnn Fabrics a few years ago, so you may still be able to find it in their Doodles line.

I hope that you are finding joy while sewing through your fabric stash, and using patterns you may not have tried before.  Being able to make something beautiful for someone who truly needs it makes me happy.  I hope that sewing to help others is making you happy too!

I Wish We Could All Be Going Places

In these unprecedented times, when virtually the entire world is under “Safer At Home” orders, it is surreal to look back to a month or two ago when most of us led what now feels like rather carefree lives.  It’s important to remember the beauty and joy of life, increase our faith, and do useful things that make us happy.  Sewing is certainly one of my happy places!  Except when I have to seam-rip because I’ve done something silly, like sew the front and back right and wrong sides together. 😉  Which happened, by the way.  Fortunately I had only sewn part of the way up the side seam before I realized it!

The Pattern Emporium Going Places Dress was the perfect pattern to sew at this time.  Florida is already quite warm, and dresses are a staple in my closet.  There are multiple neckline options from ballet to babe, and high and low square necklines.  And the dress can be fitted or flared.  I chose the deeper babe neckline and love the fit of the flared skirt.  Having a fitted bodice is quite figure flattering, and the skirt flares out at the perfect place so that it skims and shapes the waist without being tight across the midriff.

The neckline and straps can be finished with bands or binding.  But let me tell you- once you have the ability to cover-stitch, binding is just as easy as bands, and looks so beautiful!  I’m becoming more comfortable with using the cover-stitch feature of my machine, and am absolutely loving the results!  It just looks so professional and is so much faster than top-stitching with my old sewing machine.

Going Places binding

I used rayon spandex from Phee Fabrics for my dress, and it is the perfect weight and drape for dresses.  And tank tops.  I literally make all my tank tops out of Phee’s rayon spandex, and a good portion of my dresses.  It’s safe to say that this is one of my favorite fabrics!

Going Places strut

So, is there anything that I would change the next time I make this pattern?  I think I’ll make the back bodice one size smaller.  Yoga class has given me a pretty decent back taper, and the back is little looser than I need.  I also think I’ll widen the back straps just a smidge.  While the straps cover my bra straps quite well, my “old lady” bras widen out before meeting the back band, and the straps of the dress don’t quite cover that area.   The Going Places Dress is a pretty quick sew, doesn’t take a lot of yardage, and is definitely worth adding to your pattern collection!  The square neckline option is next on my list.

To complement my dress, I made the Pattern Emporium Songbird Kimono & Cardi.  I own several cardigan patterns, and bought this one specifically because it was designed for woven fabrics.  I found some chiffon at an estate sale for a really good price, and thought it would make beautiful cardigans.  While I love the two cardigans I’ve made, let me tell you, sewing chiffon is not for the faint of heart!

Using chiffon is like trying to cut, pin, and sew a cloud!  It’s a bear to try and get it to lay flat and smooth and not get wavy and distorted when you cut it out.  You have to use so many pins to try and hold everything in place while you’re sewing.  The fabric is so fine that pins tend to slide right out as you handle the fabric.  And it frays, badly.  So a serger is almost a necessity when sewing chiffon.  That being said,  I absolutely love the result of my efforts!

Going Places & Songbird

It’s flowy and fun, and looks great with a dress.  This is the first of the two Songbirds I’ve made, and I sized down for the second one.  I have long arms, and added two inches of length to the sleeves, but certainly could have gotten away with just an inch.  I’ve worn my Songbirds with a T-shirt and skirt, long-sleeved shirts and pants, and dresses.  I’ll certainly throw them on with a tank top and shorts on chilly evenings or in air conditioned spaces.

Here are my tips for sewing with chiffon.  Take your time.  It takes time to smooth and even out your fabric.  Use all the pins.  It really helps to keep the fabric from shifting as you sew.  This also means that by necessity you have to sew more slowly to ensure that you pull the pins before accidentally sewing over them!  Because chiffon is super flowy and has no body, you may want to add some body in certain areas.  I used knit interfacing (specifically Pellon SK135 Sheer-Knit fusible interfacing) to stabilize the band.  I chose this interfacing because it is sheer, and wouldn’t be visible through the chiffon.  I cut the interfacing half as wide as the band, and carefully lined it up with one edge of the wrong side of the fabric to press it on.  Follow the manufacturers instructions and use a pressing cloth!  Even a paper towel works to help keep the residue from getting on your iron.  Just be sure to peel it up as soon as you press a section so that it doesn’t stick to the interfacing.  And enjoy trying new patterns, techniques, and experimenting with a new look.

Songbird outstretched

Embrace life, and enjoy every moment of laughter and silliness!  And sew a little happiness, while we stay at home rather than Going Places! ❤


Itty Bitty & Not So Itty Bitty Baby Dresses

My granddaughter needs play clothes for the summer, since she’s outgrown pretty much everything from last summer.  Toddlers grow fast!  So my daughter gave me some tops and dresses to upcycle.  They were all XS or small, so children’s clothes would be about all that would fit on the fabric.  I chose three coordinating fabrics, and got to work.

Using my rotary cutter, I trimmed along the side and sleeve seams, and ripped the clothes apart.  A seam ripper was necessary to remove hems and binding as needed, to be able to lay the fabric out smoothly.  It certainly would have been easier and faster to use yardage, but it was fun to think creatively how to fit my pattern pieces and make it all work.

I’ve made a couple of Made By Rae Washi Dresses blogged here, but hadn’t tried any children’s patterns.  This is my latest (and favorite!) Washi Dress, made with a beautiful Art Gallery Fabrics border print called Roads to Flowerhouse.

teal Washi

While scrolling through the Made By Rae children’s patterns, I came across the Itty Bitty Baby Dress.  It’s designed for wovens, but I knew that it would work to use knit fabrics.

The pattern calls for a simple gathered skirt, trimmed with bias tape.  Since I was upcycling, had limited sized pieces of fabric, and had found coordinating fabrics, I decided to make a three tiered skirt instead.  For the Itty Bitty Baby dress, instead of the suggested 9″ high rectangles of fabric, I cut my top strip 3″ high, and the second and third tiers 3-1/2″ high.  Each tier was gathered and sewn to the tier above it, then the skirt was sewn to the bodice as per the pattern directions.  Newborn sized clothes always look so cute!

Itty Bitty dress

There also happens to be an expanded size of the pattern in a size 3, which is the size my two year old granddaughter is growing into.  It’s made the same way as the Itty Bitty newborn size, and it too got hacked to have a triple tier skirt.  Instead of the suggested 15″ high skirt panels, the top tier was a 4-3/4″ high strip, followed by 5″ high strips for the second and third tiers.  The toddler skirt is a bit more gathered, since Lila likes to run and play and climb and move.

Bitty expanded

Since the dresses were already bright and colorful, I thought that it would be fun to use variegated thread to cover-stitch everything.  That’s the funny thing about having the ability to cover-stitch.  You go a little crazy and fun and play around with it.  On the toddler dress, I used a reverse triple cover-stitch to accent everything.  To lessen the scale, I chose a narrow reverse cover-stitch for the newborn dress.

The Bummies pattern is from Brindille & Twig, with a ruffle added across the bum for a little extra fun.  Because I already spend too much quality time with my seam ripper, I just couldn’t bring myself to rip off the leg bands that I accidentally sewed on inside out. So I just reverse cover-stitched over the seam allowance, and turned it into a “design element”!

Bummies design element


Admittedly, these outfits are super bright and a bit wild, but that’s what makes them so fun!  Normally, I wouldn’t post without modeled photos, but with the current state of the world, I don’t know when we’ll be able to visit our daughter and her family.  Hopefully before the new baby is born!  And this is as good a way as any to share that I’m going to be Grandma to another little girl!  🙂 ❤

Do you have some unworn clothes in your closet that could be turned into fun fabric for little ones?  Consider upcycling them into to something new.  There are so many cute patterns to try.  And it’s fun to sew for my soon-to-be itty bitty baby, and not so itty bitty girl.

Stay well, and sew something that makes you happy!


Tempo Athletic Tights

How I Upcycled, And Made Them Capri Length

The fun curved details of the GreenStyle Tempo Tights finally made me break down and try a pair.  🙂  When they first released, I resisted because there wasn’t a capri option, and it is hot in Florida.  I wear capri length tights to workout year round.  As a creative sewist, I knew that I could get the length that I wanted, without sacrificing the curved insert at the bottom of the leg.

For my first pair, I decided to do some upcycling, and use a couple pairs of ready-to-wear leggings that were just taking up space in my drawer.  So I carefully cut them apart by using my rotary cutter along the inner leg seam, and up the center front and back seams.  With the fabric smoothed flat, I laid the side panel pattern piece on the capri length striped material.  I aligned the center fold of my pattern with the industrial cover-stitched seam that was down the side of the old workout pants, and left the existing hem in place.  Since the upcycled leggings had been capri length, I just folded up the bottom of the pattern to mark the length.

Tempo fit pattern

Then I used the fabric from a second pair of similarly dismantled leggings to cut out the front and back panels, as well as the bottom leg inserts.  Matching up the seam lines of the bottom inserts with the seam lines at the bottom of the side panel, I folded the insert pattern piece at 1″ longer, to give myself room for a hem (since my side panels were already hemmed).

Then I followed the pattern tutorial to stitch everything together.  I also had my first go at reverse cover-stitching.  It’s definitely not perfect, but it was fun to practice a new skill at hopes of improving.

Tempo front

Tempo back

The look is fun, it kept two old pairs of leggings from being tossed or donated, and assured me that the fit was right.  So I grabbed my Phee Fabrics black Supplex and got to work.

For my second pair I wanted an even shorter capri length, ending just below the knee.  This was going to require more alteration than just folding up the bottom of the pattern!  I took my side panel pattern piece, laid it on my master pattern (I always trace my patterns on waxed or parchment paper, and keep my master pattern intact, in case I need to make changes or grade sizes) and slid it down 4-1/2″, being sure to keep straight on the grainline.  Then I traced the bottom curves in this new location.

Tempo capri adj

Using a compass, I traced a line 3/4″ inside the curve, to give me the alignment for a new custom bottom insert.  Since the original bottom insert is designed for your lower leg, it won’t fit up higher on your calves.  But it was simple to lay a piece of parchment paper on my pattern, follow my drawn inner curve, and trace the side and bottom to match up.

Tempo insert adj

Then I just cut along the outer curve and folded the pieces under in case I want to make the longer length next time.  Can you tell I don’t want to have to trace the pattern again? 🙂

The tights would have been a faster sew the second time, if I had remembered that I wanted pockets, and didn’t have to seam rip to add them in instead of accidentally skipping right by that first step. Ugh!  Oh well, pockets are totally worth it!

Tempo black

It is notoriously difficult to see details on black fabric.  I love the length, I love the pockets, and I love the black powernet inserts at the bottom.

Tempo black angle

Which I of course tried to photograph with a fun yoga move. 😉

Tempo inside leg

And my reverse triple cover stitch has greatly improved!  Using the curve foot makes sewing the curves so much easier.

Tempo black close

So, do the Tempo Tights beat out the Super G‘s in my workout wear drawer?  The Tempo Tights have a simple triangular gusset, which is fine for daily wear, or workouts that don’t involve major stretching.  Although I like the look and the variety, nothing beats the comfort of the Super G gusset for yoga, my preferred workout.   So, should I hack the Tempo Tights to use the Super G gusset?   Hmmmmm… that could work!

In case you’re wondering, the turquoise top is the GreenStyle Staple Tank, which is truly a staple in my closet!  I have made at least 5 of them, all in Phee Fabrics rayon spandex, and I wear them all the time.  The white workout top is a hacked GreenStyle Jillian Tank, blogged here.  The purple top is a GreenStyle Power Sports Bra, hacked into a workout top, and blogged here.

This post may contain affiliate links.  This means that at no extra cost to you, I may receive a small commission if you purchase through my link.  As always, I only give my honest opinion.  After all, it is my blog, which represents me! 🙂  Thank you for reading and sharing my love of sewing, fabric, patterns, and pattern hacking. ❤

Use Every Scrap Of Fabric

Including A Selvage Design Feature

Sewing for children can be fun, because their smaller size generally means quicker sewing.  And you can be super bold in color and try fun things on kids clothes that you may be a bit hesitant to try on an adult size!  After making myself a beautiful Designer Stitch Madison Dress, I had some scraps of Ponte left over.  They weren’t large enough to make an adult clothing item, but there was just enough to squeeze out a dress and leggings for my granddaughter.

WB Gma

The striped Ponte was quite stretchy, so it was perfect for leggings.  I’ve tried several  baby leggings patterns, and have been happy with most of them.  Since Lila is growing quickly, it seemed time to make the jump from a baby pattern to a girl pattern.  The 5oo4 Patterns Little Ninja Leggings (which is a free pattern) worked very well, and came up high enough in the back to properly cover her bum.  I dislike super low rise leggings, and was very happy with the fit of the Little Ninjas.  They definitely give full range of motion, as Lila was easily able to climb in and out of the box “fort” that Grandpa made for her! 🙂

WB box

The green Ponte was a super soft rayon blend, and had such a pretty fringed selvage that I just had to use it for something!  I found it at Pennie Fabrics in Sarasota, Florida.  It’s an interesting independent fabric store, is a bit of a maze, and is not organized into fabric types at all.  But if you’re willing to wander through and feel all the rolls of fabric, you could come up with something unique that you love.  The green Ponte was imported from Italy, and you could feel the softness and quality.  It was therefore, rather expensive, so I wanted to put every square inch to good use!

The Stitch Upon A Time Wendybird Dress was a great choice for this project.  The simple lines of the round neck, plain front version, with hemmed sleeves let the focus be on the fabric.  To add an extra pop of color, I cut a strip an inch and a half wide out of the striped fabric to use as piping between the bodice and skirt.  After folding the strip in half, right sides out, I basted it to the bottom of the front and back of the bodice.

Wendybird piping

Then I stitched the dress together as per the pattern tutorial.  (Although the photo distorted and makes the fabric look ribbed, it’s actually very smooth.)  I cut along both edges of the green Ponte to get 1-1/4″ wide strips of selvage to trim the hem.  After stitching the selvage to the hem of the dress, I pressed the seam allowance up towards the skirt, and zigzagged it in place.

I absolutely love the finished look!  It’s super fun, totally unique, and a great way to use what would otherwise be scraps.

WB point

Obviously Lila loves it too, judging by her smile. 😉

WB smile

I’m glad I made a larger size so that she’ll be able to wear this outfit all next winter too.  If you’re looking to personalize your makes, take a look at the selvage, and don’t be afraid to use every last scrap!

WB window

This post may contain affiliate links.  This means that at no extra cost to you, I may receive a small commission if you purchase through my link.  As always, I only give my honest opinion.  After all, it is my blog, which represents me! 🙂  Thank you for reading and sharing my love of sewing, fabric, patterns, and pattern hacking. ❤

Lila & The LLK Kensington Dress

I did a bit of Christmas sewing, making microwavable bowl cozies for my Mom, siblings and family, and adult children, making a total of (I think) 22 cozies by the time I was done.

bowl cozies

We use our cozies all the time, whether cooking broccoli or oatmeal, or keeping our fingers from freezing while eating a banana split.  Not that we do that often, really! 😉

bowl micro

I also sewed a few things for Lila. ❤  I thought the Little Lizard King Kensington would be a cute dress, but I had to make a couple of alterations.  My daughter dislikes buttons.  She has disliked them since childhood.  Which presented quite a challenge when trying to find the collared shirts required at their elementary school!  (I didn’t have time to do much sewing back then).  So, she didn’t want Lila’s dress to have buttons.  Which meant I had to alter the pattern to use a zipper.  It wasn’t really hard to do.  I just found the center point of the back overlap, and instead of using the button placket, I reduced the width of the bodice back to just having a 1/2″ seam allowance.  I had cut only one skirt panel the width of my 45″ fabric, and put the seam at center back.

This meant that rather than following the pattern tutorial, after attaching the collar and bodice lining at the neckline, the skirt had to be gathered and sewn to the bodice.  The zipper was installed (ending about 3″ down into the skirt).  Then the bodice lining, (which I had pulled up out of the way while installing the zipper) was sewn down into place.

LLK porch

The most challenging part of the pattern was the scalloped collar.  It wasn’t that it was hard to do, just very time consuming.  The scallops on a size 2 are rather tiny!  I took my time, and very carefully trimmed and clipped each scallop so that it would lay neatly when it was turned and pressed.

Another important consideration when using a fabric with an obvious pattern to it, like this Art Gallery Fabrics Evanescence Blackout, is to take your time when laying out your pattern pieces.  For a professional finished product, the design needs to line up and be evenly spaced.  Notice that the darker “stripe” going across the collar is the same on the left and right?  I also took care when cutting the skirt and bodice to ensure that the almost plaid-like design was evenly spaced where they meet at the waistline.  The print doesn’t have perfectly straight lines forming an even plaid.  It’s more of a pretty graphic design and loosely drawn and wavy grid pattern.  Although I tried to get the sleeves as perfectly aligned, the right sleeve lines up better than the left.  Oh well, perfection escapes me again!  Hahahahahaha!

At least my granddaughter is perfect, and perfectly adorable! 🙂

LLK yard full

And a bit of advice for photographing toddlers: always bring snacks.  Everybody is much happier when there is food in their tummy!

banana

Lila also got a rayon spandex dress, trimmed in stretch lace, hacked from the Ellie & Mac Grow With Me Pajamas.

LLK flat lay

I cut a strip of the stretch lace to half the width, and added it at the bodice to skirt seam line.  I shortened the skirt to make it dress length, and gently curved the hem so that it would hang nicely when on the body.  After gathering the lace (about 2-1/2″ yards worth), I zigzagged it onto the hem.  Lila likes the orchid color, and the soft, breezy comfort of the dress.

EM grow pj

It’s such a comfortable play dress, that she just didn’t want to stop swinging for photographs.

swing

It didn’t take long to whip up a couple of Made For Mermaids Hadley Hand-Tied Bows, and attach them to hair clips for a finishing touch.  Maybe I’ll make one of the larger bow sizes next time.  After all, Lila is a little southern belle!  😉

Hadley bow

She is also fun to sew for, and pretty much looks adorable in everything I make for her!  Now I need to sew up a couple more patterns for this sweet girl. ❤

The bowl cozies (link to tutorial here), Kensington dress, and bow, were all made with Art Gallery Fabrics 100% cotton purchased from Phee Fabrics.  The 13oz. rayon spandex was also purchased at Phee Fabrics.

Thank you for reading and sharing my love of sewing, fabric, patterns, and pattern hacking. ❤