I was super excited to see that the North Shore Swimsuit is one of the GreenStyle patterns of the month (which means it’s on sale through July 2019). I’ve been wanting to try the pattern ever since I decided that this is the summer of swimwear sewing. It is a classic pattern with options for a monokini, or two piece with a deep V or full coverage front, and a halter or U back, in pullover, tie-back, or S-hook closure. The bottoms can be scoop, low, mid, or high rise. Whew! And you can mix and match the options for an entire wardrobe of swimwear. If you are completely new to sewing swimwear, there is a great video tutorial series for the GreenStyle North Shore on YouTube, linked here.
For my first version I went with a mid-rise bottom, and a deep-V full cup front with the S-hook U-back. It turned out great, and is a classic two piece that looks like RTW. Using Tricot as the main fabric was a no-brainer, as it is a classic swimwear fabric that can withstand lots of use. As always when sewing a swim top, all of the top pieces were cut out of the Tricot, high quality powernet for support, and swim lining. For the bottoms, I used powernet in the front only. It adds a little bit of tummy control, without giving a “muffin top”.


Basting the powernet to your swim fabric makes sewing so much easier. I don’t know about you, but there’s no way I can keep multiple layers lined up without basting and a bunch of pins! The pattern has an elastic chart that makes adding the elastic easy, especially if you are new to swimwear sewing and not yet comfortable with just sewing it on by feel. Definitely follow the directions about sewing the elastic around the legs. The extra stretch in the back keeps the bottoms sitting properly on your bum, rather than riding up uncomfortably!

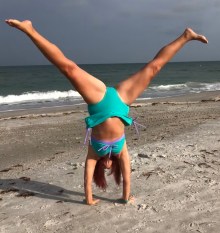
Since the first version turned out so well, I decided to have some fun with the pattern, and turn it into a strappy bikini. I folded down both sides of the deep-V full cup front, shaping it into a curvy triangle. I used the halter S-hook back, and cut both pattern pieces out in my nylon spandex fabric, swim lining, and powernet.
Baste the powernet to the main fabric, and sew the front and back together at the side seam. Sew the lining front and back together at the side seam. Lay the lining on the main fabric wrong sides together and baste. Knowing that “triangle style tops” don’t normally have a whole lot of support, you need to add support by stretching the elastic tighter to help the top hug your body.
To figure your elastic lengths, measure along the front edge from the top of your triangle down to the center front. Subtract 3/4″, (because you don’t want elastic in the 3/8″ seam allowances) then multiply by .75. Exercise your swim elastic before measuring to that length. Rather than cutting the elastic, just use a pencil to mark your line. This makes it easier to hold on to the elastic and stretch it while you are sewing. Use a zig-zag stitch to sew your elastic to the center front, starting 3/8″ from the top, and stretching the elastic so that the marked point ends 3/8″ from the bottom of the center front. Then repeat the process to measure from the top of your triangle, down under the armscye to the end of the back piece. Again subtracting the 3/4″ for the seam allowances and multiplying by .75. Mark the elastic, start sewing 3/8″ from the edge, stretching the elastic to fit and zig-zag, stopping 3/8″ from the other end.
Then fold the edges under enclosing the elastic, clipping it in place. Topstitch with your zig zag set at 2.5 length and 3.0 width. The elastic will want to curl up a bit until it is topstitched down.

Then add the underbust band and elastic, and sew on the S-hook as per the pattern tutorial. Because my bust is apparently more close set than average, I overlap my front pieces 1-1/2″ before attaching to the band. You may or may not want to overlap depending upon the shape of your bustline.
Now it’s time to make some strappy straps! Cut two strips of fabric 1-1/2″ wide by 16″ long. Fold them in half, right sides together and clip in place. Lay your 3/8″ clear elastic (you can use cotton swim elastic, but the clear elastic makes flatter straps and is listed as chlorine safe) along the cut edge, and carefully zig zag so that your zig goes just off the edge of the elastic and into the center of the fabric, and the zag is completely on the elastic. Once the strap is completely sewn with the elastic, use a safety pin to turn it right side out.

Baste or pin the straps in place, and try on for fit. On the back, my straps are stitched in place 1-1/2″ from the S-hook. You may need to cut some length off the straps in order to pull the front up to where it is comfortable. But better to have extra strap length to cut off, than to have too short of straps!
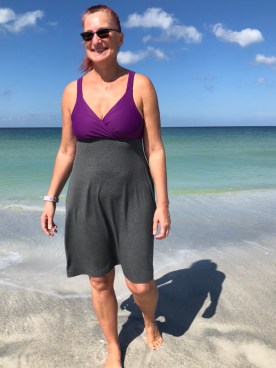
Since I made a sexy top, I decided to make the bottoms a little sexier by cutting them about halfway between mid-rise and scoop bottom. To finish the top of the bottoms, I zig-zagged elastic along the top edge at a 1:1 ratio to keep the top snug, but not tight. Top stitch just like you do the elastic around the legs or swim top. The scoop shaping is flattering and comfortable, even on a 50+ year old Grandma! 🙂 At least my husband certainly thinks so! 😉


While I probably wouldn’t run in this bikini, let’s be honest- I don’t run! (Hence the jiggly bits that would make me feel uncomfortable while running.) Hahaha! But I definitely feel comfortable and supported while walking the beach and playing in the waves.
All of my fabric came from Phee Fabrics, the Tricot, powernet, and swim lining, as did the matte palm nylon spandex print. Sadly, this particular print is no longer available, which is why I’ve been hoarding it, and was so excited to play with this pattern. There are however, so many pretty colors of Tricot and a couple of stripe prints to choose from.
Never be afraid to try hacking a pattern! Even if it doesn’t turn out exactly like you envisioned, you always learn something from the experience. I’m contemplating double straps next, maybe criss-crossing a set. It’s another opportunity to add a pop of color and create a new look. It’s just sew much fun to play with patterns! 😉
*This post may contain affiliate links. This means that at no extra cost to you, I may receive a small commission if you purchase through my links. As always, I only give my honest opinion. After all, it is my blog, which represents me! Thank you for reading and sharing my love of sewing, patterns, fabric, and pattern hacking. 😉

 You need that extra width to make your drawstring casing, and for your skirt to have a little bit of ease. The skirt back should also match the curve of your briefs and have the same extra width. Because I’m tall and have a booty, I added a little extra length to the center back of my skirt, tapering up to the side length. It’s just enough to cover my bum when the skirt isn’t gathered up on the sides. Sew the skirt front and back right sides together with a 1″ seam. Make drawstrings by cutting four 1-1/2″ wide strips of fabric twice as long as the side seam of your skirt. Fold each strip right sides together and using a stretch stitch sew with a 3/8″ seam allowance. Use a safety pin or bodkin to turn the strips right side out.
 Fold the bottom hem under 1/2″ and use a zig zig or other stretch stitch to hem. On the right side of your skirt, make a small horizontal slit in each casing, about 3/8″ above the hem. Thread a drawstring in each casing and tack the drawstring in place at the top.
 Align the center front, center back, and side seams of your brief and skirt and pin or clip in place. Try it on to ensure everything feels comfortable and lines up nicely. This is your opportunity to trim the rise a little bit if needed for better alignment. Easing the skirt to fit the brief, baste them together. Then sew on your waistband and elastic and you’ve got a new swim skirt!


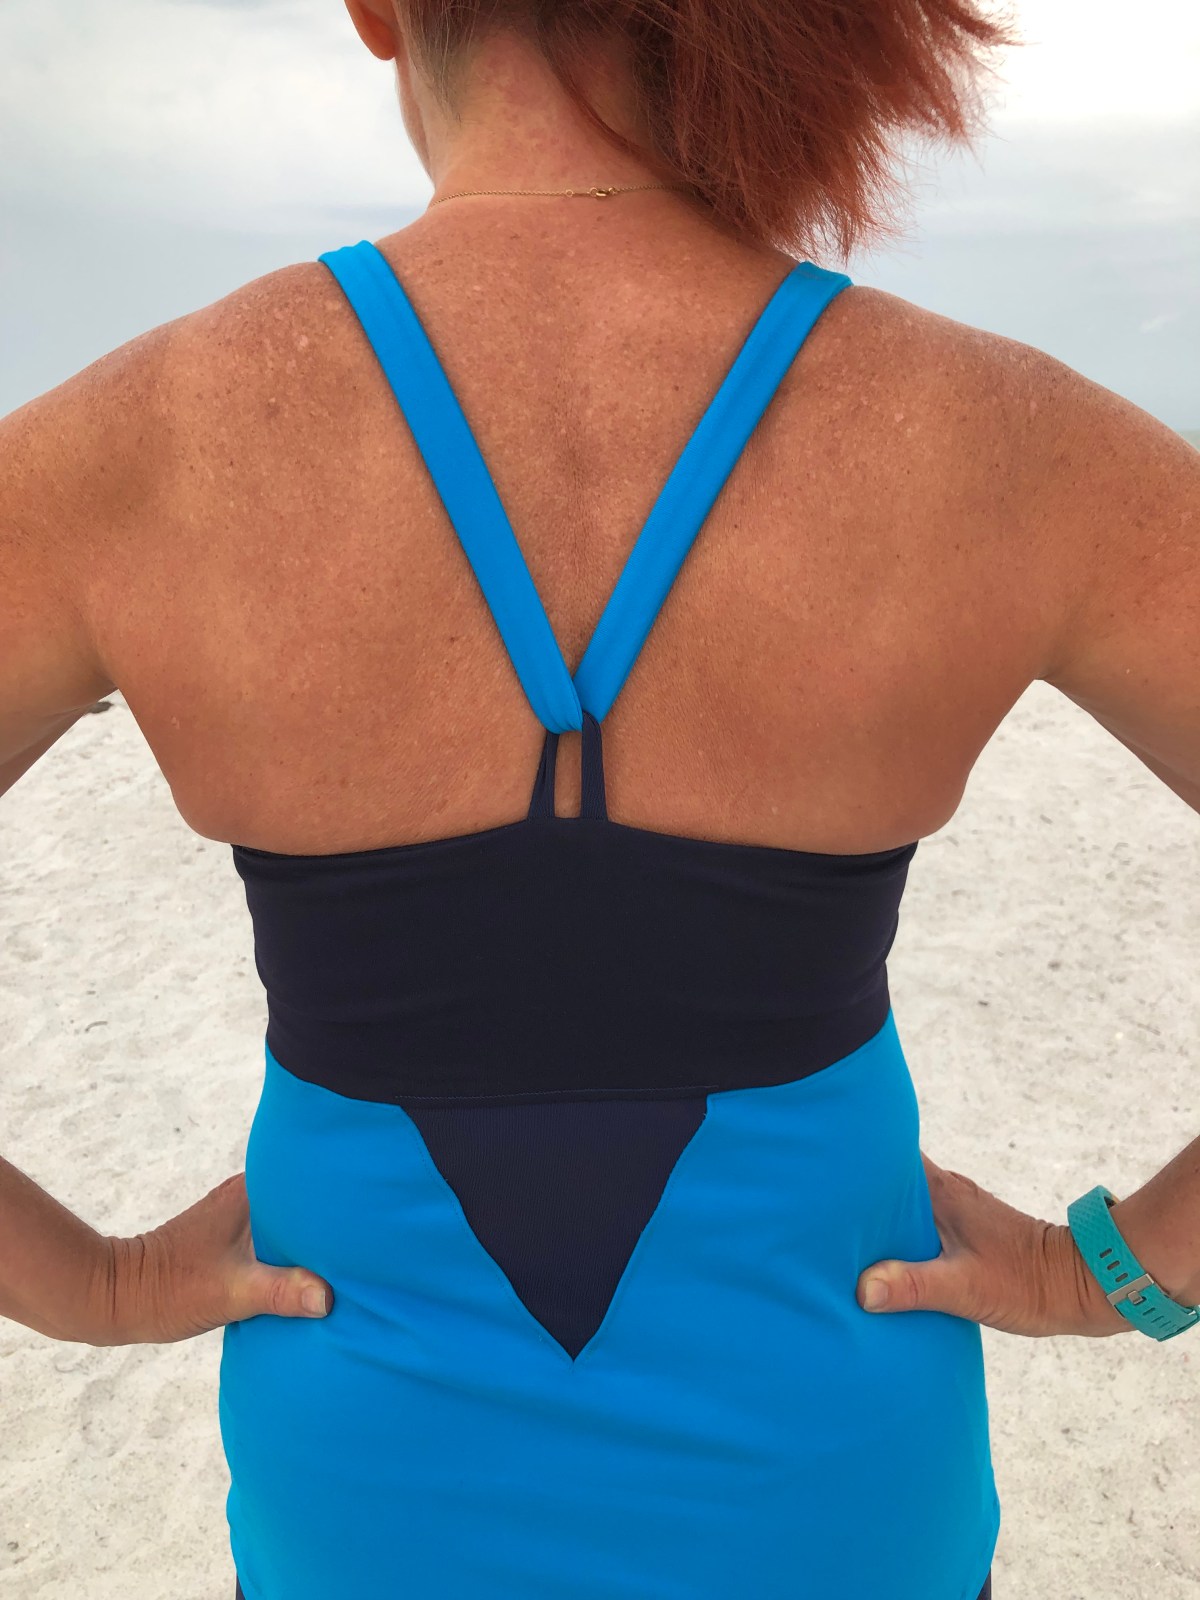
 You’ll need to poke one side of the back through the narrow space at center back to turn the back right sides out. Then it’s time to sew your side seams. I hate bulky side seams, and with the straps, and elastic, and layers of fabric and powernet the seam could get bulky! So I do it a little differently than you may have seen. Since the front strap casing is folded down at the top front, my normal method of sewing the main front to main back, and lining front to lining back, lining up the top seam isn’t going to work.
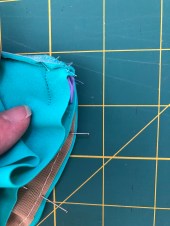


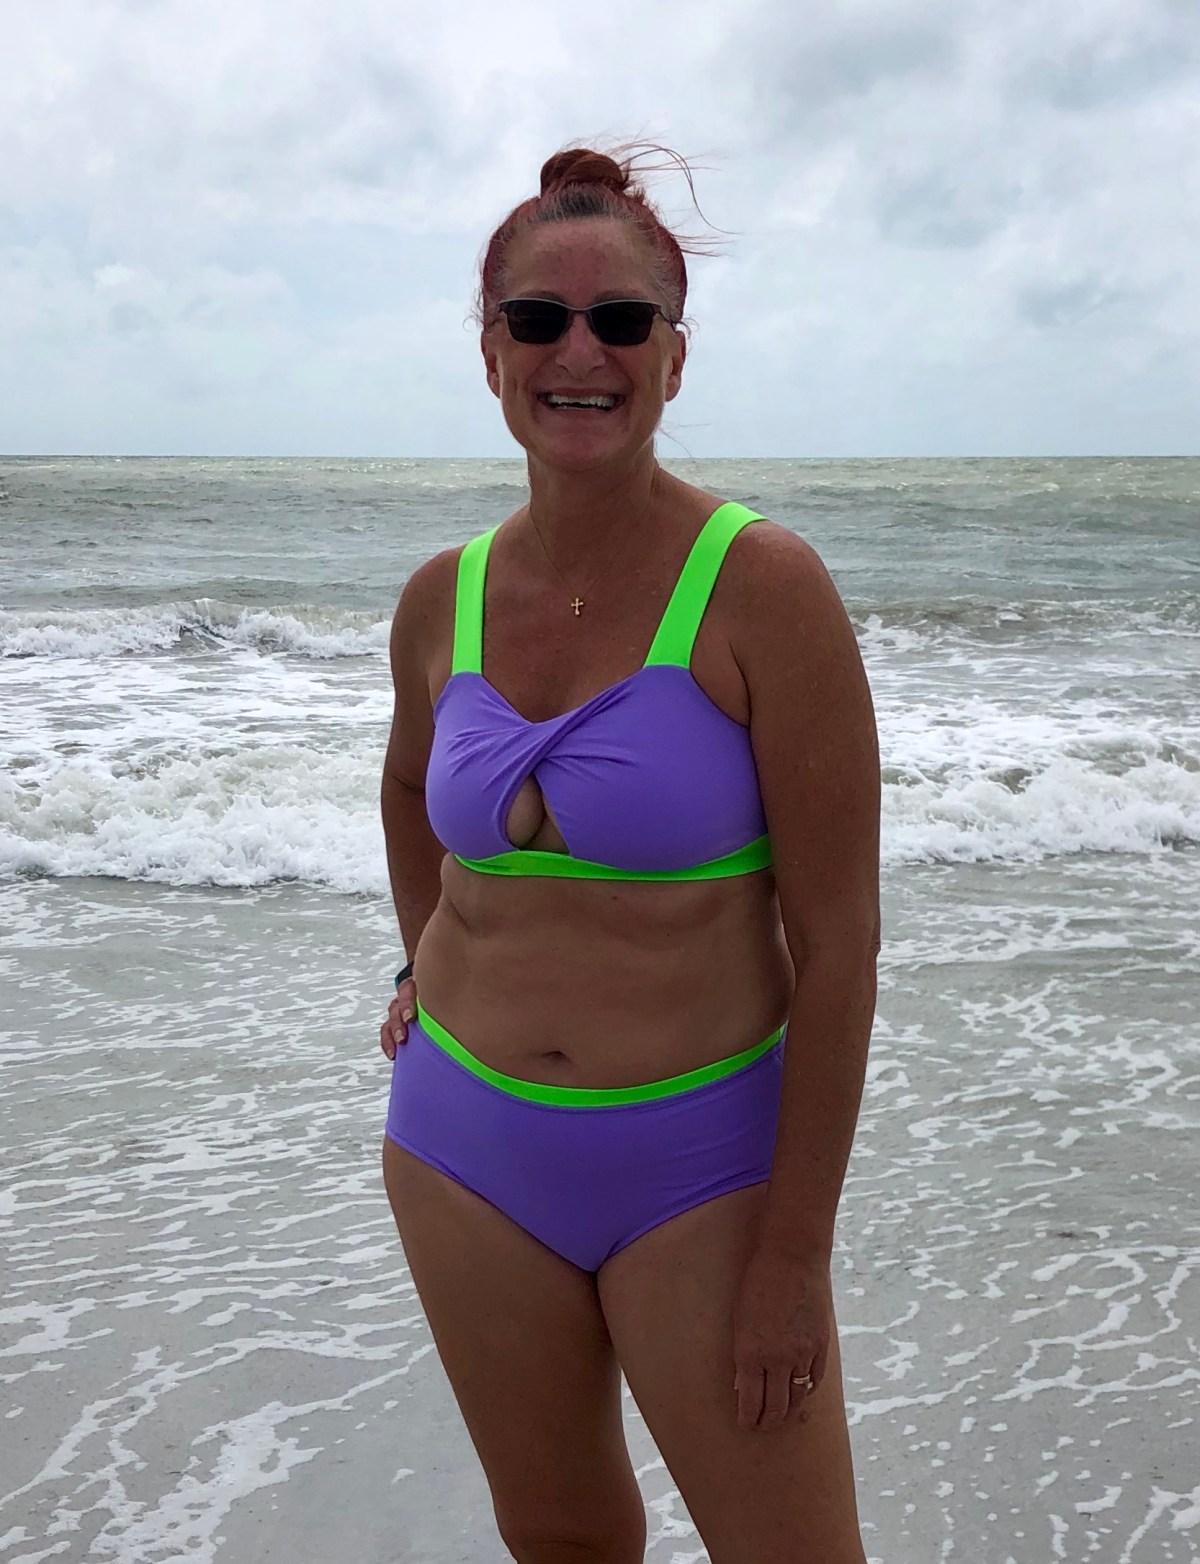


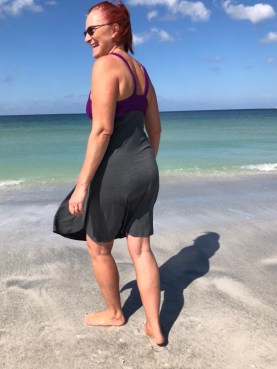
 My Scrundie swim bottoms were a success, and I have a cute new swimsuit! I love that it’s modest enough, while still being sexy. My husband definitely approves of my creation!

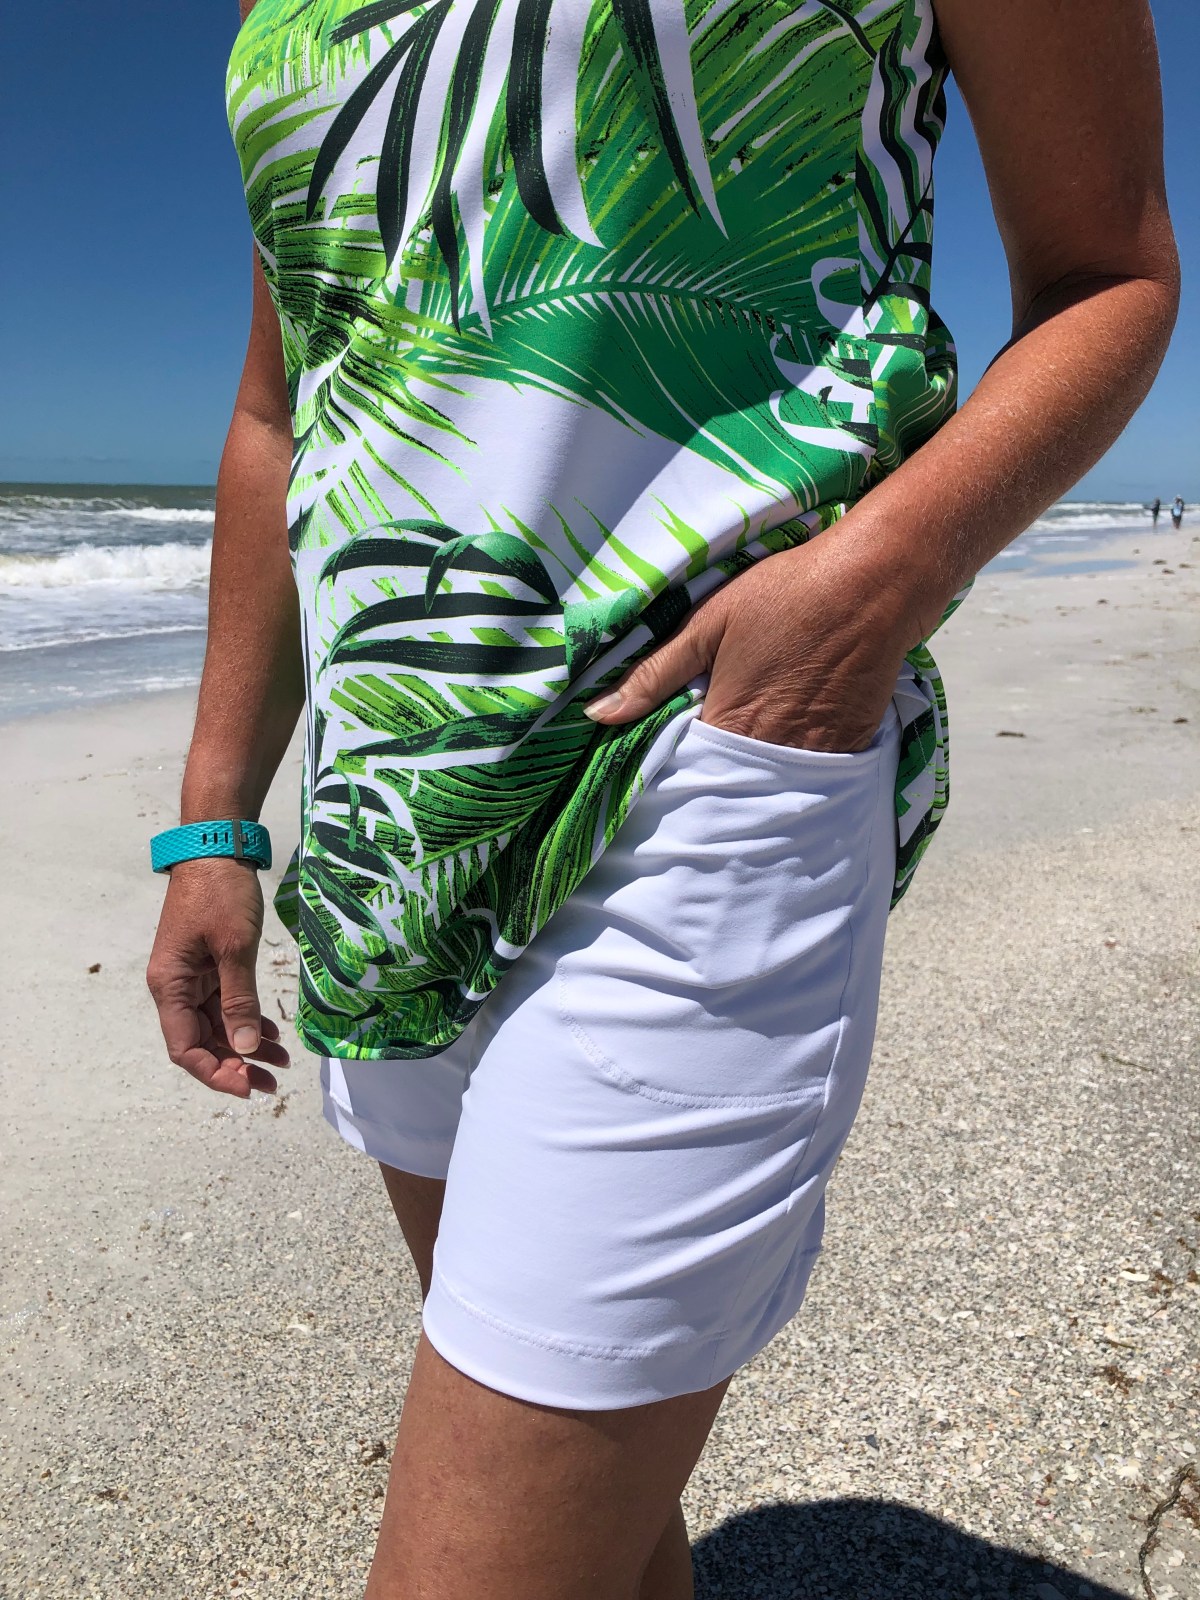
 I cut out two 4-3/4″ x 7-1/2″ rectangles for my front pockets. I wanted them to be hidden seam pockets like the one I did on the
  I flipped the pockets back to the outside edges after stitching and basted them in place.
 At this point, I should have been able to sew the tank front and back together, and sewn the bodice to the tank. But I had made a couple of rookie errors. 😦 The first was that I had made the tank too wide at the top. This was easily remedied by angling the tank in at the top so that it was the same width as the bodice (and the original tankini pattern piece.) The second error was not considering the fact that I am tall, and should have added an inch to the length of the tank. The problem was remedied easily enough by adding a band. I cut out the band pieces, and sewed them onto the bodice per the pattern tutorial, except using a 3/8″ seam allowance, and spacing my bodice front center V only 1/2″ apart. I don’t want to show too much skin at yoga class!
 I brought the outer band down and basted it in place before attaching the tank portion. I sewed on the tank, hemmed the bottom, and I’ve got a cute new workout top!


 I used a strip of powernet 1.5″ x 4″ to make my center back strap loop. I folded it in half lengthwise, and sewed it with a 3/8″ seam allowance. I turned it right side out, made a loop, slid it inside the center back opening I had left in the bra, and stitched it in place. Then I sewed 1/4″ clear elastic in the seam allowance along the top of the bra using a zig zag stitch. I stretched it slightly from the side seam up to the bra front points. I also stretched it slightly along the center front from point to point.
 Stitch one end of your strap in place at one of the bra front points, turn the bra right sides out, string the strap through the loop and try it on. Adjust the strap length to fit you comfortably, while still feeling supportive. Then turn it inside out again to stitch the strap at the appropriate length, and trim off the excess. I think I ended up cutting a couple of inches off of mine.
 Because I didn’t want the center front tie, I just made a gathering stitch down the center front of the bra top, and stitched my gathers in place with a zig zag, followed by a stretch stitch to ensure that my gathers stayed in place even with the frequent wearing and washing my workout tops get.
 Then I cut a 6″ triangle out of my powernet. You can use the triangle you cut out of the bodice, (adding 3/4″ on the two sides to give yourself a seam allowance) as a pattern.


 If the lace and circular knit were an exact color match, I would have just used one layer of fabric for my skirt. If you’re going for sheer and sexy, you could just use the powernet.
 When you sew the side seams together, sew all layers at the top and bottom for about an inch, leaving the middle 2 to 3 inches of just the front bodice lining free so that you have an opening in the side seams.

 Then turn your bodice right sides out and press. Don’t forget to press all seams open as you sew. This helps reduce bulk when sewing your layers together, as well as giving your garment a more finished look. Cross the bodice fronts over as per the pattern markings and baste in place. Pin or baste the straps in place and try on for fit. You may want to shorten your straps or move them closer to the center. Maybe you want to cross them in the back. The best part of sewing is that you make garments that fit YOU. Once you’ve decided on strap placement, stitch the straps in place. Lining up the bottom edges of your bodice main and lining fabrics, baste the layers together. This makes it easier when you sew on the band.


 Other than the straps, I sewed the bra together per pattern instructions. While I love the look of the double straps, they are more time consuming to construct. So I still cut out four strap pieces, but used them flat (as main fabric and lining fabric) rather than as double straps sewn to each shoulder. I used powernet in my straps rather than adding elastic.
 Once you’ve sewn your main and lining pieces together along the top, try the bra on, adjust the straps to length, then push the straps through the openings and stitch.
 To avoid bulk, be sure to trim the seam allowances at the back strap openings on an angle before turning the bra right side out. It’s important to press as you sew. It helps everything lay more smoothly, and gives your projects a more professional finish. See the difference pressing makes between the left and right straps in the photo below?
 The Lille body was wider than my bra. If I were making the body out of Supplex, and wanted it more fitted, I would have slimmed the top of the body a bit. Since I was going for a drapier fit with ruching, I just matched up my quarter points and eased the body to fit the bra.
 I could have added a band with elastic on the inside at this point, but wanted to try something else. I used 3/8″ swim elastic cut to fit me at the snug yet comfortable length (just like you would trial fit the wider elastic in the band). I overlapped the elastic and stitched it together making a circle. Then I matched up my quarter points, and zig zagged the elastic to the seam allowance. After that, I flipped the seam allowance toward the bra, and top-stitched it in place.
 To ruche the sides, I cut two pieces of swim elastic a couple of inches shorter than my side seams. I zig-zagged the elastic to the side seams and ta-dah, instant ruching!
 When I go to the beach to get photographs in my makes, sometimes silliness overtakes me. But we’ll just say I was jump testing the workout top to ensure that everything stays in place!


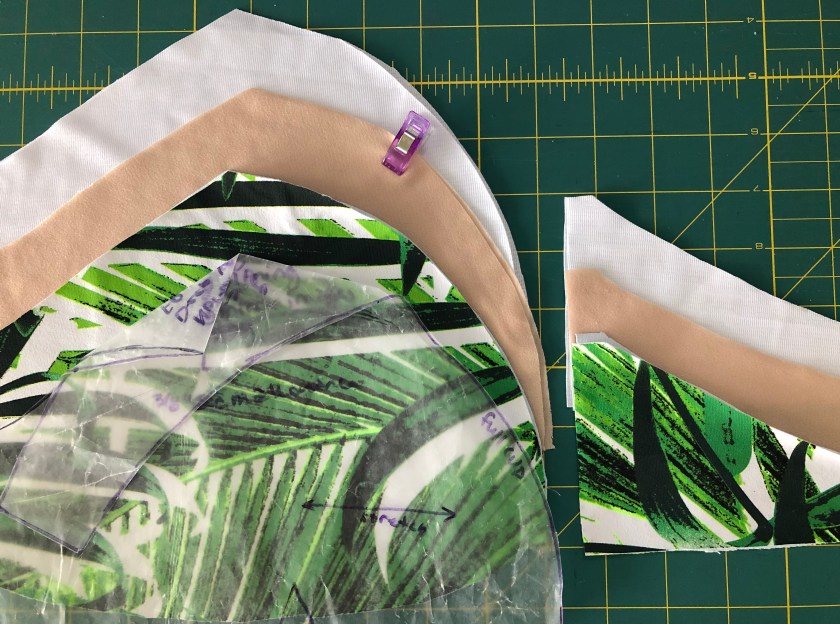
 Please note that out of respect for the designers, and protection of their intellectual property, I will not show full pattern pieces. I bought the cross-front add-on when I bought the Brazi pattern because I love the look and knew that it would be the most flattering for my body type. But you can do the straight strap hack on the original pattern. I simply marked my pattern where it curves from cup to strap, and folded it under 1/2″ above that. I folded the back straps under and cut out my modified pattern pieces. I cut four 2″x13″ rectangles out of my fabric as my strap and strap lining pieces.
 being successful at supporting “the girls” is
 Pin the trimmed powernet pieces to your lining pieces and baste in place. Do not baste along the side seams! To make the pocket for your bra cups, lay your cups on top of the bra front and mark the height. Sewing a horizontal line across the height mark will keep your cups from shifting out of place.
 Sew your main and lining front pieces right side together. The pattern tutorial recommends using elastic along the front edge of the cups. Using the elastic adds another layer of security if you are concerned about anything showing when you lean forward.


 Repeat the process with the other side seam. At this point you can follow the pattern directions about matching your center front notches, adjusting strap length, sewing on your bra band or skirt and adding the elastic.
 Since I was adding the Calista skirt to the Brazi top, and the bottom of the two bras are different shapes, I knew that I might need to make some adjustments. You might like the look of the dipped hem my mash produced, but I am kind of old school, and like my hems to be level with the floor. I had an easy fix for my problem.