Porcelynne Jackie Bra and Tankini

Workout wear makes up a large portion of my wardrobe, so I like trying out new patterns and styles. Porcelynne is known for their bra making books and extensive bra making supplies. Their current warehouse is somewhat local to me, and that is how I stumbled across the Jackie pattern. Jennifer (the designer, author, and owner of Porcelynne) is in a Florida sewing group that I’m in on Facebook. She hosted a shopping event that included fabric from an estate sale at her warehouse. I chatted with her while shopping, and commented on the sports bra she was wearing, asking her which pattern it was. She told me it was a new pattern that would be releasing soon. Once the Jackie Sports Bra pattern dropped, I bought it, and the Tankini Add-On pattern.

Sewing workout wear is fun, and ensures that I have unique, colorful outfits to wear to yoga class.

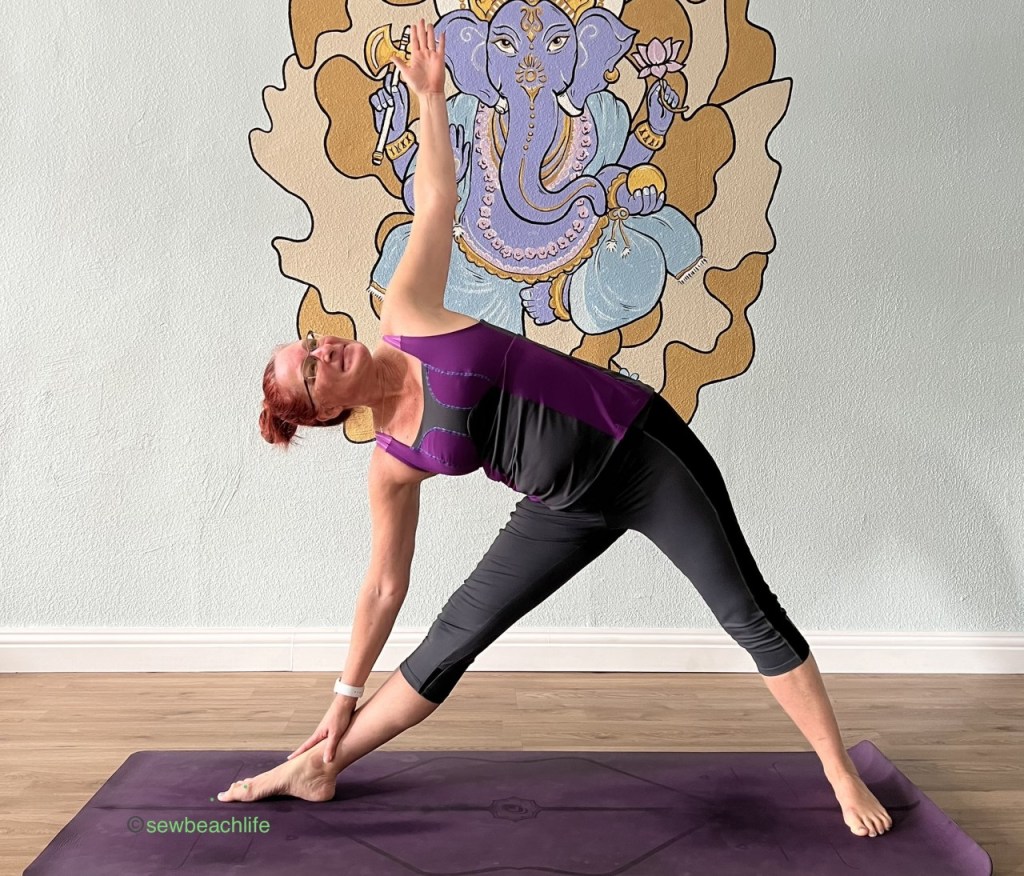
Since Christmas was right around the corner, I spent the next month sewing for others and put off sewing anything for myself. January rolled around, and with it, time to sew for myself. The Jackie is marked as a more advanced pattern, so, as suggested in the tutorial, I decided to make the “simple” pullover version, rather than the zip up front to ensure that I had chosen the correct size. The size chart is extensive and includes fitting tips for uneven breast sizes, compression fit, etc. Knowing that I planned to workout in my bra, including upside down poses in yoga class, I sized down one size for the band, and used powernet in the bra. I did not size down in the cups, because I know powernet has a strong rebound factor. Snug but not not tight is the name of the game in comfortable workout wear! This meant that instead of making the 34F that I measured, I went with the 32F.

I always baste powernet to the wrong side of the main fabric before serging the pieces together, then pull all the basting stitches. In retrospect, I should have trimmed the powernet back 3/16″ around all the edges before serging to reduce bulk in my seams.

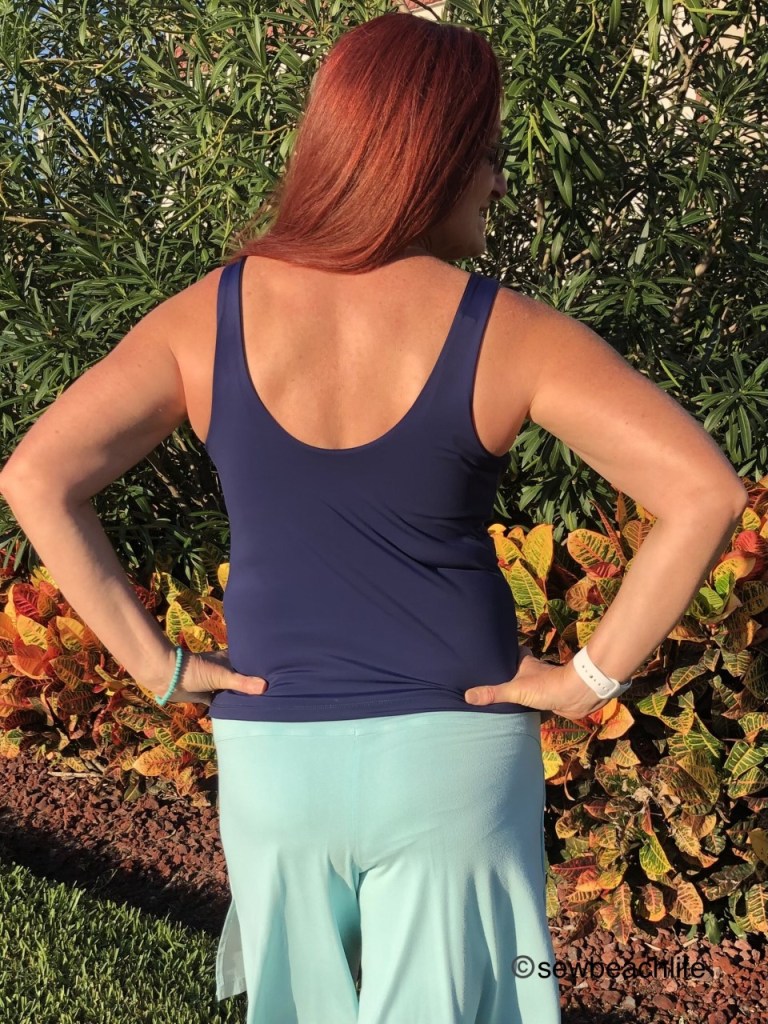
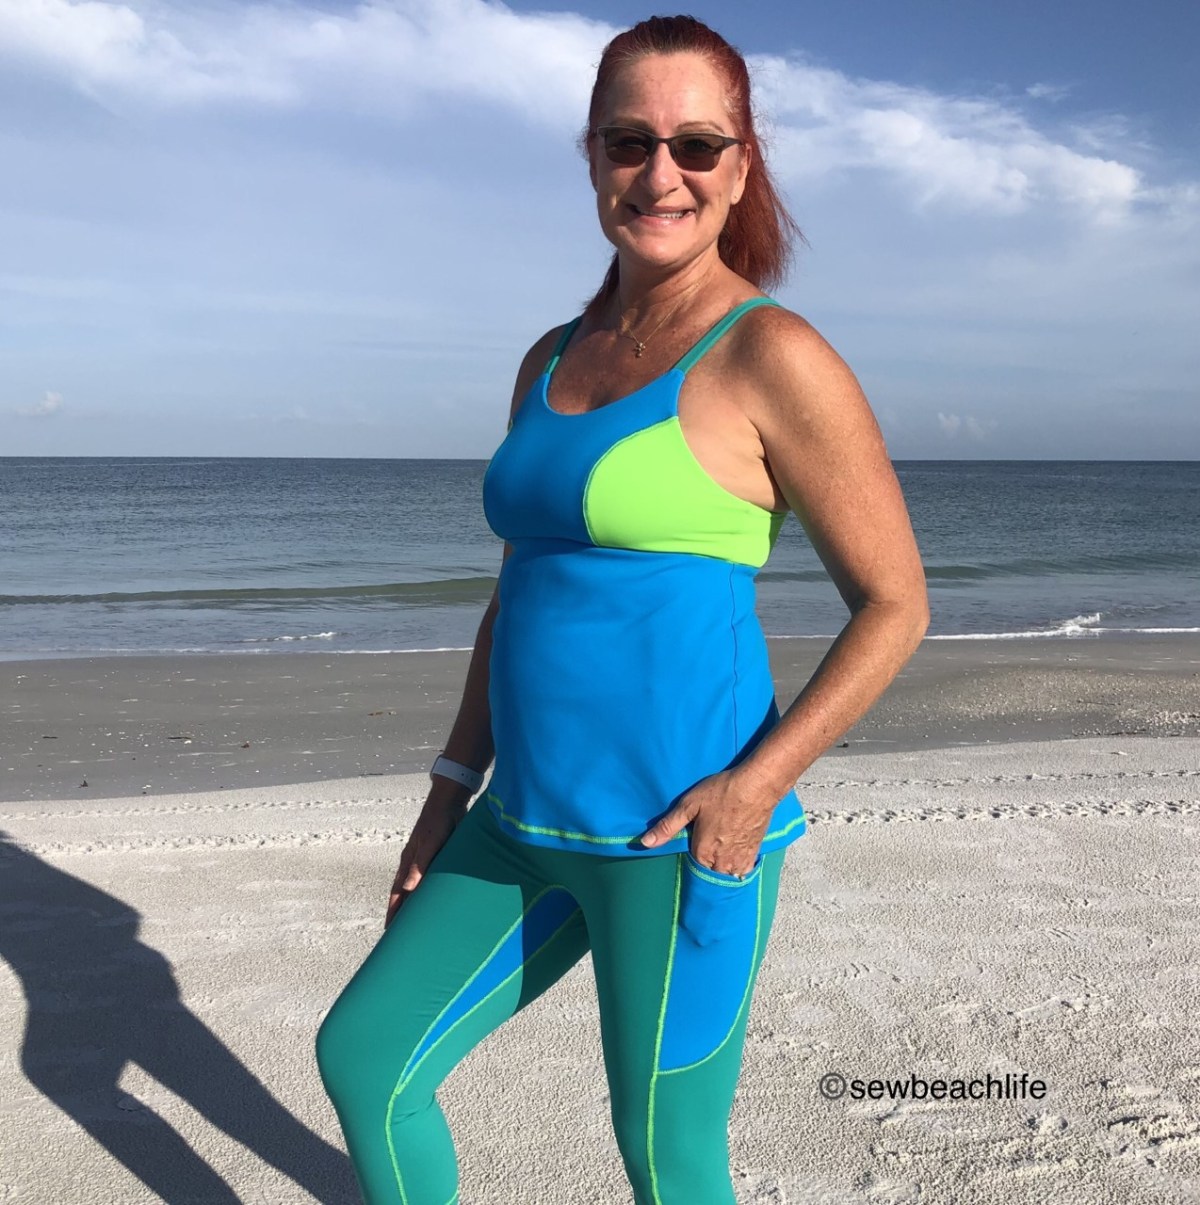
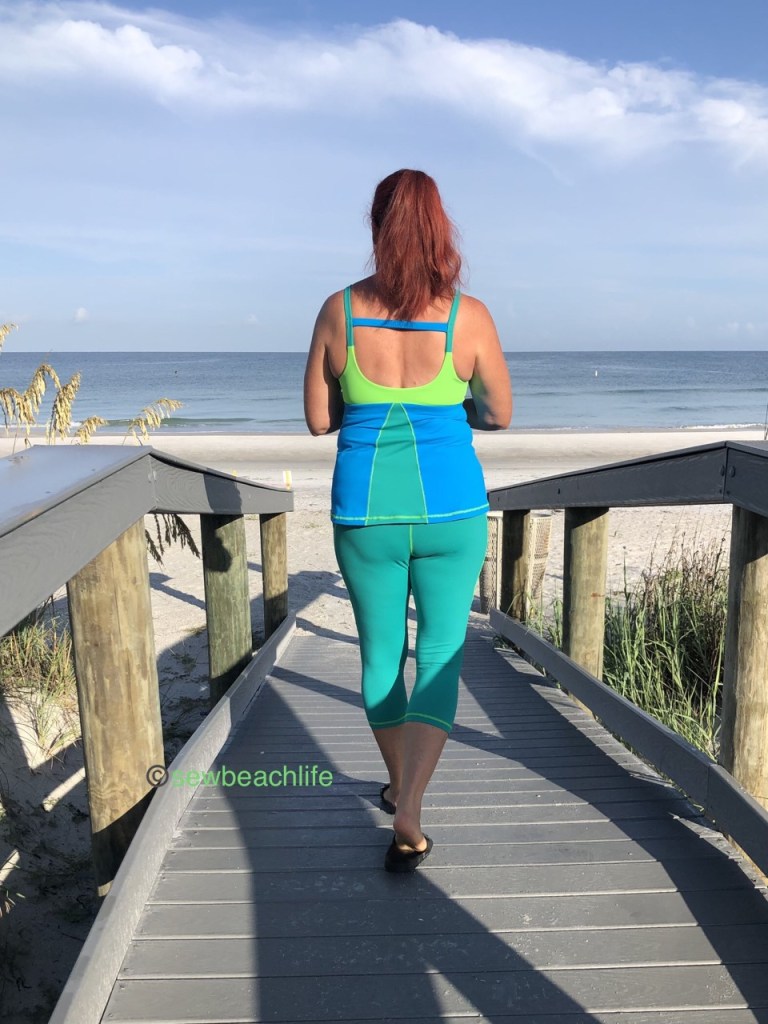
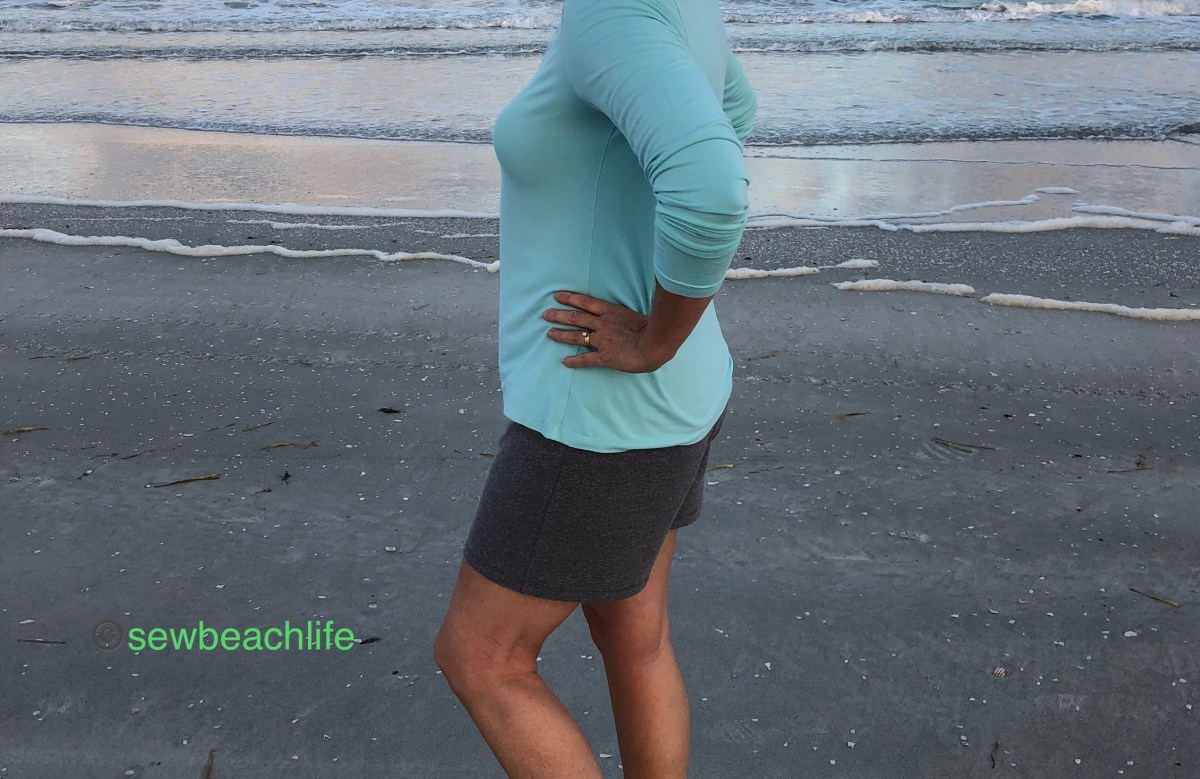
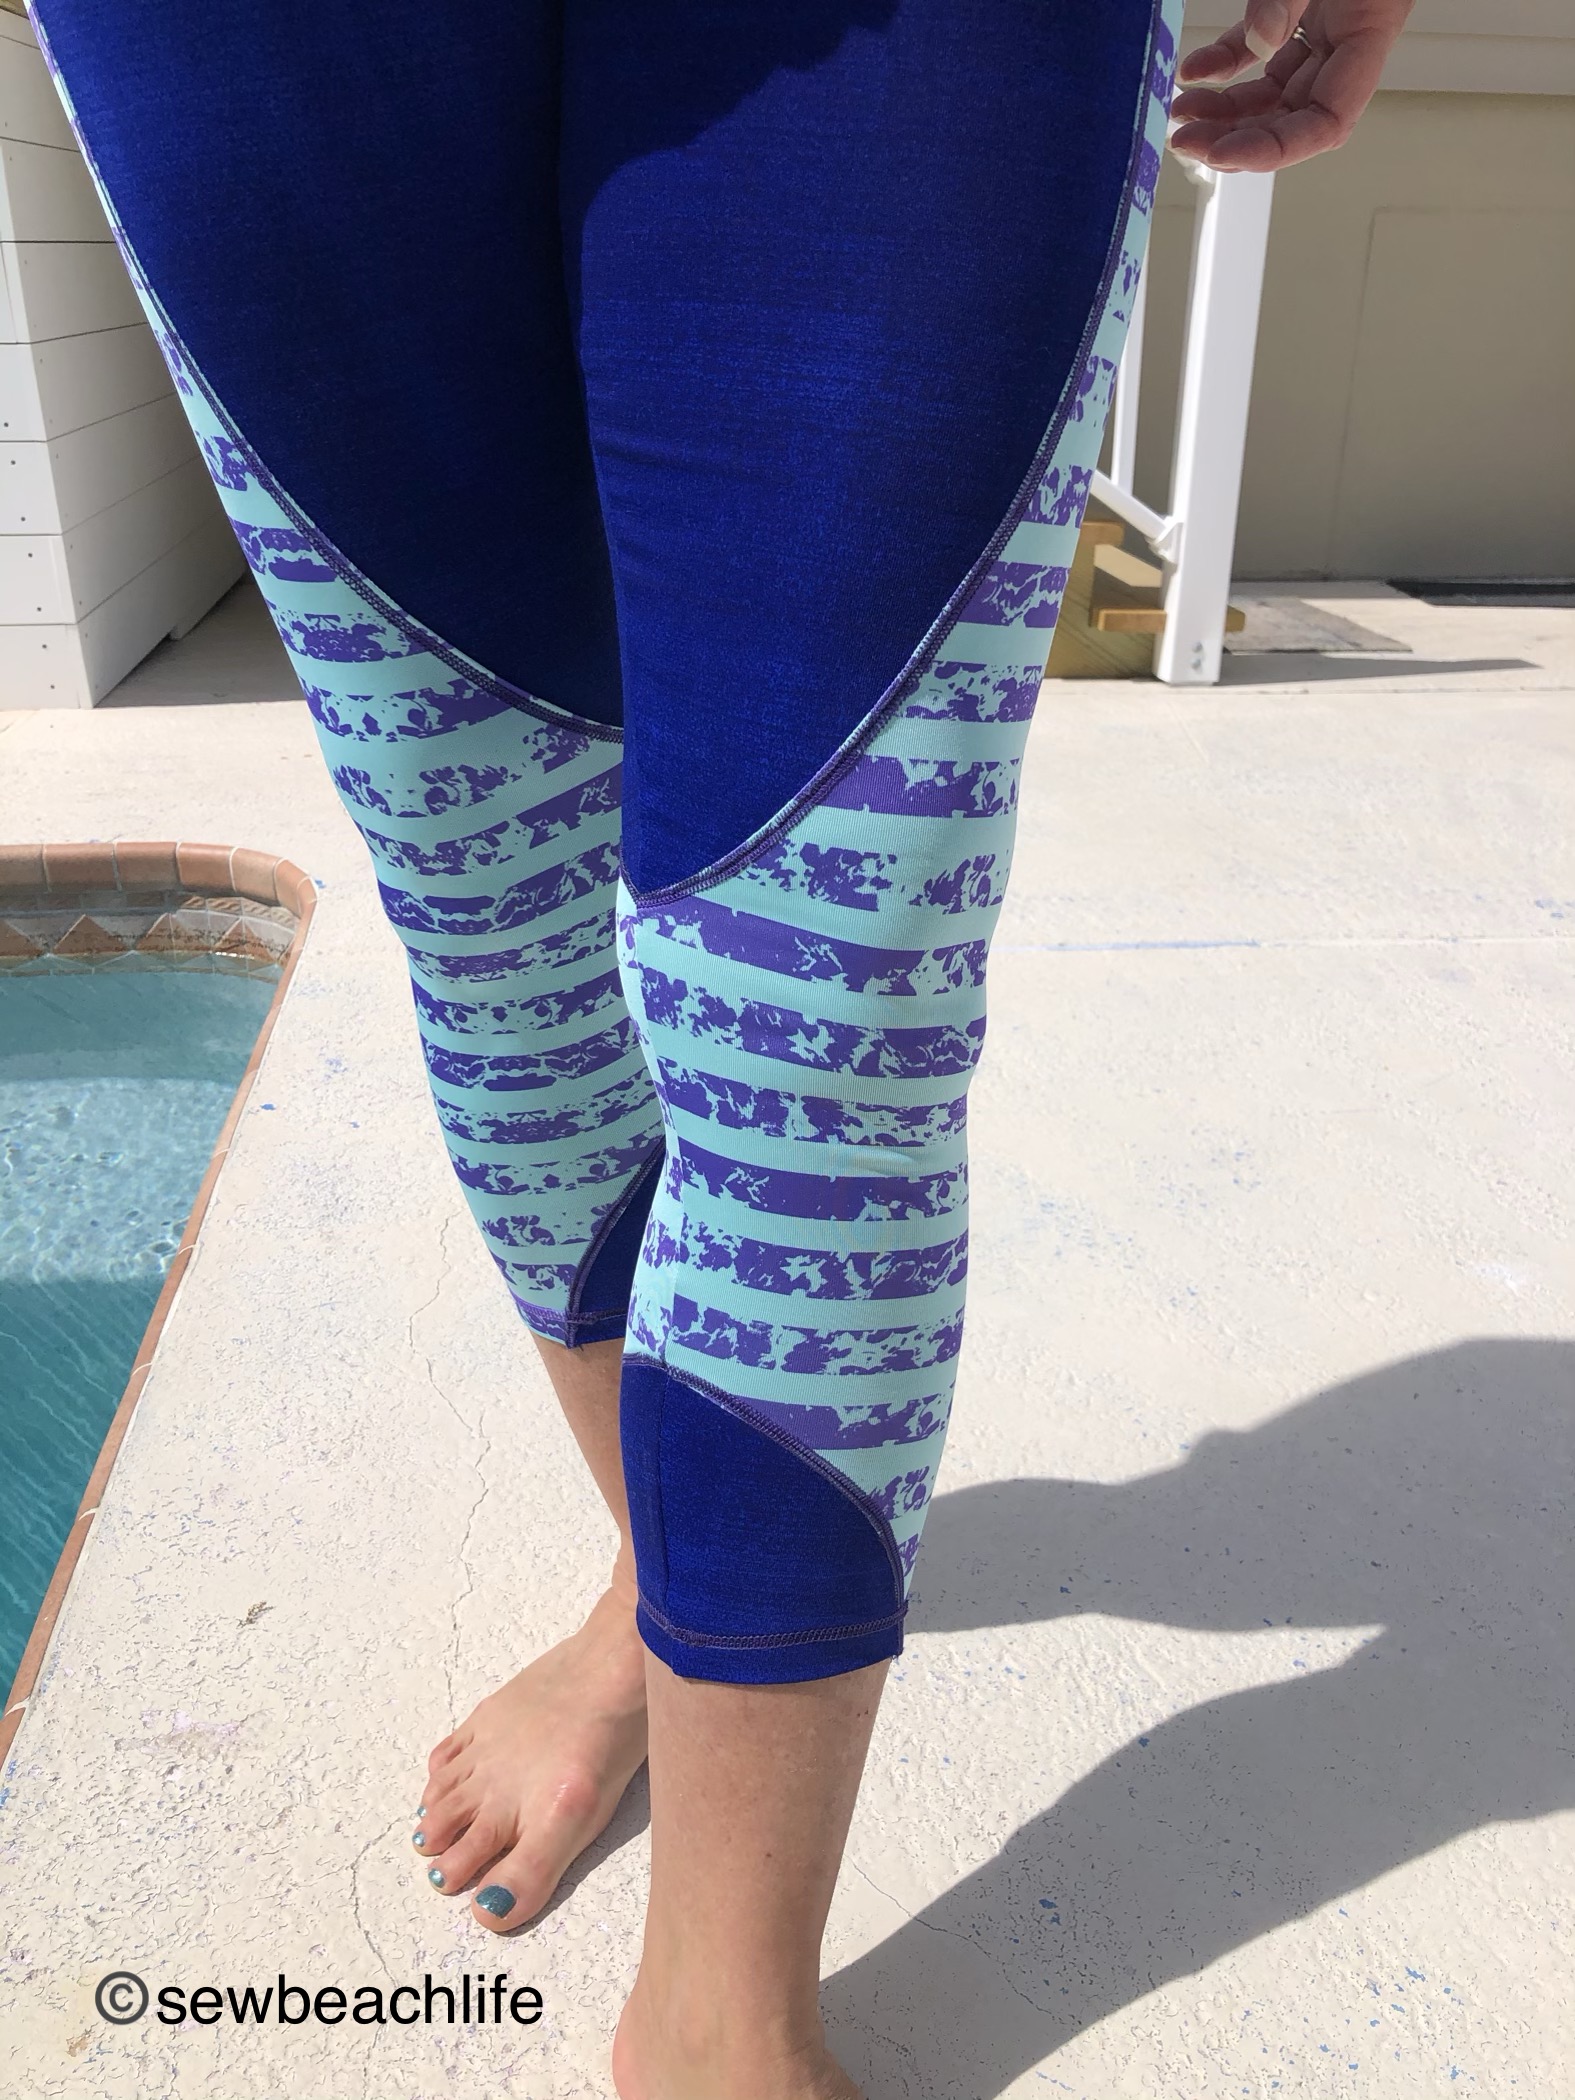
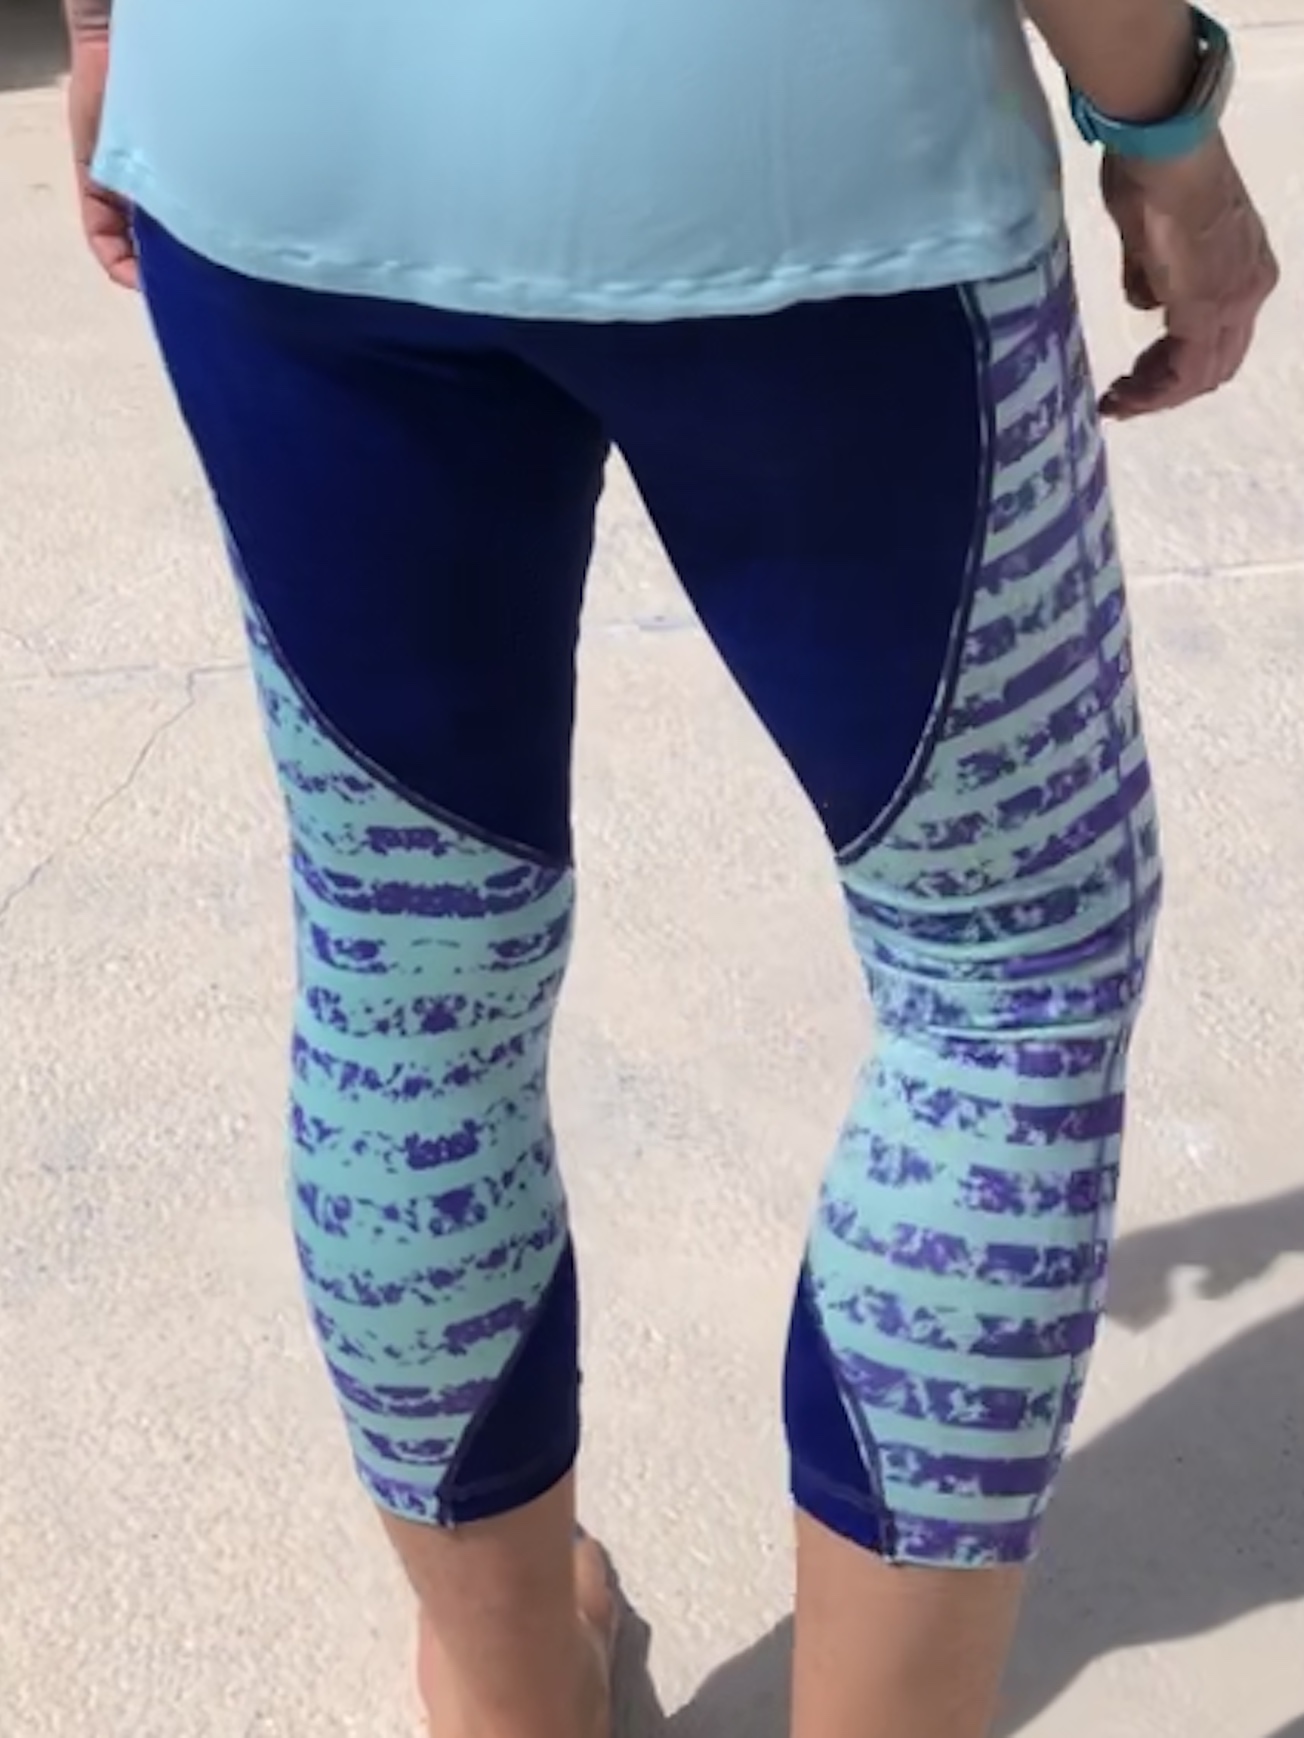
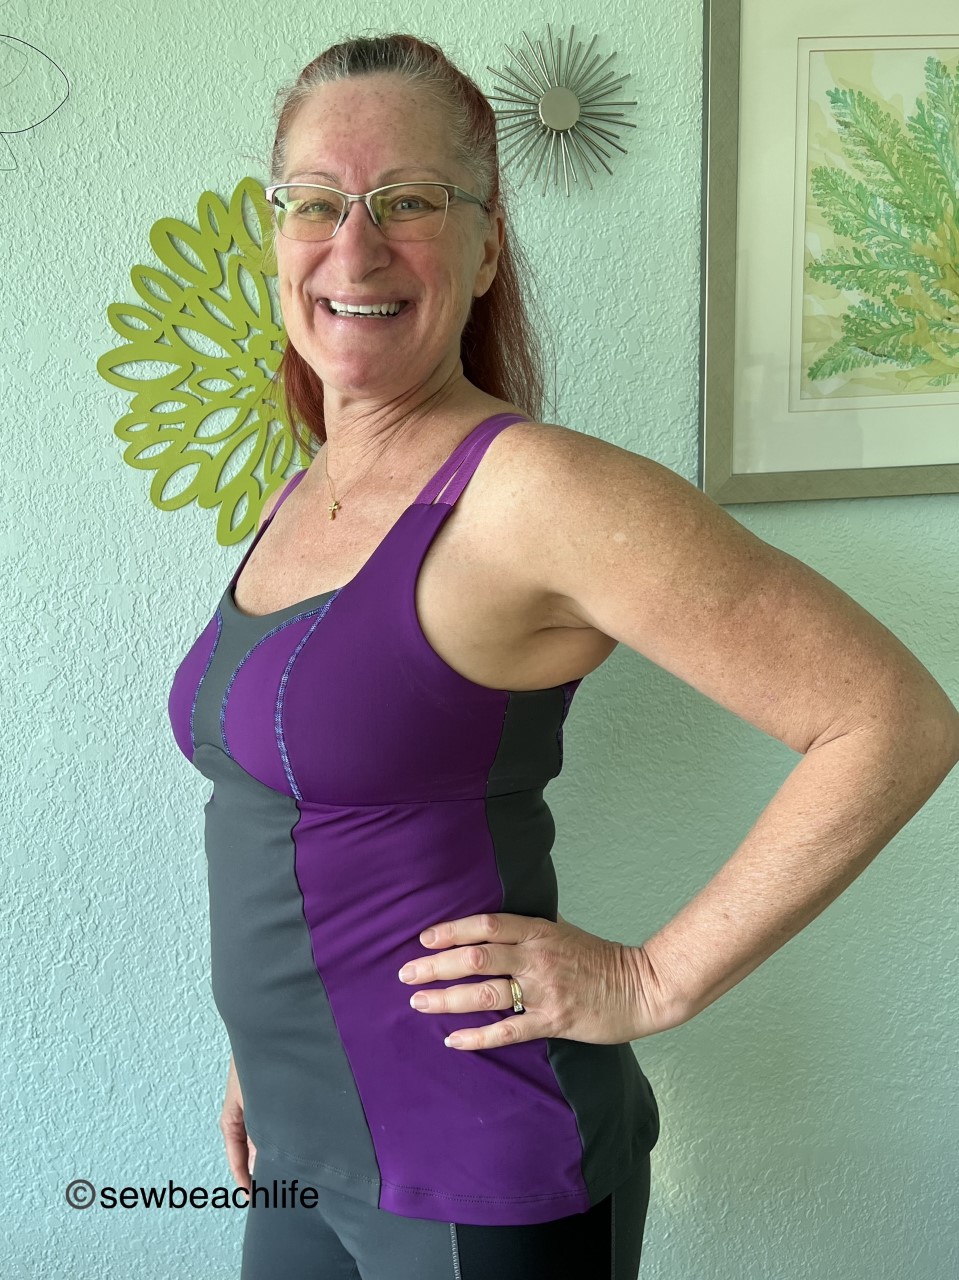
The Tankini Add-On is based on your band size and has some cool overlapped pockets on the front side panels. Although I like the looks of the pocket panels, all of my workout tights have pockets, so pockets on my top were redundant. Skipping the pockets meant a little more work to figure out the length on the side panels, but it wasn’t really that challenging to mark a new cutting line. The curving lines on the front panels of the tankini are super cool, but the curves on the side seams are not designed for my body shape. The tankini side seams were too “hippy” on me, with bulges on the sides, then a bit snug at the bottom, which makes the bottom want to slide up to a narrower point on the body. Part of this is probably due to the shape of my booty, which I frequently adjust for when making tops or dresses. Have you ever had a top or dress hem be too short in the back (shorter in the back than the front)? Even on a flowy dress, so you know it’s not because it’s too tight in the hips? Yeah, it’s super annoying, but there is an easy solution as long as it’s done at the “tracing the pattern” stage.

Whenever I’m tracing off a top or dress pattern and the back hem is straight across from center back to side seam, I know it’s going to be a problem if I don’t make an adjustment. Booties protrude from your back, and you need adequate fabric to cover them. Obviously you need adequate hip width, so do any grading out to the appropriate size first. In case you haven’t read my previous posts on the importance of grading, I am a stickler about grading to fit your body. Designers make patterns to fit an average of measurements, and they provide size charts for a reason. Just because your bust measurement falls into size x, it doesn’t mean that your waist and hips do too. Maybe they fall into the measurement range for a size y or z. It’s worth taking the time to grade to your size(s). Now back to the booty issue. If you’ve noticed the “too short in the back” issue on your makes, you need to add length at the hemline in the center back of your pattern, curving up to meet the side seam. Adding 1.5″ at the center fold line seems to be the perfect amount for me.

Notice that more length is added at the center back fold line to about the center of the pattern piece, then it curves somewhat sharply up from there.

Using a curved ruler can help you draw smooth even lines, but you can do this by eye. I do this adjustment on every fitted workout top I make. It’s helpful on more fitted tank and tee shirt patterns as well. Many flowy top patterns seem to include a curved hem. Occasionally after making a pattern with a slightly curved hem, I find that I need to add just a little bit more length to the curve at center back.

The hand on the hip is kind of pulling the fabric, but the top is the same length in the back as it is in the front.

Although I generally followed the tutorial directions when sewing the bra (which is a good idea when trying a pattern for the first time!), I’ve made enough workout wear to feel comfortable making a few changes. Since I had used powernet on all of the front and back pieces, using elastic along the top seam wasn’t necessary. The caveats to this being: first and foremost, having chosen the proper size; using a high quality powernet (not a flimsy powermesh); and using the differential on my serger. When sewing knits, always up the differential (to 1.3 generally speaking) to keep the fabric from stretching out of shape while serging.

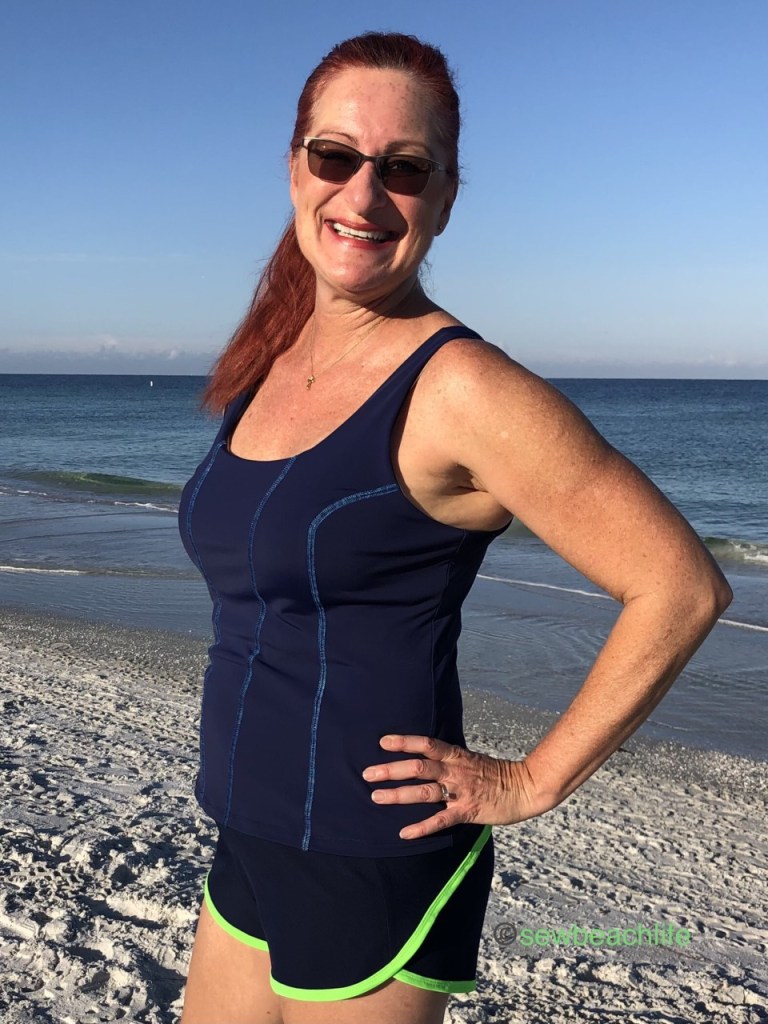
Since the neckline has a somewhat squared shape where the center front meets the side front, I found it helpful to sew with a stretch stitch first, then go back and serge to ensure nice crisp corners.

The interior of the bra and modified band.

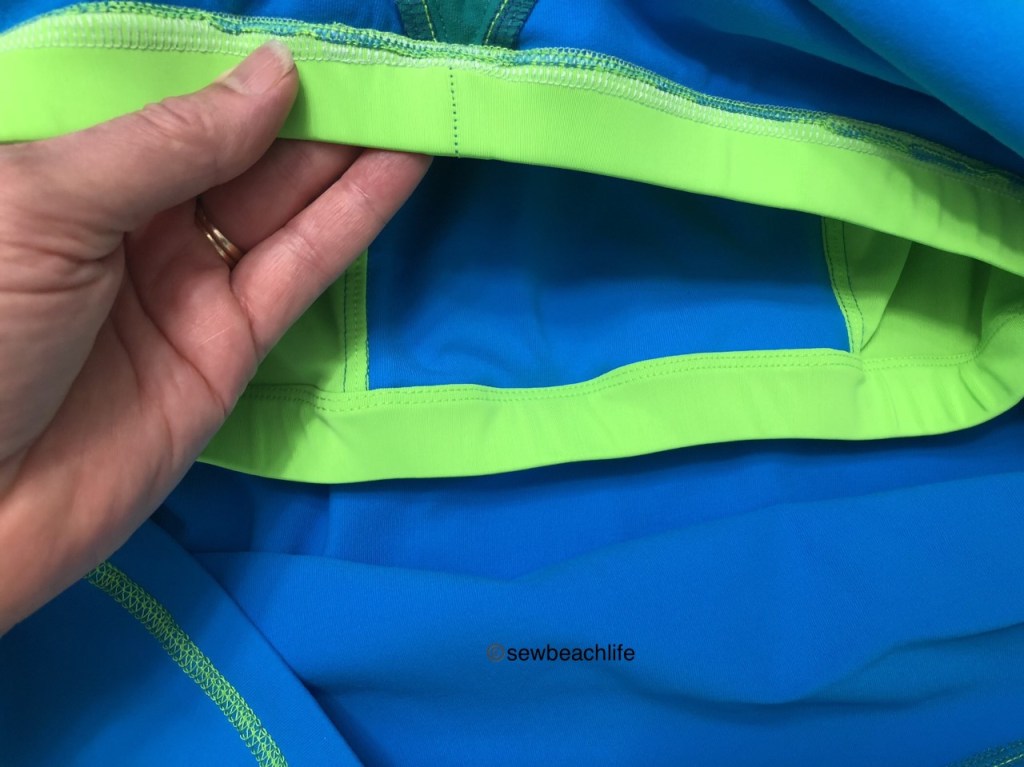
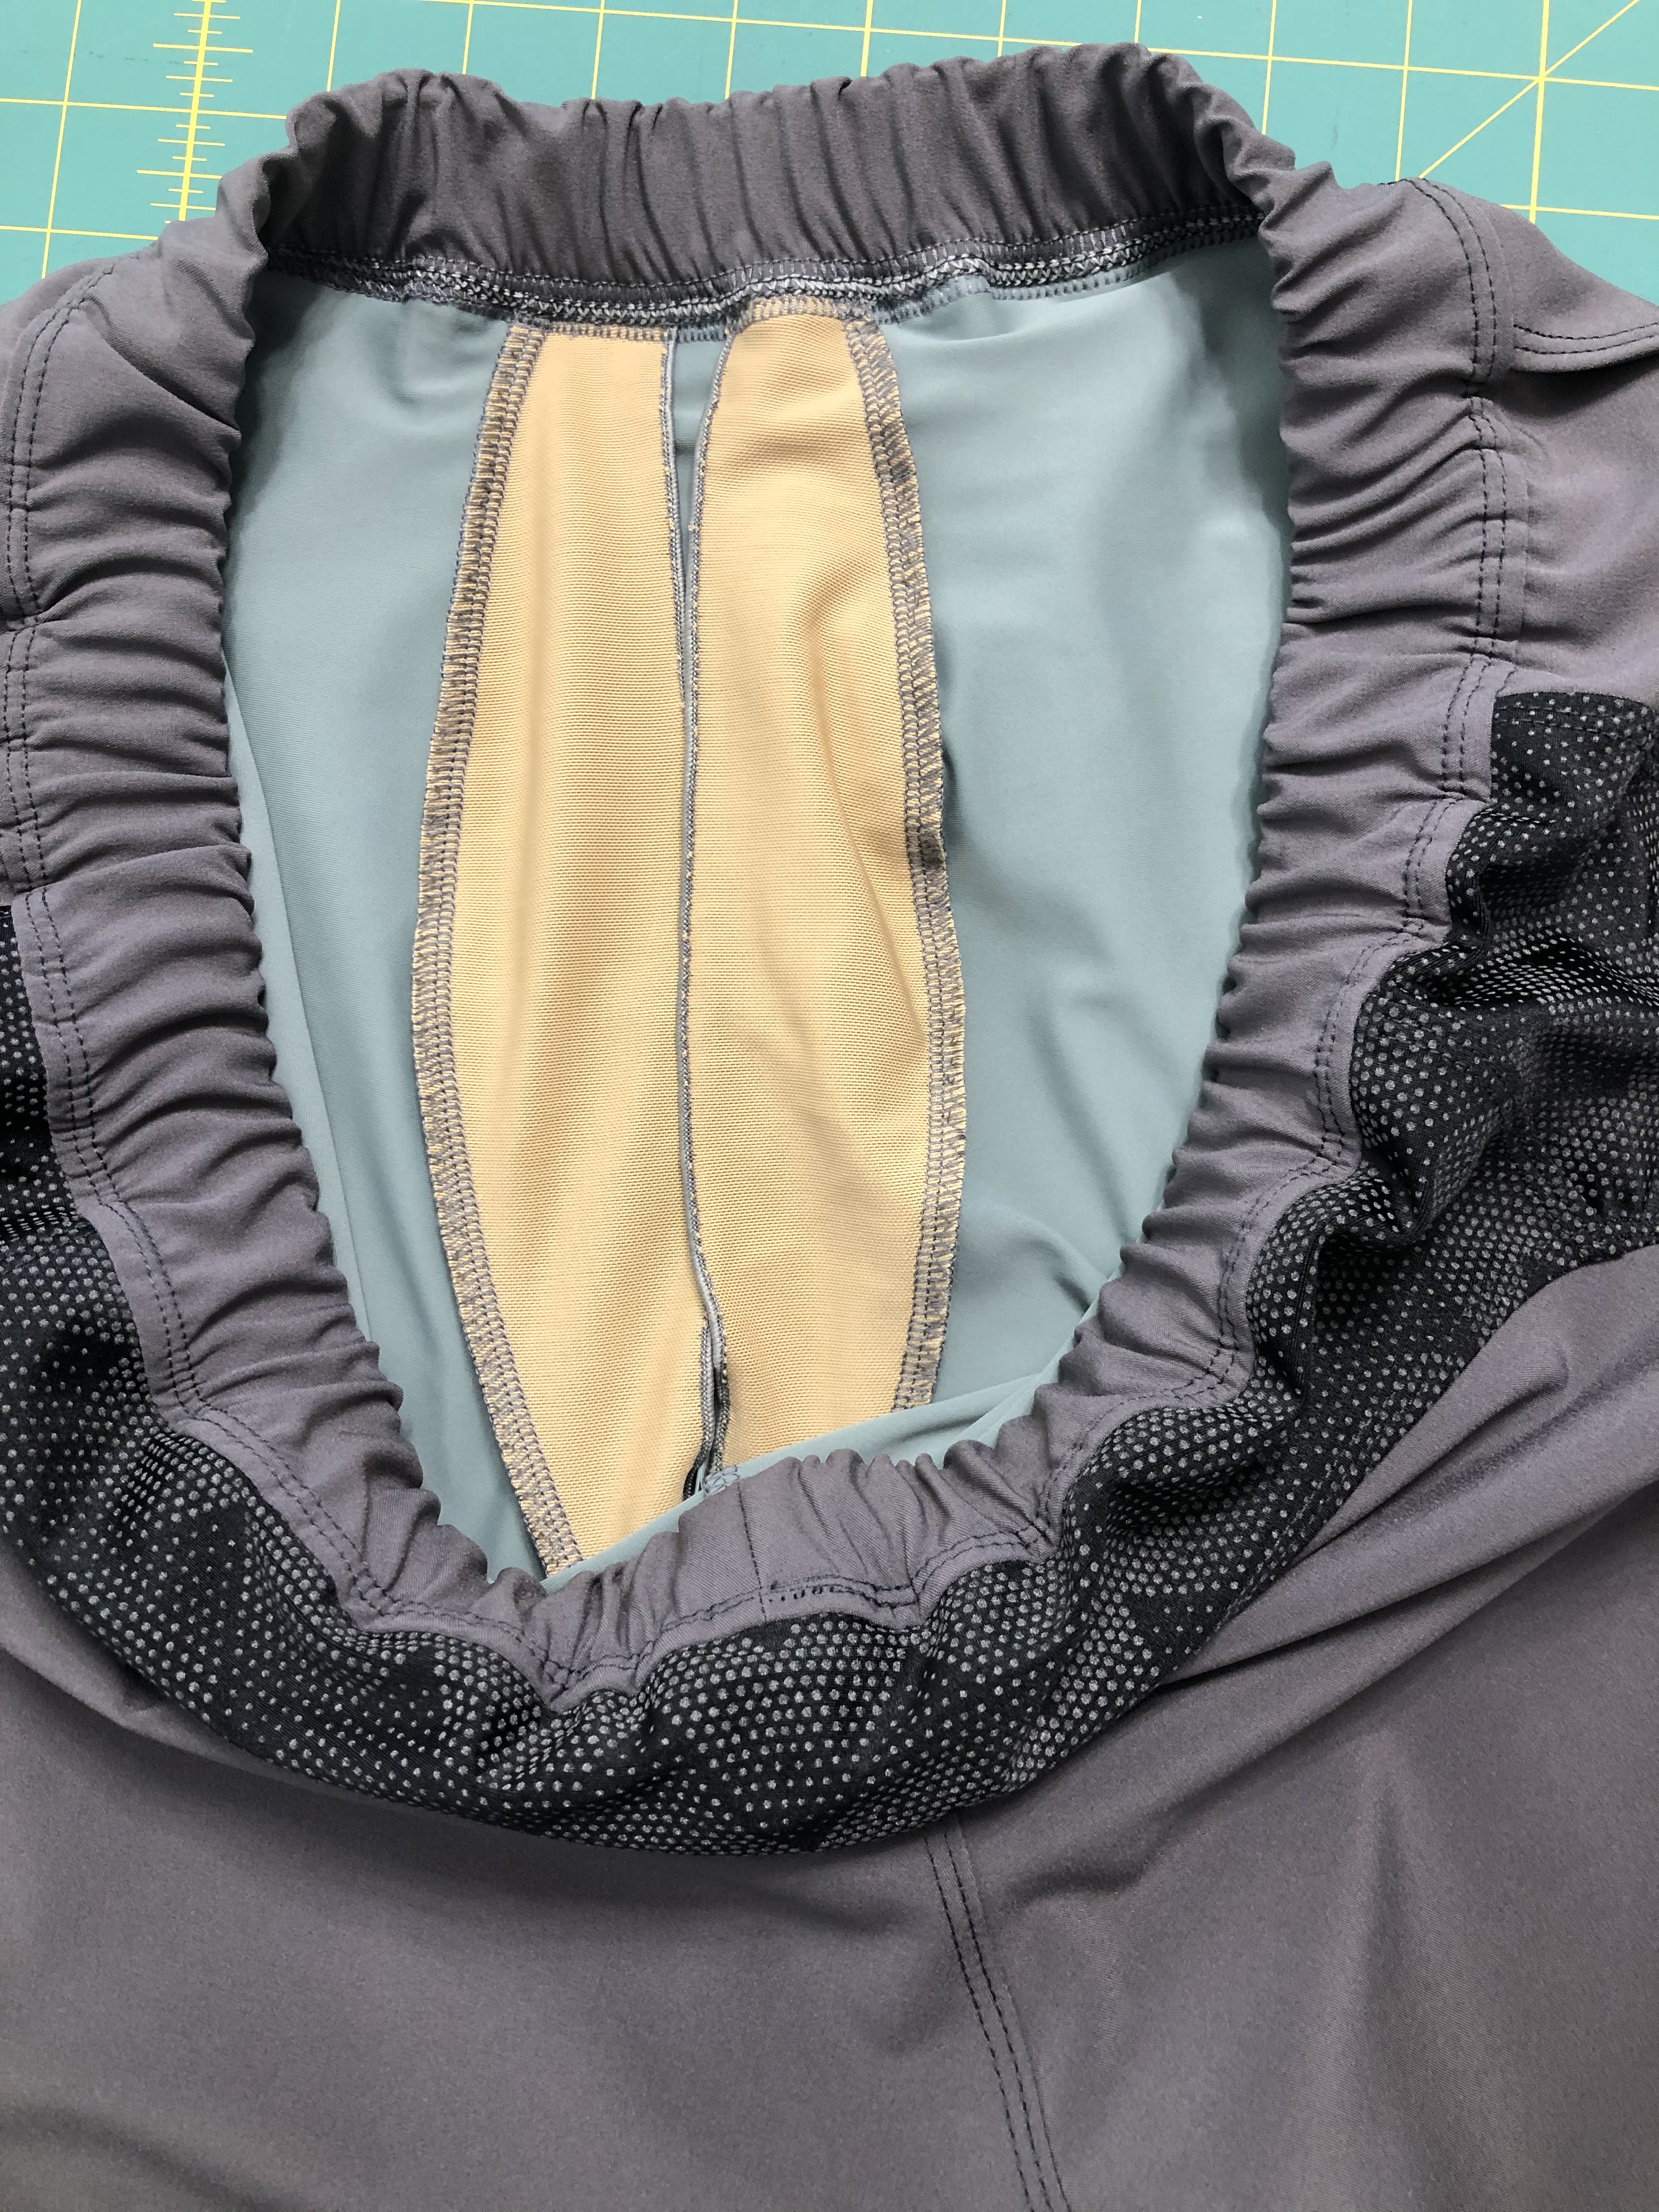
The bra pattern includes a normal rectangular band with 1-3/8″ wide elastic. The tutorial for the Tankini Add-On recommends serging narrow elastic into the seam when attaching the bra bodice to the tankini. I much prefer a nice solid 1″ wide elastic enclosed in a band on my workout tops. After all, I’m going to be upside down in headstands during yoga class and want a very secure band! On most tops the seam between the bra and bodice is relatively straight, but the Jackie bra has an interesting upward curve at center front. Rather than just using a simple rectangular band, I hacked mine to have a curve matching the curve on the center front of the tankini bodice.

The finished band has enclosed elastic.

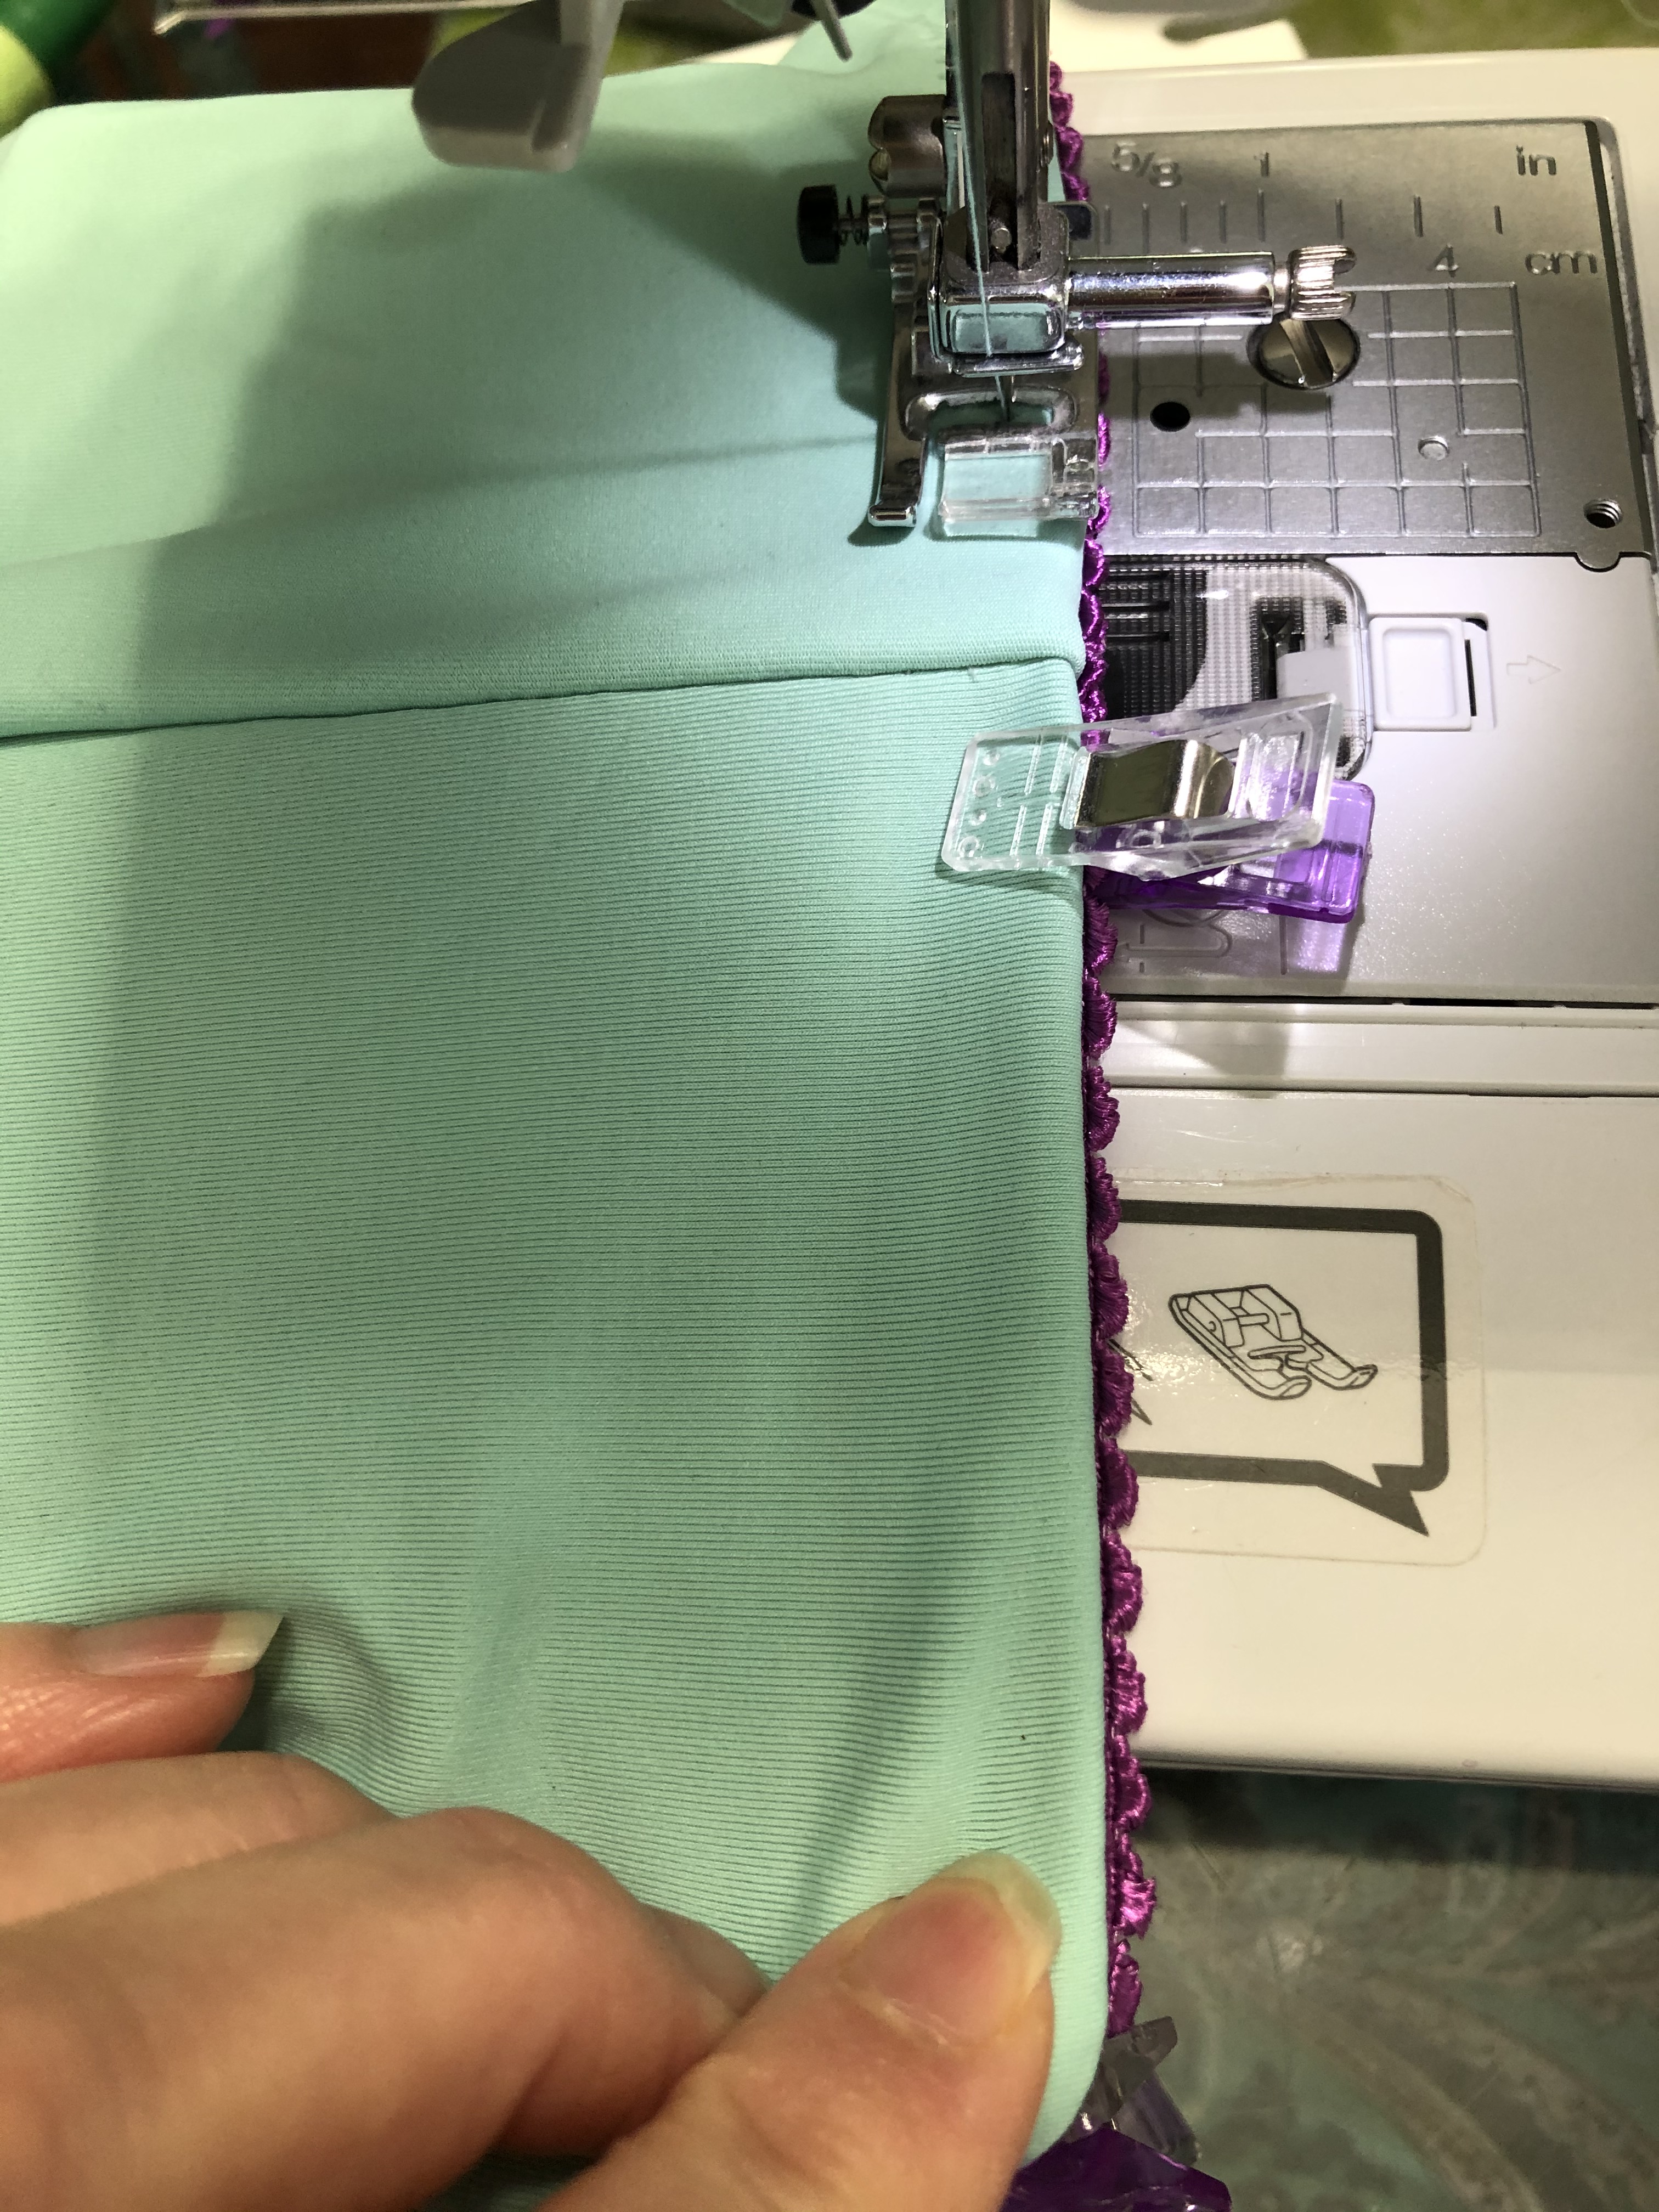
Since I don’t like loose elastic floating around inside of a band, I always serge one long edge of the band into the seam when attaching the bra and bodice. Since I’m using 1″ wide elastic, my band is 2-1/4″ high (except for the top center, which is shaped to match the bodice). Here’s what works for me: have the bodice inside out; slide the bra down inside the bodice with the right side out (the bra and bodice will be RST); place the band (sewn into a loop) inside the bra, with the right side of the band facing the lining of the bra, matching all quarter points. Serge from the inside of the top, with the band on top. I like to use plenty of pins to ensure that all layers stay perfectly aligned. Just be sure to pull the pins before they get up to the blade so you don’t hit them! If you’re nervous about this, just baste the layers together, then go over to your serger.

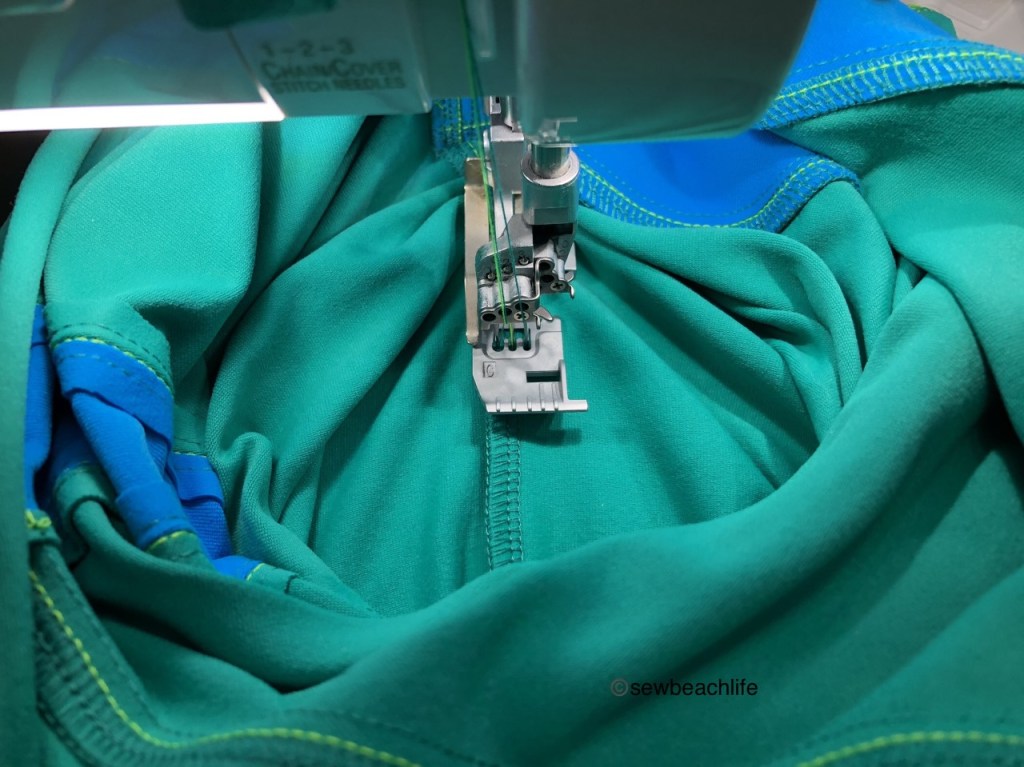
Since different brands of elastic can be more or less stretchy than others, I like to pre-stretch my elastic 8 or 10 times, then wrap it around my body where the band will fall (just under the bust) and pull it to a snug, yet comfortable tightness with a 1/2″ overlap. (Using the 1″ elastic from Wawak, mine ends up 27-1/2″ long.) Overlap the ends 1/2″, and zig-zag together, securing the ends. Mark the quarter points on the elastic (I just use a pencil). Pin the elastic to the wrong side of the unfinished long edge of the band, matching the quarter points, and serge, stretching the elastic to match the band. Then fold the elastic up inside the band, overlapping, and just matching the top of the seam. Pin, then coverstitch in place. This will keep the smooth side of the band against your skin, with the seam on the side against the bodice.

No matter how you bend, the band will lay comfortably against your body.

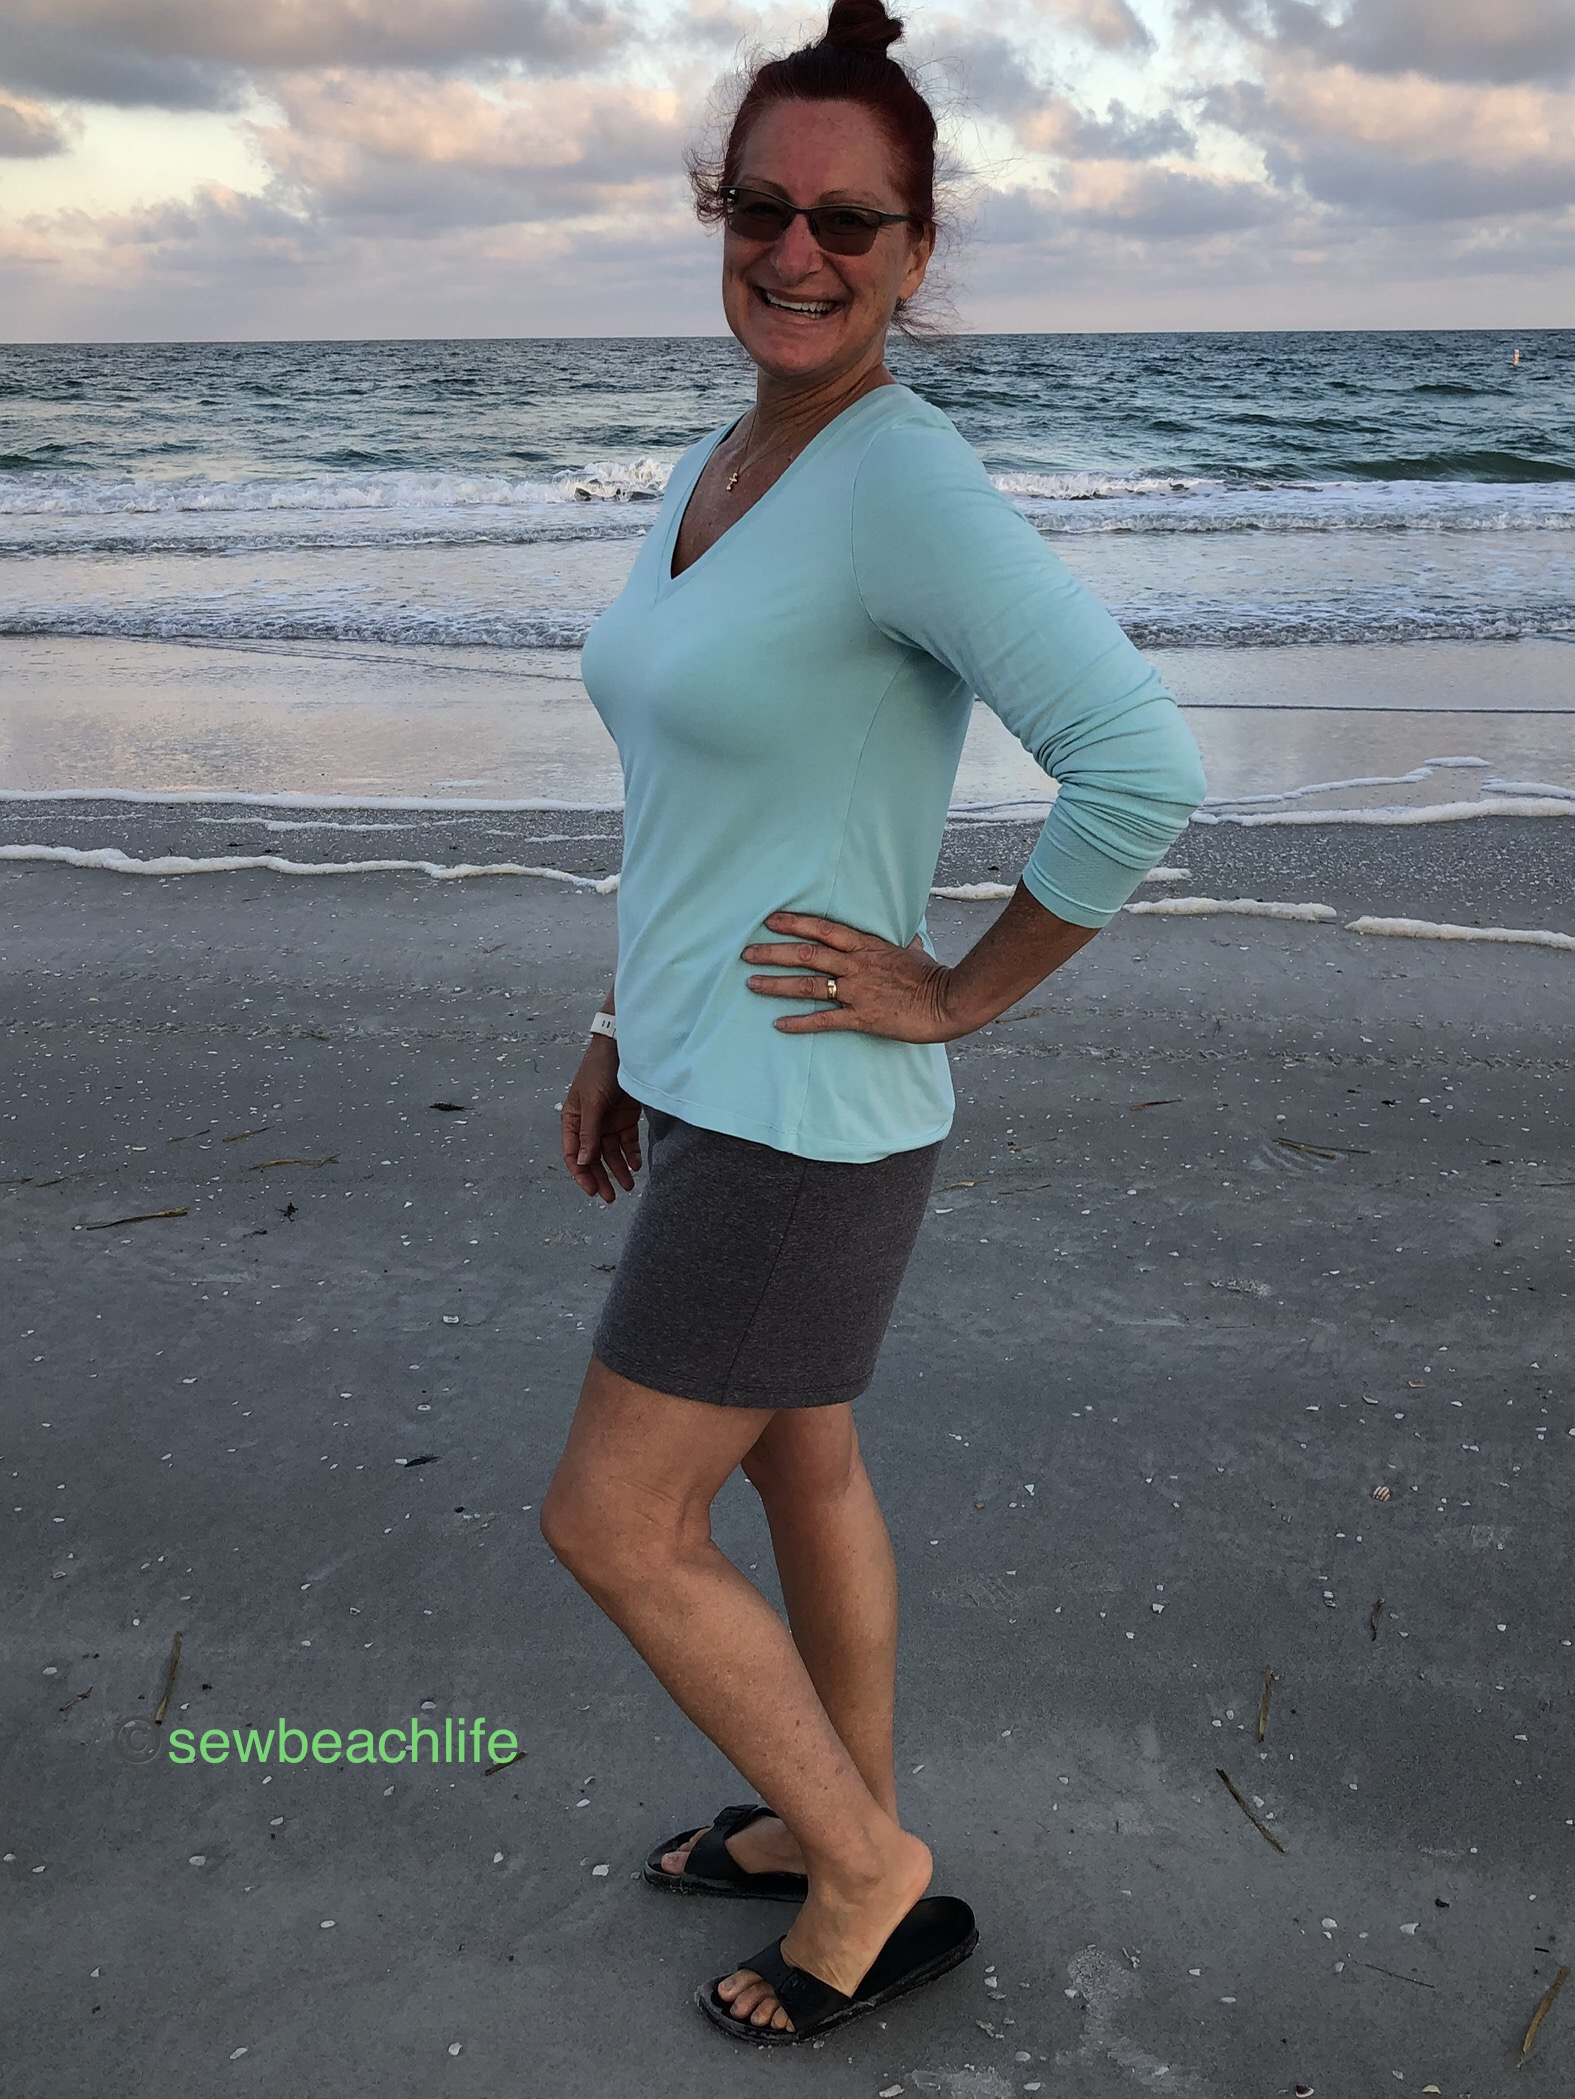
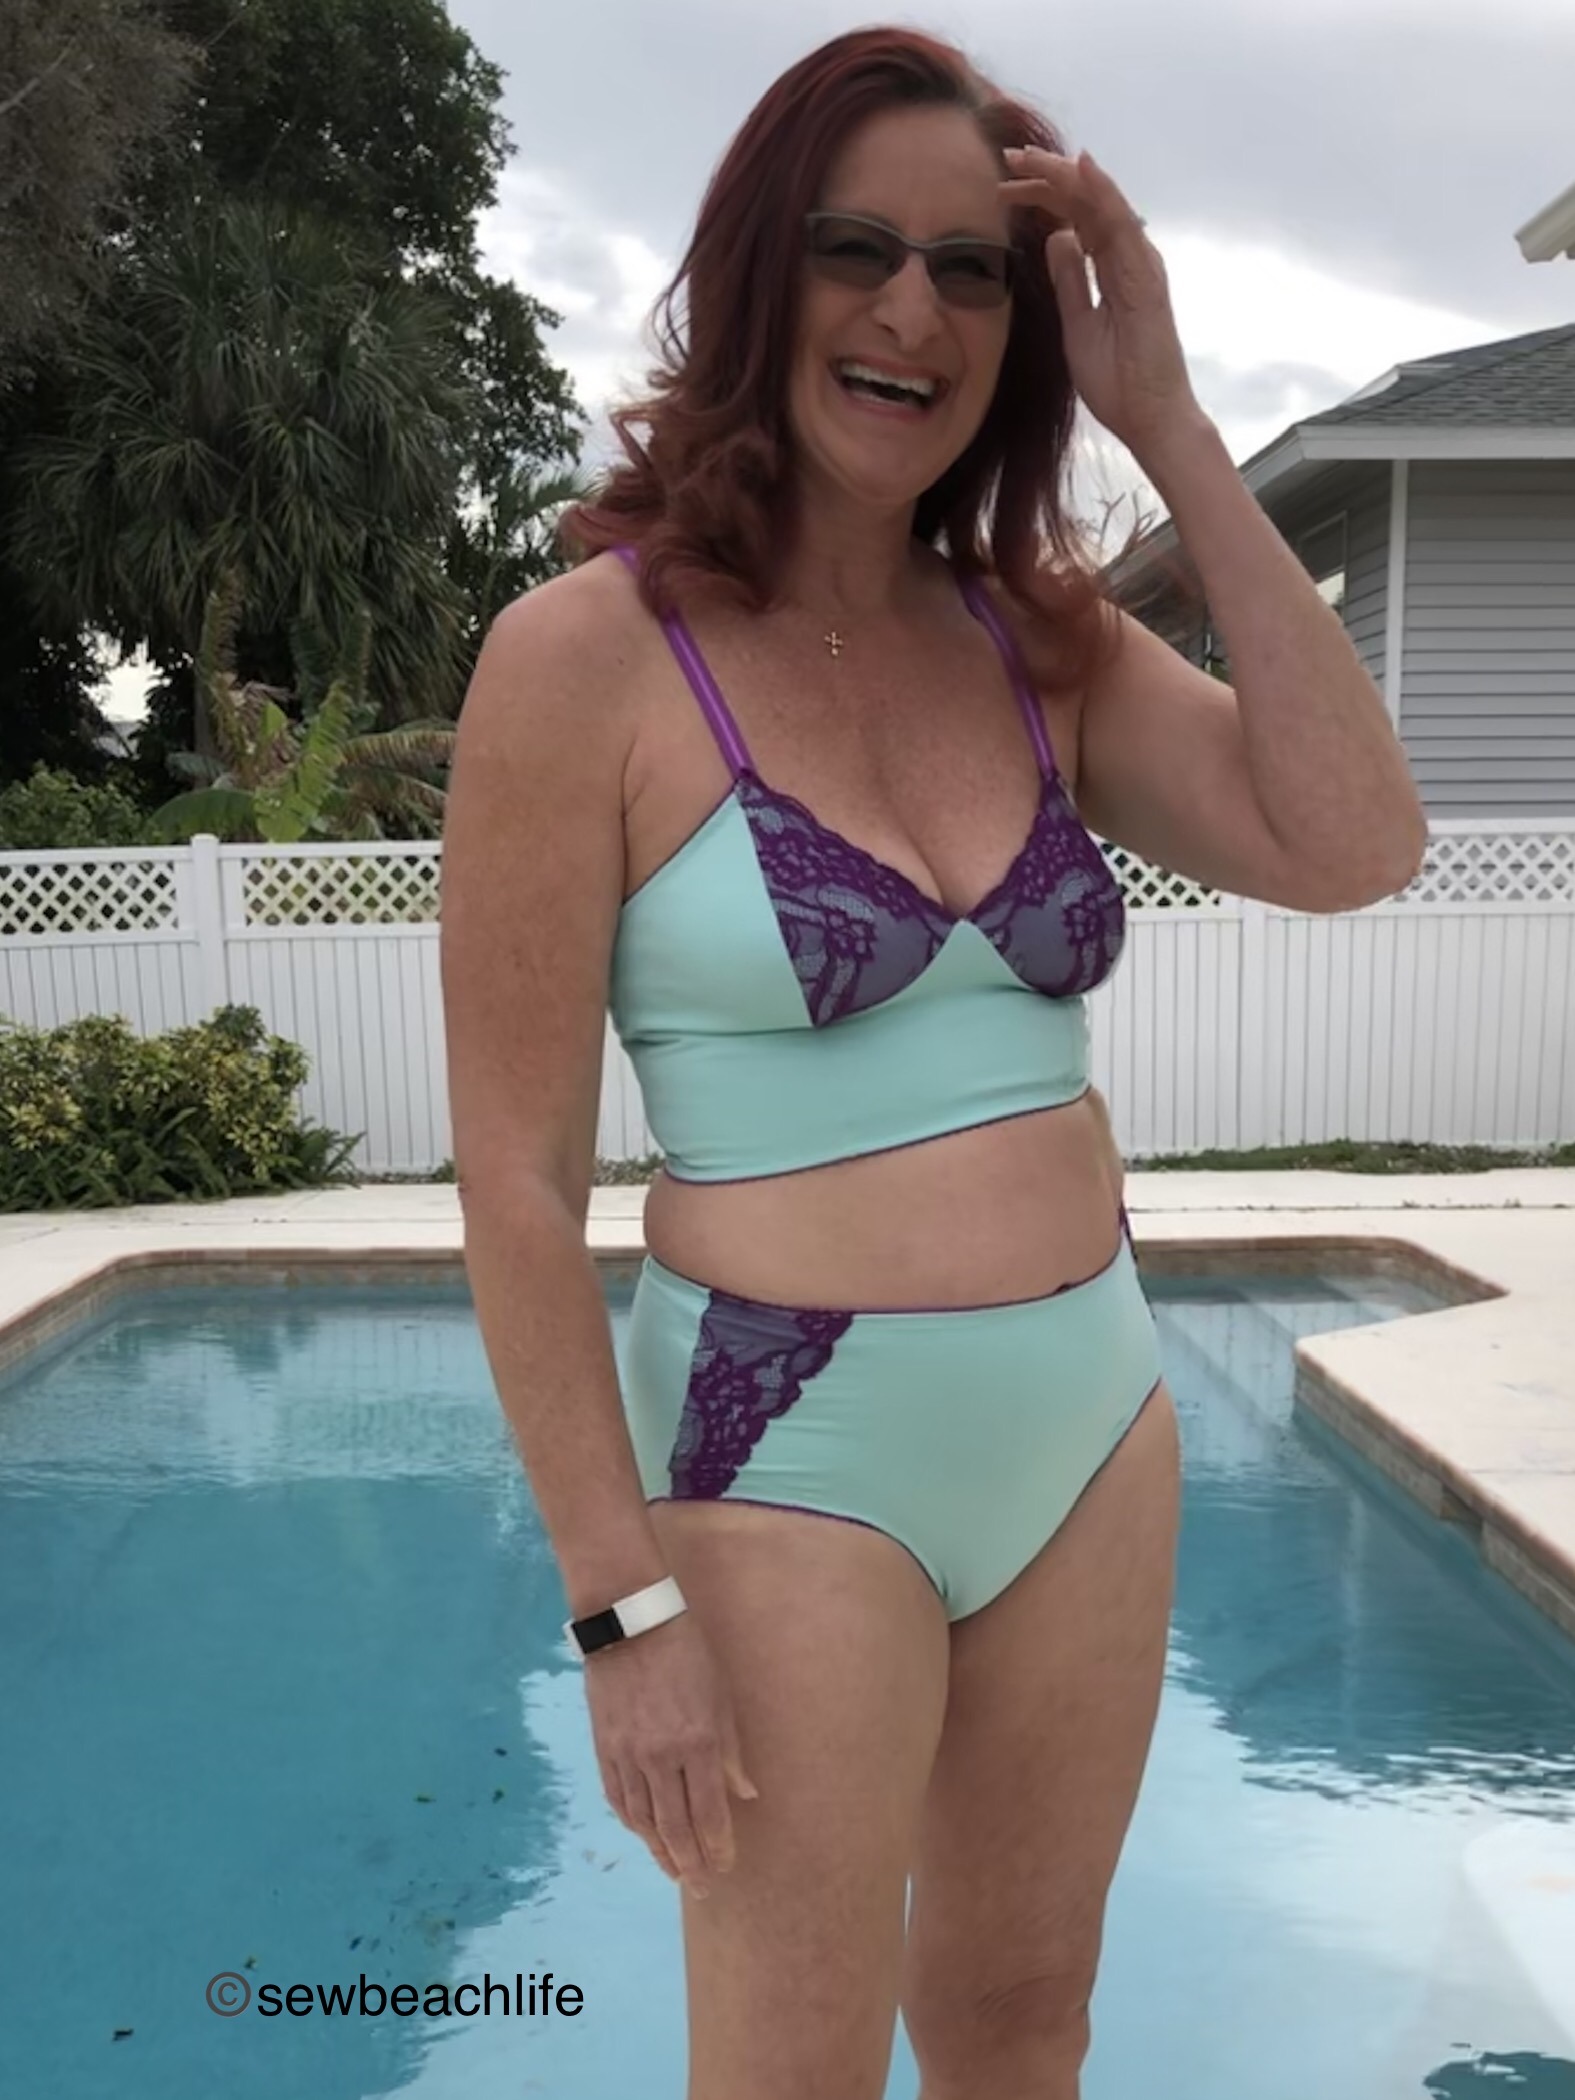
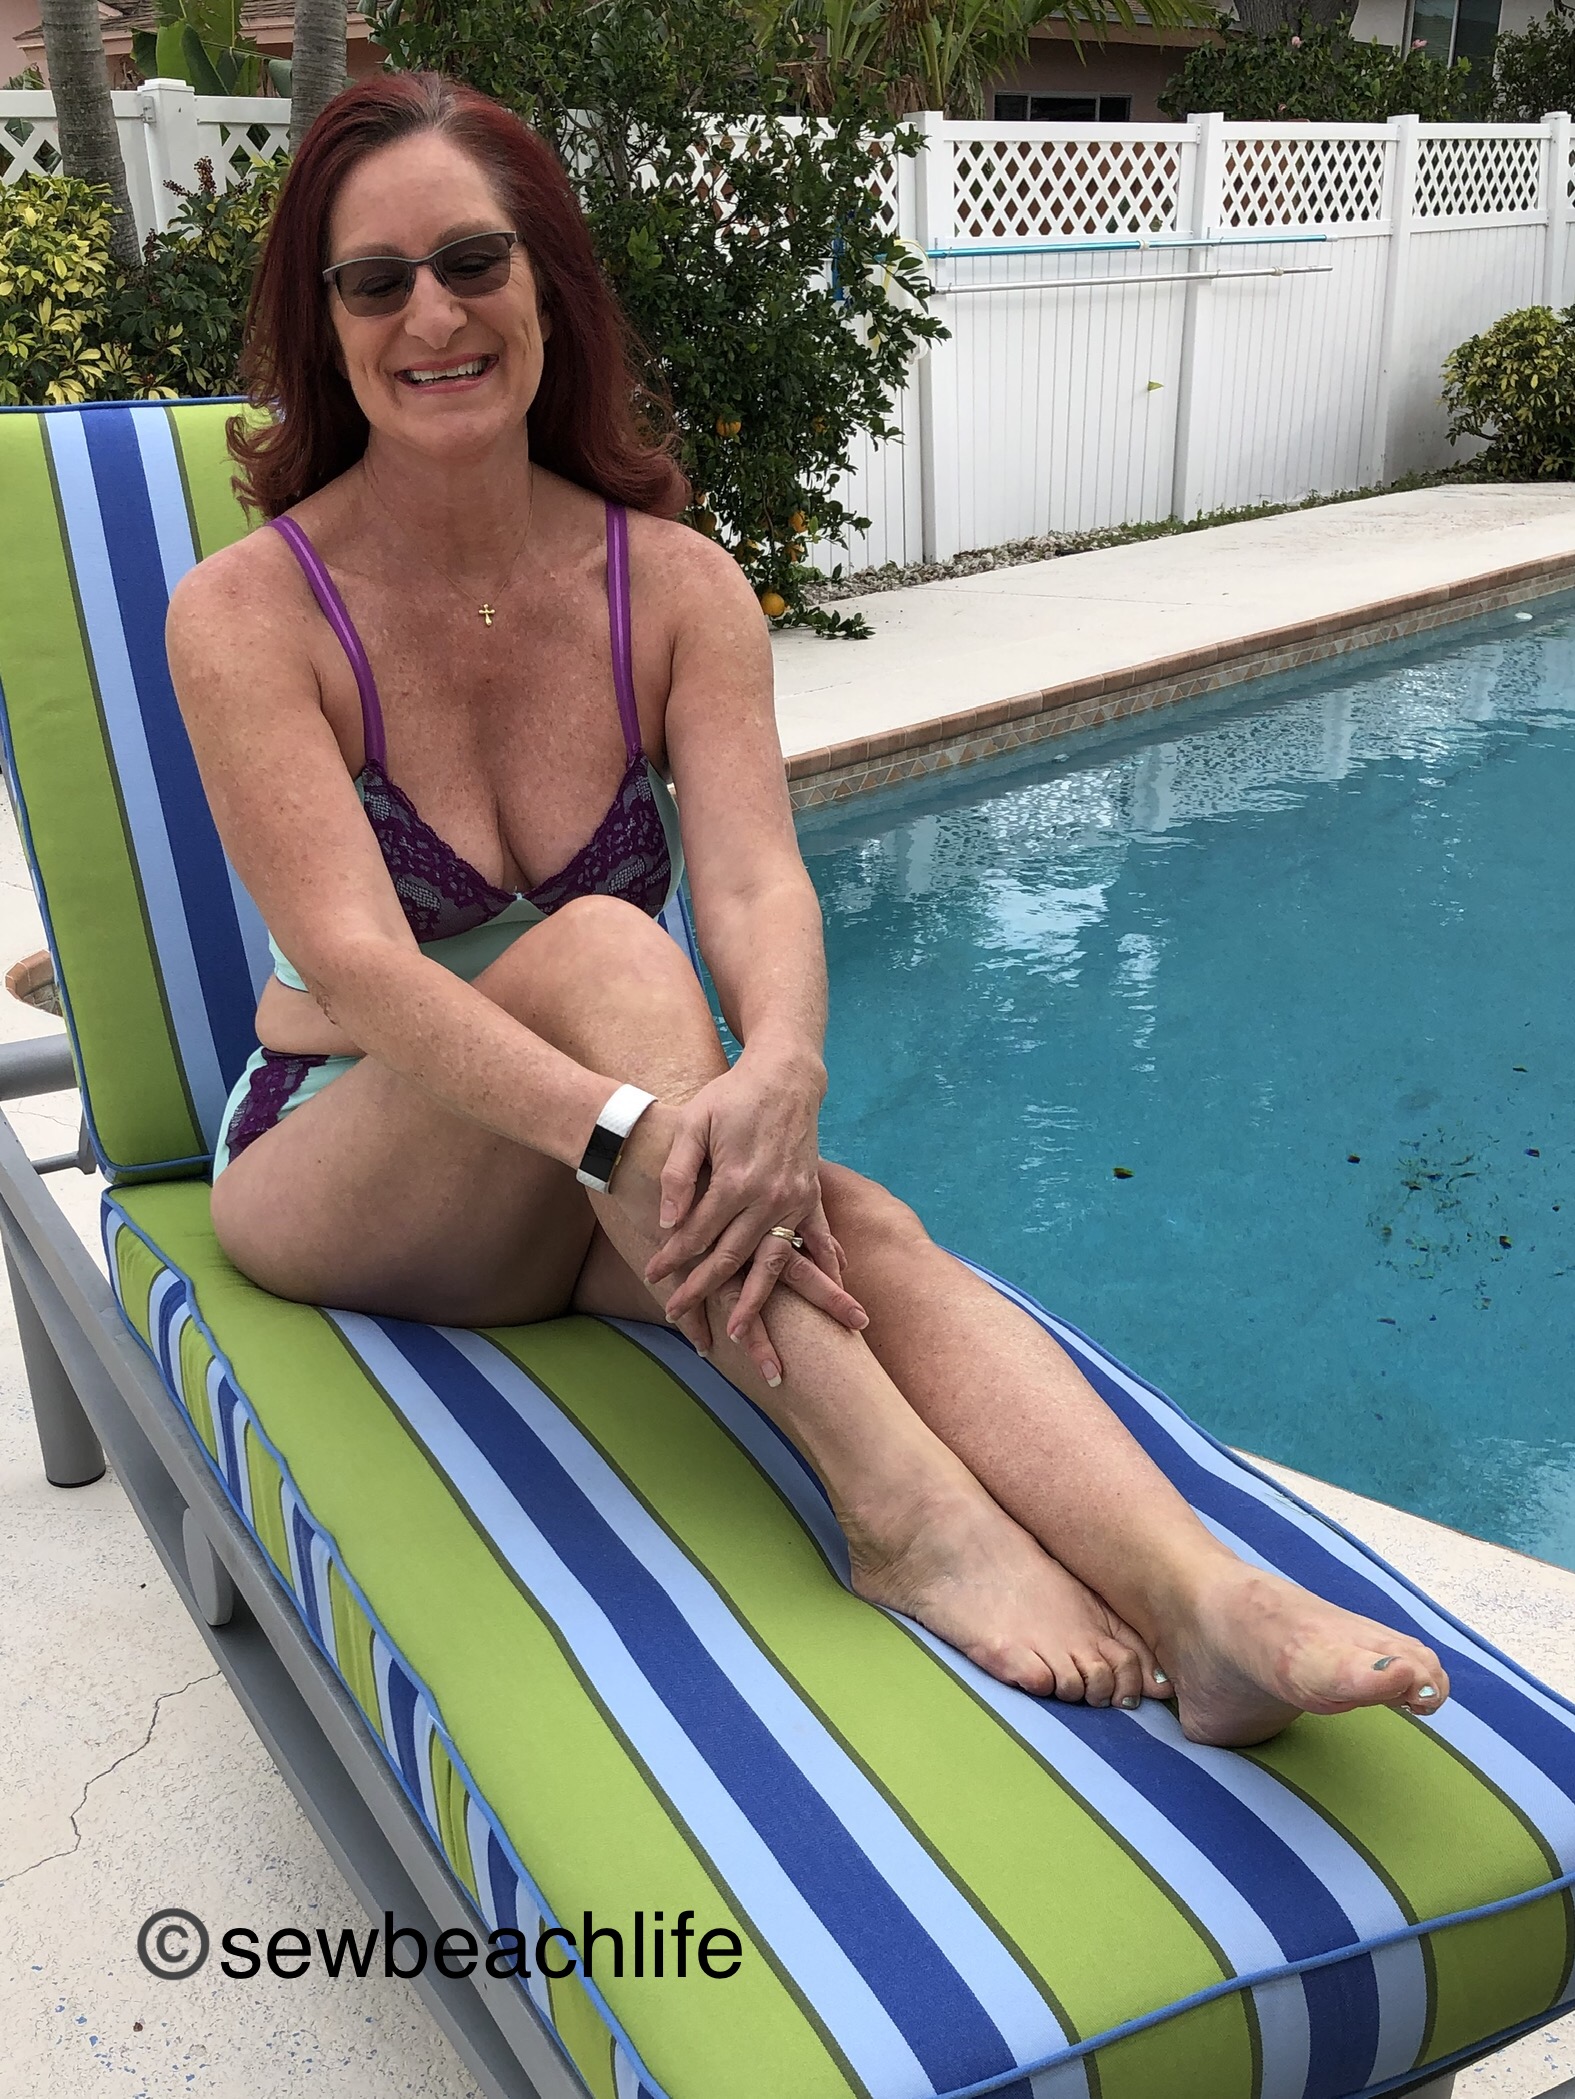
The wrap-up: I like that the Jackie bra is unique, and different from other sports bra patterns. It’s rated as a more advanced pattern, and I’m glad that I have plenty of experience sewing workout wear. It would probably be intimidating to a beginner sewist, but Porcelynne has a pattern discussion and a sew-along group on Facebook, as I recently discovered. It can be helpful to have a group of people to refer to and ask questions of who are familiar with a pattern. When people ask questions in a pattern or sewing group, and I’m familiar with the pattern or problem, I always try to help. Share your experience to help others who are still learning. That’s how we learn and grow, by doing, and seeking help from those with more experience. And I want people to love sewing, not get frustrated with it and give up.

The contrasting inserts on the side back are fun, and give you more seams to accent with a reverse triple coverstitch!

Rather than the padded adjustable straps the pattern calls for, I chose to add fixed double straps of 5/8″ wide plush bra elastic. If I were going to wear the bra as just a bra, those padded adjustable straps would probably be quite comfortable. I really should make a version with adjustable straps even if only to show off the pretty rainbow rings and sliders and plush bra elastic I bought from Porcelynne!

The details: the Porcelynne Jackie Sports Bra and Tankini Add-On patterns are available in .pdf format as well as paper patterns.

The charcoal gray supplex, powernet, and plum nylon spandex were purchased from Phee Fabrics. This particular purple is from my stash and no longer available, but there is a very pretty purple nylon spandex tricot on the site. It’s easier to sew when you use high quality fabric, and moisture-wicking nylon/spandex fabrics are your best bet for workout wear!

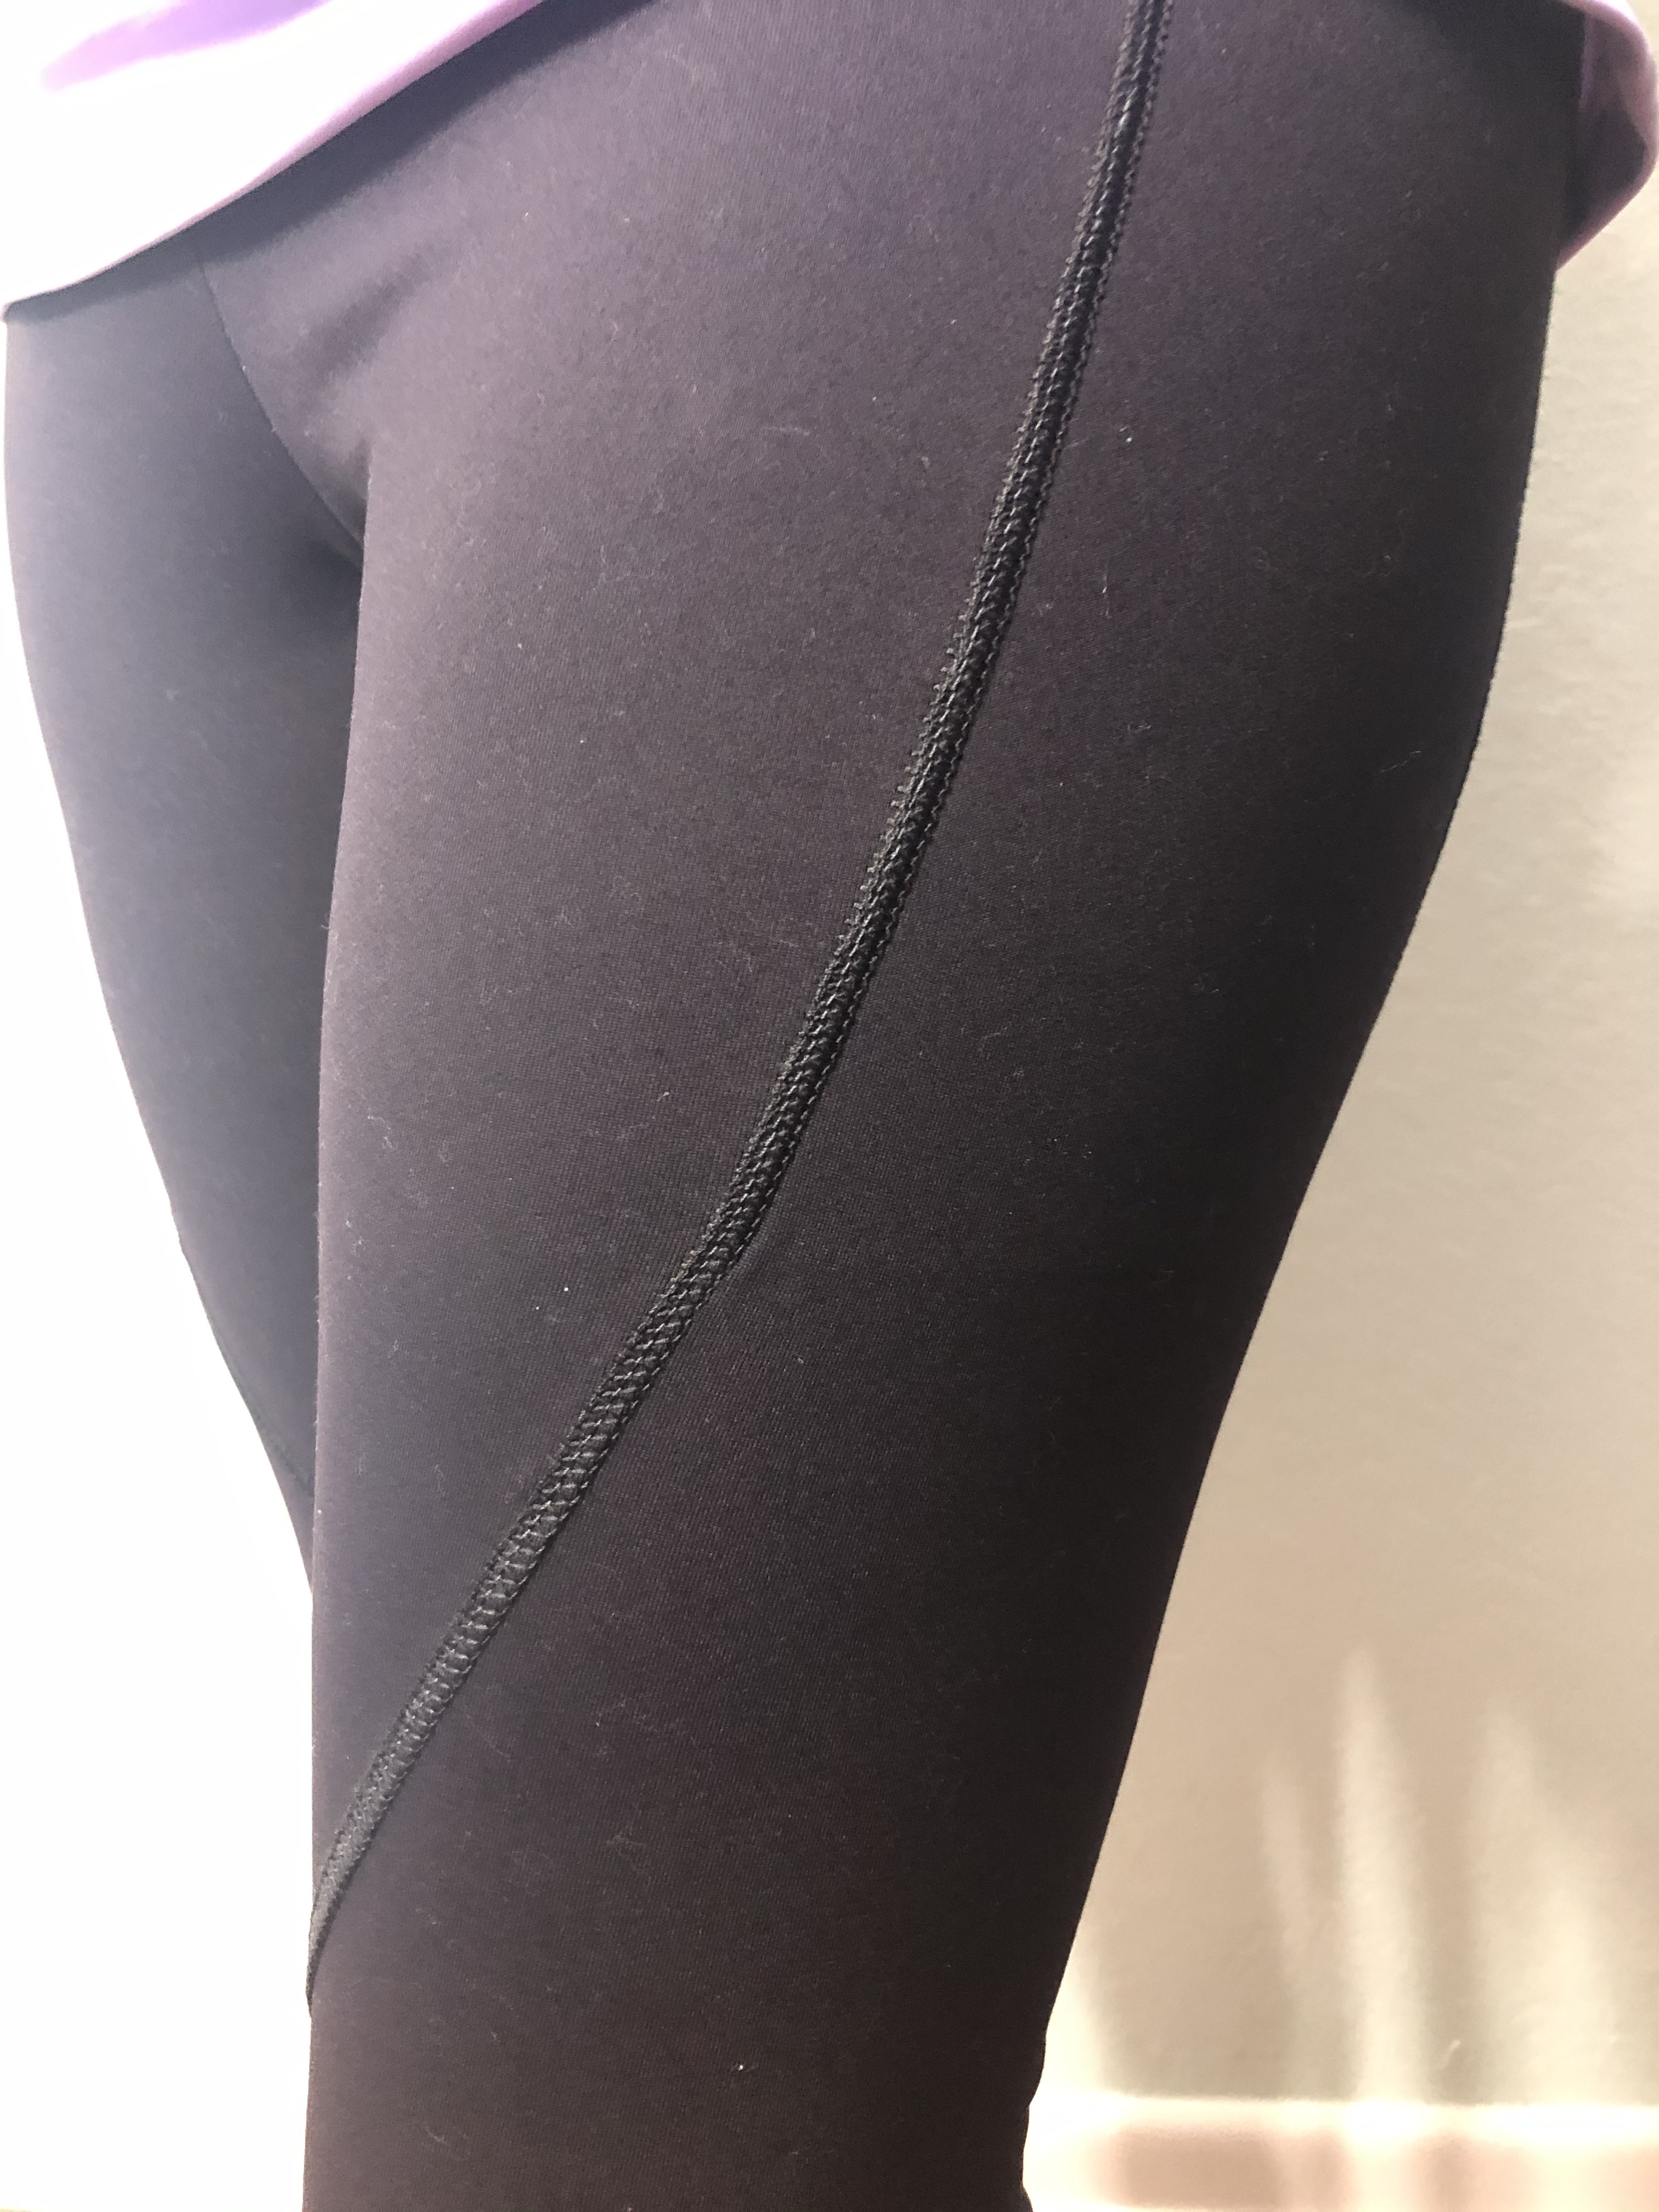
When reverse triple coverstitching, I used Superior Threads Fantastico #5154 High Society in the looper. I just love the sheen, and how prettily it accents my fabric. Their variegated threads are fabulous!

Thank you to Ashley @coastalyoga for taking photos while at the studio after a sweaty Ashtanga class!

And thank you to my sweet husband for taking photos at home. Sadly it’s too cold and windy for outdoor photos right now!

Thank you for reading and sharing my love of creating, sewing, patterns, fabric, and making beautiful, well-fitting garments!

The Corset Look

Sewing Tips And A Fun Hack

The new Corset Bra and Top from GreenStyle Creations is so fun! The princess seaming gives it shaping, the pattern design is clean finished, and it includes small, medium, and large cup options in every size.

According to the measurement chart, I need the large cup option, so those are the pattern pieces I printed. I’m so glad that the high hip length was added during testing. It’s not like the bra length wouldn’t get used, but why hide a pretty new make? And that leads me to the corset or crop length and my rant about tankinis.

Have you ever been super excited about the idea of buying a tankini because hey, a tankini will cover more skin than a regular bathing suit top. And you’ll feel more confident in a tankini. Until you try it on. How come tankinis and crop tops look so cute on some people, but when I put one on, all it does it highlight the bit of no-longer-flat belly between the bottom of the top and the top of my bottoms? 😦 I’m sure it has something to do with the combination of my size, height, and/or body shape, but let’s get real. I’m not going to be rocking a crop top. Ever. I make and wear two piece swimsuits because they are much more flattering on my body.

Which brings me back to my excitement about the hip length top being added to the pattern. First off, I could wear it as a tankini because it’s actually long enough to cover the top of my swim bottoms. 🙂 It’s a versatile top and looks cute with Warrior Pants.

A slim, fitted top is a great contrast to flowy Warrior Pants.

I love that the straps of the Corset Top easily cover even the wide straps of my bras. The clean finish of the bra and top is so professional looking, and is accomplished by using either the included shelf bra or lining pattern pieces. The pattern tutorial has clear instructions on how to do the “burrito roll” finish. By the time you make a top or two, you’ll feel quite accomplished using the finish!

I love that my bra straps are hidden, front and back.

You can insert clear elastic in the neckline and around the arms, and it would probably be helpful if you were making a bra for the gym. In which case, I’d probably add powernet too. But since mine is just a casual top, simply upping the differential on my serger to 1.3 was enough to keep the neck and arms from being baggy. (Having the correct fit also helps!) Another tip I figured out is that if you have the main fabric on top while sewing the neckline and “burrito roll” the fabric is less likely to roll outward and show the lining. You can under-stitch if you want, but by serging with the main fabric on top I didn’t feel the need to do so.

I must have been talking with my hands when my husband took this photo.

Another thing to consider when making the Corset Bra, crop or top is that fabric will make a difference in the fit. Fabric with a lot of spandex, and excellent rebound properties will fit tighter to the body, and will be super helpful when making the bra. Fabric with a lighter weight, but still a decent amount of spandex (at least 5-10%) will be less form fitting (which may be preferable in the hip length) then something like supplex or swim fabric will be.

The flattering fit of this top makes me happy. And taking plenty of yoga classes made it easy for me to balance on the railing without falling backwards into the seagrass!

Can we just talk about the beautiful princess seaming on this pattern? It’s a great opportunity to color-block, but I really wanted to bring out the lines a different way. I figured that a reverse triple cover-stitch would almost give the illusion of boning channels, which seems appropriate on the corset style. I recently ordered some Fantastico variegated thread from Superior Threads, and I am super impressed with it! It has a beautiful sheen, and the color repeat is only one inch. That means that you get see all of the colors in the thread cycle through frequently.

I love how the thread highlights the seamlines and makes them pop!

I know a pattern is good when I start dreaming about how I can hack it. And the Corset Bra and Top was just begging to be made into a top and/or dress. I’ve seen some advertisements for knit tanks with a chiffon “skirt” and I knew that it would be an easy hack. I had made a corset length top during testing, and it was easy to trim off the bottom so that it would end at my natural waist. I find tops and dresses most flattering if the narrowest part falls at the natural waist.

Then I cut a strip of chiffon 12″ high by the width of the fabric (approximately 58″ wide). You want the width of your strip to be between one and a half to two times the width of the bottom of your top. Depending on the width of your fabric and the size you are making, you may need to cut two strips, giving you a front and a back to get the width you want. Serge the two short ends of the strip together as a side seam, then serge the bottom edge to help prevent fraying. Fold the hem up 3/8″ then another 5/8″ so that the serged edge is completely enclosed. Cover or top stitch the hem. Gather the top edge of the skirt, and match the quarter points up with the quarter points of the bodice. Baste the skirt to the bodice and adjust any gathers as needed before serging.

The simple gathered chiffon skirt gives the top a whole new look!

The fun floaty look of the chiffon combined with the fitted bodice of the Corset Top looks great over a skirt. Lengthening or adding a second (one and a half times wider) tier of chiffon would totally change the look. As would making the skirt out the same knit as the bodice. I’ve got so many top and dress ideas floating through my brain!

It’s such a fun hack!

And that’s the beauty of a pattern like this. It’s a bra, it’s a top, it’s a swim top, it’s the bodice of a dress. I’ve got some GreenStyle Power Flex fabric just waiting to be sewn into Spark Tights and a cute new workout top. It’s time to sew all the things!

The details:

The navy top is nylon/spandex tricot from Phee Fabrics. It is accented with reverse triple coverstitching using Superior Threads Fantastico #5028 Peacock Plume. Worn with Warrior Pants and Moxi Shorts.

The fully lined purple top is a lightweight nylon/spandex circular knit from Phee Fabrics. It is accented with Fantastico #5154 High Society. The chiffon in my stash came from an estate sale. Worn with a Pace Skirt.

The links to GreenStyle are affiliate links, which means that at no extra cost to you, I may receive a small commission if you purchase through my link. As always, I only give my honest opinion. After all, it is my blog, which represents me! Thank you for reading and sharing my love of creating, sewing, patterns, fabric, and making beautiful, well-fitting garments! ❤

Spark My Interest

GreenStyle Spark Tights and a Power Sports Bra Workout Top Hack

When GreenStyle Creations comes out with a new leggings or tights pattern I get excited. Their patterns always fit me so well, and I always need more workout wear. 😉 I bought the pattern, but made myself finish sewing up outfits for my granddaughters before making something new for myself. Grandma love, you know?

The Spark Tights have a nice gusset, not quite as big as the Super G gusset, but big enough to provide excellent range of motion for yoga class. The pockets are generous, plenty big for even an oversized phone.

Normally, I don’t coverstitch my gussets because I don’t want to draw attention to the area. But the Spark Tights gusset is the perfect size, and I love the look of the coverstitching!

The back of the tights have a “bridge” section for shaping that curves down for the pockets. Sewing it reminded me of the sewing the Motion Shorts for my husband. I love that it’s a perfect opportunity for color blocking.

Isn’t the curve of the bridge fun? It’s a nice accent for the booty. Also, look how nicely the legs are shaped for the knee. No bagginess or bunching behind the knee. Just a smooth fit down to the calves.

The smooth fit of the legs is another hallmark of the excellent drafting of this pattern. I live in Florida, so I love capri length for my workout tights. The pattern includes thigh and calf measurements so you can grade the pattern to fit your body as needed. I didn’t need to grade at all, and I love that the tights don’t ride up my calves when walking or stretching.

There’s no center front seam and the legs are a smooth fit from top to bottom. The shaping is perfection! The high rise cut line of the waistband hits me in exactly the right spot.

Now, let me tell you about my fabric struggles, or rather the lack of fabric struggle. I thought I had plenty of Supplex in my fabric stash. I originally planned to make some very simple black or charcoal gray tights just accented with scraps from a pair of my Simpatico Leggings, and reverse coverstitched with black thread. Yeah. I only had little scraps of black and gray, and not enough of any one color to make tights and a workout top. I could have just ordered some fabric, but I had already waited to start making the pattern, and didn’t want to wait any longer. So I got super creative with my color blocking.

I knew I wanted to hack a matching Power Sports Bra into a workout top to match my tights. I was working with less than a yard scraps. With a very careful layout and using three colors, somehow, it all worked out.

To tie the green and turquoise of the tights to the green, turquoise and neon green of the Power Sports Bra, I decided to use neon green thread to triple reverse coverstitch my Spark tights. Of course I only had two cones on neon green thread, so I used the neon thread in C2 and the looper. I used emerald thread in C1 and C3. Take the time to coverstitch as you go, and the last leg seam will be the only challenging one. Since I was reverse coverstitching, my needles are on the inside of the leg. Start at the top and work your way down toward the ankle. Stitch as far as you can, and keep adjusting the leg so that you can work farther and farther down the seam.

On the left side of the photo, notice that I used the lightning bolt stitch on my sewing machine when adding the gusset, and pressed the seams open. That helped keep everything aligned and smooth, particularly at the pointed ends of the gusset. Pressing the seams open (or to one side when serging) also makes it easier to coverstitch.

I’ve hacked the Power Sports Bra into a workout top before, but wanted a different look this time. And due to the aforementioned fabric shortage, the back of the top would need to be colorblocked. There was a scrap of green left from cutting out the tights that was shaped like a long curved triangle. So that scrap became the center back of my top.

The folded scrap was clipped on the back fold line, and the shape was traced on the pattern with a red pencil. Then a second line was traced 1/2″ inside the red line.

Once a second line was traced 1/2″ inside the red line, the back body was traced from along the outer edges and over to the inner black line. This gave me a 1/4″ seam allowance for connecting the left and right body pieces to the center triangle. You may be wondering what pattern to use for the body. There are so many options! The Staple Tank, the Cami Tank, the Jillian or Lille Tanks. Which one(s) do you own and love the fit of? I like to add a bit of length to the center back of my tanks, curving up to the side seams. This gives me more booty coverage. If you love the way the Cami or Staple Tank fits, use it as is by folding the pattern under just below the bust, you don’t have to add length or a curve for the booty unless you want to.

The lower left pattern piece is what I got after tracing my pattern over to the black line drawn 1/2″ in from the red line. Don’t forget to mark the grainline! It’s super important to stay “on grain” when cutting out a pattern to keep the garment from twisting out of shape.

Follow the Power Sports Bra tutorial for assembling the bra, but stop before adding the bottom band. You can use any of the variations, I chose the U-back version, but played around with the straps. There have been several discussions in the GreenStyle Facebook group about whether the straps can be made wider instead of strappy, and whether the bra can be made with straight straps instead of crossed in the back. The answer to both of these questions is a resounding yes!

I love the wide straight straps with the U-back!

To make the straps wide instead of skinny, cut out four strap pieces as directed, but instead of sewing each strap individually, stitch the straps in place in the back. Then when the inner and outer layers of the bra are stitched together, the two layers of straps got stitched together too. When turning the bra right side out, it helps to feed the straps through with a safety pin, just like you would normally turn straps. Instead of elastic, I used a layer of powernet in the straps, as well as in all of the bra pieces for extra support. Try the bra on, and adjust the straps to the proper length. You will be cutting off a lot of strap length since straight straps don’t need to be as long as crossed straps.

The straps don’t shift or move whether I am folding forward or flowing through vinyasas.

I added a scrap bit of strap crossways like an H just for fun. I’m thinking of adding another cross strap where the neon bra and green strap meet. But since I don’t have any more scrap straps, I’d have to make one. So it’s probably not going to happen! 🙂

Once the triangle was inserted in the back and coverstitched, the front and back body pieces were serged together at the side seams. Mark the quarter points of the bra, and the quarter points of the body, and baste them right sides together. To make the band for the elastic, cut a rectangle of fabric 2-1/4″ by the length of elastic needed. Overlap your elastic to form a circle, zigzagging to secure. Serge along one long edge of the band, then stitch the short ends together. The band and elastic should be the same length. With the elastic on top, serge the elastic on the wrong side of one edge of the band.

Taking the time to baste (see the black thread?) keeps everything perfectly aligned and makes it easier to serge without worrying about pins or clips.

Then match the quarter points of the band to the quarter points of the workout top, pin, then baste in place. In the photo above you can see that the right side of the body and the right side of the bra are together. Then the right side of the band is on top of and facing the wrong side of the bra. Once it is serged, pull the basting stitches, and wrap the band around to enclose the seam. Pin it in place with the elasticated edge of the band not quite touching the seam line. Coverstich or top stitch it in place.

I love how beautifully finished the top looks on the inside and out.

Now I’ve got a colorful, comfortable, and completely customized new workout outfit.

If you’ve ever wondered whether the Power Sports Bra is supportive, check out the side view. For reference, I measured into and made a size 34F. I’m super happy with the fit of the tights and workout top.

Made with all these colorful scraps, and hacked to perfection, you can see me coming or going from a long ways away! 🙂

The details: The Spark Tights and Power Sports Bra patterns, as well as fabric are available at GreenStyle Creations.

The green and turquoise Supplex was purchased from Phee Fabrics, as well as the neon green nylon spandex tricot and powernet used for the bra.

The neon green and emerald serger thread is MaxiLock. The thread and 1″ knit elastic were ordered from Wawak.

The beach photos were taken by my sweet husband. The yoga studio photos were taken by Jaida Christina Wellness.

The links to GreenStyle are affiliate links, which means that at no extra cost to you, I may receive a small commission if you purchase through my link. As always, I only give my honest opinion. After all, it is my blog, which represents me! Thank you for reading and sharing my love of creating, sewing, patterns, fabric, and making beautiful, well-fitting garments! ❤

From Lounge Dress To Sexy Dress

Pattern Hacks And Serger Tips For The GreenStyle Valerie Dress

When the GreenStyle Creations Valerie Dress was first released, I put off buying it. I don’t know why, since 2020 was definitely the year for lounge wear! 🙂 Now that I’ve whipped a couple of them up, I’m really wondering why I waited! It’s a comfortable, flattering dress that can transform from lounge wear, to beach cover-up, to throw-it-on-and-run-to-the-store, to pretty enough to wear to church.

The shaped seamed back gives a flattering, comfortable fit that is so much nicer than a sloppy, boxy T-shirt. It has sleeves ranging from cap to long, but of course I chose to go sleeveless. #floridalife The curved hem (a shirttail hem) gives a more casual look, so I chose that and the scoop neckline for my first make of the pattern.

Talk about comfortable! This immediately became my new favorite nightgown and got worn to bed that evening. And worn around the house the next day while sewing. Surely I’m not the only one to sew in my lounge wear? Be honest, you know you’ve done it! 😉 I chose to bind the neckline and armscyes rather than do bands just because I can.

Use the same length for binding as recommended for your band, but only cut your strip 1″ high. Stitch the short ends together and quarter and pin the binding to the neckline right sides together. When you serge the neck binding on using the normal 3/8″ seam allowance, with your stitch width set at M, your machine will trim 1/8″ off. Press the seam allowance up, and wrap the binding around to the inside, pinning in place. Then top-stitch or cover-stitch it in place. It’s a super easy, yet professional looking (although technically faux) binding finish.

Windy days make taking photos a bit challenging!

People sometimes get nervous about hemming a curved shirttail hem, with memories of past wonky, wrinkly, bunched up hems. But it really isn’t hard if you do a couple of things. First of all, don’t sew with fabric that doesn’t have “recovery”. Generally speaking, this means it contains spandex/Lycra. When you stretch your knit fabric out, it should come back to its original size. If the fabric stays in a stretched out shape, it’s a sign that the fabric is going to grow and hang oddly and unflatteringly. Just don’t waste your time with it. Secondly, the Valerie pattern has a nice gradual curve not sharp turns, which makes it easier.

And here’s the most important tip: serge along the hemline on the right side of your dress, using a 4 thread overlock, stitch width of M, stitch length of 2 to 2 and a quarter, with your differential turned up to 1.3. This does two things. It gives the hem stability so that it won’t stretch out while top or cover-stitching. It also very slightly brings the edge in a bit. Then when you pin the hem in place, you won’t have excess fabric bunching up. You’ll just have a smooth beautifully curved hem.

Smooth curves and no weird bunching, it’s magic I tell you! 🙂

One Valerie dress led to another… as in the very next day I decided I needed another one! To change things up, I did a mash and a hack. Mashing the Valerie with the Staple Tank was a no-brainer, since the Staple Tank is my most used tank pattern. Simply layer your Valerie pattern with your Staple Tank pattern, matching the natural waist markings. Then trace the Staple Tank bodice merging it into the Valerie body .

This photo led to my next tweak, further pattern grading.

A seasoned sewist has learned and understands the importance of grading. But a new sewist is likely to be a bit nervous about the idea. You mean I bought a pattern and it’s not going to magically perfectly fit my unique body and shape? What??? Okay, the possibility exists that it will fit you perfectly well, at least as well as your basic ready-to-wear. But the more you sew, the more demanding you become about getting the best fit possible. And the first step towards that is measuring and grading. Pattern companies include a measurement chart in the tutorial, and it’s important to look at them.

You may be tempted to say well, my bust falls into size x, and my waist and hips are size z, so I’ll just make size y. Depending on the ease of the garment, it may fit. But it will likely be a bit large on your shoulders, and the top or dress may ride up because it’s a little too snug across the hips. Personally, I like when patterns include an upper bust measurement, as well as a full bust measurement. My bust is fuller than average for the frame of my body. So if I choose a pattern size based on my bust measurement, it’s likely to be too wide across my shoulders, which leads to bagginess above the bust, with the excess fabric digging into the front of my armpits. Super uncomfortable and not an attractive look. So I generally trace a smaller size above the bust, grading out to my bust size below the armscye. If my hips measure on the edge of two sizes, I generally grade out to the bigger size to give myself more room for the booty.

Grading to fit your curves leads to a curvy sexy fit.

All of this is pattern dependent of course, but on a more fitted style like the Valerie Dress or Staple Tank, it’s super important to grade. Some people get all fancy using a french curve to grade their patterns. Since I don’t own one, I just draw gently curved lines from one size to the next. Think hourglass curves rather than straight lines when going in or out on sizes.

Using the lower scoop back of the Staple Tank really changes the look of this dress.

You kind of get a hint of my side vent hack in the photo above. Since I was doing the straighter hem on this dress, I thought it would be fun to add some side vents. I marked the sides of the front and back pieces 4″ up from the hem, and made a 3/8 ” snip.

Apparently it’s time to buy a new marking pencil, since I’m working with just a pencil stub! 🙂

Serge from the snip to the hem, along the bottom raw edge, up to the snip on the other side, on both the front and back.

Serging the edges makes it easy to get a clean finished hem.

Then follow the pattern tutorial for assembling the dress. When sewing the side seams together, be sure to fold the lower vent area out of the way when serging off the snipped edge. Tuck your serger tails, and press the vents to either side and cover stitch. Then pin the hem up and coverstitch. You’ll end up with beautifully finished side vents.

I could have made the vents 5 or 6 inches long and still felt comfortable.

I love the look and fit of this hacked, mashed dress! It’s comfortable, and kind of sexy, while still looking classy. In fact I wore it to Mass on Sunday with one of my Sunday Cardigans.

It was hard to stop grinning in a dress that made me feel confident and pretty!

Here’s the takeaway: grade to fit your body; don’t be afraid to mash the Valerie with one of your favorite patterns; side vents are fun; and try my serger tips and tricks. The details: both the emerald and navy dresses were made with rayon spandex purchased at Phee Fabrics.

So, which version should I make next? I’m thinking I need to try the V-neck!

This post may contain affiliate links.  This means that at no extra cost to you, I may receive a small commission if you purchase through my link.  As always, I only give my honest opinion.  After all, it is my blog, which represents me! 🙂 Thank you for reading and sharing my love of creating, sewing, patterns, fabric, and making beautiful well-fitting garments! ❤

Shorts Or Swim Trunks? How About Both!

Sewing For Men, Episode 3

My husband isn’t often interested in patterns, or in being my model for a pattern test. 🙂  He did however, really like the line drawings for the new GreenStyle Motion Athletic Shorts.  Since he basically lives in athletic shorts, he was more than happy to let me sew them for him!

The Motion Shorts are designed for stretch wovens, with an optional liner layer made in 4-way stretch fabric.  The front pockets are deep and large, so no matter how big your phone, there’s plenty of room for that, and all the other stuff guys tend to carry!  The curved back gives shaping and is quite flattering on the booty.  And the side and back panels give an opportunity for contrast fabric and pretty top-stitching.

Motion back

The liner layer can be made of mesh for a traditional swim trunk style, or Supplex or other compressive fabric for support for working out.  I chose to use nylon/spandex tricot so Dan can wear his shorts for workouts and swimming.  Moisture wicking, quick drying fabric is key when making swim or workout wear.  I use the same Phee Fabrics tricot for my swimwear and dresses, and he’s lucky I had this khaki steel color in my stash and used it for him, rather than the dress I had intended to make with it! 😉

Motion lining

After I made the first pair of shorts, he requested that I add a “hammock hack” to the liner layer, so that they would fit like ready-to-wear Saxx, and all the underwear I make for him.  No problem sweetie, I can do that! ❤  Powernet is the fabric of choice for the gusset hammock, just as it is added to bras and swimwear, because of its supportive nature.

The hammock is a partial moon shape, with the straight edges toward the center, and the curved edges sewn to the center panel of the liner layer.  After cutting out the mirror image hammock pieces, I do a tight rolled hem on the straighter side of both pieces.  If you don’t have a serger, you can also use cotton swimwear elastic tautly stretched and zig-zag stitched to the straighter edges.  Lay the hammock pieces on the lining center panel and pin along the curved edge.  Then baste along the sides and across the top with a zig zag stitch set at 2.5 or 3.0.  Then stitch the dart at the bottom of the center panel.  Snip the top of the dart up to, but not through the stitch line, and press the seam open.  Then baste it in place.  Notice how having a larger curve on the hammock piece, compared to the curve on the center panel gives the wearer space to tuck everything in?  (I’m trying hard here to be descriptive without being too descriptive if you know what I mean!)  This is a family friendly blog!

Motion gusset

At this point, the center panel can be sewn to the liner pieces as per the pattern tutorial, and the shorts can be completed.  Here’s a photo of the inside of the finished shorts.

Motion gusset complete

The pattern has options for 5″, 7″, and 9″ inseam lengths, which is great because they can be customized to fit your needs.  Dan prefers the 7″ inseam, because he doesn’t like longer shorts that get caught on his knees when he’s working out.  If I were making myself a pair, I’d choose the 5″ length.  And yes, I tried his shorts on.  I’d need a smaller size, but they were pretty cute on me too!  The pockets are so much bigger than any other shorts I’ve made, so who wouldn’t want that?

Motion pocket

They are flattering from every angle, and I am so excited that the beach has reopened so we can go for walks along the shore again.

Motion right side

And no photo session with a guy is complete without plenty of silly poses for your viewing pleasure! 😉

Motion guns Motion buff

Obviously I need to make him a few more pairs, because he is loving the look!

I used stretch twill from Phee Fabrics as the main fabric, with a scrap of (no longer available) reflective chevron as a fun accent.  It’s funny how making them out of all one fabric color gives them a dressy look, while using an accent fabric gives them a more sporty look.  And I know that I’ve found a winning pattern when he starts asking me to customize and hack it for him! 🙂

This post may contain affiliate links.  This means that at no extra cost to you, I may receive a small commission if you purchase through my link.  As always, I only give my honest opinion.  After all, it is my blog, which represents me! 🙂  Thank you for reading and sharing my love of sewing, fabric, patterns, and pattern hacking. ❤

Keep It Simple & Add Some Flair

Keeping it simple sounds like a great idea right about now, during a time of uncertainty.  And I (mostly) have been!  My days are filled with sewing, cooking, cleaning, spending time with my husband, prayer and reflection, and texting and FaceTiming family.  Like most people, I also probably spend too much time reading about the virus, watching TV, and on social media. 😦  So it’s time to get back to writing about sewing and patterns and fabric and all the other things that make me happy! 🙂

There were some chilly days here in Florida last month, so I decided to make the Pattern Emporium Keep It Simple Babe Tee shirt.  Patterns with lots of options can be overwhelming and wonderfully useful!  The Keep It Simple Babe has high and low square necks, high and low round necks, boat and crew necks, turtlenecks, and a V-neck.  And everything from cap to long sleeves, so there are definitely options.

Since Florida is hot most of the year, tank tops make up a good portion of my wardrobe.  But there are chilly days, so a long sleeved tee is a practical make.  Super soft rayon spandex is my favorite fabric for tops and flowy dresses, and I had enough of this turquoise from Phee Fabrics in my stash to make the long sleeved tee.  The sleeves are slim enough to stay in place when pushed up to 3/4 length, but not feel too tight.

KISB Urban front

The V-neck is a good depth, not too high or too deep, and the neck-band came out perfectly.  The bodice skims over the body and doesn’t cling or show off the fact that I’ve probably eaten too many cookies while staying “safer at home”!  The Keep It Simple is a solid pattern choice.  Now for the Flair!

I had a small bit of Cozy French Terry left after sewing some fuzzy slipper socks for my sister, and managed to squeeze a pair of shorts on the fabric.  The Pattern Emporium Urban Flair Pants are one of my favorite pants patterns.  There are three leg width options and I chose the wide leg version to make a pair of basic black pants a couple months ago.  I love them!  They are super comfortable, the back darts smooth over the booty, and other than adding length I didn’t need to alter the pattern at all!  If you’ve ever sewn pants, that is saying something!

Urban Flair pants

So that’s why I decided to use the pattern to make a pair of shorts.  I marked the pattern to give me a 5-1/4″ inseam, and cut the legs straight across.  Since I was using scraps, I had to cut the pockets out of rayon spandex, and used Supplex and the rayon spandex for the waistband.  Supplex makes great waistbands, because it has excellent recovery.  So instead of folding the waistband pattern piece in half, I hacked it to have an inner waistband of Supplex, and an outer waistband of rayon spandex, so it would match the pockets.  I slightly contoured it, and added a seam allowance so that the finished waistband would be the same height as the pattern called for.

waistband

It’s a fun accent, and worked out great.  I will say that it’s imperative to use a substantial weight of rayon spandex.  Flimsy rayon spandex won’t hold the weight of your phone and will get stretched out of shape.  This is 13oz. rayon spandex, the same as I used for my tee.  My phone easily fits in the generously sized pockets, and the shorts are super comfortable.

KISB Urban pocket

More shorts are definitely on the agenda, along with more walks along the beach!

KISB Urban side

Both patterns were great additions to my collection, and I’m glad I bought and made (more of) them.  I hope that you are doing lots of sewing, and enjoying spending time communicating with the people you love.  So keep it simple, give yourself some grace, and don’t forget to add a bit of flair and fun to your life! ❤


Itty Bitty & Not So Itty Bitty Baby Dresses

My granddaughter needs play clothes for the summer, since she’s outgrown pretty much everything from last summer.  Toddlers grow fast!  So my daughter gave me some tops and dresses to upcycle.  They were all XS or small, so children’s clothes would be about all that would fit on the fabric.  I chose three coordinating fabrics, and got to work.

Using my rotary cutter, I trimmed along the side and sleeve seams, and ripped the clothes apart.  A seam ripper was necessary to remove hems and binding as needed, to be able to lay the fabric out smoothly.  It certainly would have been easier and faster to use yardage, but it was fun to think creatively how to fit my pattern pieces and make it all work.

I’ve made a couple of Made By Rae Washi Dresses blogged here, but hadn’t tried any children’s patterns.  This is my latest (and favorite!) Washi Dress, made with a beautiful Art Gallery Fabrics border print called Roads to Flowerhouse.

teal Washi

While scrolling through the Made By Rae children’s patterns, I came across the Itty Bitty Baby Dress.  It’s designed for wovens, but I knew that it would work to use knit fabrics.

The pattern calls for a simple gathered skirt, trimmed with bias tape.  Since I was upcycling, had limited sized pieces of fabric, and had found coordinating fabrics, I decided to make a three tiered skirt instead.  For the Itty Bitty Baby dress, instead of the suggested 9″ high rectangles of fabric, I cut my top strip 3″ high, and the second and third tiers 3-1/2″ high.  Each tier was gathered and sewn to the tier above it, then the skirt was sewn to the bodice as per the pattern directions.  Newborn sized clothes always look so cute!

Itty Bitty dress

There also happens to be an expanded size of the pattern in a size 3, which is the size my two year old granddaughter is growing into.  It’s made the same way as the Itty Bitty newborn size, and it too got hacked to have a triple tier skirt.  Instead of the suggested 15″ high skirt panels, the top tier was a 4-3/4″ high strip, followed by 5″ high strips for the second and third tiers.  The toddler skirt is a bit more gathered, since Lila likes to run and play and climb and move.

Bitty expanded

Since the dresses were already bright and colorful, I thought that it would be fun to use variegated thread to cover-stitch everything.  That’s the funny thing about having the ability to cover-stitch.  You go a little crazy and fun and play around with it.  On the toddler dress, I used a reverse triple cover-stitch to accent everything.  To lessen the scale, I chose a narrow reverse cover-stitch for the newborn dress.

The Bummies pattern is from Brindille & Twig, with a ruffle added across the bum for a little extra fun.  Because I already spend too much quality time with my seam ripper, I just couldn’t bring myself to rip off the leg bands that I accidentally sewed on inside out. So I just reverse cover-stitched over the seam allowance, and turned it into a “design element”!

Bummies design element


Admittedly, these outfits are super bright and a bit wild, but that’s what makes them so fun!  Normally, I wouldn’t post without modeled photos, but with the current state of the world, I don’t know when we’ll be able to visit our daughter and her family.  Hopefully before the new baby is born!  And this is as good a way as any to share that I’m going to be Grandma to another little girl!  🙂 ❤

Do you have some unworn clothes in your closet that could be turned into fun fabric for little ones?  Consider upcycling them into to something new.  There are so many cute patterns to try.  And it’s fun to sew for my soon-to-be itty bitty baby, and not so itty bitty girl.

Stay well, and sew something that makes you happy!


Tempo Athletic Tights

How I Upcycled, And Made Them Capri Length

The fun curved details of the GreenStyle Tempo Tights finally made me break down and try a pair.  🙂  When they first released, I resisted because there wasn’t a capri option, and it is hot in Florida.  I wear capri length tights to workout year round.  As a creative sewist, I knew that I could get the length that I wanted, without sacrificing the curved insert at the bottom of the leg.

For my first pair, I decided to do some upcycling, and use a couple pairs of ready-to-wear leggings that were just taking up space in my drawer.  So I carefully cut them apart by using my rotary cutter along the inner leg seam, and up the center front and back seams.  With the fabric smoothed flat, I laid the side panel pattern piece on the capri length striped material.  I aligned the center fold of my pattern with the industrial cover-stitched seam that was down the side of the old workout pants, and left the existing hem in place.  Since the upcycled leggings had been capri length, I just folded up the bottom of the pattern to mark the length.

Tempo fit pattern

Then I used the fabric from a second pair of similarly dismantled leggings to cut out the front and back panels, as well as the bottom leg inserts.  Matching up the seam lines of the bottom inserts with the seam lines at the bottom of the side panel, I folded the insert pattern piece at 1″ longer, to give myself room for a hem (since my side panels were already hemmed).

Then I followed the pattern tutorial to stitch everything together.  I also had my first go at reverse cover-stitching.  It’s definitely not perfect, but it was fun to practice a new skill at hopes of improving.

Tempo front

Tempo back

The look is fun, it kept two old pairs of leggings from being tossed or donated, and assured me that the fit was right.  So I grabbed my Phee Fabrics black Supplex and got to work.

For my second pair I wanted an even shorter capri length, ending just below the knee.  This was going to require more alteration than just folding up the bottom of the pattern!  I took my side panel pattern piece, laid it on my master pattern (I always trace my patterns on waxed or parchment paper, and keep my master pattern intact, in case I need to make changes or grade sizes) and slid it down 4-1/2″, being sure to keep straight on the grainline.  Then I traced the bottom curves in this new location.

Tempo capri adj

Using a compass, I traced a line 3/4″ inside the curve, to give me the alignment for a new custom bottom insert.  Since the original bottom insert is designed for your lower leg, it won’t fit up higher on your calves.  But it was simple to lay a piece of parchment paper on my pattern, follow my drawn inner curve, and trace the side and bottom to match up.

Tempo insert adj

Then I just cut along the outer curve and folded the pieces under in case I want to make the longer length next time.  Can you tell I don’t want to have to trace the pattern again? 🙂

The tights would have been a faster sew the second time, if I had remembered that I wanted pockets, and didn’t have to seam rip to add them in instead of accidentally skipping right by that first step. Ugh!  Oh well, pockets are totally worth it!

Tempo black

It is notoriously difficult to see details on black fabric.  I love the length, I love the pockets, and I love the black powernet inserts at the bottom.

Tempo black angle

Which I of course tried to photograph with a fun yoga move. 😉

Tempo inside leg

And my reverse triple cover stitch has greatly improved!  Using the curve foot makes sewing the curves so much easier.

Tempo black close

So, do the Tempo Tights beat out the Super G‘s in my workout wear drawer?  The Tempo Tights have a simple triangular gusset, which is fine for daily wear, or workouts that don’t involve major stretching.  Although I like the look and the variety, nothing beats the comfort of the Super G gusset for yoga, my preferred workout.   So, should I hack the Tempo Tights to use the Super G gusset?   Hmmmmm… that could work!

In case you’re wondering, the turquoise top is the GreenStyle Staple Tank, which is truly a staple in my closet!  I have made at least 5 of them, all in Phee Fabrics rayon spandex, and I wear them all the time.  The white workout top is a hacked GreenStyle Jillian Tank, blogged here.  The purple top is a GreenStyle Power Sports Bra, hacked into a workout top, and blogged here.

This post may contain affiliate links.  This means that at no extra cost to you, I may receive a small commission if you purchase through my link.  As always, I only give my honest opinion.  After all, it is my blog, which represents me! 🙂  Thank you for reading and sharing my love of sewing, fabric, patterns, and pattern hacking. ❤

Use Every Scrap Of Fabric

Including A Selvage Design Feature

Sewing for children can be fun, because their smaller size generally means quicker sewing.  And you can be super bold in color and try fun things on kids clothes that you may be a bit hesitant to try on an adult size!  After making myself a beautiful Designer Stitch Madison Dress, I had some scraps of Ponte left over.  They weren’t large enough to make an adult clothing item, but there was just enough to squeeze out a dress and leggings for my granddaughter.

WB Gma

The striped Ponte was quite stretchy, so it was perfect for leggings.  I’ve tried several  baby leggings patterns, and have been happy with most of them.  Since Lila is growing quickly, it seemed time to make the jump from a baby pattern to a girl pattern.  The 5oo4 Patterns Little Ninja Leggings (which is a free pattern) worked very well, and came up high enough in the back to properly cover her bum.  I dislike super low rise leggings, and was very happy with the fit of the Little Ninjas.  They definitely give full range of motion, as Lila was easily able to climb in and out of the box “fort” that Grandpa made for her! 🙂

WB box

The green Ponte was a super soft rayon blend, and had such a pretty fringed selvage that I just had to use it for something!  I found it at Pennie Fabrics in Sarasota, Florida.  It’s an interesting independent fabric store, is a bit of a maze, and is not organized into fabric types at all.  But if you’re willing to wander through and feel all the rolls of fabric, you could come up with something unique that you love.  The green Ponte was imported from Italy, and you could feel the softness and quality.  It was therefore, rather expensive, so I wanted to put every square inch to good use!

The Stitch Upon A Time Wendybird Dress was a great choice for this project.  The simple lines of the round neck, plain front version, with hemmed sleeves let the focus be on the fabric.  To add an extra pop of color, I cut a strip an inch and a half wide out of the striped fabric to use as piping between the bodice and skirt.  After folding the strip in half, right sides out, I basted it to the bottom of the front and back of the bodice.

Wendybird piping

Then I stitched the dress together as per the pattern tutorial.  (Although the photo distorted and makes the fabric look ribbed, it’s actually very smooth.)  I cut along both edges of the green Ponte to get 1-1/4″ wide strips of selvage to trim the hem.  After stitching the selvage to the hem of the dress, I pressed the seam allowance up towards the skirt, and zigzagged it in place.

I absolutely love the finished look!  It’s super fun, totally unique, and a great way to use what would otherwise be scraps.

WB point

Obviously Lila loves it too, judging by her smile. 😉

WB smile

I’m glad I made a larger size so that she’ll be able to wear this outfit all next winter too.  If you’re looking to personalize your makes, take a look at the selvage, and don’t be afraid to use every last scrap!

WB window

This post may contain affiliate links.  This means that at no extra cost to you, I may receive a small commission if you purchase through my link.  As always, I only give my honest opinion.  After all, it is my blog, which represents me! 🙂  Thank you for reading and sharing my love of sewing, fabric, patterns, and pattern hacking. ❤

Oh Olivia!

Adjusting the Designer Stitch Olivia to fit my figure

Pattern testing can really stretch your sewing and pattern adjusting skills.  Especially when the pattern involves princess seams.  While some people are lucky enough to have “average” bodies, I think most of us need to do at least a little bit of tweaking and fine tuning of patterns.  In fact, that’s probably why some of us started sewing in the first place.  To get a better fit than off the rack clothing.

The Designer Stitch Olivia Bralette and Knickers, Briefs, Panties pattern is a gorgeous set designed for comfortable lounging, while looking enticing. 😉  It isn’t designed to be a mega supportive workout bra, though my husband did say that it looks like a cross between a workout bra and a swimsuit top!  To be fair, I have made plenty of workout bras and swimsuits, so I can see where he’s coming from. 🙂

Ann (the designer at Designer Stitch) always recommends making a muslin or toile to perfect your fit, before cutting into your “good” fabric.  When making a muslin (practice garment), it is important to use fabric with the same stretch as your good fabric.  If your fabrics don’t have similar stretch, you aren’t going to get the same results.  The Olivia size chart and tutorial give clear instructions on selecting your size.  So I traced the pattern in my size and got to work.

Years of sewing for myself have shown me that my bust apex is lower than average.  Time, gravity, and having breastfed my two children also means that my bust is much fuller on the bottom half than it is on the top.  So I knew that a round curved princess seam was going to need a little bit of adjustment.  It’s not hard to fix, it’s more a matter of trial and adjustment, trial and adjustment.  I stitched the cups together, held them up to my bust and kind of pinched out the excess fabric at the top of the bust to make my first adjustment.  I took the cups in along my pinned together line, and marked the change on my pattern.

Then I stitched the rest of the bralette together without bothering to use any elastic, since this was just my muslin.  The top curve needed to be flattened out even more, so I carefully pinned the excess fabric and again marked the change on my pattern.  Finally I felt ready to move onto my good fabric.  Which, surprise, surprise, 😉 also led to a pattern hack.  Since the bralette was such a fun design, I decided to make it into a nightgown.  Who doesn’t need more summer nighties?

Since I like adding support to all my bras, swimwear, and workout tops, I used all the bralette pattern pieces to cut a layer of powernet, and another layer of fabric to use as a lining.  I basted the powernet to my main fabric, and treated it as one layer, sewing the bralette together.  Then I sewed all the lining pieces (out of the same nylon/spandex tricot fabric) together, basically making a second bralette.  After carefully pinning the two bralettes right sides together, I stitched the two together along the top edge.  (I did leave openings at the top to insert straps).  I tried it on, determined my strap length, and sewed the straps in place.  With the bralette inside out, I added clear elastic within the top edge seam allowance, zigzagging it in place.  The pattern tutorial gives suggested elastic lengths, so you don’t have to guess what length to use.  Then I turned the bralette right sides out, and basted the bottom together.

I cut a rectangle of fabric 21″ high by the 60″ width of my fabric.  After folding the “skirt” in half right sides together, I stitched along the short end of the fabric, leaving the bottom 7″ unsewn to form a slit.  Using a long zigzag stitch, I gathered the top of the skirt until it was the same width as the bottom of the bodice.  Evenly distributing the gathers, I aligned the slit with one of the bodice seams and attached the skirt to the bodice.  Then I hemmed the bottom and edges of the slit to complete the nightgown.

Olivia nightgown

My topstitching caused a few puckers along the princess seam, so it’s not perfect, but it is perfectly wearable and comfortable.

Then it was time to move along and make a pretty set using stretch lace and trimming with double plush picot edge elastic.  The high rise waist of the panties felt a little too high for me, so I cut an inch off the top at the waist.  Some of my favorite RTW panties have lace accents at the hip, so I decided to try a similar look with my lace.  After picking out a pretty motif in the lace, I laid the flowery design on top of the front panty piece on an angle, and pinned it in place.  The lace got stitched in place with a zigzag stitch, then I laid the lace on the opposite hip and tried to get the mirror image motif perfectly aligned.

Olivia panty lace

Once the lace was zigzagged in place it was super easy to follow the pattern tutorial and complete the panties.  My foolproof tip for sewing on the picot elastic (I use the same technique with swim elastic on swimsuits) is to set the zigzag stitch length at 2.5, and the width at 3.0, and sew with the fabric and elastic lined up with the edge of my presser foot.  (The tutorial has a labeled drawing showing how to divide the elastic length along the leg opening for the perfect amount of stretch in each area.)  Then I flip the elastic to the inside and pin or clip it in place.  Using the same stitch length and width, and sewing on the right side of the garment, zigzag around the leg opening, again lining the fabric up with the edge of the presser foot, and gently stretching the fabric until it lays flat while you stitch.

When it came to the bralette, I again cut a layer of powernet and basted it to the fabric, treating it as one layer.  I basted the bralette together, and did one last little adjustment to the cups so they fit perfectly smooth.  Never underestimate the value of basting and trying on to perfect your fit.  Then take the time to trace your changes onto your pattern piece.  I started with the yellow highlighted lines, which got trimmed back to the orange, which got adjusted to the blue, and in the final tweaking, down to the green.

Olivia patt adj

I added a layer of the stretch lace to the Cup Center Front, again aligning the lace motifs so that they would match.  Rather than hacking to add a lining, I followed the pattern tutorial, and finished the bralette edges with the picot elastic.  I took the time to change out the thread to match the fabric and elastic on each side for a professional finish.

Olivia stitching picot

And I ended up with a very pretty set, that almost looks beach ready!

Olivia hips sbl

Olivia close sbl


I could not help but laugh at the ridiculousness of me trying to take “sexy looking” photos!  It’s just not gonna happen!  I’m a 50+ year old Grandma, who enjoys the occasional cookie or apple crisp, (after a delicious salad of course), and I’ve got the real life body to prove it! 🙂

So I kicked off the heels, and hopped on the lounge chair and tried again.

Olivia lounge sbl

Eyes closed and laughing, with leaves blown into the pool.  Yep, that’s as sexy as it gets!  Hahahahahahahaha!  #reallifesexy

So, if you’re looking for a real life sexy set, that can pretty easily be made as swimwear, or hacked into a nightie, and adjusted to fit your curves, Olivia has got you covered!

The nightgown was made of nylon spandex tricot, purchased at Phee Fabrics.  The bralette and panties were made of circular knit, with powernet, stretch lace, bra strapping, and picot edge elastic all purchased from Phee Fabrics.


Thank you for reading and sharing my love of sewing, fabric, patterns, and pattern hacking. ❤