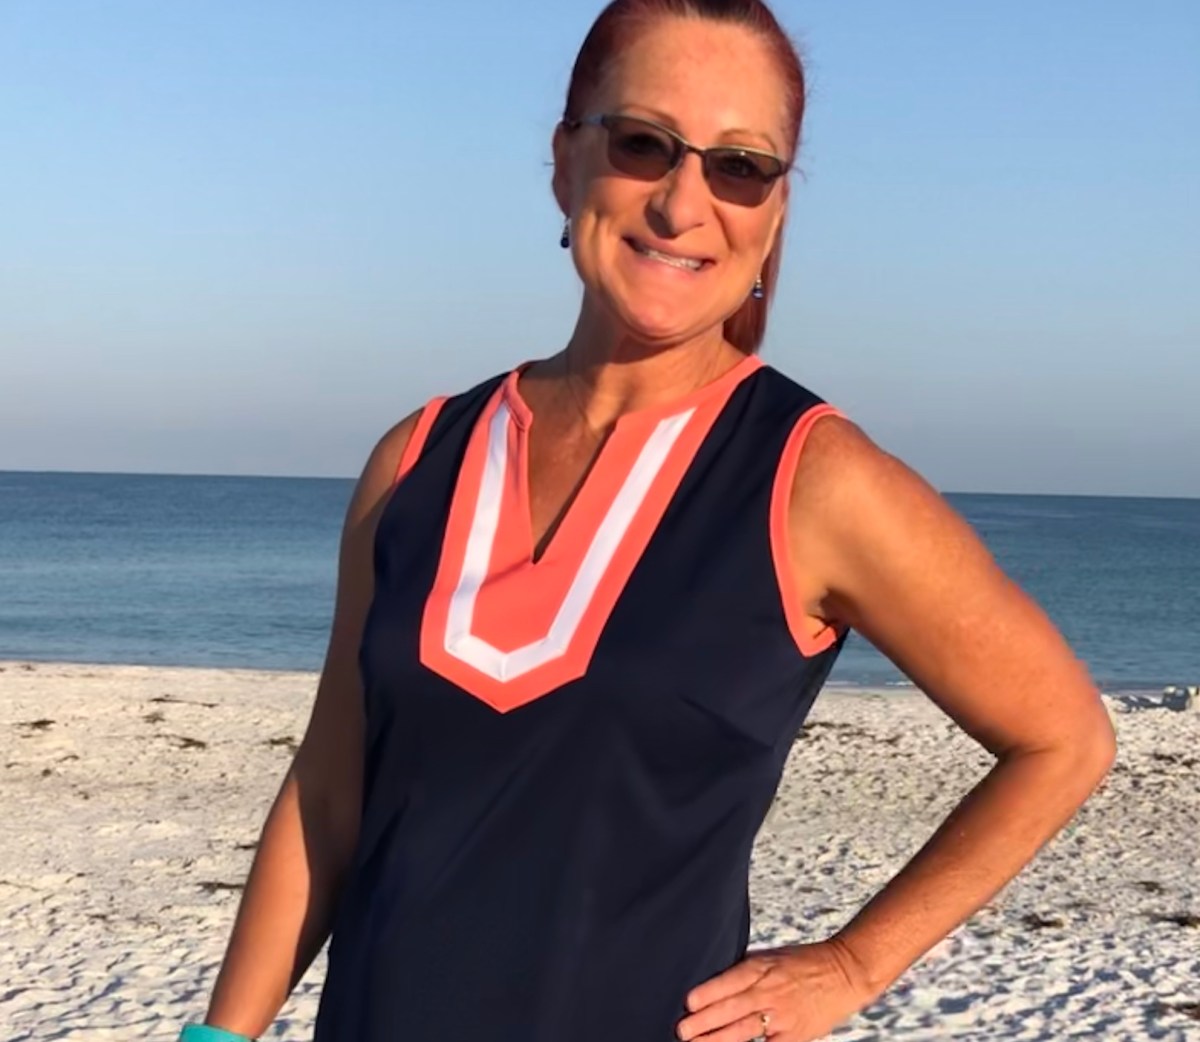
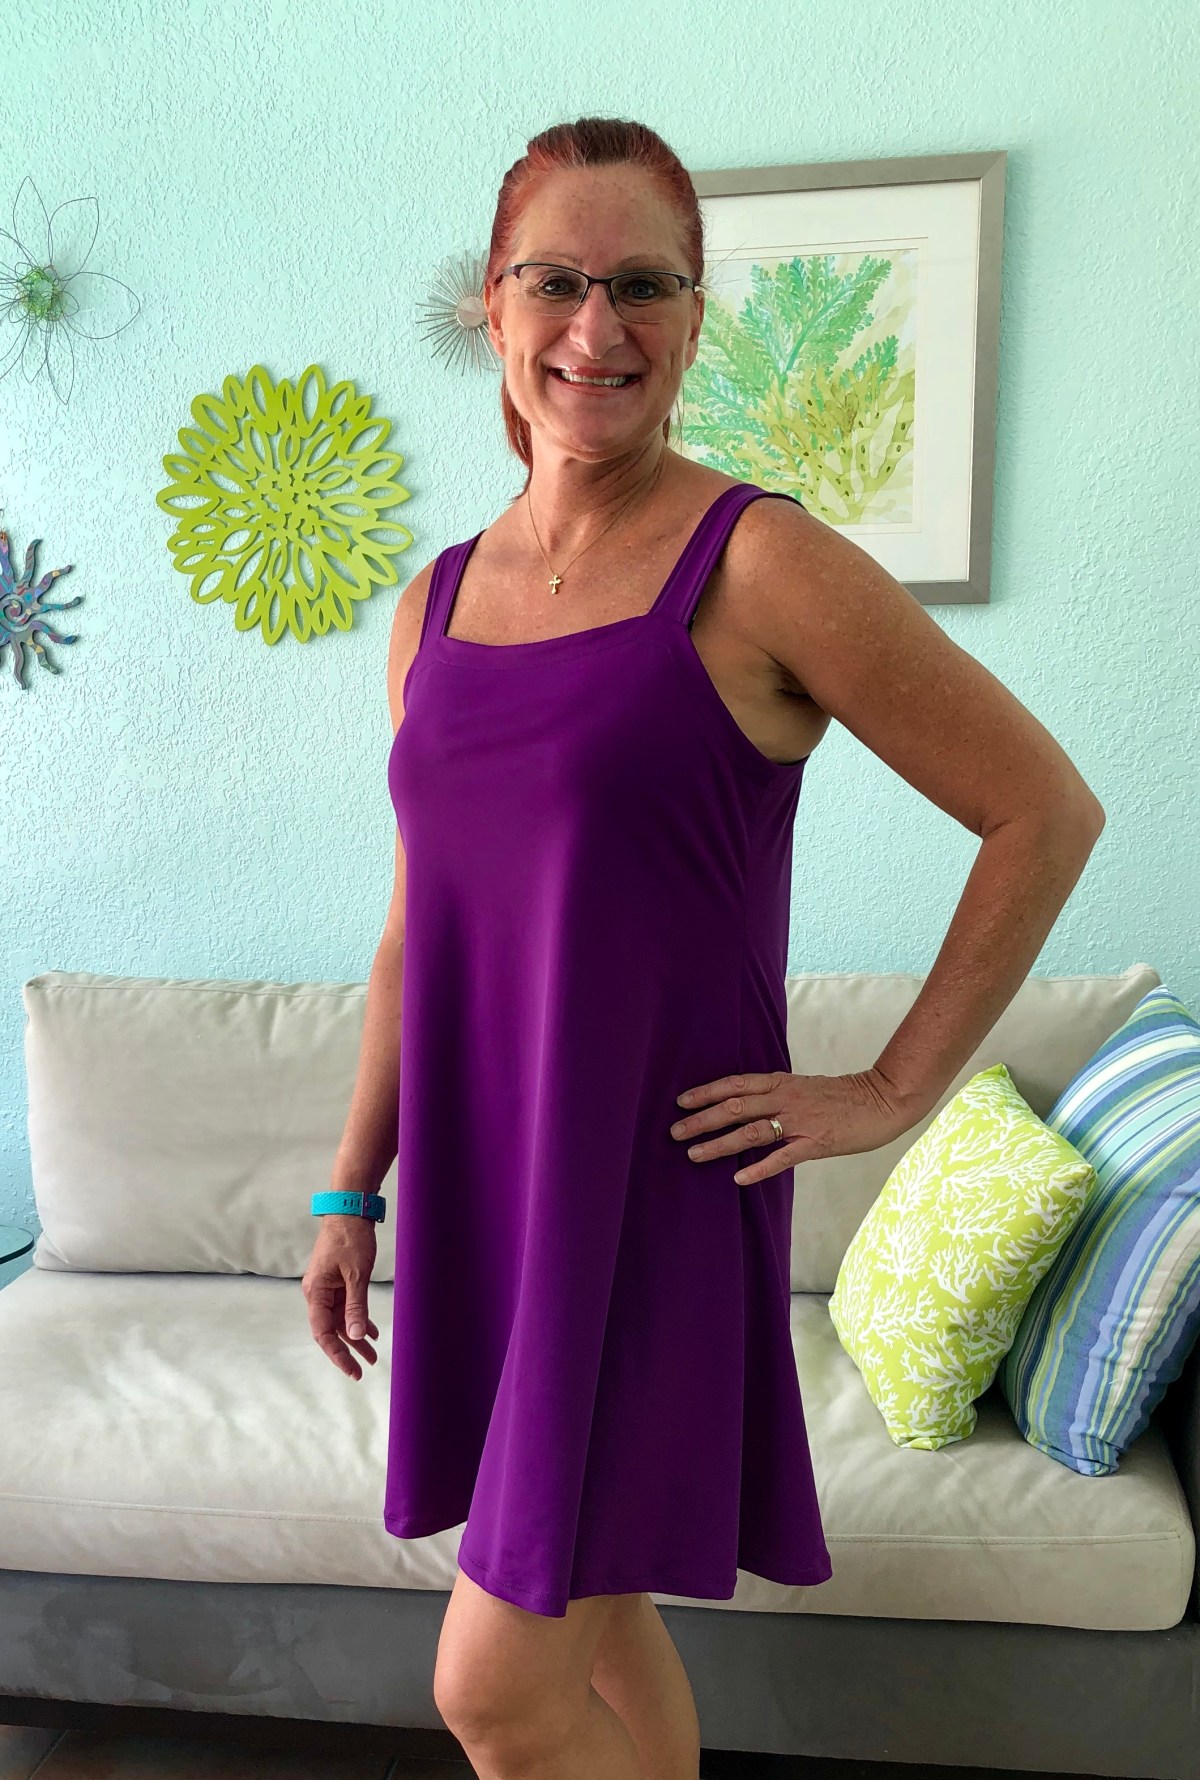
I was super excited when I was chosen to be one of the testers for the Sinclair Patterns Yasmin V-neck Dress with pleated accents. I love dresses, and wear them all the time. And let’s just say that the pleating and detail in this dress spoke to me. When I saw the line drawing and tester call I immediately filled out the tester application!
Sinclair Patterns are rather unique in that their patterns come in petite, regular, and tall. No more having to add a couple of inches to a skirt or dress so that it is long enough to wear without worrying about showing more leg than I want when bending, or climbing in and out of a vehicle. Armscyes that are actually deep enough. All the things that a tall sewist has to constantly adjust on a pattern are already figured out for you!
When you sign up for a pattern test, you’d better have some fabric on hand. Testing obviously moves along quickly, so you need to be prepared to print and tape your pattern together, trace your size, cut your fabric, and get sewing. Luckily, I had ordered some of the new rayon spandex ribbing from Phee Fabrics, and was smart enough to have ordered 3 yards. I have a bad habit of usually only ordering 2 yards or less of a fabric, and when you are tall, that is not enough for a dress with a full skirt! The ribbing has a luxurious feel, a pretty ribbed texture, and beautiful drape. I knew it would look great sewn into a Yasmin Dress!
Call me brave, call me crazy, but I am not one for using cheap fabric for muslins. Cheap fabric is generally a polyester blend, ewww! I don’t like the feel of it, it’s unlikely to lay as nicely as quality fabric, it’s generally a pain to sew with, and it’s probably not going to be substantial enough or have adequate recovery for the type of clothing I like to sew, so I just don’t bother with cheap fabric. That being said, you do run the risk of wasting nice fabric when you test.
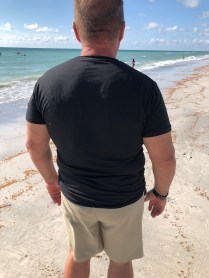
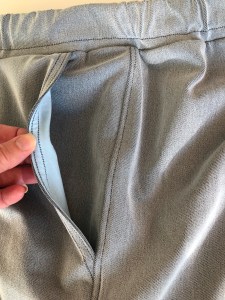
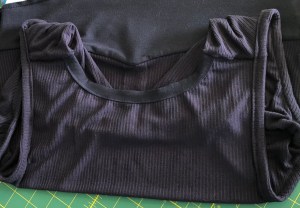
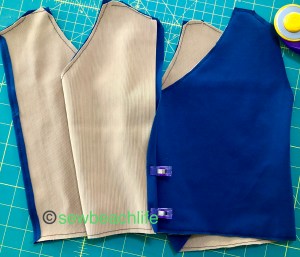
This is the first time I’ve tested for Sinclair Patterns, and I have to say that I am very impressed with how thorough Oxana is. She asked for our thoughts about the pattern before we even started. I mentioned that I was interested in a sleeveless dress, since Florida is warm most of the year. Other testers also commented that they would wear a sleeveless dress. She added a sleeveless cut line to the pattern. She asked for honest input and made changes as needed as tester photos and feedback came in. Another thing you’ll notice about Sinclair Patterns is the way the garments are finished. Just look at how pretty the inside of the bodice and waistband look. The shoulder seams and waistband are enclosed, and the neck has a neat interior banded finish.
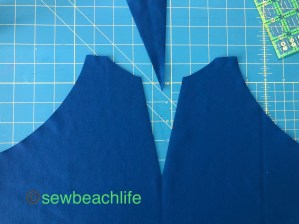
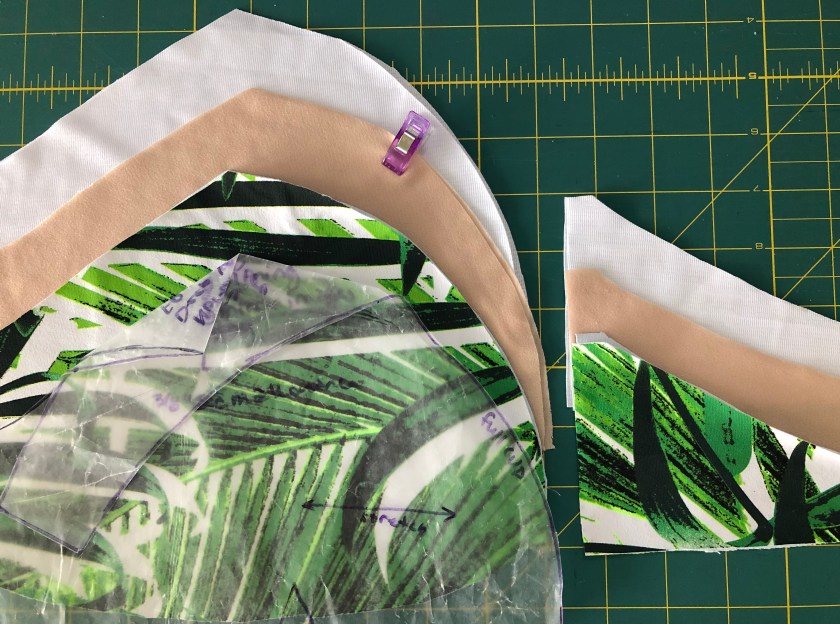
The pattern itself isn’t hard, but the pleats are a bit time consuming. Don’t worry- the tutorial is thorough, and I’ve got some tips to make the pleats a little easier. Here’s my first tip: print the bodice front in just the size that you need. I generally don’t print in layers, preferring to print all sizes of a pattern in case I want to grade sizes, or make the pattern for my daughter who is a much smaller size than me. You need the pleat markings to be precise in order to get even pleats. And when you’ve got lots of markings in 12 different sizes all in one general area on a pattern, you need to narrow things down! So trust me when I say to print the bodice front in just one or two sizes if needed.
Tip number two: Wash Away Wonder Tape is your friend. You still need pins to mark your pleats, but putting a tiny piece of Wonder Tape for your pleat to fold over and stick to, makes things easier.

Tip number three: Scotch tape is surprisingly helpful. Of course I didn’t figure this out until I sewed my second bodice and thought, “Hmmmm….I wonder if a piece of Scotch tape will hold the pleats better than the pins did so that I can keep the pleats even while sewing?” The answer is YES! It (and the Wonder Tape) definitely kept the pleats perfectly spaced and even while I sewed the bodice to the waistband.

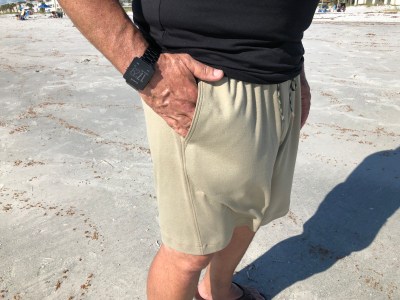
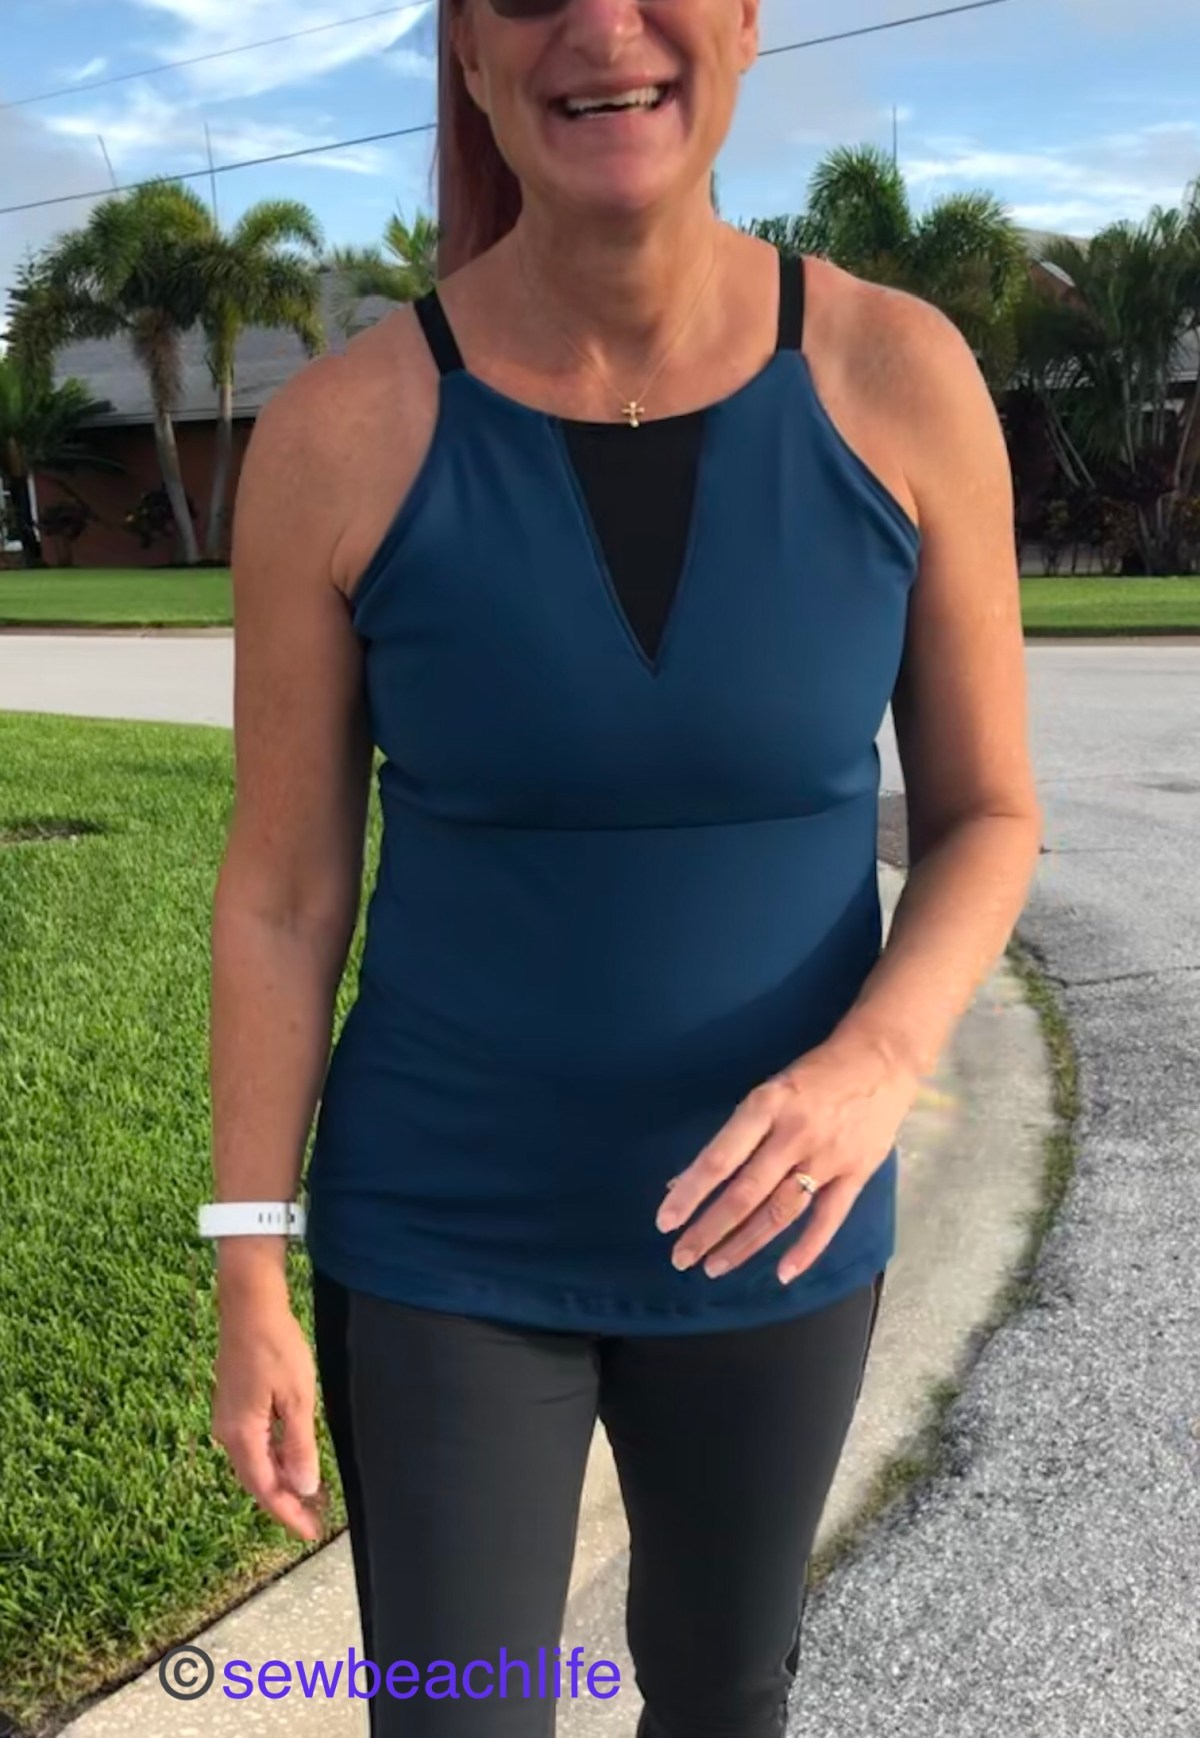
Tip number four: Powernet is an awesome fabric. If you follow my blog, or read my posts or comments on the Facebook sewing groups I belong to, you know that my love for Phee Fabrics powernet is strong. It is supportive in bras, workout, and swim tops, makes a great accent on workout tops and tights, and has magical tummy smoothing powers in waistbands and swim bottoms. It is recommended to use an athletic fabric for the inner waistband pieces of the Yasmin to help support the weight of the skirt, and lend stability to the waistband. Since the Supplex I have on hand is destined for workout wear, I decided to baste some powernet to my waistband to give it the necessary support.

Use plenty of pins to keep everything aligned, and sew with the powernet facing up. I don’t know if I’ve mentioned that before, but when helping someone who was struggling a bit with powernet, I realized that some people may not even consider fabric stretch when they sew. Generally speaking, you want anything smaller, or with less stretch on top while sewing, such as powernet, elastic, bands, or when easing pattern pieces together. If your larger piece or stretchier fabric is on top, your presser foot will tend to stretch it out even more.
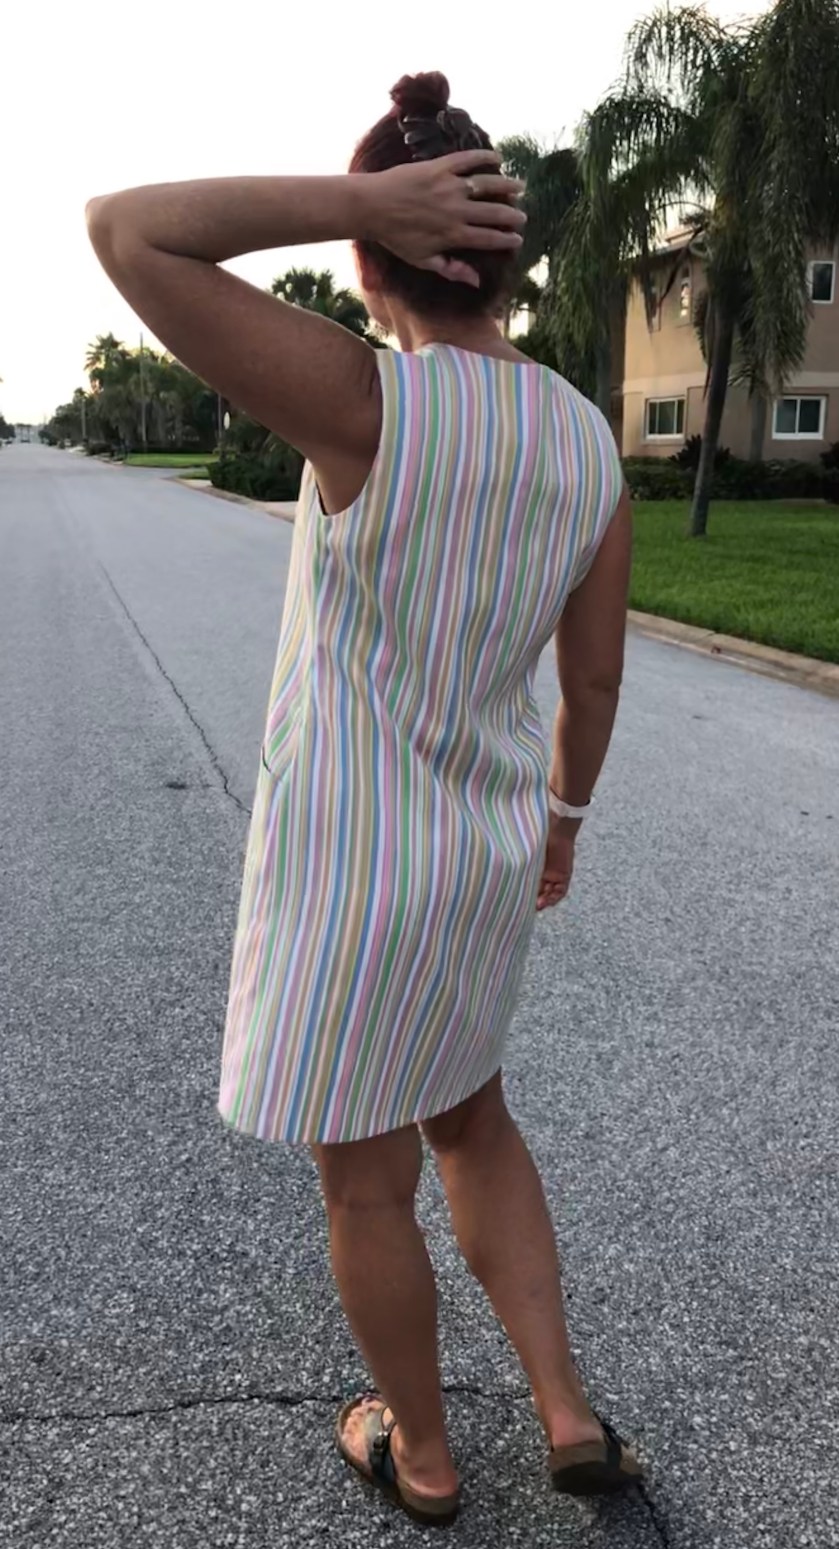
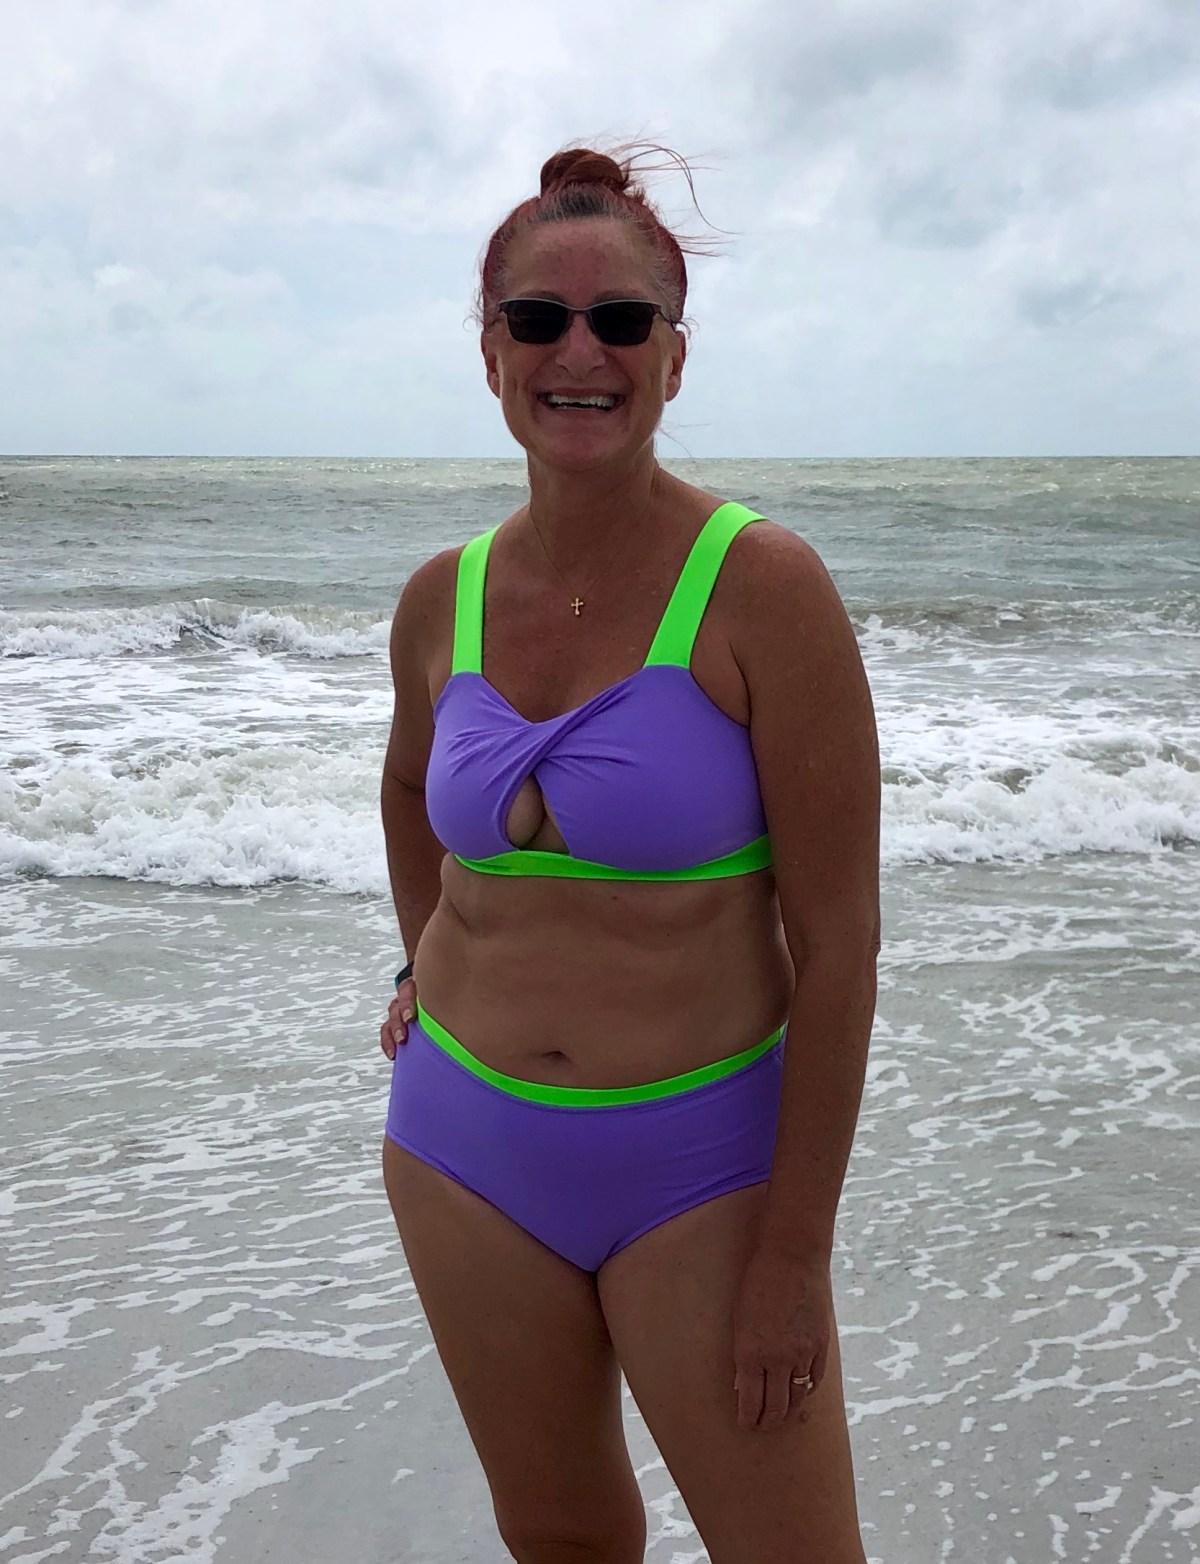
Summer in Florida is the rainy season. But it will usually rain for a short time, and the sun comes right back out. Not this week! It rained for two days straight as I sewed, and rained all the next day as I waited to take photos of my dress. Finally, the rain slowed down to a slight mist, and the sun started to peek out from the clouds. My dress was all pressed and ready to go, so we quickly drove to the beach for some photos.
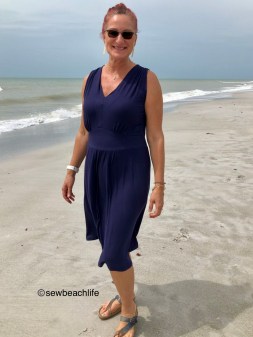

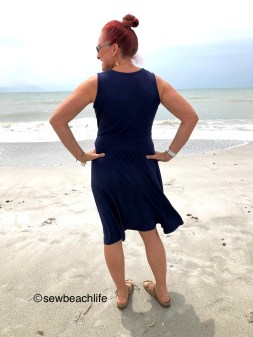
The rain may have stopped, but there was plenty of wind to whip my skirt around! I love the pleats at the shoulders and under the bust, and how the V-shaped waistband gives nice definition. I used the gathered version skirt on my dress, and love the drape and comfortable ease of this dress.

Since I still had some time before the pattern released, I decided to make the other skirt option. Apparently I need to order some fabric, (says every sewist and fabric hoarder 🙂 ) because I didn’t have enough fabric for a knee length skirt, let alone a midi length. So I decided to try a peplum. I NEVER wear peplums. But the flare of the skirt really spoke to me, so I had to try it. I dug through my fabric and found scraps of floral that sort of matched the bit of rayon spandex and ribbing I used for the bodice and waistband. I marked and cut the skirt at 13-1/2″ from the waist, and used a 1″ hem. A smaller hem would be easier on a curved skirt, but I was just guessing at the length when I hacked the skirt into a peplum. If I were short, I’d probably make the peplum 8-9″ long, and would probably cut it at 12″, no more than 13″ for my tall self next time.


It’s such a fun look that I couldn’t help but twirl! And I’m branching out and trying a new style of top. That’s one of the fun things about sewing, sometimes you end up with a surprising, unexpected new style in your wardrobe. Although the skirt I’m wearing is RTW, using a pencil skirt along with a peplum overlay would be another cute hack for this dress!
There are options for knee length, midi and maxi length in the gathered skirt version. The elegant look of this pattern would look so beautiful as a maxi dress. Since I also love the flared skirt, I guess I need to make another Yasmin Dress (or two)! Once I order more fabric, of course. 😉
*Note: I recieved the pattern for free as part of the testing process. I always participate fully when I test by submitting fit photos and commentary, offering constructive feedback on the fit, process, etc., comment on other testers posts, noting any fit issues, and applauding beautiful work, and filling out the survey to try and help ensure that the pattern fits well, and the tutorial is easy to understand and follow.
This post may contain affiliate links. This means that at no extra cost to you, I may receive a small commission if you purchase through my links. As always, I only give my honest opinion. After all, it is my blog, which represents me! Thank you for reading and sharing my love of sewing, patterns, fabric, and pattern hacking. 😉


 You need that extra width to make your drawstring casing, and for your skirt to have a little bit of ease. The skirt back should also match the curve of your briefs and have the same extra width. Because I’m tall and have a booty, I added a little extra length to the center back of my skirt, tapering up to the side length. It’s just enough to cover my bum when the skirt isn’t gathered up on the sides. Sew the skirt front and back right sides together with a 1″ seam. Make drawstrings by cutting four 1-1/2″ wide strips of fabric twice as long as the side seam of your skirt. Fold each strip right sides together and using a stretch stitch sew with a 3/8″ seam allowance. Use a safety pin or bodkin to turn the strips right side out.
 Fold the bottom hem under 1/2″ and use a zig zig or other stretch stitch to hem. On the right side of your skirt, make a small horizontal slit in each casing, about 3/8″ above the hem. Thread a drawstring in each casing and tack the drawstring in place at the top.
 Align the center front, center back, and side seams of your brief and skirt and pin or clip in place. Try it on to ensure everything feels comfortable and lines up nicely. This is your opportunity to trim the rise a little bit if needed for better alignment. Easing the skirt to fit the brief, baste them together. Then sew on your waistband and elastic and you’ve got a new swim skirt!


 You’ll need to poke one side of the back through the narrow space at center back to turn the back right sides out. Then it’s time to sew your side seams. I hate bulky side seams, and with the straps, and elastic, and layers of fabric and powernet the seam could get bulky! So I do it a little differently than you may have seen. Since the front strap casing is folded down at the top front, my normal method of sewing the main front to main back, and lining front to lining back, lining up the top seam isn’t going to work.


 My Scrundie swim bottoms were a success, and I have a cute new swimsuit! I love that it’s modest enough, while still being sexy. My husband definitely approves of my creation!

 I cut out two 4-3/4″ x 7-1/2″ rectangles for my front pockets. I wanted them to be hidden seam pockets like the one I did on the
  I flipped the pockets back to the outside edges after stitching and basted them in place.
 At this point, I should have been able to sew the tank front and back together, and sewn the bodice to the tank. But I had made a couple of rookie errors. 😦 The first was that I had made the tank too wide at the top. This was easily remedied by angling the tank in at the top so that it was the same width as the bodice (and the original tankini pattern piece.) The second error was not considering the fact that I am tall, and should have added an inch to the length of the tank. The problem was remedied easily enough by adding a band. I cut out the band pieces, and sewed them onto the bodice per the pattern tutorial, except using a 3/8″ seam allowance, and spacing my bodice front center V only 1/2″ apart. I don’t want to show too much skin at yoga class!
 I brought the outer band down and basted it in place before attaching the tank portion. I sewed on the tank, hemmed the bottom, and I’ve got a cute new workout top!