Who can resist a fun new sports bra? Especially with options for a super cute infinity, twist, or simple back design. I am all over trying new sports bra patterns, and the infinity strap design is just so unique and fun.
I don’t limit myself when it comes to wearing sports bras. They get worn to the gym, as a swim top at the beach and in the pool, and for everyday wear. They also get worn with shorts when I skate around my neighborhood, because that is #floridalife. 🙂
The Delphi Sports Bra pattern calls for athletic fabric. I used nylon/spandex Supplex and nylon/spandex Align 2 for my two bras. You could add powernet if you wanted, but I found that the compression and firmer rebound of Supplex and Align 2 were adequate for me. (For reference, I wear and buy a size 32D bra at Soma.)
I wore one of my freshly made bras all day yesterday and it was super comfortable. The straps stay in place, and the neckline depth is perfect. It’s high enough to be supportive, but low enough to not show under a scoop or V-neck top.
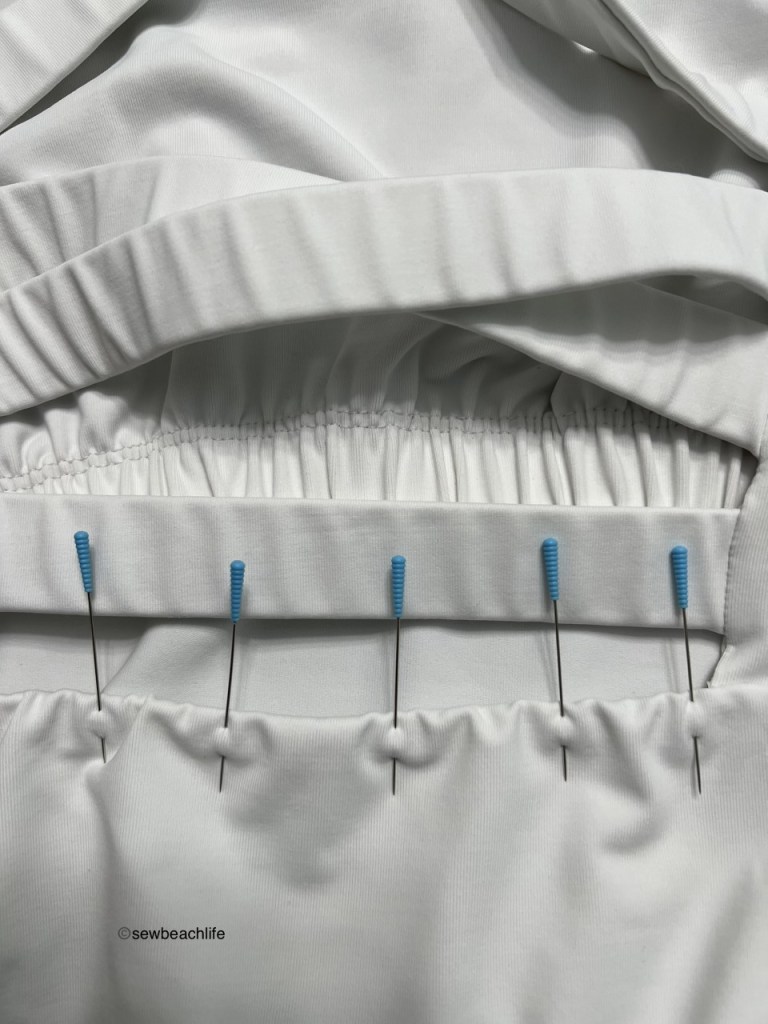
You can use 3/8″ or 1/2″ elastic in the straps. Although the pattern calls for 1-1/2″ or 2″ elastic in the band, because I am rather short-waisted (which seems weird for a tall girl, right?) I chose to use 1″ elastic in my band. Of course that meant adjusting my band height to 2-7/8″, but I love being able to personalize a pattern to fit my body. That’s one of the reasons that I sew my own clothes.
Greenstyle has once again nailed it on a fun, great-fitting, well-designed pattern with the Delphi Sports Bra. It doesn’t take a huge amount of fabric, and can be worn with shorts, skirts, leggings, and under your favorite top. Sizing ranges from 32″ to 61″ at the full bust. If you need it, there are 2″ and 4″ full bust adjustment pattern pieces for the front.
The details:
The Delphi Sports Bra pattern is one of the many awesome patterns by Greenstyle. I had some plum Supplex from Phee Fabrics in my stash for the first Delphi Bra I made. The teal Align 2 for my second bra was purchased from Greenstyle a while back. Although this particular color is no longer available, they have lots of pretty colors in stock. I also recommend the Signature fabric line, which is another high quality nylon/spandex athletic fabric.
For reference, I made a size C1 with the plum supplex. For the second bra, I again used size C1, but cut the front in size B2 width (keeping the C1 length), which feels more comfortable for my shoulder width and at the armscye. I dislike anything being too close in the armscye, and this combination works perfectly for me.
I can’t remember which pattern I used for the swim bottoms, but the Delphi Sports Bra is also shown worn with the Windward Shorts and Tidal Skirt, blogged here and here.
I purchased my 1/2″ and 1″ knit elastic at Wawak, along with the Maxi-Lock serger thread. There are steps in the pattern that I highly recommend using your sewing machine to stitch, such as the side seams, and attaching the back infinity straps. It’s also important to trim those seams to reduce bulk and help them lay more smoothly when turned out to the right side. I drive a Bernina sewing machine and LOVE it! Other seams and the cover-stitching on the straps were done on my Babylock Triumph, which I also love.
I cannot stress strongly enough how much easier and more fun it is to sew when you use high quality patterns, fabrics, and machines. It isn’t that you can’t sew with a cheaper machine, because I sewed for decades on much, much less expensive machines. But once I had saved enough money to purchase my current machines, I really feel like the quality of my work, and ease of sewing (due to less frustration with machine capacity, bobbin struggles, lack of foot height, and motor strength) has greatly improved.
Thank you for reading and sharing my love of patterns, sewing, fabric, and cute sports bras! The links to GreenStyle may be affiliate links (if I did them properly!) which means that I may earn a few pennies if you use my links without it costing you anything extra. Since this is my blog and represents me, I always give my honest opinion about any patterns, fabric, or supplies that I talk about. I do like knowing whether the time I spend writing posts actually interests people enough that they take a look at the patterns I review, but I write for me. It’s one more creative pursuit that I hope is helpful or interesting to others. I write to share my love of sewing and to encourage others to love it as much as I do! ❤
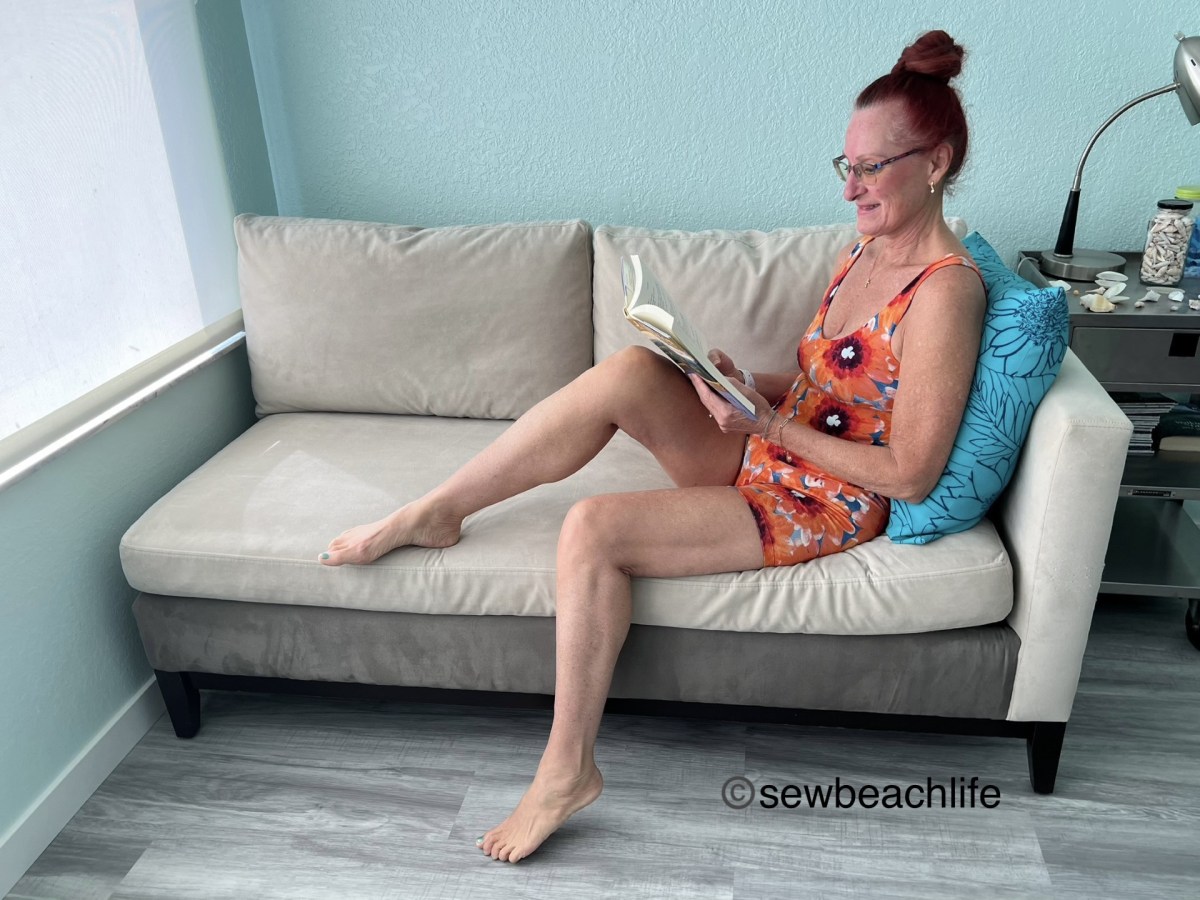
I love versatile patterns, and the new Bobby Brami pattern from GreenStyle does not disappoint! It makes for super comfortable pajamas when paired with the Billie Shorts. You can lounge all day, clean house, sew, read, do laundry, and snuggle your cat, all while feeling cozy, yet cool.
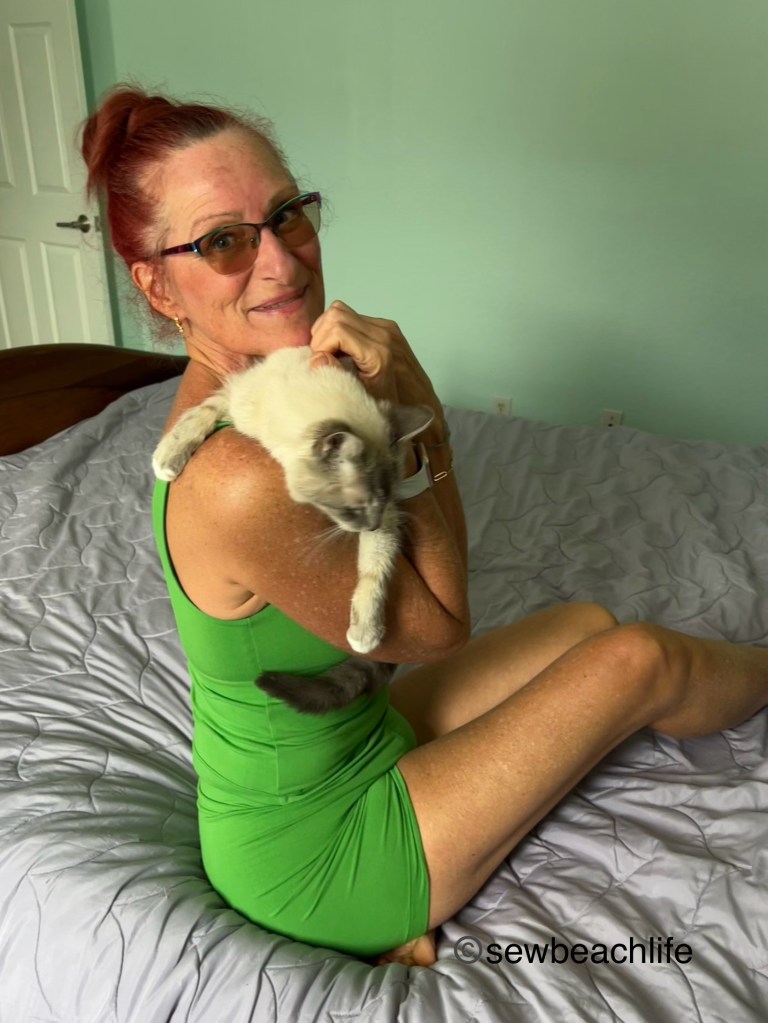
I love the way he curls his tail around me when I hold him. He loves being held up on my shoulder like a baby.
I interrupted his nap for some kitty snuggles.
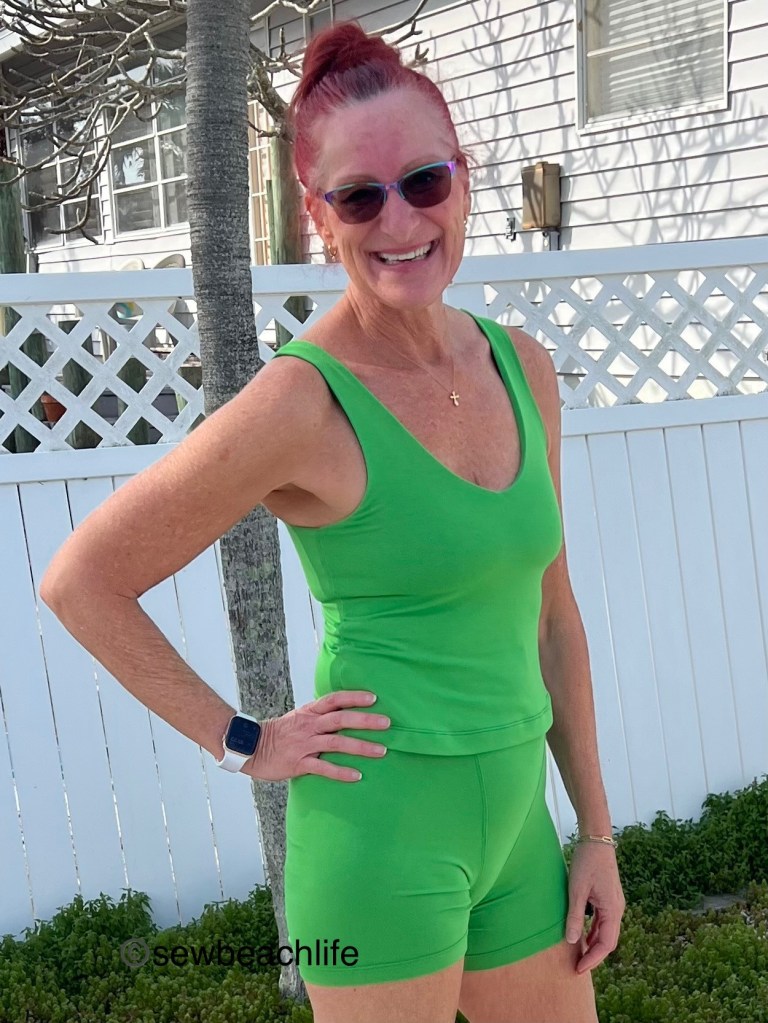
But the Bobby Brami isn’t just for lounging. I wear mine out and about while running errands, taking a walk on the beach, and while skating. Fabric choice makes a little bit of difference on which top I’ll choose. All of my Bobby Brami shelf bras are made with high quality nylon/spandex swim or athletic knit. I didn’t even bother using power knit as an additional layer, because the shape of the pattern pieces gives me adequate support. The coral floral print and bright green main layer (and Billie Shorts) sets are rayon/spandex. They are soft and cozy.
It’s been chilly here in Florida, but it finally warmed up enough for me to skate again. When it finally hit the mid sixties, I wore the coral floral Bobby with some Moxi bike shorts to skate.
Some of the side streets have been repaved and they are so much smoother and nicer to skate on.
You’ve just got to pause and have some fun when you get to the top of a little bridge!
As much as I love rayon/spandex, I’m unlikely to wear it while doing a sweaty workout. On those 90 degree days, I’ll reach for the nylon/spandex athletic fabric tops, like my palm leaf print or solid white versions.
When pattern testing, I like to take fresh measurements just to make sure I’m choosing the correct size(s). Garments fit best when you start with your upper bust measurement to get a good fit at the shoulders. Then you can grade for the full bust, waist, and hips. My upper bust is a size D, and my full bust is on the outer edge of D. My waist and hips are size F. So my pattern is graded from D to F starting below the bust. After making the first test version, I realized that my bust projection made the front of my top a smidge too short. But I don’t measure into or need the +2″ or +4″ FBA front pattern pieces. What I do need is a little bit of extra length at the center front. So I reshaped the hem similar to the hem on the FBA front of the Azure top shared here. Adding 3/4″ at center front, gently curving up to nothing at the sides made a world of difference.
See how evenly the hem sits? It’s the same length all around instead of riding up in the front.
I upcycled the pretty palm leaf print fabric from a now too large tunic top (shared here) for my third Bobby Brami. Because it has a higher percentage of spandex and would be more form-fitting and less drapey, I experimented with adding 1/2″ to the length of both the (previously adjusted) front and back of the top. I’m super happy with the results!
This top is so comfortable and supportive, I don’t even have to think about adjusting or pulling on it. Carefree clothing is the best!
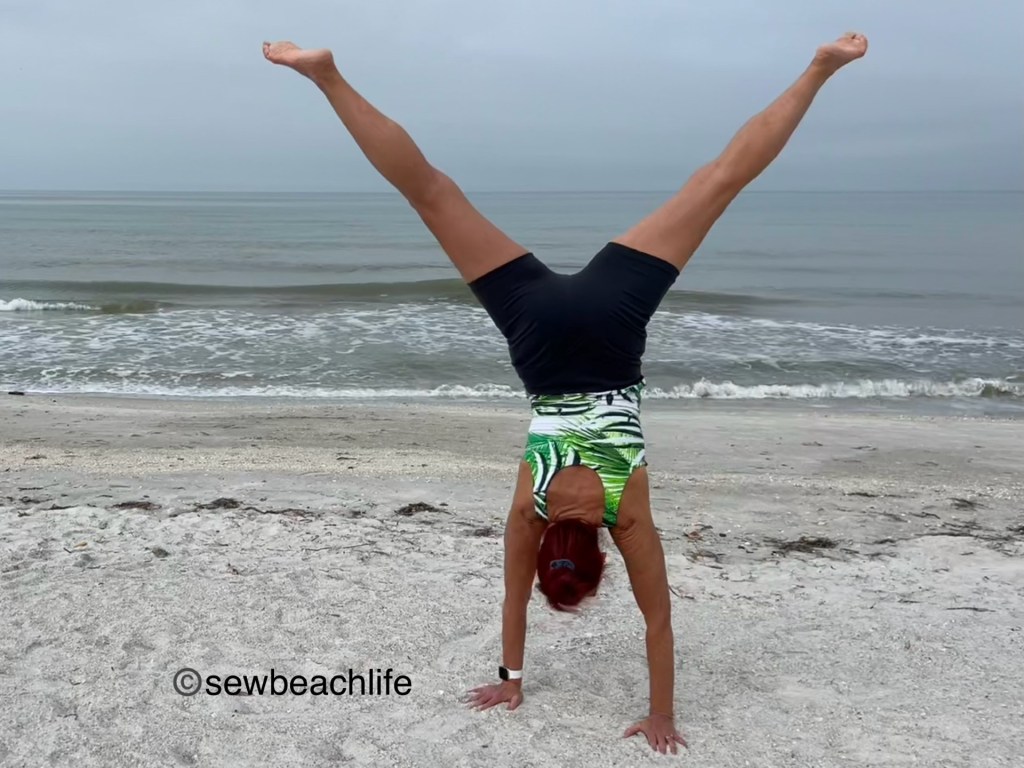
The slim fit of the pattern and quality of the nylon/spandex fabric kept the top firmly in place even when doing cartwheels.
All four of my Bobby Brami’s have the V-neck front, U-back, and are the (longest) high hip length. Some may think that’s boring, but I like what I like! 😉 There are a lot of options: high neck, U-neck, and V-neck fronts; and high neck, U-neck, and V-neck backs, which can be mixed and matched; along with bra length, waist crop, and high hip lengths. They can be worn with shorts, leggings, and skirts, like the Paseo Skirt shared here.
I love the just the right amount of coverage of the soft V-neck.
The Billie Shorts have three length options from boy shorts to the longest length, which is what I made. There’s also a lengthen/shorten line if you need to adjust the rise.
I like the longer length, and if you’re someone who experiences “chub rub”, I can foresee these being made in a nylon/spandex to be both smoothing and to protect the inner thighs. I know someone who would probably really appreciate if I made her a pair or two, as this is the style that she likes, and struggles to find in her size. Speaking of size, these patterns come in sizes B-M, which range from a full bust of 30″-61″ and a hip of 32″-62″.
If you choose to make Billie Shorts as a smoothing layer to wear under scrubs or clothes, you’ll be happy to note that there is a liner pattern piece that should be made out of cotton/spandex, bamboo/spandex, rayon/spandex or other breathable fiber. Alternatively, you could just cut a second center front piece so that the full center is lined.
A freshly sewn burrito rolled main top and shelf bra may not look like much before it’s pressed, but when it’s done, you can’t help but admire the clean finish!
One of the sewing techniques used on the Bobby Brami is the burrito roll. Don’t let the idea of it intimidate you. It really is just rolling from one side over to the other armscye, wrapping the right sides around the rolled up fabric, and pinning, then sewing them together. When you pull the fabric out after stitching, it’s amazing to see the clean finish of your garment.
Have I mentioned lately that I love the coverstitch feature on my Triumph? It makes hemming and finishing elastic bra and waistbands so quick and easy!
Though it is a rather soft V (due to the negative ease of the pattern) the V-neck does come to a point. It can be tricky to navigate exactly where to stop and pivot your fabric. I like to use a disappearing fabric marker to mark the center line of my V. Then I can stitch, keep the needle down, and pivot to stitch the other side of the V. I use a lightning bolt stitch for this, as this is a knit garment with a bit of compression. Once I’ve stitched the V, I clip down to but not through the stitching line. Then I can easily serge the neckline while adding the clear elastic to the seam. Once serged, I very carefully snip the elastic at the center of the V, trying not to snip any thread. This will help the fabric lay smoother at the V. I generally use my seam ripper to do this, as the tiny point can easily get in there to do the job.
It was easy to tell the front from the back at a glance as I made V-front and U-backs on my Bobby Brami’s. But I’m making a U-back and front for my daughter, as she prefers a slightly higher cut at the bust. To make life easier, I put a clip at the center back of the main and shelf bra pieces. A simple tip that can make things faster, easier, and avoid confusion when sewing.
Although the tutorial calls for adding clear elastic at both the neck and armscyes, I cannot stand anything tight or constricting in any way in my armpits. So I used clear elastic only on the neckline seam, feel like I have great support, and don’t feel the need for it around the arms.
Good support and a flattering fit? Yes, please!
I’m super happy with my new makes and will continue to get so much use out of them! It was nice to wear a new top to yoga class on Saturday because I do seem to be running out of workout wear and get tired of wearing the same five outfits week after week. I’m in love with these new patterns!
I had intended to add a video of my backbend to wide legged forward fold to headstand and back to wide legged forward fold, but WordPress wants me to upgrade (and pay more for) a premium plan in order to add videos. Lame. So no videos for me. 😦 But check out my new Liforme yoga mat! I bought the XL length during their holiday sale and love it! My previous Liforme mat lasted me for six plus years of doing yoga 3, 4, or 5 times a week.
I can’t be the only one that curls their legs up when sitting, right? 🙂
I love his sweet kitty face!
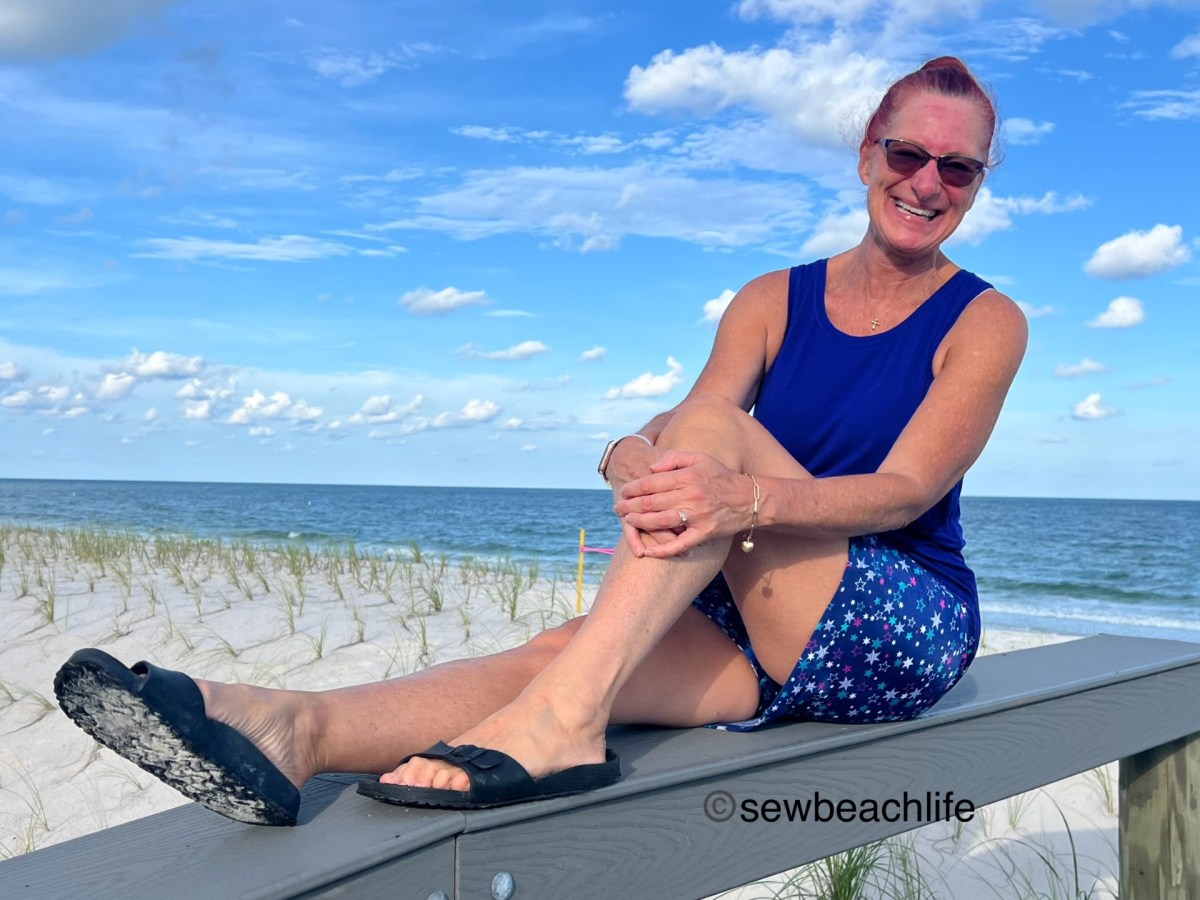
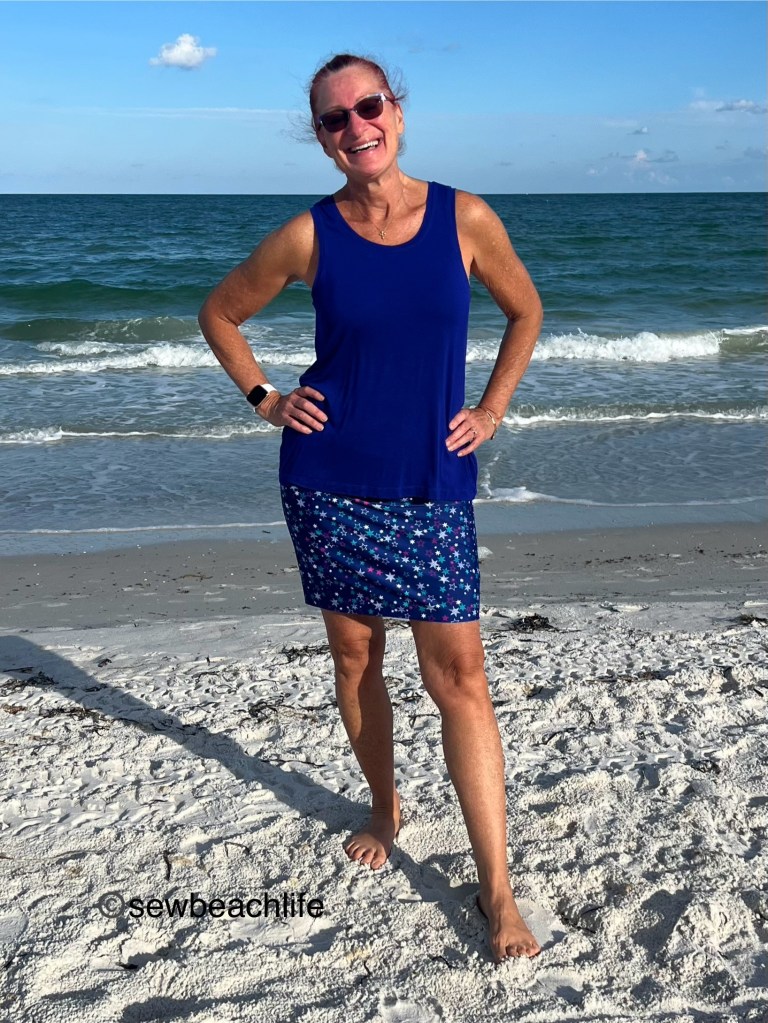
This is a summer uniform for me!
The links to GreenStylemay be affiliate links (if I did them properly!) which means that I may earn a few pennies if you use my links without it costing you anything extra. Since this is my blog and represents me, I always give my honest opinion about any patterns, fabric, or supplies that I talk about. I hope that the time I spend writing posts and sharing sewing tips interests people enough that they take a look at the patterns I review. I write to share my love of sewing, patterns, and fabric, and hope that it encourages others to love sewing as much as I do! ❤
Love the easy breezy comfort of a skirt? Me too, especially when it has super cool optional front pockets, along with the option of back welt pockets. The thing that makes it even better are the optional undershorts, with or without side panel pockets. The GreenStyle Paseo Skirt pattern is perfection!
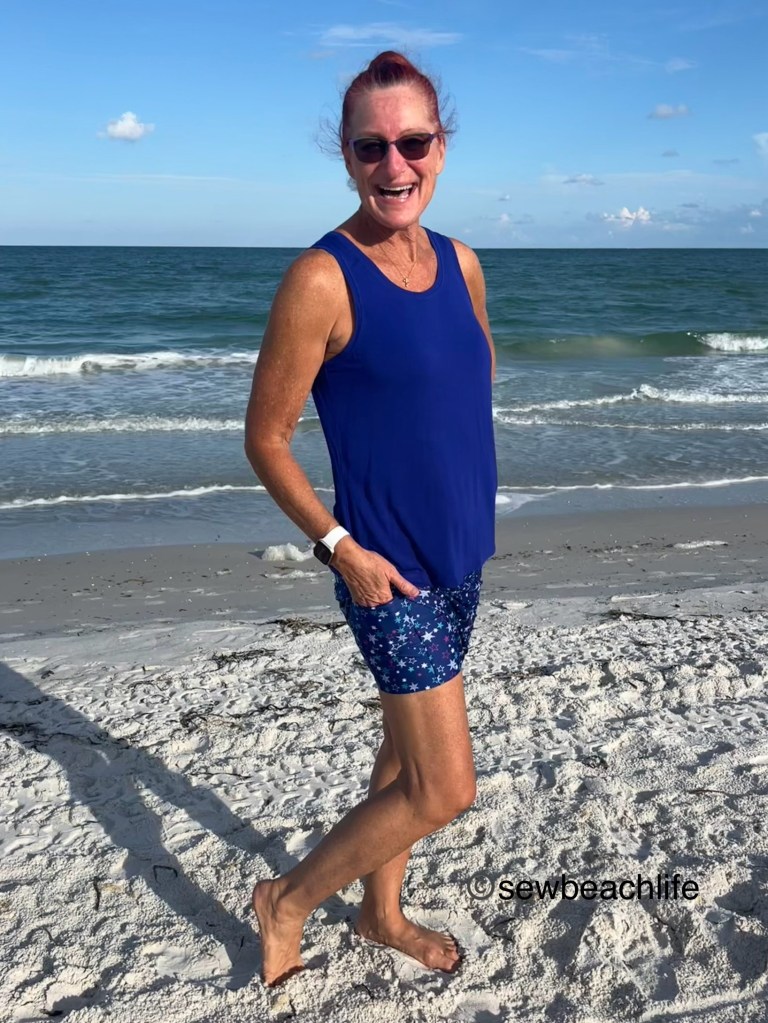
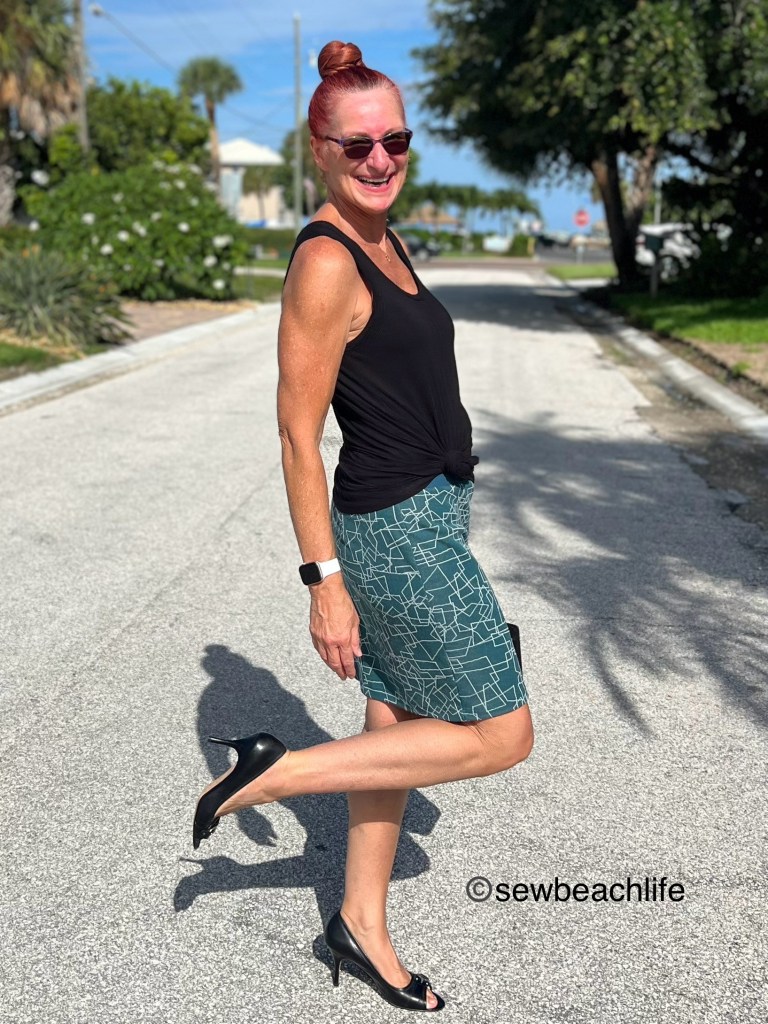
I love this pattern so much that I made three versions, all of them a bit different. (I would have made more before posting, but a home project left me with little sewing time). The blue shorter pencil skirt has the optional undershorts with side panel pockets. It’s made of a heavier weight nylon spandex swim, and I love it!
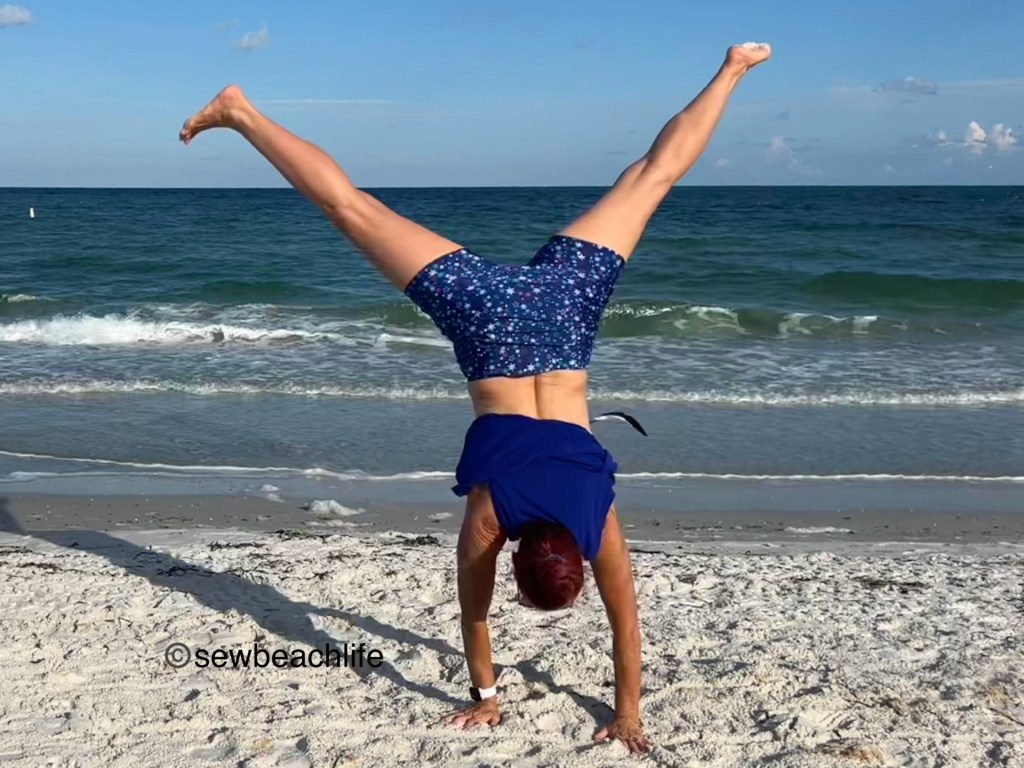
The side panel shorts pockets are a perfect size, wide and deep enough for a large iPhone. Did I mention that the undershorts have two length options? I made the shorter length. It’s super awesome to have attached shorts in case you break into spontaneous cartwheels 😉 or have children (or grandchildren) to chase after and play with.
My top slid up, the skirt slid up slightly, but the shorts stayed perfectly in place! Even the bird flying by (see the wing behind me?) was impressed. 😉
My teal long pencil skirt with no pockets or shorts was a super quick sew. It is scuba, upcycled from a no longer worn dress. Because the scuba didn’t have the greatest recovery, I used nylon spandex supplex from GreenStyle for the waistband.
The longer length pencil skirt is perfect for church or work. My only regret is not adding the front pockets. But being an upcycle, I was working with limited fabric. All future versions are going to have pockets! It really doesn’t take much longer to make the pockets.
This skirt is so comfortable and easy to wear all day, I wish I could say the same for the high heels! 🙂 Back in the day, heels were no big deal. Apparently I’ve reached the stage of life where Birkenstocks rule the day.
I just feel so fancy in this skirt! Obviously, I need more in my closet.
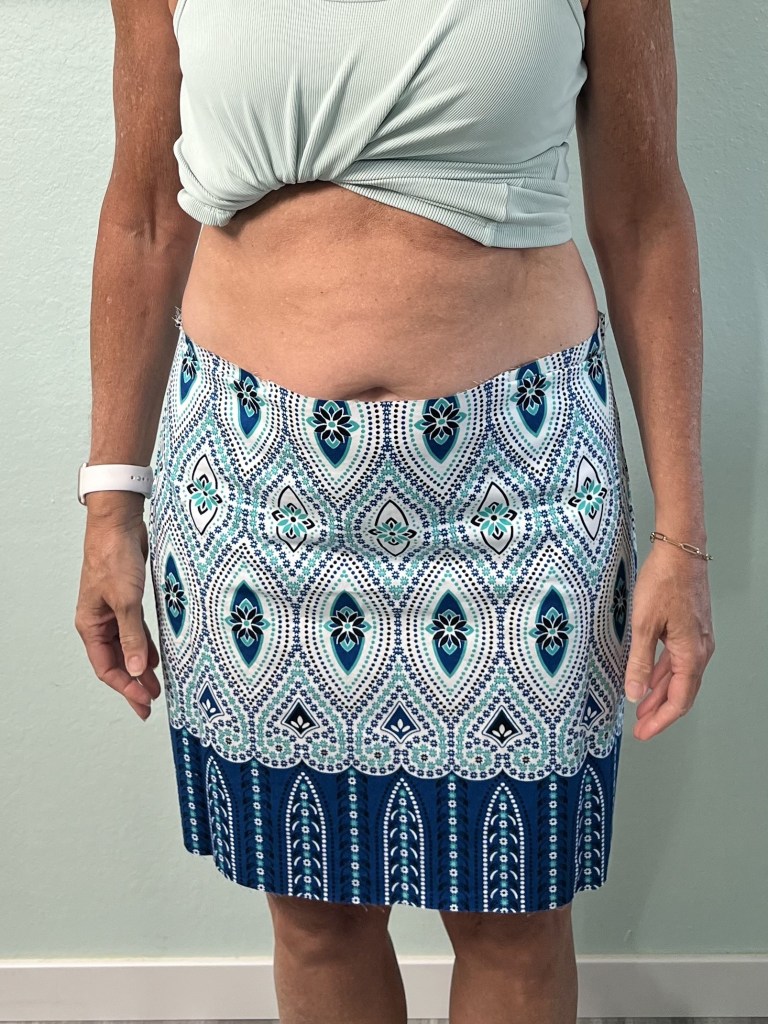
The third skirt I’m sharing is technically the first one I made. I’d made it as the longer length straight skirt with front pockets, using a stretch cotton twill panel from Mood Fabrics, taking the time to carefully match the border print at the side seams and at the front pockets. I’d chosen to make the straight skirt because I was sure that the pencil skirt would be too form fitting on me. Boy, was I wrong!
It was cute, but a bit longer and straighter than I wanted for a summer skirt. For reference, below is a photo from testing to see the longer length straight skirt. Keep in mind that it didn’t yet have a waistband on it.
Looking at the other pattern testers photos, I just loved the cut of the pencil skirt. So I unpicked the side seams and back waist darts and cut it down to the short pencil skirt. The updated version of the pattern (that’s why patterns get tested, to perfect every tiny detail!) has curved back darts, and it fits so smoothly with no bumps at the end of the dart. I’m very happy that I chose to cut it down to the shorter pencil option, as I think it’s a more flattering look on my body shape.
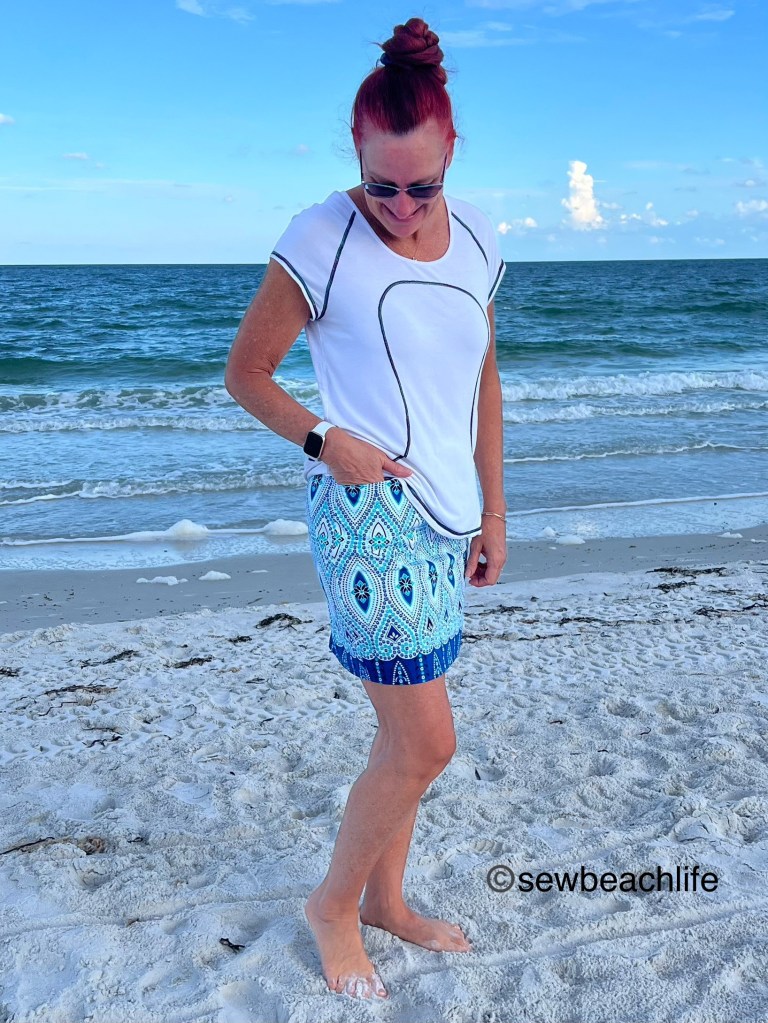
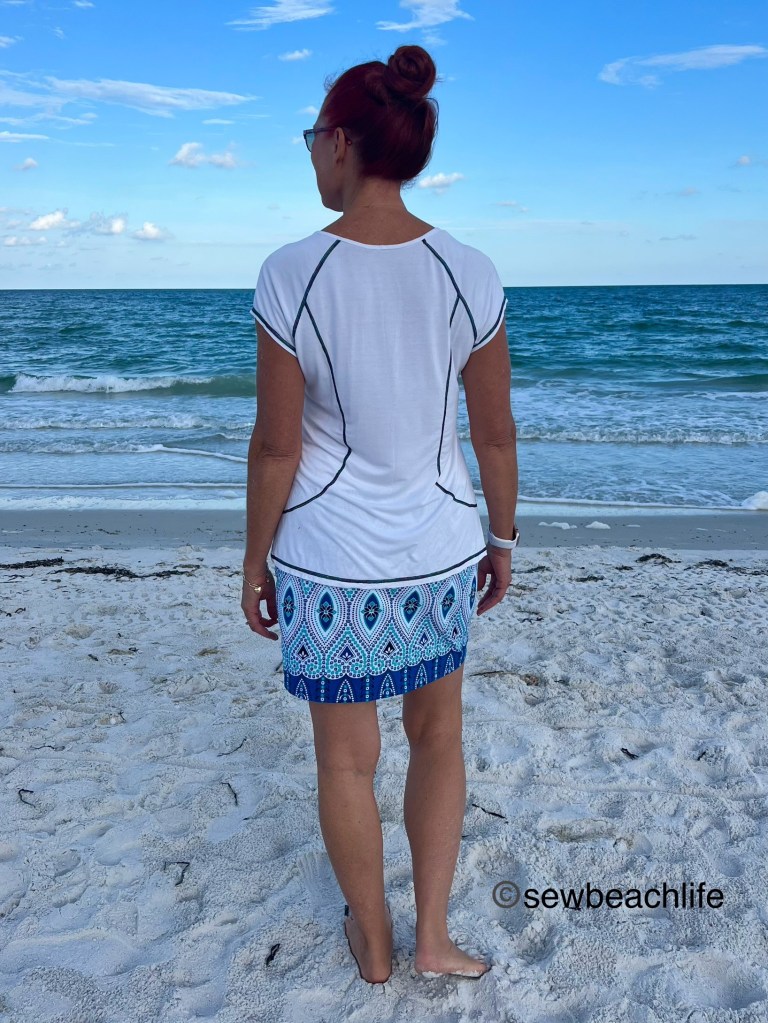
The skirt fits great, but since I’ve lost weight the Waimea Rashguard Top I made a few years ago is getting a bit big and baggy on me.
It’s important to use a knit fabric with good recovery for the waistband, since this is a pull-on skirt with no zipper. There are options for a mid or high rise waistband. The mid rise worked great for me. Since I like being able to carry my heavy phone in a pocket, I generally add 1/4″ clear elastic when serging the top seam of my waistbands together. Feed the elastic (grippy side down) through the slots on the presser foot. Your waistband pieces are right sides together. Once you’ve got everything aligned, lower the presser foot, ensuring that you can see that the elastic is back to where the needles will catch it.
Using a four thread overlock with a stitch length of 2, stitch width on M, and the differential at 1.3, serge around the top of the waistband. You don’t need to stretch or pull on the elastic. If you do, the elastic will end up a bit too tight, giving the dreaded “muffin top” look. Just gently let it feed through your fingers and let the machine do the work.
I love all three of the Paseo Skirts I made, and can’t tell you which is my favorite. Which one do you like the best?
The details:
The Paseo Skirt from GreenStyle Patterns comes in sizes B-M (hip sizes 32″-62″) with pencil or straight options, shorter or longer lengths, an optional flounce, an optional curved faced hem, optional front pockets and/or back welt pockets, a mid or high rise waistband, and optional undershorts in two lengths that can be plain or have side pocket panels. Whew, I think I listed all the options! I love patterns with a lot of versatility. They make me feel like I really get my money’s worth because I can make dozens of skirts and they can all look a little bit different.
My blue skirt is nylon spandex swim purchased as a destash from Ragamuffin Fabrics. I wore it with a blue modal Leeward Tank, you can read the post here.
The teal skirt is upcycled scuba, with a mid rise waistband made of supplex from GreenStyle Fabrics. It was worn with a black rayon spandex Staple Tank (read post here) tied in a knot.
The border print skirt is a stretch twill panel (with not-quite-enough stretch) from Mood Fabrics. Fortunately, I am on the very bottom edge of my size range and it works. You’ll want to pay attention to the fabric stretch requirements, especially for the waistband. You can read more about the Waimea Rashguard top worn with it here.
This is one of my favorite patterns, and will be made again and again. It’s perfect for traveling and wearing out and about. GreenStyle has knocked it out of the park again!
The links to GreenStyle may be affiliate links (if I did them properly!) which means that I may earn a few pennies if you use my links without it costing you anything extra. Since this is my blog and represents me, I always give my honest opinion about any patterns, fabric, or supplies that I talk about. I do like knowing whether the time I spend writing posts actually interests people enough that they take a look at the patterns I review, but I write for me. It’s one more creative pursuit that I hope is helpful or interesting to others. I write to share my love of sewing and to encourage others to love it as much as I do! 🙂
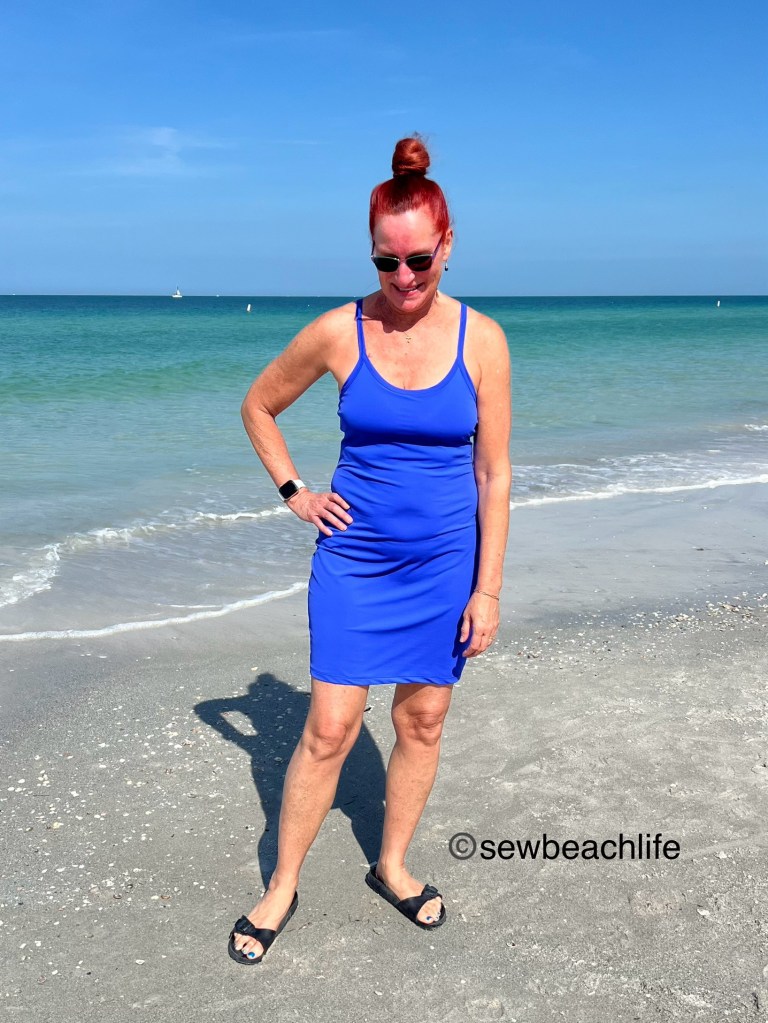
The new Savannah Dress pattern is so cute! I love that it has so many options: a fitted look (with or without a center back seam for extra shaping!); a half or full circle skirt; narrow or wide straps that can be sewn as straight, crossed or in a V; an optional shelf bra, with a full bust option; and an optional removable bra cup panel.
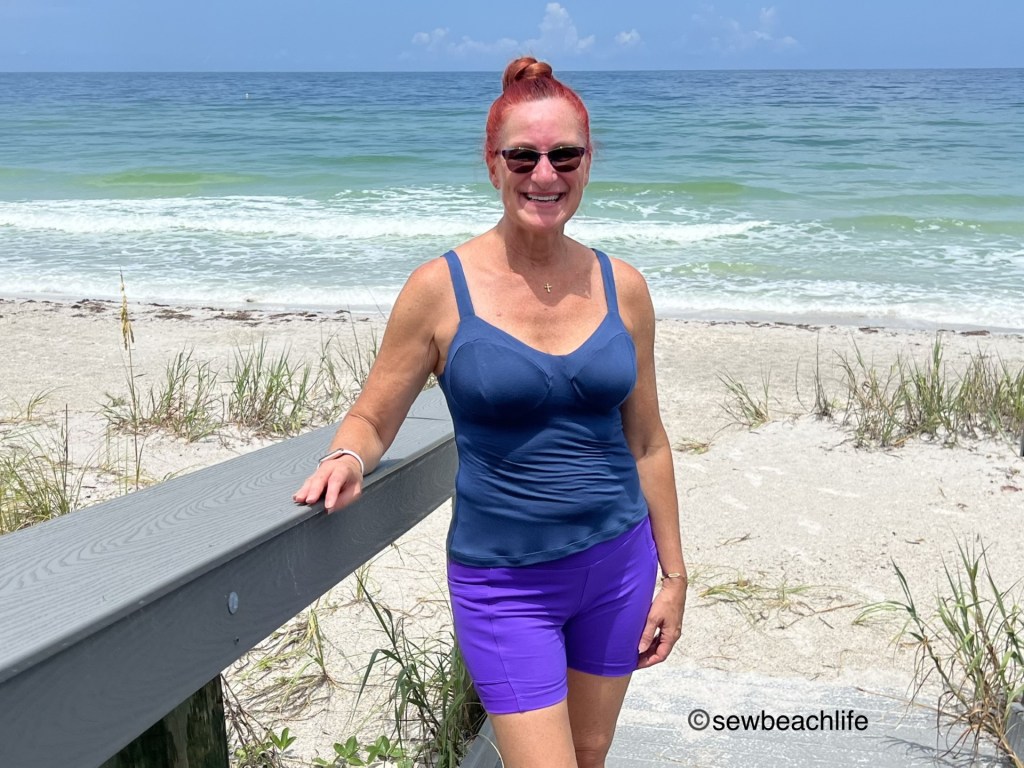
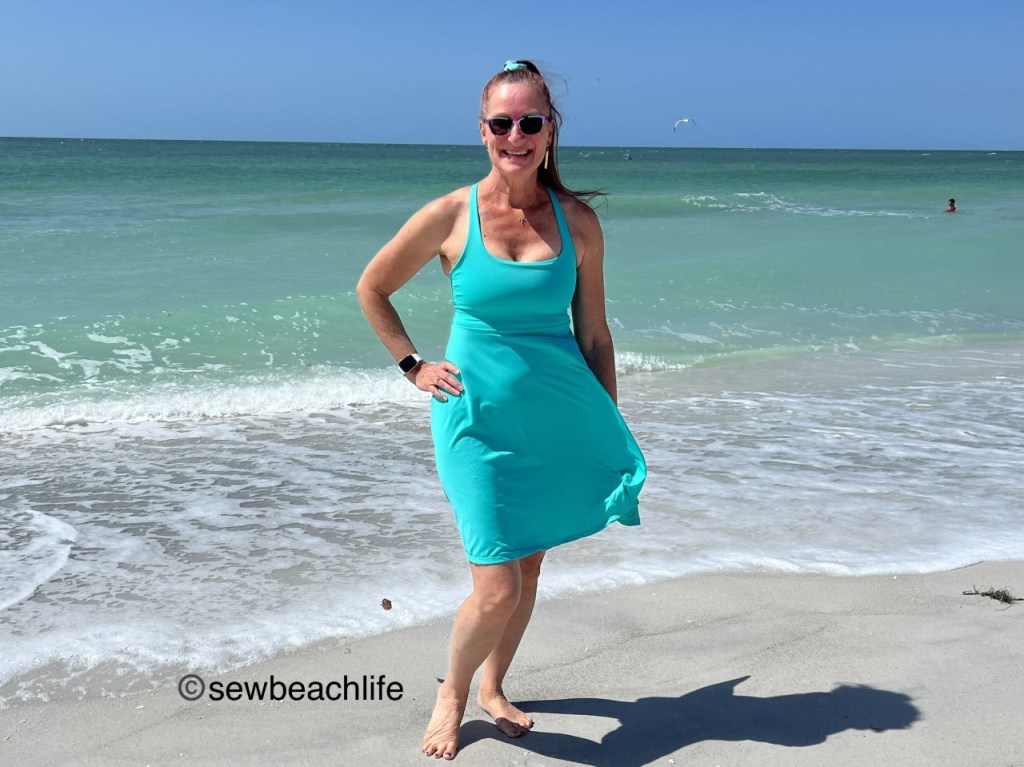
I don’t normally wear fitted dresses, but this one intrigued me. I’m super glad that I’ve made a couple because they are comfortable and perfect for the sunny weather here in Florida.
Fitted dresses are great for walking the beach because even on a windy day, you don’t need to worry about a full skirt blowing up in the wind. Although technically, you don’t need to worry anyway, because this pattern includes shorts too!
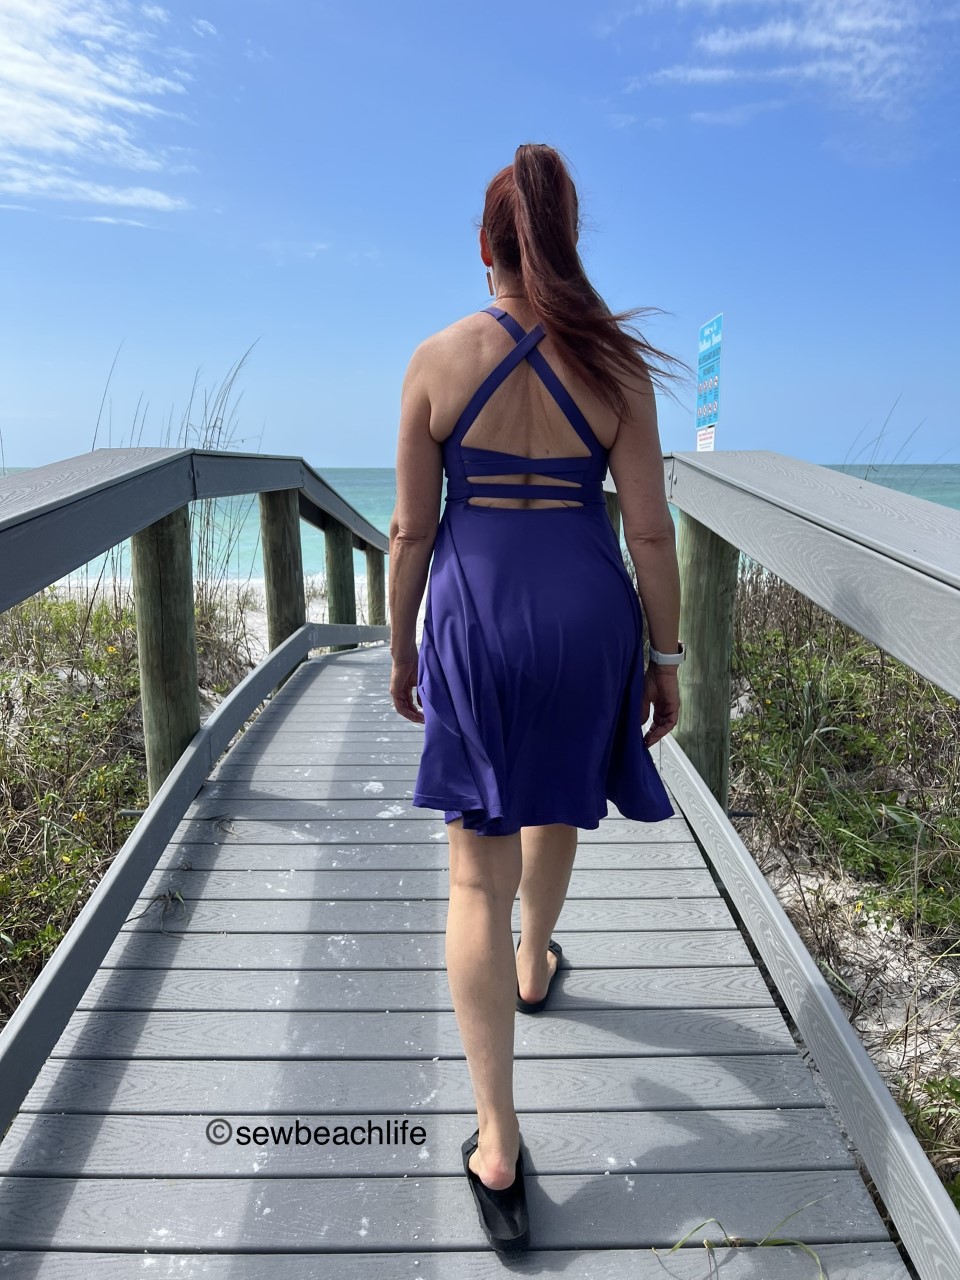
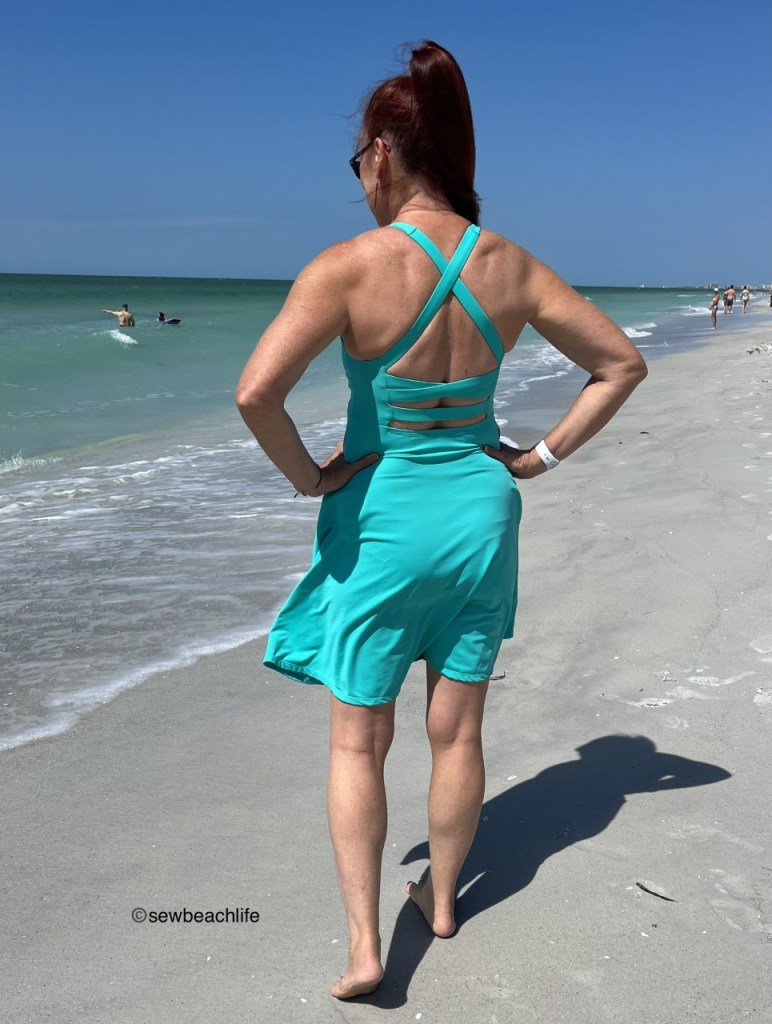
I chose the straight skirt option for both of my dresses and made the optional shelf bra (because who wants to deal with a strapless bra?) with crossed straps. The first dress had the one piece back, but several pattern testers thought that perhaps a seamed back would better fit and accentuate our curves. The designers made that option happen, and I like it!
Have I mentioned how much I love well-drafted patterns, and designers who work hard to try and make a great fitting pattern? Probably several times now! It really does make a difference in your sewing success when you use a well-drafted and tested pattern, and grade to fit your body.
Speaking of grading, always start by taking fresh measurements of your upper and full bust, waist, and hip, and reference the size chart before printing your pattern. Use the layers function when you print, and print just the size(s) you need. You may want to print a size larger and/or smaller if you’re on the edge of a size range. My upper bust measurement puts me in a size E, with my waist and hips falling into size G. So that’s how I graded the dress, and made the shelf bra in size E.
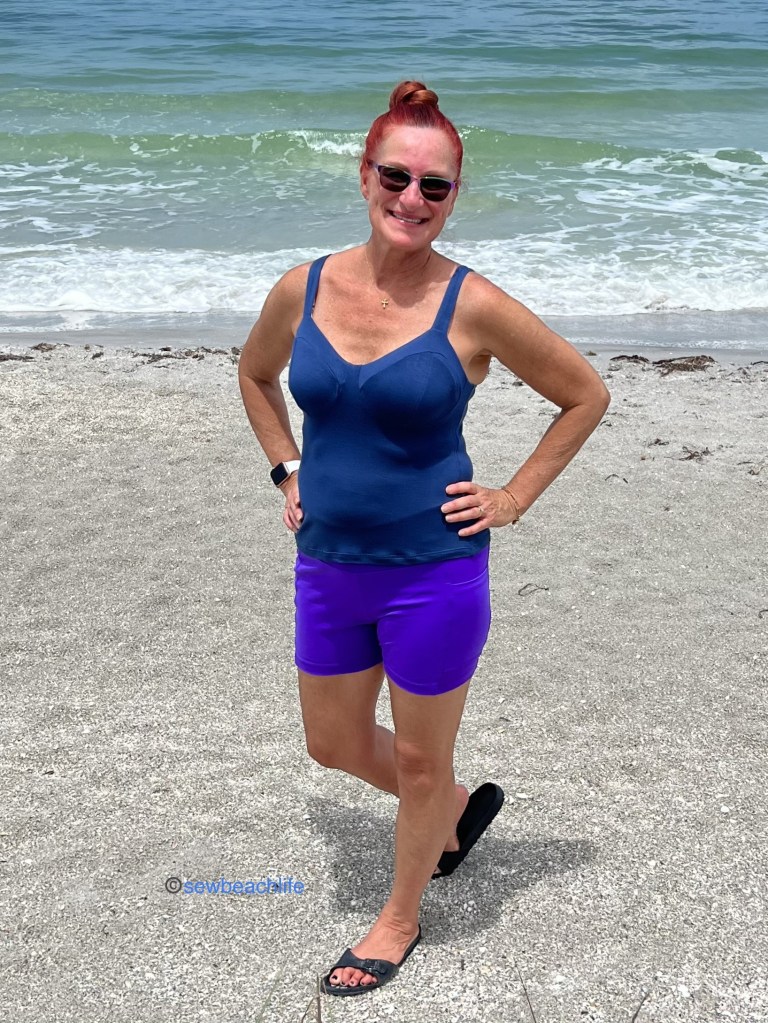
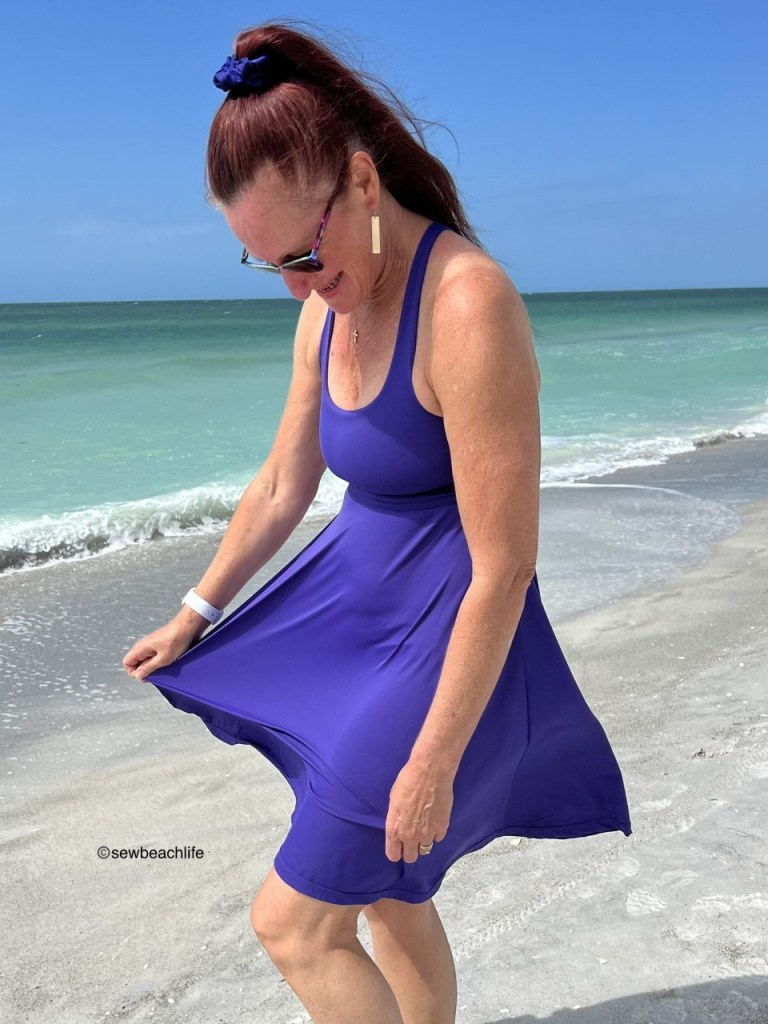
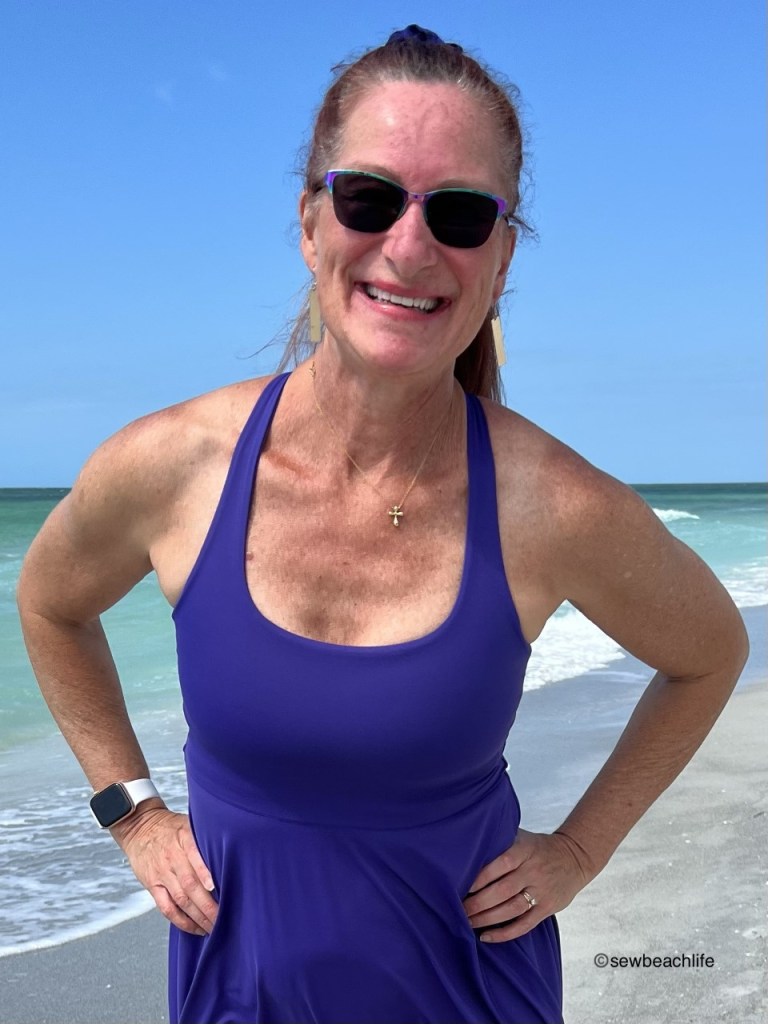
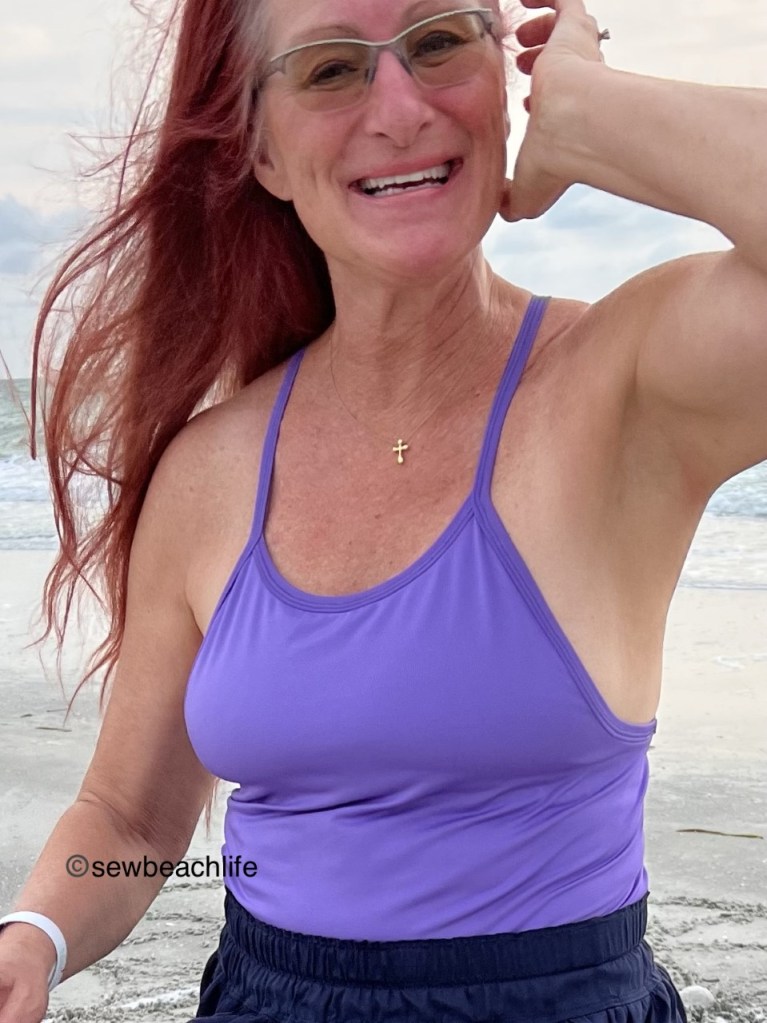
I didn’t use powernet in the shelf bra of the purple dress, but I did add the optional bra cup panel in case I ever want to add cups. It’s pretty supportive, even without powernet. This purple nylon spandex tricot was purchased at Phee Fabrics, and I love the happy color!
Supportive enough, even without powernet or bra cups, which is saying something considering I am a mature Grandma!
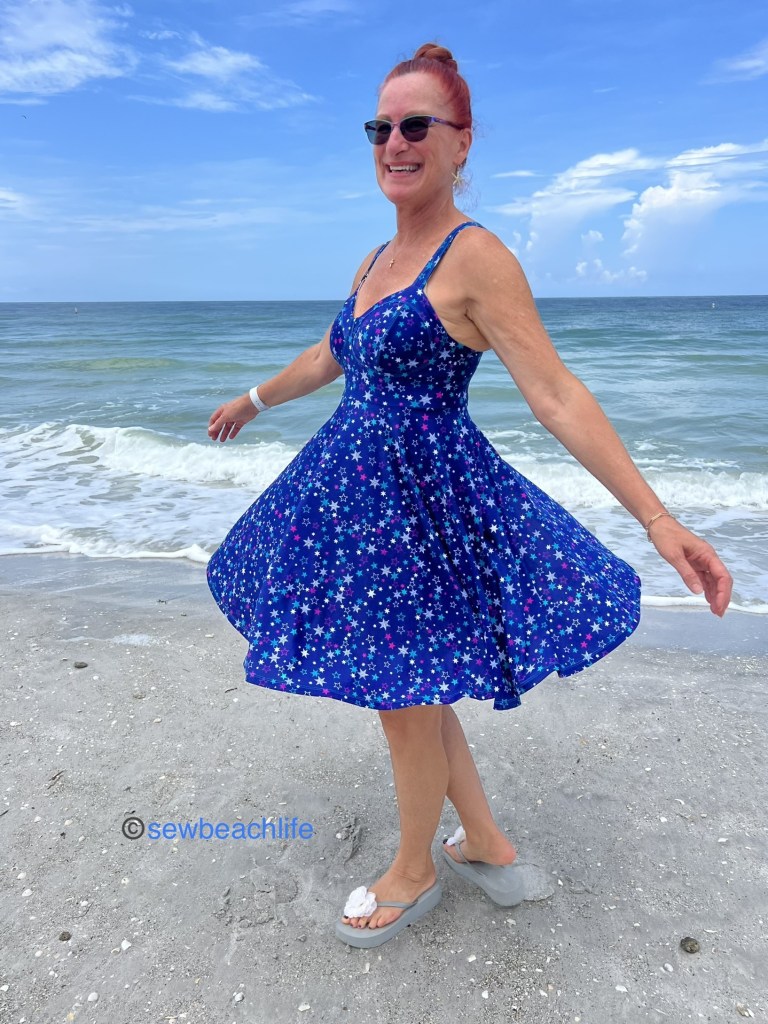
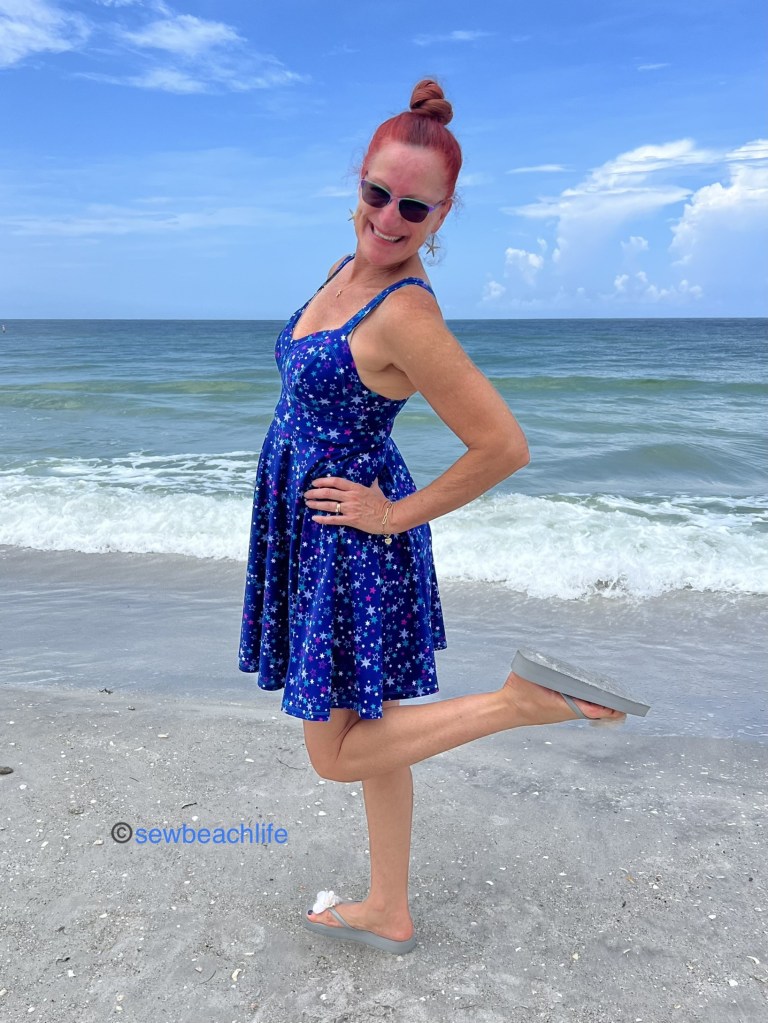
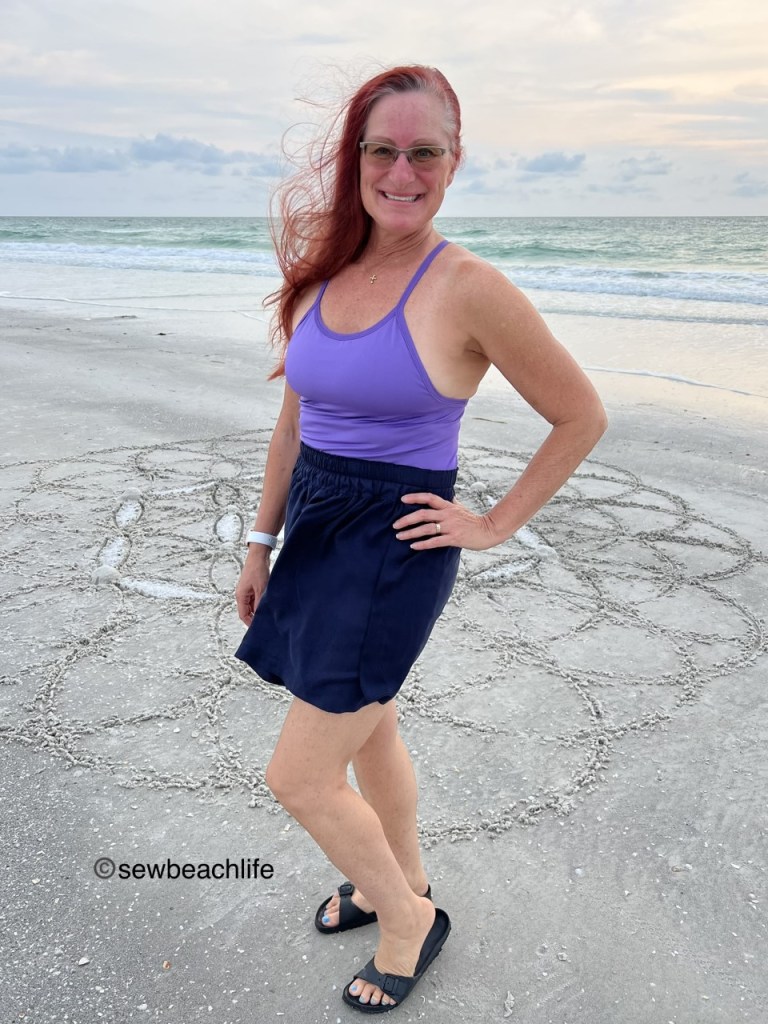
The center back seam really does add nice shaping if you have a curvy booty, or sway back. It also seemed to save on fabric, because I was able to fit my blue dress on one yard of 60″ fabric. If you’ve followed my blog or noticed my comments on sewing pages, I am all about playing fabric tetris to use the least amount of fabric possible, because I love high quality fabric. The beautiful blue nylon spandex fabric was purchased from Porcelynne.
The center back seam shaping fits nicely over your curves. And if you’re wondering, my straps are crossed and stitched at 2″ to either side of center.
I decided to use powernet as the optional bra cup layer on the shelf bra of the blue dress. I probably should have used a layer on the shelf bra back too for a little bit of smoothing, but whatever! Hopefully people are looking at my back muscles from twenty plus years of yoga rather than the back fat. 😉
A bit more support with the layer of powernet, though I don’t know why I bothered cutting the openings for bra cups, since I don’t use them.
Did I mention that the dress has multiple length options? I cut on the shortest length line, adding 1″ to the length because I am tall. The longer lengths hit below knee, which isn’t my thing on this style of dress. The circle skirt pattern pieces are formatted so that you can easily choose the length you want. Super helpful, because when I make the half circle skirt version, I’ll make it a bit longer than this.
Slightly above the knee seems to proportionally be the best length on me for summer dresses.
Do you want to hear something amusing? My husband and I walk along a busy road to the beach to get photos. It is spring break season, and traffic is heavy. First, I got whistled at while walking. Hahahahahaha! And on the way back, a young gentleman leaned out the window of a passing car making, lets call them complementary comments on my appearance. Oh my! I mean, obviously my husband thinks the dresses are “hot” and loves it when I wear them. But it cracks me up when a (much) younger dude still thinks I’ve got it! 🙂
Making a pattern that fits your style and body not only looks flattering, but gives you that extra boost of confidence to really enjoy wearing what you make.
The details:
Savannah Dress from GreenStyle, in sizes B-M (fits full bust sizes from 30″ to 61″, hips from 32″ to 62″)
Thank you for reading and sharing my love of patterns, sewing, fabric, and creating practical, useful garments! ❤
The links to GreenStyle may be affiliate links (if I did them properly!) which means that I may earn a few pennies if you use my links without it costing you anything extra. Since this is my blog and represents me, I always give my honest opinion about any patterns, fabric, thread or supplies that I talk about. I don’t even bother to use aff links when I share on social media, so obviously it’s not a big deal to me whether you choose to use them. I do like knowing whether the time I spend writing posts actually interests people enough that they take a look at the patterns I review, but I write for me. It’s one more creative pursuit that I hope is helpful or interesting to others. I’m writing to share my love of sewing, not to make money! 🙂
My husband is very supportive of my sewing, whether it be tolerating patterns and fabric spread across the dining table 🙂 or the time I spend in front of my machines. So the man definitely deserves some of my sewing love!
I was able to test the Ragamuffin Patterns Men’s Boxer Briefs and added quite a few pair to my husbands underwear wardrobe. My husband is easy going and relatively easy to please when it comes to gym shorts and workout shirts, (which is his normal daily outfit other than dress clothes for Mass on Sunday). But he is quite particular about comfortable and supportive underwear. I don’t blame him, because who would want to wear underwear that doesn’t fit properly? This made him a perfect candidate for pattern testing the Boxer Briefs!
That may sound weird, but truly, the whole point of testing a pattern is to perfect the fit, ensure that it’s comfortable across a range of sizes, offers enough style options to be appealing, and that the tutorial makes sense to sewists from beginner to advanced. So pattern testers need to be able to articulate what they like (or dislike), how it fits, and what could make it better.
I’ve tested enough patterns to understand the importance of clearly communicating with a designer. But it’s a little different when you aren’t testing the pattern on yourself. Luckily my husband was patient enough to try on multiple versions and explain what he liked and what changes or tweaks to the pattern he would prefer.
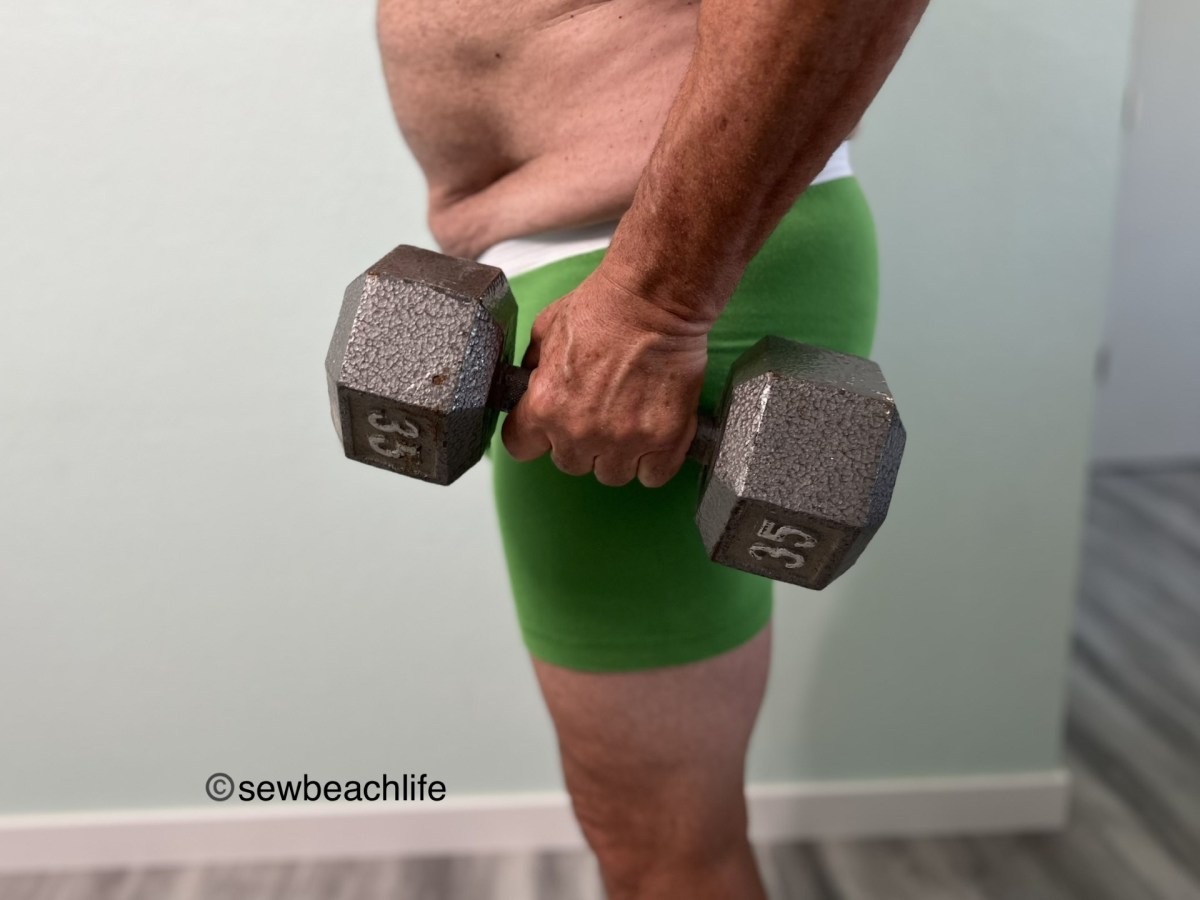
The Men’s Boxer Briefs pattern is loaded with options (in sizes XXS to 6XL) with four lengths from undies to thigh length; no fly; classic fly; and contoured fly with no, side, or horizontal opening; band, exposed, or hidden elastic waistband; leg finish options; and an optional internal hammock.
Long a fan of expensive Saxx and Tommy John underwear, my husbands preferred style was easy to pin down: briefs length (though he’ll wear trunks length), and horizontal contoured fly with an internal hammock.
He says the no back seam is very comfortable, although there is a back gusset option if you like color-blocking or want to use smaller scraps of fabric.
I’ve made side fly underwear for him before, but this was the first time I’ve sewn horizontal flys. Frankly, I think a horizontal fly is an easier sew. You still have that contoured pouch seam to stitch, but really, they are a pretty quick sewing project.
These aren’t the final version of the pattern so the fit has been refined a bit, but they are still always in rotation, and my label addition just cracks me up!
He loves his made with love underwear, and wears them as much as (if not more than!) his name brand ready-to-wear ones. As he’s a bit of a gym rat, he says that the internal hammock is important to “keep everything high and tight” for comfort during workouts.
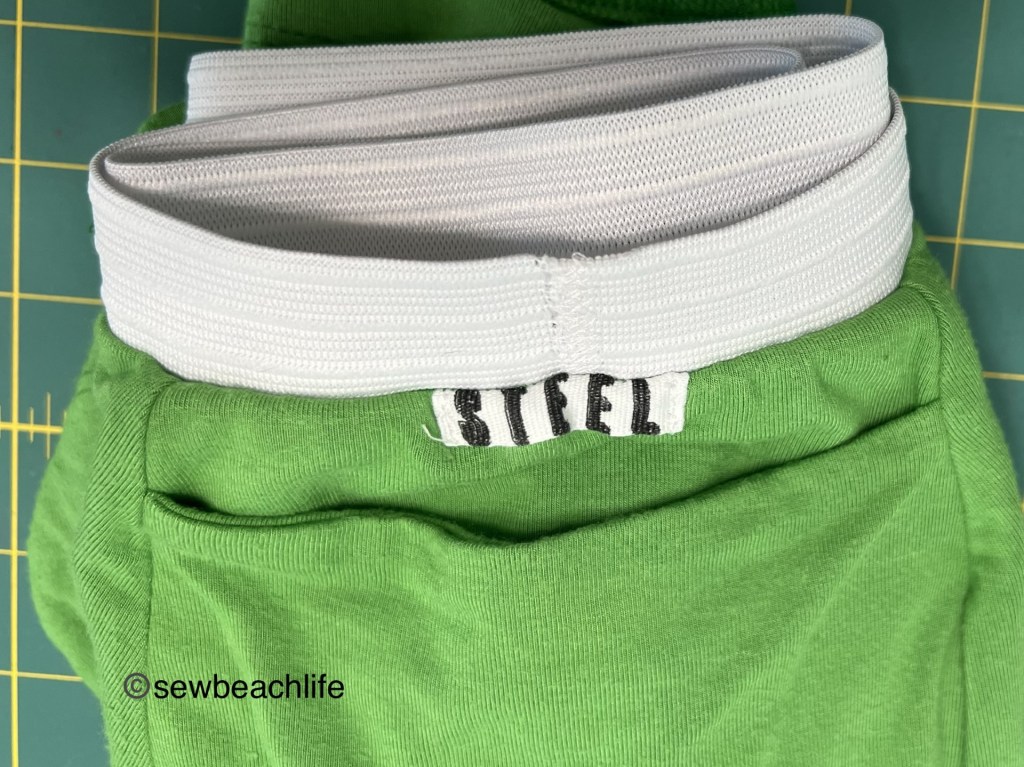
I like adding a personal touch to my makes, and used two different methods to do so. On the green pair, I added a little label centered at the top of the pouch and serged into the waistband. I like saving interesting selvedge pieces if I think they are cute or funny or may be useful for something. Knowing that I had a piece of selvedge that had the word steel on it, I thought it would be fun to use on my husbands underwear. Because hey, what guy doesn’t want to be a man of steel, right? 😉 It’s literally just folded under twice on the sides to hem the edges. The bottom is the finished edge of the fabric, and the top was serged in place when attaching the elastic for the waistband.
A fun tag adds personality!
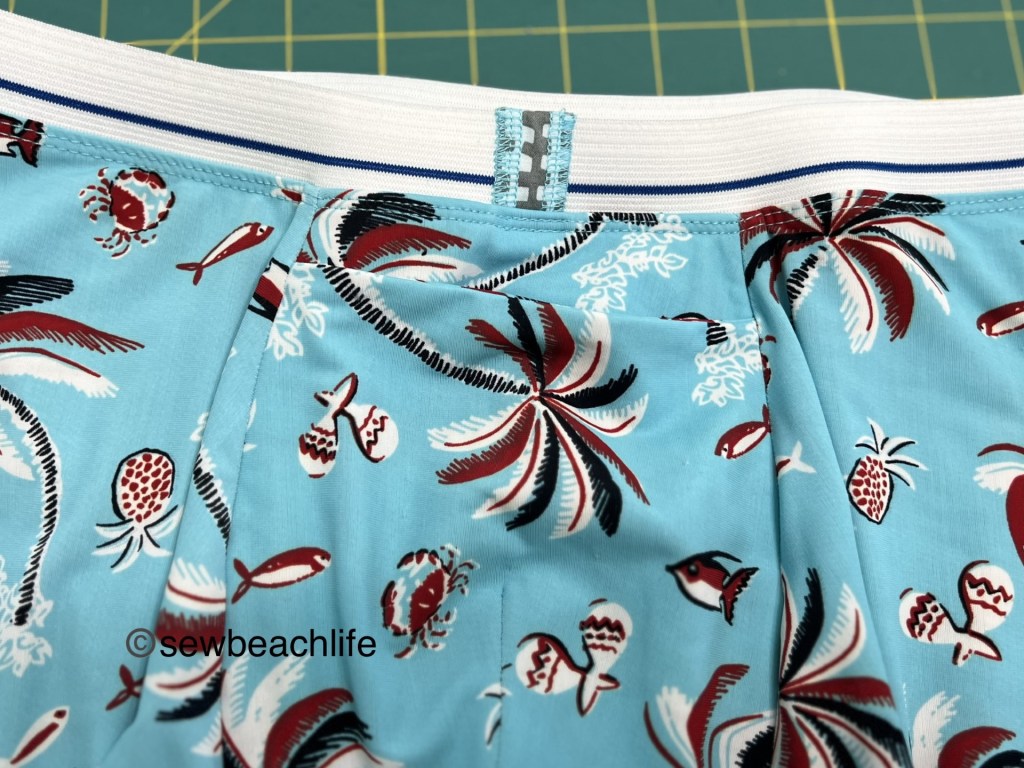
I also like giving a finished look to elastic waistbands by making a decorative seam cover. Simply cut a rectangle of fabric 1″ wide by two times the width of the elastic you are using (plus 1/4″ to give you some wiggle room). My underwear elastic was 1-1/4″ wide so I cut a piece of pretty fabric 1″w x 2-3/4″h using my rotary cutter and a ruler, to ensure that I stayed straight on the grain. Use a 4 thread overlock to serge the two long edges of the rectangle to keep it from fraying. I like overlapping elastic by 1/2″ and zigzagging all around the overlap when using elastic for waistbands. Then center the seam cover over the elastic join, pulling the raw ends to the bottom edge and pinning in place. Finish the seam cover by zigzagging the two long sides. The raw edges of the fabric will be enclosed in the seam when you attach the elastic waistband.
A pretty and practical seam cover.
When I was ordering fabric to make his underwear, I showed him the Patriotic Island Swim print from Ragamuffin Fabric and he thought it looked cool. When I pulled the freshly washed fabric out of the dryer to show him, he felt it and said, “Oh that’s too nice to use for underwear!” 🙂 Baby, you deserve nice fabric. And nice custom made underwear!
After all, he is a pattern cover model!
The details: using the coupon code SewBeachLife will give you 5% off your entire purchase of Ragamuffin patterns and/or fabric and supplies! The coupon code is sort of an affiliate link, and I’ll earn a few pennies if you use it.
He loves them so much that I took apart an earlier test version made in this fabric and cut the updated pattern pieces out of my fabric scraps and sewed him up a second pair in the exact same fabric! Which I guess tells you that they are an economical sew, since I was able to make two pairs in size 2XL out of one yard of fabric.
I received the pattern for free in exchange for testing, but feel that it is well worth buying as it has so many options and an extensive size range. The test was a long one, but totally worth it for the final product!
Thank you for reading and sharing my love of patterns, sewing, creating, serging, fabric, and making practical, useful garments! ❤
The timing of the new GreenStyle Briny Swim Top pattern test worked out perfectly with a scheduled trip to our daughter and son-in-law’s home. I make matching clothes for my granddaughters all the time, and they love it. They frequently ask to wear their matching dresses, tops, shorts, etc. But I very rarely get to match with my daughter because she lives so far away.
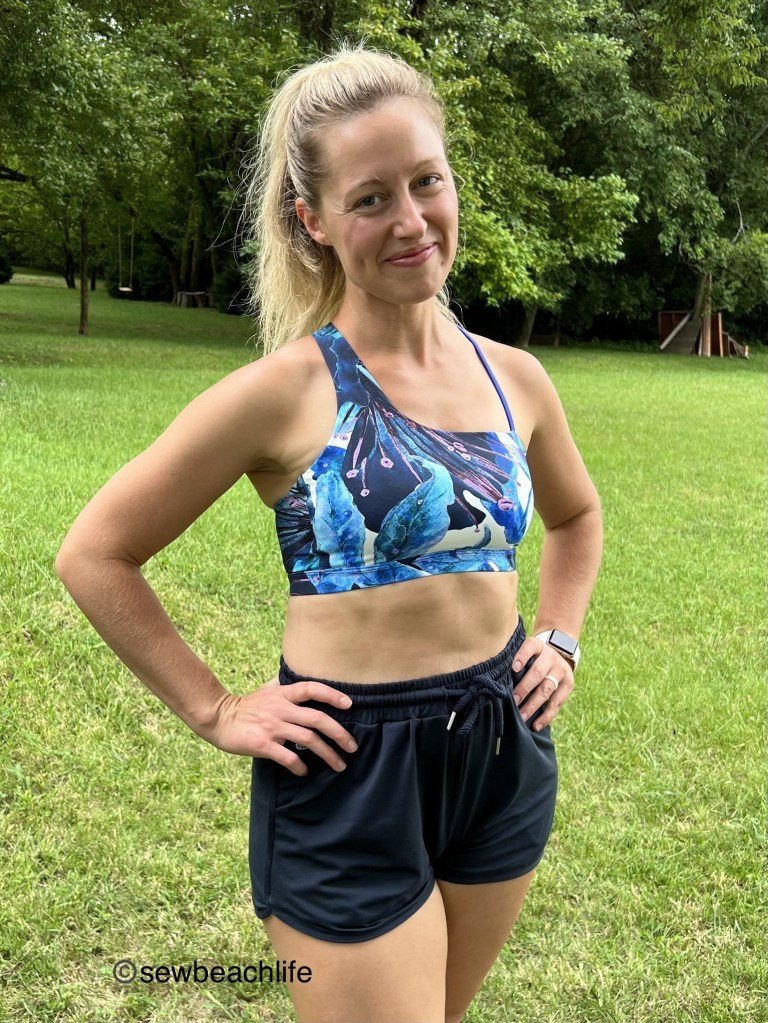
As soon as I saw the tester call, I sent a photo of the line drawing to my daughter and asked her if she wanted a cute new swim top. I knew that it was a style that she would look great in, and she loved the look. So matching swim tops it was!
My daughter is a smaller size than me, and has a smaller cup size, and the size D fits her perfectly! She chose to have the optional skinny strap, and thought that the bright blue nylon/spandex swim that I used as the lining fabric would be a cute contrast against the GreenStyle Align 2 Paradise print main fabric.
Isn’t she a beauty? Let me tell you, her inner beauty far outshines the outer. I am so blessed to have her as a daughter!
The crossed straps in the back highlights the fun contrast of the solid against the print, and the narrow versus wide fixed strap even better.
It’s such a cute pattern! Very on trend, and looks cute whether worn with swim bottoms or shorts. It’s so comfortable that she didn’t take it off after photos, and wore it for the rest of the day. She threw a white sheer mesh top over it, slid on a pair of pants, and wore it out for date night that evening. I should have grabbed a photo of her, but I was trying to give the girls their baths and ready for bed so that she and her husband could get out the door.
As I have a fuller bust, I made the size E with the darted bust option. Since I knew that I would be sewing while visiting, I had to pack up my serger and fabrics and attempt to sew during quiet times. Let me tell you, when you have very active three and five year old granddaughters who want to play all the time, (well, other than when they are asking for food :-)) there is no quiet time! Hahahahahaha! I don’t know how all you Mama’s with little ones do it.
I took the girls on lots of stroller strolls, visits to the playground and pool, played dress-up, built with magna-tiles, played with stuffies, played pet shop (where the girls pretended to be snow leopards, clouded leopards, cheetahs, pink kitties, puppies, etc. and I would “buy” them as my pets. They were super cheap, sometimes $3, and sometimes $5. It was hilarious! I had to pretend to pay for them (with a beep on the imaginary POS system), and could then open the imaginary cage doors (squeak) and go in and play with whatever animals they were being at the time.)
The darted front (FBA) bodice is the right choice for me size wise. Rather than just relying on compression and a bit of shaping, the dart gives more room, support and shaping for a fuller bust. I’d get even more support from the compression of powernet, which is something that I always use in sports bras, workout and swim tops. However, when packing for our road trip, I neglected to put it in my bag of fabric, notions, thread, and sewing supplies. 😦 whomp, whomp.
It’s such a cute top however, that I’ll likely go through the trouble of seam ripping it, and add a layer of powernet to the wrong side of the main fabric so that I can feel more supported when wearing my Briny as a sports bra for roller skating.
I added the optional strap to mine, and with a heavier bust, I chose to make my strap have a finished width of 5/8″, a little wider than than the pattern calls for. Surprisingly though, I think that if using powernet in the top, I would feel comfortable even without the extra strap. I guess I’ll just have to make another one, and check it out. 😉
I think the top looks great worn with my favorite GreenStyle Moxi Shorts bike shorts (the compression under layer to the loose shorts.)
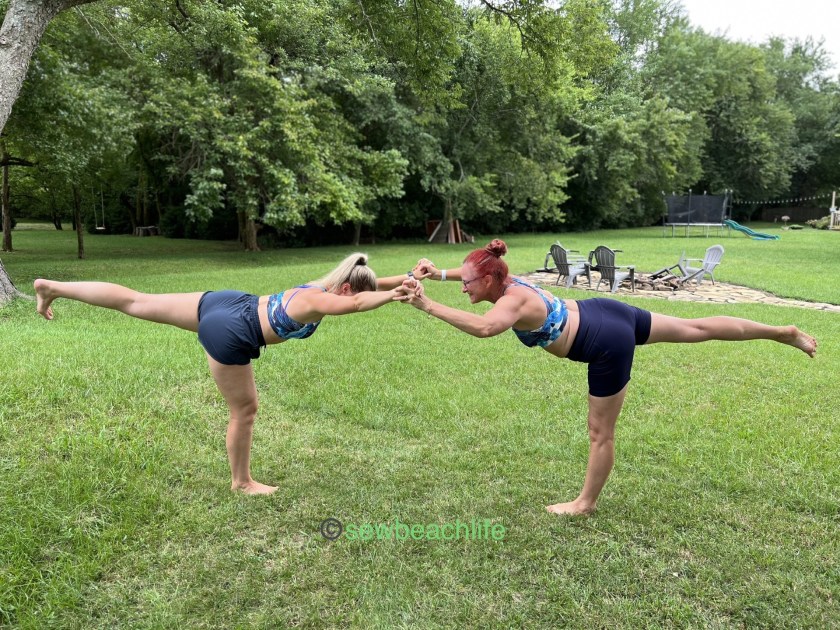
If you ever have the opportunity to make matching clothes with your adult child(ren) and have a photo shoot, I highly recommend that you do it! It’s fun, you get the chance to be awkward and silly posing together, and you’re wrapping your child in a handmade hug. ❤
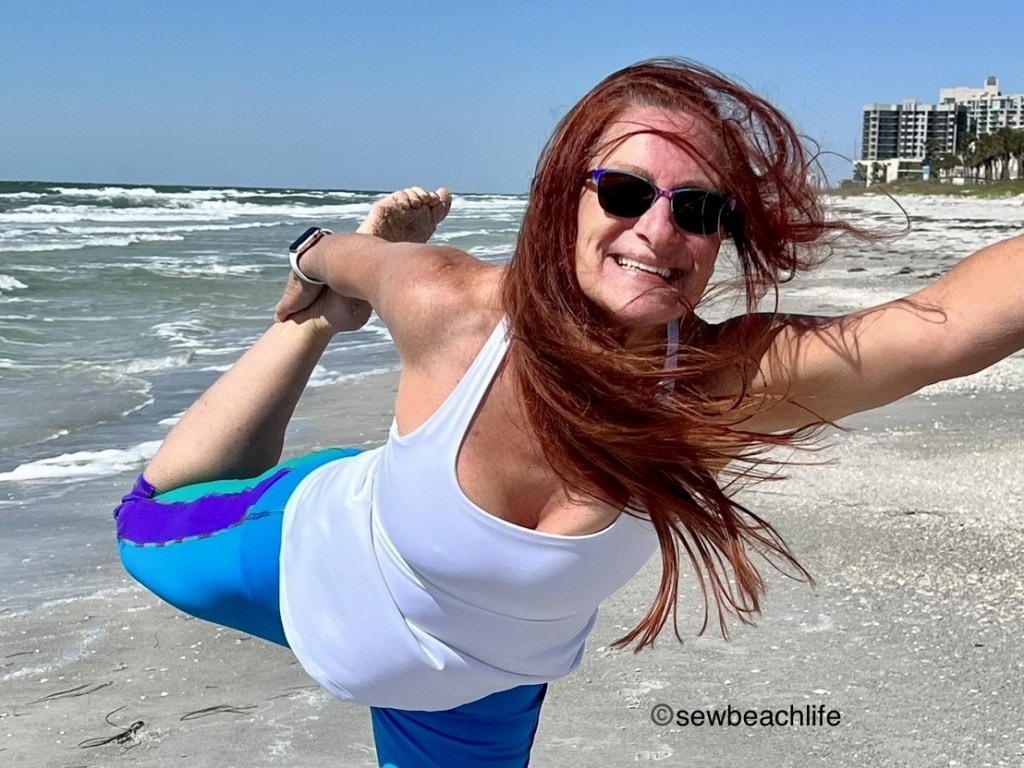
I swear my leg was higher than this! We only did warrior III because she said she couldn’t do a yoga toe hold. I think she can, especially if we held on to each other. 🙂
Hugging my girl in the cute handmade hug I made for her.
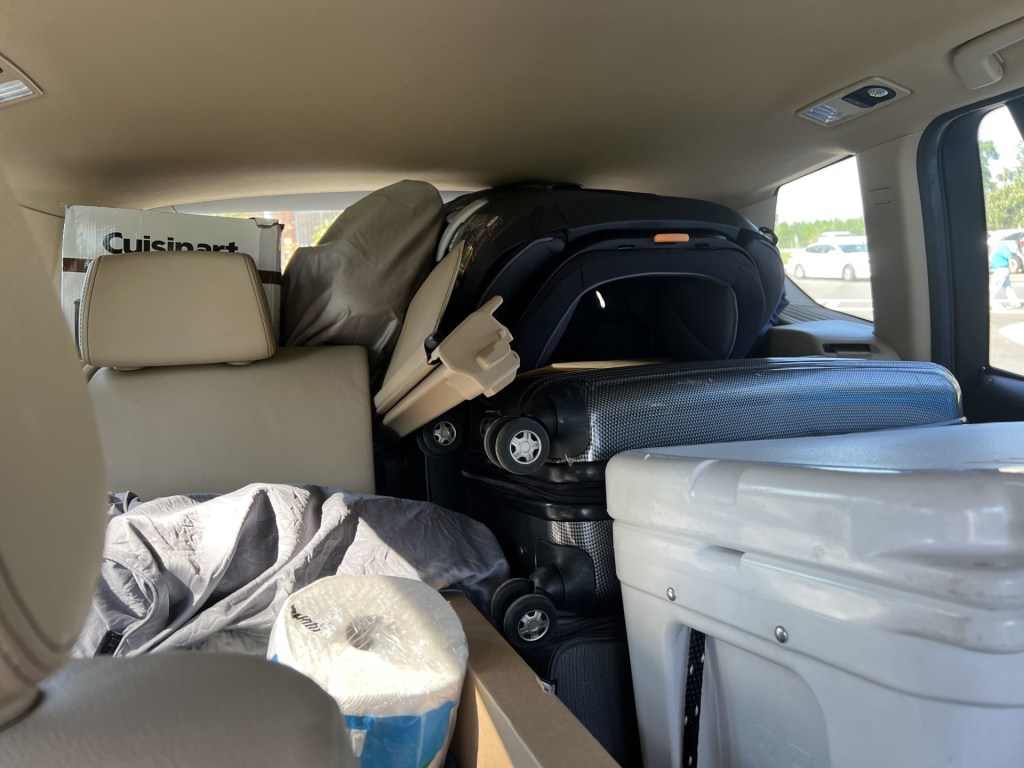
Since I’d never traveled with my sewing before, here are my best tips: pack your serger or sewing machine in it’s original box, so that it can be safely cushioned by the styrofoam and original packing materials. I brought my Babylock Triumph (combination serger and coverstitch machine) with me, and there is no way I would have done it without it being in the original box. Our car was completely full with not only suitcases, our cooler and bin of snacks, our pillows, and a small blanket, but a coffee maker, car seat, and our daughters order from Ikea as she doesn’t have one near her.
It’s a 13 hour drive, so a cooler with water, sliced veggies, and fruit is essential. Especially since I have food allergies, and can’t just stop anywhere and safely eat. My serger was safely tucked in the back, all snug and secure in its box.
Bring all the fabric (double checking that you have powernet if you’re going to need it!), thread in matching colors, elastic, and any sewing notions you may need. You can’t count on whatever local sewing or big box stores to have what you want in stock. Try to have your patterns printed out, and traced in the needed sizes. When you’re doing a pattern test, that’s a little challenging because there is likely going to be an updated version of the pattern before finals. If where you’re staying doesn’t have a printer, check out the local options for printing your patterns. Other than that, just enjoy and go with the flow. Traveling and visiting people you love is fun. And while things may not always work out as planned, enjoy those little moments and memories, and listen for every “Grandma, I love you” and take every snuggle and hug that comes your way.
Thank you for reading and sharing my love of creating, sewing, serging, great patterns, fabric, and making beautiful, well-fitting garments! ❤
The links to Greenstyle may be affiliate links, which means that at no extra cost to you, I may receive a few pennies if you purchase through my link. As always, I only give my honest opinion. After all, it is my blog, which represents me!
It’s a dress, crop, top, cami, and corset style top all in one
Sometimes a pattern testing call just speaks to you, so you apply and hope to get chosen for testing. I’ve never tested for Ragamuffin Patterns before, and was excited about testing for them. I’ve got to say, Jennifer was super easy to test for. She was very open to all comments on or questions about the pattern pieces, construction, and how everything fit all the testers.
One of the main reasons I was drawn to the Princess Party Dress was the cup size options and the flattering shaping they provide. Whether you have an A or an E (or larger) sewing cup size, having cup shaping that fits your body means you’ll get the most customized and flattering fit.
To ensure proper sizing, testing started with a cami top. My measurements put me in a size Large E cup. I graded out to an XL from waist to hips because I was making the classic length and using rayon/spandex, and didn’t want the back to ride up. Fabric will always choose the path of least resistance, and if it’s too snug across the hips, it will ride up towards a narrower part of the body.
My cup sizing was spot on, and the E cup size fit well.
The cup shaping is so flattering, and the straps are perfectly placed to hide my bra straps. Since I was using a somewhat lighter weight rayon/spandex which doesn’t have as much rebound/recovery as say a nylon spandex swim fabric, I reinforced my straps with elastic.
Obviously I could have done a better job of pressing the hem before taking photos. Yikes! 🙂
Since I knew that the size Large in an E cup fit, I was ready to sew my dress. I contemplated whether to do the princess seaming on the bodice, along with the seamed cups. After a bit of dithering, I decided that with a printed fabric the simple bodice would look best, especially since I planned to accent the cups, straps, and hem with coverstitching in a contrasting color.
I thought that my turquoise coverstitching was quite bold, but it doesn’t look like it in this photo!
One of the best things about sewing your own clothes is that you can adjust things to fit your unique body. For instance, I am longer than average from shoulder to bust point, so I made my straps 14″ long. For being taller than average, I am a bit short-waisted. I tried on my bodice before adding the skirt, and ended up taking 1″ off the bodice in the front, tapering up to 1-1/4″ at the side seams, and up to 1-5/8″ off at center back. I love customizing clothes for a perfect fit, it’s just so satisfying!
Who can resist twirling in a circle skirt? ❤
Since I’m tall, and wanted to ensure that the knee length dress actually ended up at the top of my knees, I cut the waist at my size large, but cut the hem at P2 length, which ended up perfect! It’s long enough for modesty, but short enough to be fun and flirty. Here’s my favorite tip for hemming a circle skirt: serge the raw hem with the differential turned up to 1.5. This will slightly gather the bottom so that when you turn it under to hem, it will lay nice and flat for you.
It’s a perfect summer dress, and I wore it to a party that weekend. The nylon/spandex swim fabric from Ragamuffin Fabrics is breathable, comfortable, and perfect for a fun, swishy dress.
I’m very happy with my new Princess Party Dress. It fits well, it’s a flattering silhouette, and with cup sizing, it lays smoothly over the bust, with no wrinkles or pulling. Yay!
Patterns with plenty of options really make me feel like I’m getting my money’s worth. The Princess Party Dress pattern includes a simple cami, cami with three piece cups (with or without princess seam panels), a lace-up corset style option (with front or back lacing), narrow, wide, or tied straps, cami lengths from crop to classic, and peplum, mini, or knee length skirts for the dress option. Whew! I hope I’m remembering everything.
Sorry for the crooked photo of the graphic of the options. I’m traveling this week, so I’ve got to work with what I’ve got!
I’ve worn the dress and the cami a couple of times now, and am very happy I made them. They are comfortable and cute additions to my wardrobe whether I’m taking my granddaughters for a stroller stroll, attending a party, or walking the beach.
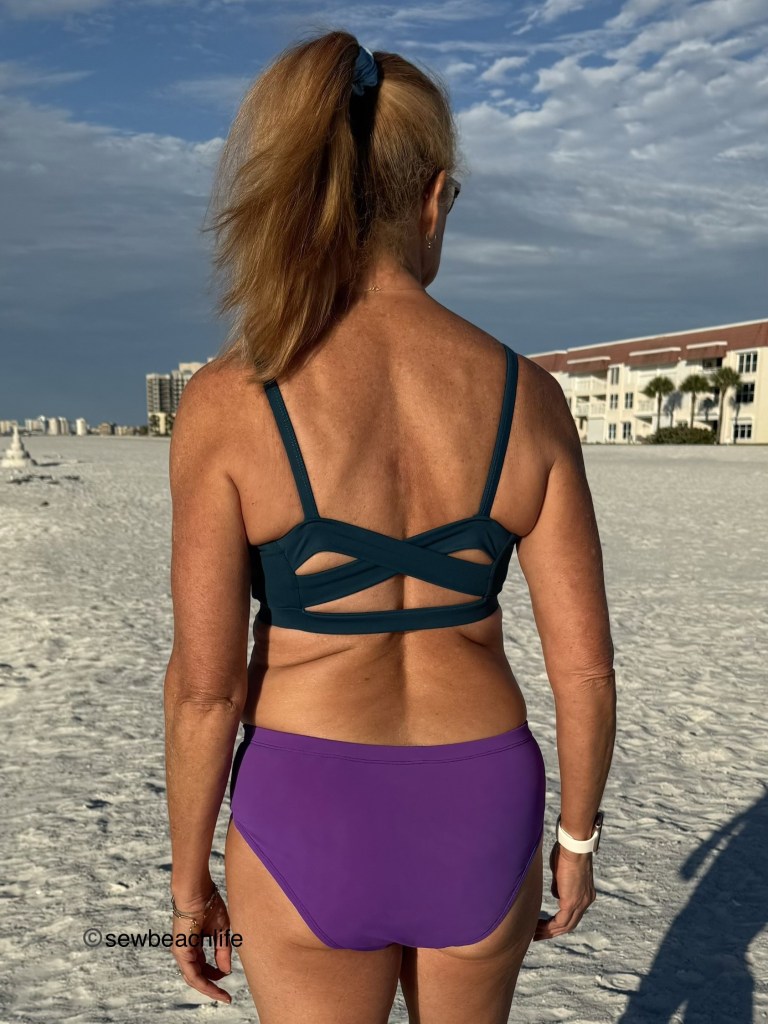
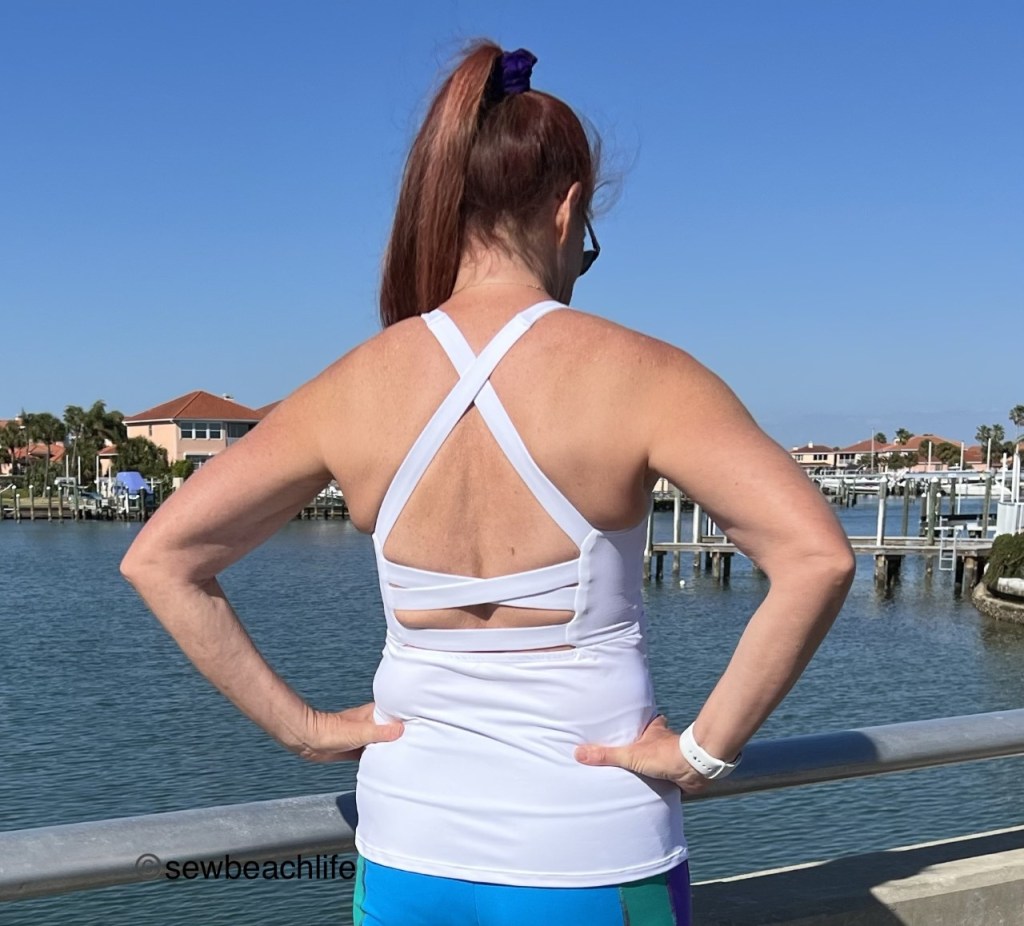
I’m pretty discerning when it comes to pattern testing, and only test when a pattern looks like something that would get a lot of wear. When I saw the tester call for the Stitch Upon A Time Spellbound Bra and Dress, I applied right away. That criss cross back is exactly what I’ve been looking for!
When you’re a bit busty, you’ve got to love a pattern that has cup sizes. Seriously! There don’t seem to be many designers in the .pdf (or paper) pattern world that include multiple cup sizes. Including cup sizes makes a pattern fit so much better. The Spellbound includes sizes XXS to 6X, along with cup sizes A-G (determined by the difference between your full bust and upper bust). Per the measurement chart, I made a size small D cup. The size chart on this is spot on, and did not require any grading. The strap lengths were perfect (which seems amazing to me because obviously there is a lot of math involved to get all five strap pieces the proper length for each size).
Although it is a shelf bra and relies upon compression, I feel quite comfortable with the amount of support. If you wanted to, I suppose you could add bra cups during construction, but I don’t feel the need to do so. This is coming from a girl whose regular bras have underwires, so that is saying something!
Pretty and supportive!
There are usually changes and updates during testing, which is kind of the point. A designer wants to ensure a great fit on real bodies in a wide range of body shapes and sizes. A higher neckline option was added for anyone that prefers a little more coverage. Another tester and I commented that we wanted to hack the bra into a dress, and Kelly (the designer) made that happen!
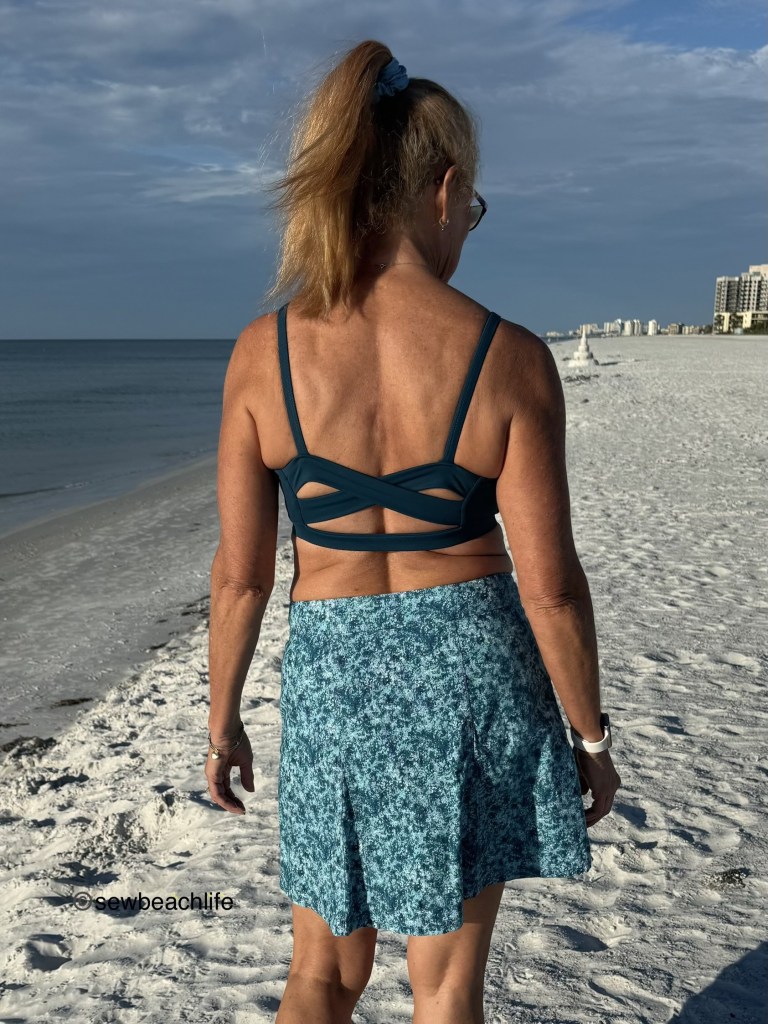
Why does it always seem to be windy when I try to take photos of a new make?
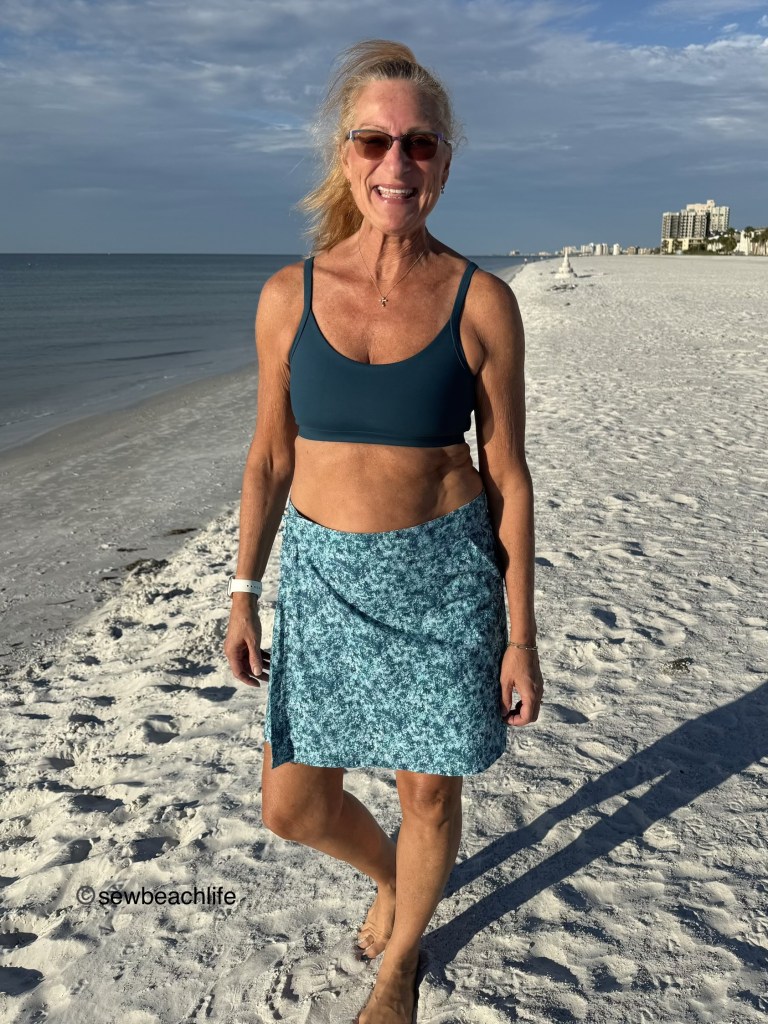
Having this bra pattern turn into dress just makes me so happy! I love, love, love it! The half circle skirt is swishy, but not too full. It’s super easy to get dressed for the day when you can wear a dress with a built-in bra. The knee-length option hits in just the right place, even on a taller girl like me.
I know some people get frustrated when trying to hem a knit skirt with a curved hem, but here’s my not-so-secret tip to make it easy: serge around the raw hem of the skirt with a 4 thread overlock with a stitch width of M, stitch length of 2, and up the differential to 1.5. This will slightly gather the hem, curling it up, which helps it to lay flat to hem. Then I like to pin up a 5/8″ hem and coverstitch it. It turns out perfect every time. Make sure to follow up with a nice press for a professional finish.
The criss-cross straps show just enough skin to look and feel sexy. Combined with the supportive front, it’s definitely a confidence boosting look for me.
Obviously one dress wasn’t enough for me, 😉 so I’ve already made two. I’m contemplating over what fabric I should try next. The turquoise dress is a nylon spandex tricot (swim) fabric. The purple dress is a nylon spandex circular knit. Both fabrics were purchased from Phee Fabrics a while back, so I don’t know if these particular colors are still in stock. It’s important to use fabric with good stretch and recovery (rebound factor) so that the bra fits well and stays somewhat firmly against the body. If you have a larger cup size, I also recommend using powernet. Though it is optional, I like the extra bust support it provides.
No matter how far forward I lean, I still feel supported.
I can wear my dresses to walk the beach, or go to the grocery store, or out to dinner. (If it’s at a restaurant that has gluten and dairy free food that’s safe for me to eat!) which is quite the challenge for me. My journey of food allergies deserve a discussion of their own on Sew Beach Life, and will probably be my next post.
The Spellbound Bra and Dress is flattering whether I’m sitting or standing. Even on a windy day! 🙂 There is a peplum top cut line on the skirt that will turn the bra into a cute, casual top. But I go to yoga class four days a week, and a flowy top isn’t practical for forward folds and headstands! 🙂
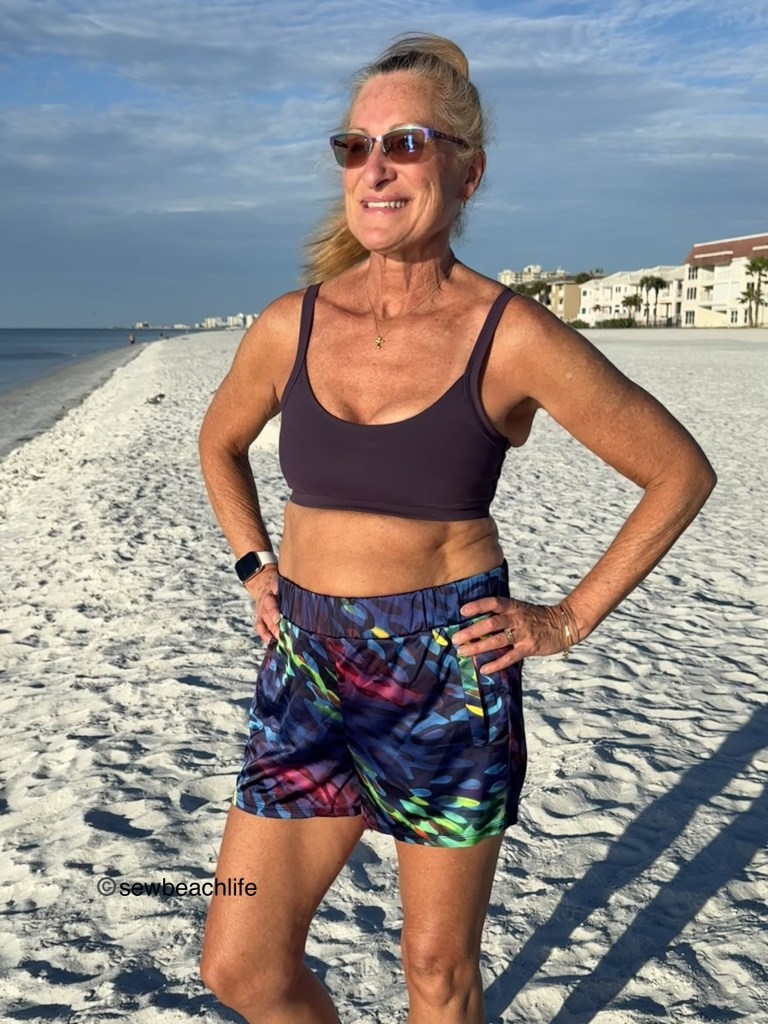
If you follow my page, you know that I can never leave a pattern well enough alone. Especially a pattern that I love as much as this one! So I had to turn this bra into a workout top. I mashed it with the Versa Cami and came up with something fun.
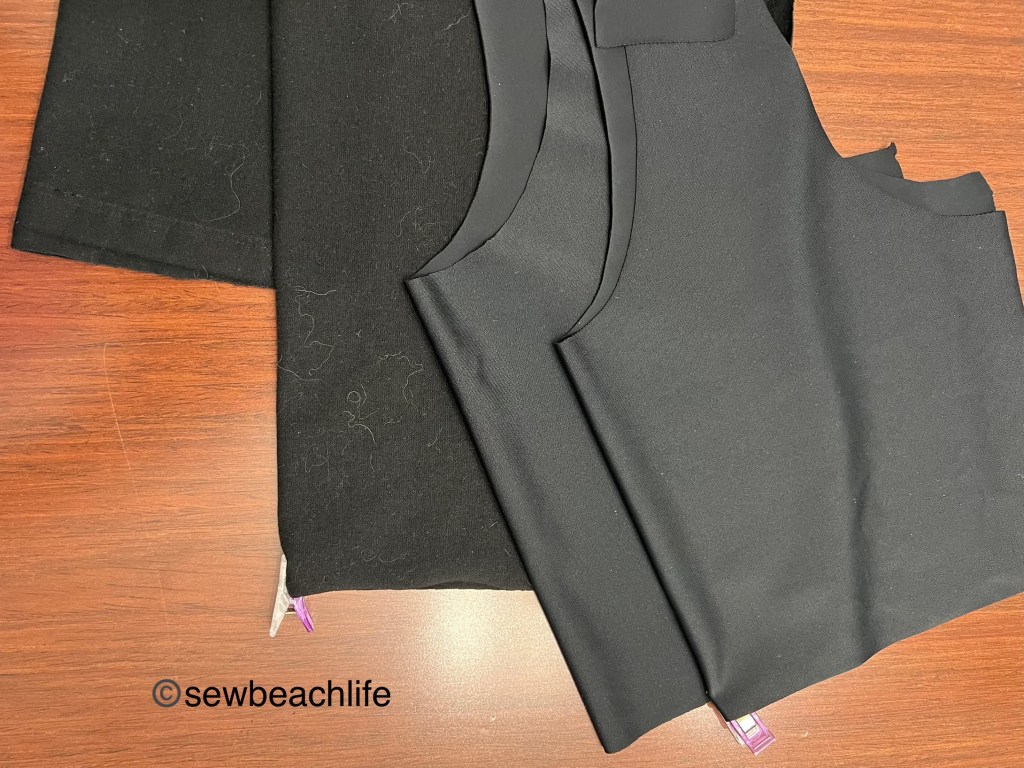
I wanted the front to be one piece, without a seam between the bra and body of the top. The back of course, has to have a seam.
To get the front pattern piece, I lined up the front of the Spellbound at the lining cut line with the front of the Versa Cami at the shorten or lengthen here line on the pattern piece. Once I traced down to the bottom of the bra front piece, I started grading out for my hips. My grading went from small to large, and I removed one inch from the small length and large width at the hemline.
To get the back pattern piece, I started at the shorten or lengthen here line on the Versa Cami, and graded out for my hips. Originally, I just went straight across and cut on the shorten/lengthen line. But after sewing it up, I realized that the straight line gave me too much fabric at center back, and didn’t show the same amount of skin that the dresses show in that area. So I refined the pattern piece and used the curve from hem of the Spellbound skirt at the top of my back piece. In hindsight, I’ll probably just use the top curve of the skirt for the top curve of my top on the next one. My grading went from small to large, and I used the small length and large width at the hemline. You may be wondering why I shortened the front piece an inch but not the back. Two reasons: I like my workout tops to hit at hip level (the Versa is a bit longer than that); and because the back has a 1/2″ seam whereas the front doesn’t.
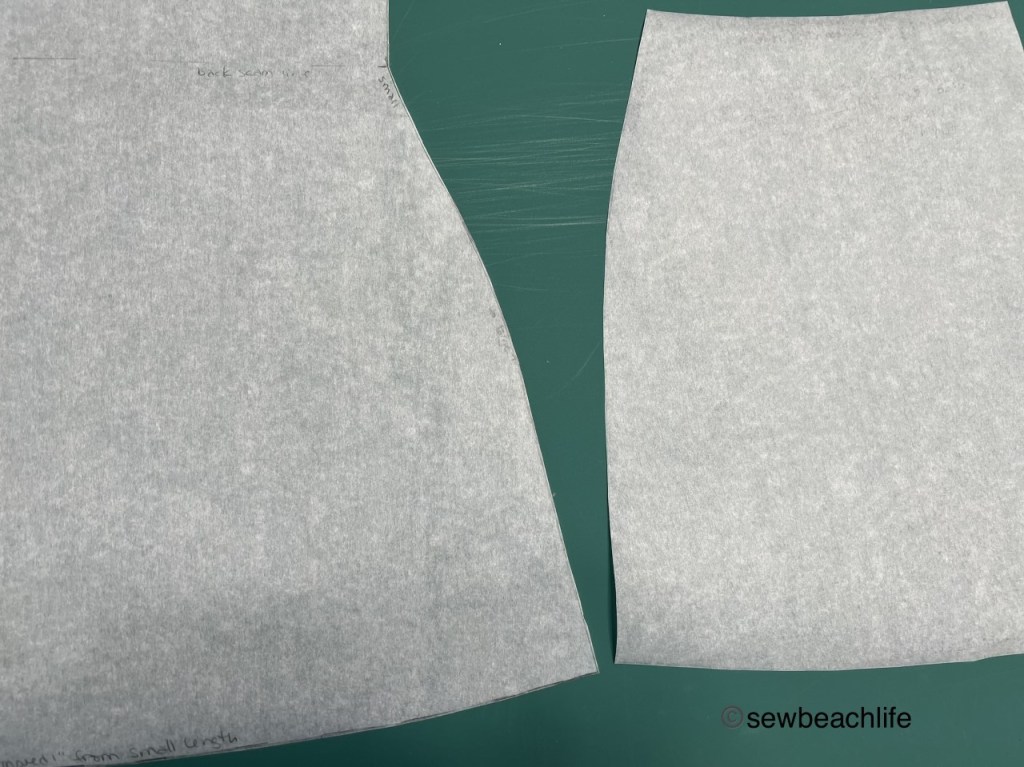
The pattern pieces I created to hack the bra into a workout top.
As always, I don’t show full pattern pieces out of respect for the designers hard work in creating a pattern. But I am showing enough for you to see the smooth curves of my grading. The front pattern piece is on the left, and the back pattern piece is on the right. A French curve ruler is a very helpful tool for grading and adjusting pattern pieces.
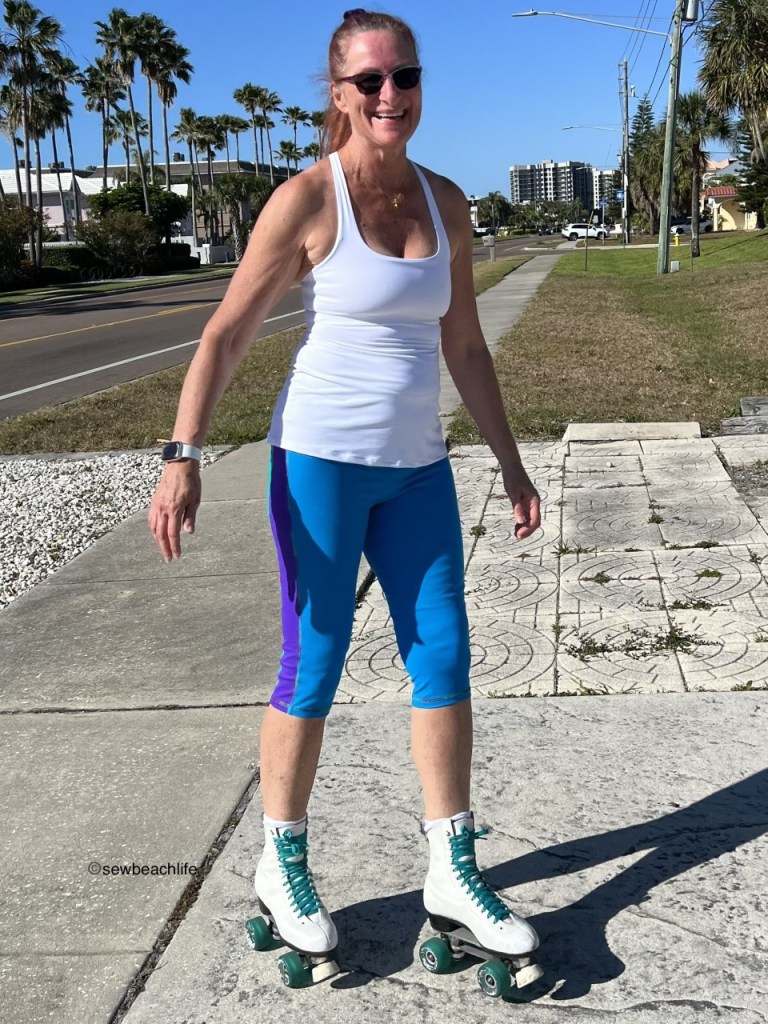
I wear my workout top to skate around the neighborhood as well as to yoga class.
The top is sewn together by following the tutorial for the Spellbound bra up to the point of hemming, except for one thing. When sewing the bra front (turned into a workout top) piece to the bra side piece, don’t sew all the way to the bottom of the side piece. Stop 1/2″ from the bottom to leave yourself fabric for the back seam. Then snip tobut not through the stitching line. This will allow you to press the seam toward the back and top or coverstitch as per the tutorial. You’ll sew the bra lining front and side pieces together as per normal.
I changed the construction of the Spellbound bra lining piece a tiny bit to suit my preferences. I am longer than average from shoulder to bust point and needed to add 5/8″ in order for the elastic to land in the perfect spot under my bust. Although a higher cut line was added to the pattern, my unique body shape requires the elastic lower because I needed the entire bra to slide up, not just add height at the front. This is a common alteration I have to make on a lot of tops and dresses, not just this specific pattern. Just one more reason that I sew- I can make clothing that fits my body. Because I don’t like elastic touching my bare skin, I added another inch so that I could flip the elastic up and have fabric against my skin.
I cut my powernet at the original lining and powernet cut line and the bra main fabric is cut at the original bra cut line. The bra lining is the only piece that I lengthen.
As per the tutorial I basted the powernet to the wrong side of the lining piece. Here’s where I go rogue from the pattern tutorial: I serge the elastic to the wrong side of the lining, then flip it up to fully encase the elastic. Use plenty of pins to hold the elastic in place and coverstitch.
Notice how the serged elastic overlaps the bottom of the basted-in-place powernet?
After top or coverstitching the edge of the elastic in place, remove the basting stitches along the bottom of the powernet. I purposely don’t lengthen the powernet to the same length as the lining because I don’t want the bulk and stiffness of the powernet in the enclosed elastic. It just needs to be long enough to get caught in the topstitching.
My other tip involves the straps. Once you’ve threaded the elastic through the straps, zig zag both ends of the straps to ensure that the elastic stays aligned with the ends of the straps.
You’ll notice how helpful the zig zag basting is when you are pulling the top straps through the bra, and when you’re criss-crossing, pinning, and stitching all the straps at the back.
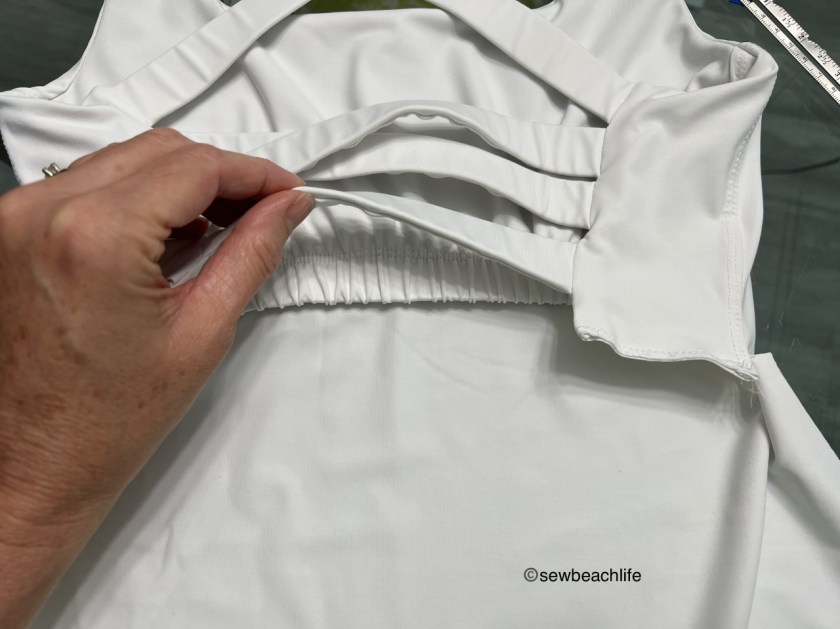
Here’s how the straps on the workout top hack look once they’re stitched in place.
There are a couple of things to notice in the photo above. First is the clean finish of the enclosed elastic on the liner if you choose to go rogue like I do. The second item of note is the snip on the side seam that will allow the back bottom piece I made be stitched in place.
I add 3/8″ knit elastic along the top of the back workout top or skirt piece. I don’t take the elastic all the way to the side seams, because I don’t want bulky seams. It’s just there to give a little stability to the top of the back of the skirt or workout top bottom back piece. Once the seam connecting the bra to the skirt or workout top back bottom is complete, I fold the elastic down, pin it in place and coverstitch it.
Coverstitching is probably trickier than topstitching in this small area, but I’m so used to working with my machine (I coverstitch a lot) that it isn’t a big deal to me. Either method works and will give nice results.
After that it’s just pinning and stitching the bottom half of the side seam and hemming your new top! You can wear it to the gym, to yoga class, or to skate around your neighborhood.
Even though I skate on a somewhat regular basis, it’s hard to keep from rolling when you’re trying to get photos on the slope of a bridge!
In case you’re wondering what capri length leggings I’m wearing, they are the Stitch Upon A Time Legend Leggings, posted about here. They’re getting a little too big, but I still like them. I should take them apart and make them in a smaller size.
Trying to get nice photos on the beach on a super windy day when it’s not even 60 degrees F makes for some interesting shots!
Luckily the next day was warmer and I got to go for a little skate around the neighborhood.
Whether you make the Spellbound bra, peplum top, or dress version, or play around with my idea of a Versa Cami hack, I’m pretty certain that you are going to love this pattern as much as I do!
Thank you for reading and sharing my love of creating, sewing, serging, great patterns, pattern hacking, fabric, and making beautiful, well-fitting garments! ❤
The links to Stitch Upon A Time may be affiliate links, which means that at no extra cost to you, I may receive a few pennies if you purchase through my link. As always, I only give my honest opinion. After all, it is my blog, which represents me!
A fitted strappy top or crop (with an optional shelf bra!) is the perfect complement to a light breezy skirt. I love it when Stitch Upon A Time brings an on-trend look to life!
About a month ago, I was sitting at the beach with family and friends and noticed the skirt a woman walking by was wearing. I know people watching is a common “sport”, but garment sewists, we tend to clothing watch. 🙂 Whenever I see a cute dress, top, skirt, or outfit, I start thinking: do I have a pattern for that? Anyways, the maxi length skirt she was wearing was made of a white gauzy fabric, had overlapping sides, and an elasticated waistband. It looked so cute, but I had never seen a pattern like it. About a week later, the testing call for the Cinder Skirt popped up and I was so excited to sign up for it! The Sage Top was also being tested, and I couldn’t resist the opportunity for a cute new summer outfit.
It’s a perfect beach walking outfit!
The design of the Cinder Skirt is perfect, with beautiful, clean finishes. There are no exposed raw edges, all the seams are enclosed. With quality finishes like this, no matter how many times you wash and wear this woven skirt, it won’t fray. The secret to the hem on the curved sides is the facing. My best tip for the facing is to serge along the inner curve with a four thread overlock, then press that inner curve to the wrong side of the fabric. This will make it easier to press, and keep your fabric from fraying inside the hem, even when using fabric that tends to fray a lot, like linen.
The facing is pinned to the skirt panel right sides together. See how smoothly that inner curve lays? And how badly the linen fabric (along the outer cuve) frays before serging?
When serging the facing to the skirt panel, up the differential to 1.3 or even 1.5 when serging the outer curves. This will help the curved seam lay flat when the facing is flipped to the inside and pressed. Just don’t forget to put it back on N for the straight sections!
I love the beautiful details of the elasticated waistband and overlapped panels on the sides of the skirt!
The waistband calls for either two rows of 1″ elastic, or one row of 2″ elastic, stitched in the middle. The directions call for top-stitching the upper edge of the waistband, inserting the elastic, then top-stitching below the elastic, and inserting the second row of elastic. I followed the rules on my first test version, but decided to try using my coverstitch and a different method on my second skirt.
I thought it might be easier to leave an opening for elastic, stitch the waistband, then insert the two pieces of elastic. To prepare the waistband for this, I serged along both short ends to finish them. Then I sewed the short ends together 1/4″ past the halfway fold of the waistband. I stitched the bottom 1/2″ of the short ends together too. This left me an opening for the elastic on the inside of the waistband. I pressed the seam open and stitched along the opening to finish it.
Notice how the bottom of the waistband is serged and pre-pressed? This will make it easier to do the final top/cover-stitching on the waistband.
Since even a narrow coverstitch is wider than a single row of top stitching, I had to make small changes. Rather than top-stitching 1/2″ from the upper edge of the (folded in half) waistband, I coverstitched 1/4″ from the upper edge. Leaving 1″ of room for the 1″ wide elastic, I ran the next row of coverstitching. As per the pattern tutorial, the raw edge of the waistband was serged onto the gathered skirt. The pre-pressed bottom of the waistband was folded over the serged waist seam, carefully pinned in place, then coverstitched.
It’s important to stitch slowly, and pause to remove pins to avoid breaking a needle or damaging your machine.
I love the beautiful clean finish on the waistband, and the professional look of coverstitching. I will admit though, that it took a bit of work to get both pieces of 1″ elastic threaded evenly through the waistband with this lightweight fabric! It’s such a fun skirt though! And I love that there are three length options- mini (which is what I made), knee, and maxi length. I still need to find some white gauzy fabric to duplicate the maxi skirt that I saw at the beach!
Here’s what the inside of the waistband looks like before adding the skirt and elastic. I could have hand-stitched the openings closed after adding my elastic, but because I finished the edges, I don’t feel the need to get out a needle and thread! Also, my cat obviously likes to hang around and requires petting while I am sewing! 🙂
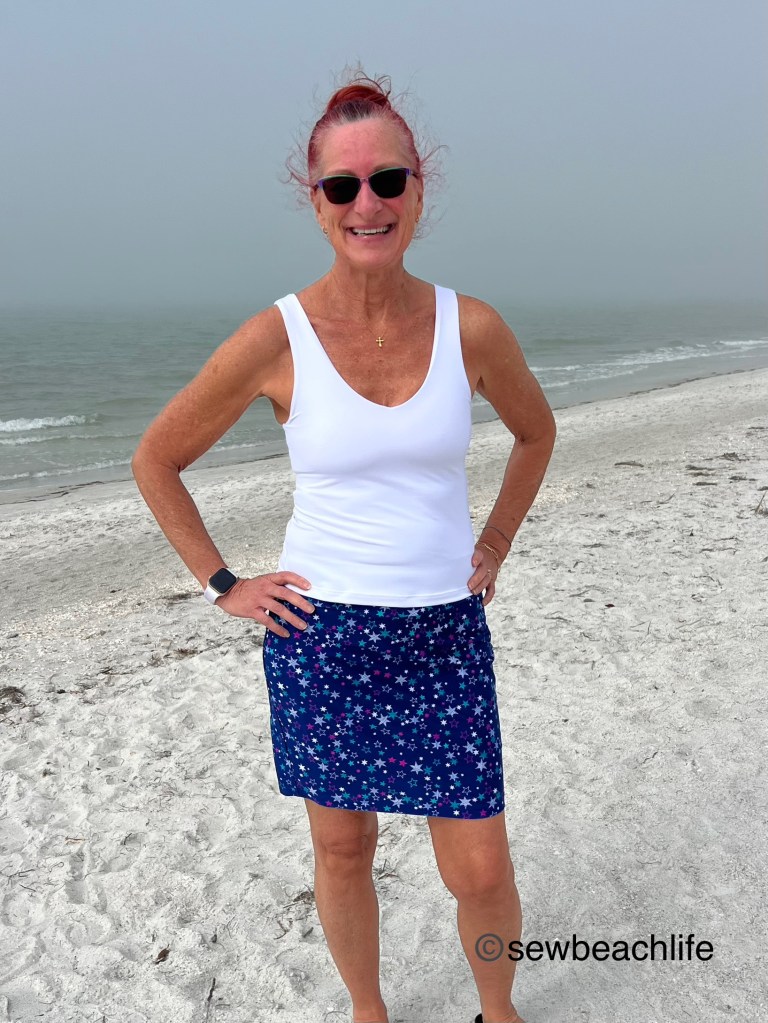
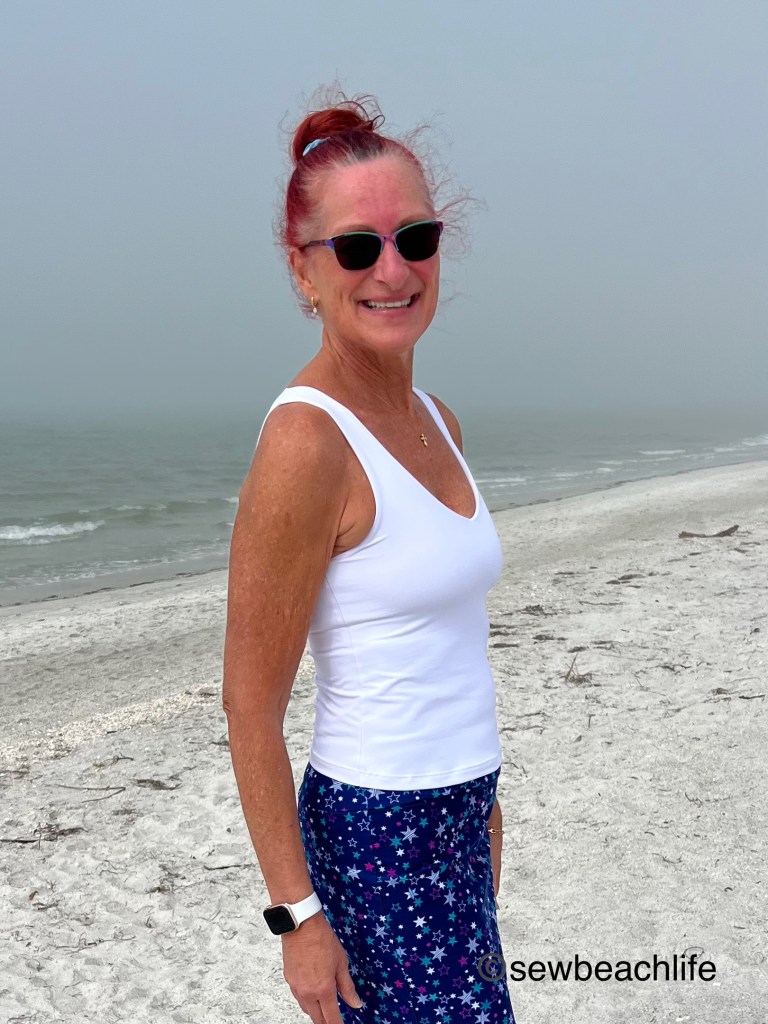
The Sage Top is such a great companion to the Cinder Skirt! Being a fitted tank, it skims the body and works well with the gathered skirt. I love that it has a built-in shelf bra so that I don’t have to wear an uncomfortable strapless bra.
The shelf bra is surprisingly supportive and comfortable.
The Sage Top with shelf bra is not designed to wear as workout top (unless of course your bust doesn’t really need support for exercise). But for casual wear, it provides adequate support to wear comfortably. Because I have a larger cup size, and have a “grandma” bust, I always use powernet in every bra/shelf bra/swimwear/workout top I make.
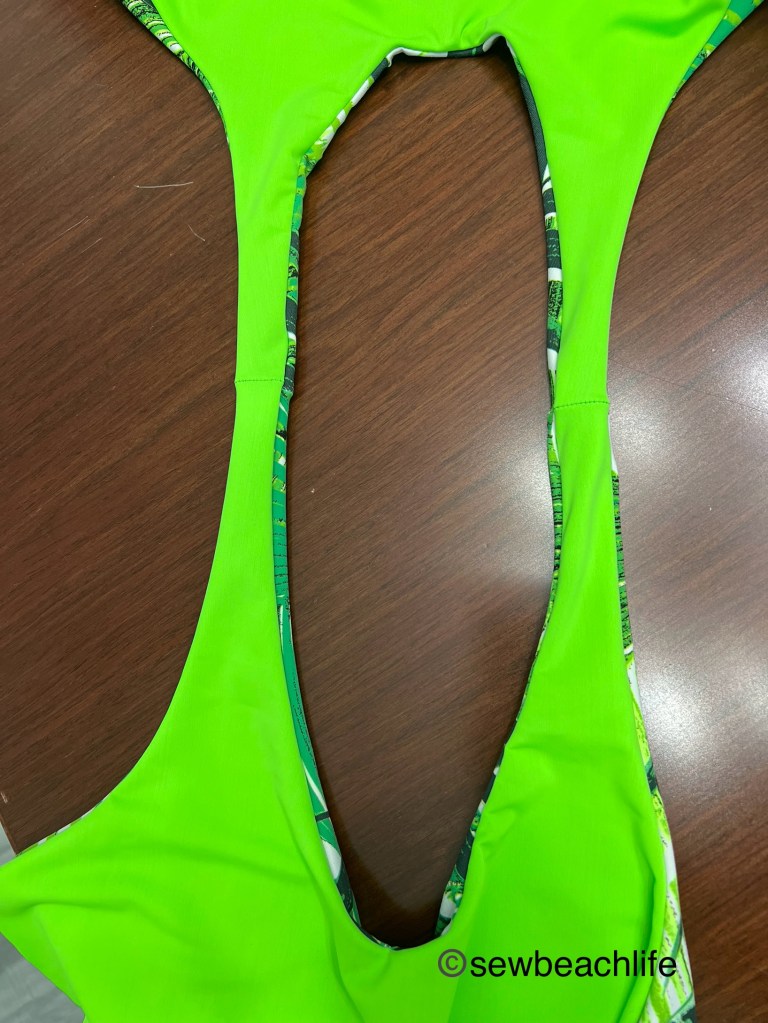
The main fabric I used is a lighter weight nylon/spandex circular knit. It is super soft and comfortable, but doesn’t have as much recovery as say an athletic or swim knit. So I used a nylon/spandex swim fabric, and a layer of powernet for the shelf bra. And, I snuck some clear elastic in on the strap section of my binding.
I love that it’s so easy to thread 1/4″ clear elastic through the presser foot of my machine, and it feeds evenly as it’s serged into the seam.
This photo makes it obvious that I didn’t follow the pattern tutorial and do a double folded binding. When doing binding on a knit garment, I just find it easier to use 1/4″ seam allowances, and use the faux binding method. Should I be advising people to not follow the tutorial and go rogue? Possibly not, but it’s what works best for me, and gives such beautiful results that I’m unlikely to change my faux binding habit! 🙂 To accommodate the method, I cut the binding strips at 1-1/4″ wide, instead of the called for 2″. (1/4″ seam allowance + 1/2″ wide binding + 1/2″ folded under).
To prep my binding strips, I serge along one long edge of the binding, using a four thread overlock with a stitch width of M, and a stitch length of 2, upping my differential to 1.3 to add stability to the straps. Then I serge the binding to the garment right sides together, and press the binding up. Then I fold the binding around to the back until the raw serged edge aligns to cover the seam. Use plenty of pins to keep the binding in place, and coverstitch.
I love finding random designs, sandcastles, and messages left by beach-goers. I don’t know who drew this cool design in the sand, but I admire the precision and time it must have taken! It added an interesting background for my photos. So, thank you to whoever made it!
The design of the Sage Top and Crop is so elegantly simple- a seam up the center back, and binding. Easy breezy! Center back seams are great for shaping. In for the waist, and curving out to fit smoothly over the bum.
Yoga has given me some rather serious lat muscles 😉 even if this isn’t the most flattering photo. We were losing the light and it was a cloudy evening, so Dan (my sweet accommodating husband) just took a quick snap.
I’ll wear my Sage Tops with shorts to go skating. It’ll be nice to not have to wear a bra on hot, muggy Florida days. Since we’re busy working on a home updating project, I haven’t had time to skate in weeks. It’s killing me to miss out on my normal Wednesday morning skate around the neighborhood, but such is the life of avid DIYers! It’s also taken away pretty much all of my sewing time, which is why I don’t have any more of these outfits made yet.
The wind didn’t blow the overlapped sides on the skirt open. So there is enough modesty for general wear. Along with knee and maxi lengths if mini length isn’t your style.
So, I’ll have to content myself with this cute outfit until I get some more sewing time! I’d also like to hack the Sage Top, by cutting the crop length, and adding either the Max Top and Dress skirt, or the Wylde Dress skirt. Ah, so many possibilities!
The 1″ wide knit elastic for the shelf bra in the top and the waistband of the skirt was purchased at Wawak, along with the MaxiLock serger thread used for construction.
The navy lyocell twill fabric for the skirt was a surprise clearance section find at JoAnn Fabrics. I would definitely buy it again, as it was the perfect weight and drape for this skirt.
Thank you for reading and sharing my love of creating, sewing, patterns, patterns, fabric, and making beautiful, well-fitting garments! ❤
The links to Stitch Upon A Time may be affiliate links, which means that at no extra cost to you, I may receive a few pennies if you purchase through my link. As always, I only give my honest opinion. After all, it is my blog, which represents me!